
 Pin it
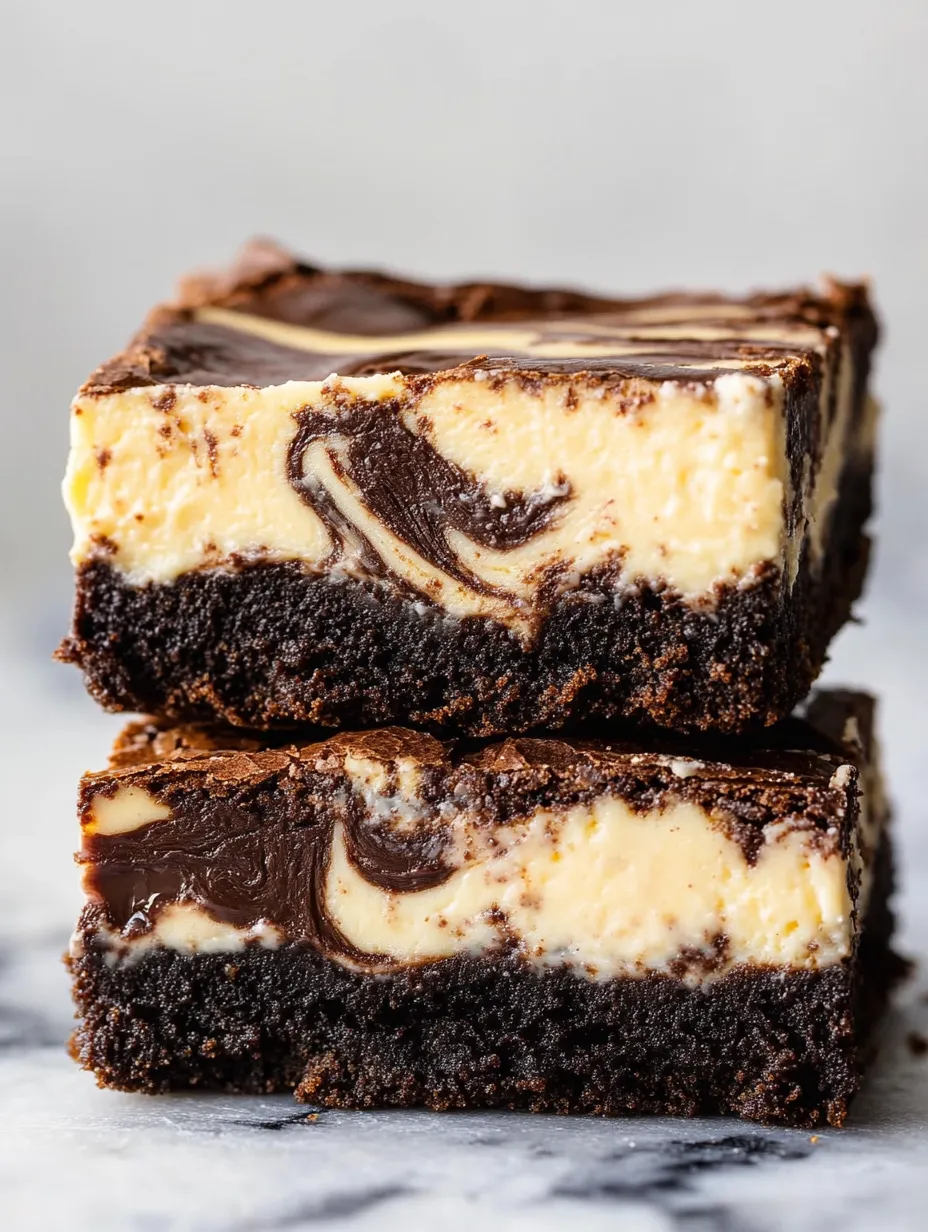
Rich cheesecake brownies bring together the best of two worlds tender fudgy brownie base swirled with a creamy tangy cheesecake layer This recipe creates decadent dessert bars that look beautiful and taste even better
I first tried this when my daughter begged for something chocolatey and creamy Together we marbled the swirls which became our favorite part and now everyone asks for the trick
Ingredients
- Unsweetened baking chocolate: gives a rich chocolate foundation Look for bars with a deep cocoa aroma and glossy snap
- Unsalted butter: provides richness and fudgy texture Always choose a quality brand and ensure it is fresh for the best flavor
- Granulated sugar: sweetens both the brownie and cheesecake layers I prefer finer crystals so they dissolve easily
- Unsweetened cocoa powder: deepens chocolate notes A Dutch process brand will give a smoother flavor
- Eggs: bind both layers and create structure Use large size at room temperature for even mixing
- Vanilla extract: rounds out sweetness Real vanilla offers the best flavor so avoid imitation if possible
- Salt: boosts all the other flavors Use fine sea salt for even blending
- All purpose flour: provides structure Regular bleached or unbleached works
- Cream cheese: for cheesecake richness Go for full fat blocks and ensure its softened at room temperature
- Sour cream: adds a subtle tang that highlights the cheesecake swirl Use a thick creamy style for best results
Step by Step Instructions
- Prepare the pan:
- Line a nine inch square pan with foil and lightly coat with nonstick spray This keeps the bars from sticking and makes cleanup easier
- Melt chocolate and butter:
- Combine chopped chocolate and unsalted butter in a large microwave safe bowl Heat in thirty second bursts stirring after each until melted and silky smooth This step creates the base for a glossy brownie texture
- Mix in brownie ingredients:
- Add granulated sugar and cocoa powder to the melted chocolate mixture Stir with a spatula or wooden spoon Slowly mix in the eggs and vanilla and then sprinkle in salt The mixture should look a bit grainy but smooth out as you blend
- Add flour:
- Gently fold in all purpose flour until just combined Be careful not to overmix which can make brownies tough Spread the batter into your prepared pan in an even layer
- Beat cheesecake layer:
- In a fresh bowl use a hand or stand mixer to beat softened cream cheese with sour cream until completely smooth and lump free This is important for a creamy cheesecake swirl
- Mix in cheesecake add ins:
- Blend in eggs one at a time then granulated sugar and vanilla Extract under mixing leads to a streaky texture so go for smooth even mixing
- Layer and swirl:
- Pour cheesecake mixture over the brownie base Use a knife or skewer to gently swirl the two together for a marbled look Try not to overmix or the layers will blur
- Bake:
- Slide the pan into a preheated three hundred fifty degree oven Bake for fifty to fifty five minutes until the top is lightly puffed and no longer shines Check the edges which should look golden Remove and cool completely at room temperature
- Chill before serving:
- Refrigerate at least four hours to firm up the layers Cold brownies slice much neater for pretty bars
 Pin it
My favorite part is always watching the swirling step Each pan turns out a little different like edible marble and even after making dozens my kids still ask if they can help with the swirls
Storage Tips
Store cut brownies in an airtight container in the fridge up to three days Layer with parchment if stacking to prevent sticking For longer storage wrap individual pieces tightly and freeze Bring to room temperature or enjoy cold straight from the fridge which is my guilty pleasure
 Pin it
Ingredient Substitutions
No sour cream on hand Substitute with plain Greek yogurt of the same consistency or use mascarpone for an extra rich swirl If you need a gluten free version swap the flour for a measured blend of one to one gluten free mix Avoid using whipped cream cheese for the topping as it changes the texture
Serving Suggestions
Serve these cheesecake brownies well chilled on their own or with fresh berries for a pop of color For a special occasion top with a dollop of whipped cream and chocolate shavings These also make beautiful gifts wrapped in parchment and ribbon
Cultural Notes
Cheesecake brownies became popular in American bakeries during the late twentieth century combining two beloved desserts into one The marbled look comes from a classic technique borrowed from European tortes which is all about the joy of swirling batter and making each slice unique
Frequently Asked Questions
- → How do I make the swirls look smooth?
Let the cream cheese and eggs warm up to room temp. Spread the cheesecake on top, then grab a butter knife and gently swirl it through both layers for cool marble streaks.
- → Is it OK to swap in semi-sweet chocolate?
You can totally use semi-sweet, just cut down on the sugar since that chocolate’s already sweetened.
- → Why should I chill the bars first?
Chilling firms everything up so slicing is easy and neat. It also gives the flavors a chance to come together.
- → How do I keep these bars fresh?
Pop them in a sealed container in your fridge. They’ll be good for three days, or stash them in the freezer for longer.
- → Which pan should I grab?
Go for a 9x9-inch square pan. It bakes the two layers evenly and gives you just the right thickness.
- → How do I melt the butter and chocolate?
Toss both into a microwave-safe bowl, zap in 30-second bursts, and give everything a stir after each time until it turns silky.