
 Pin it
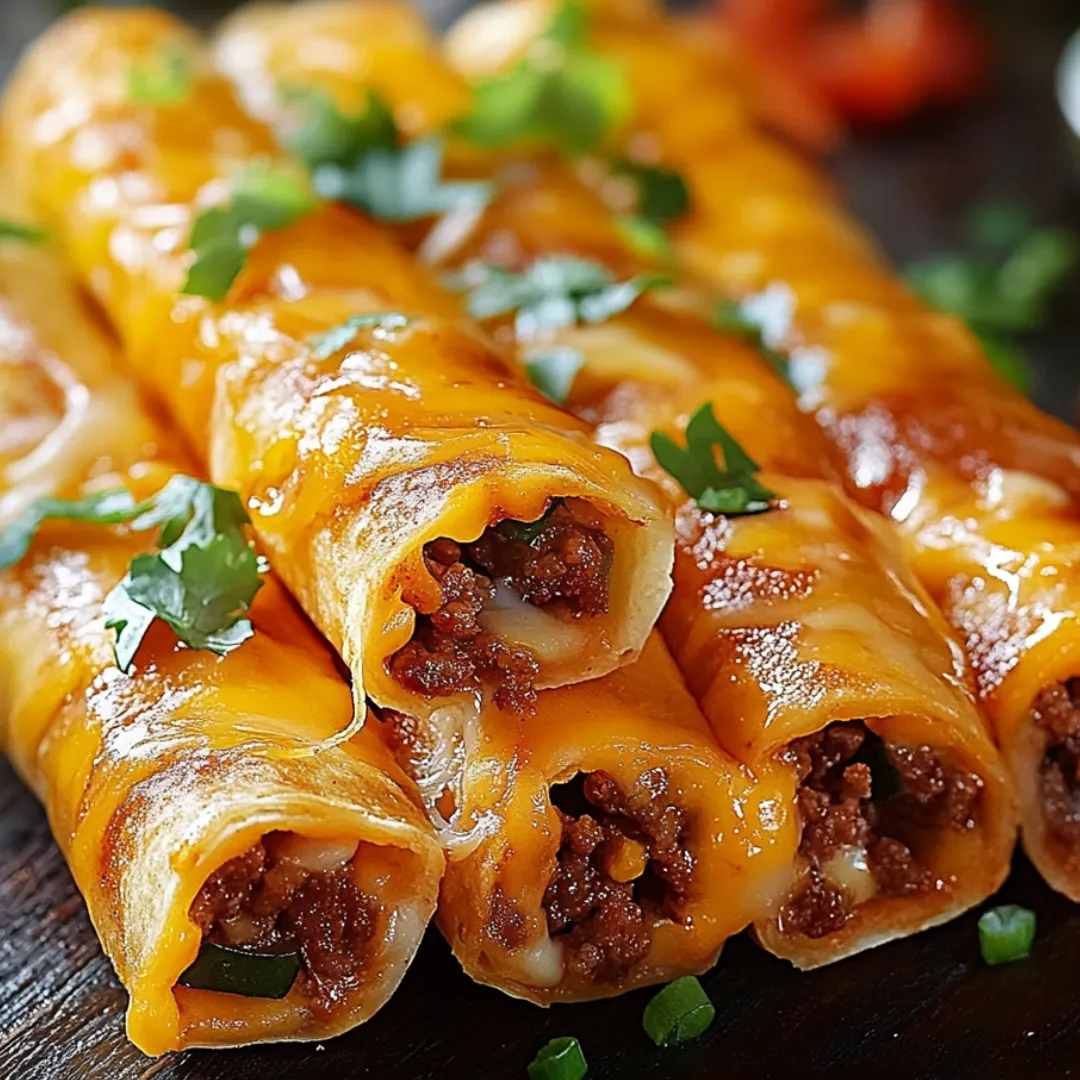
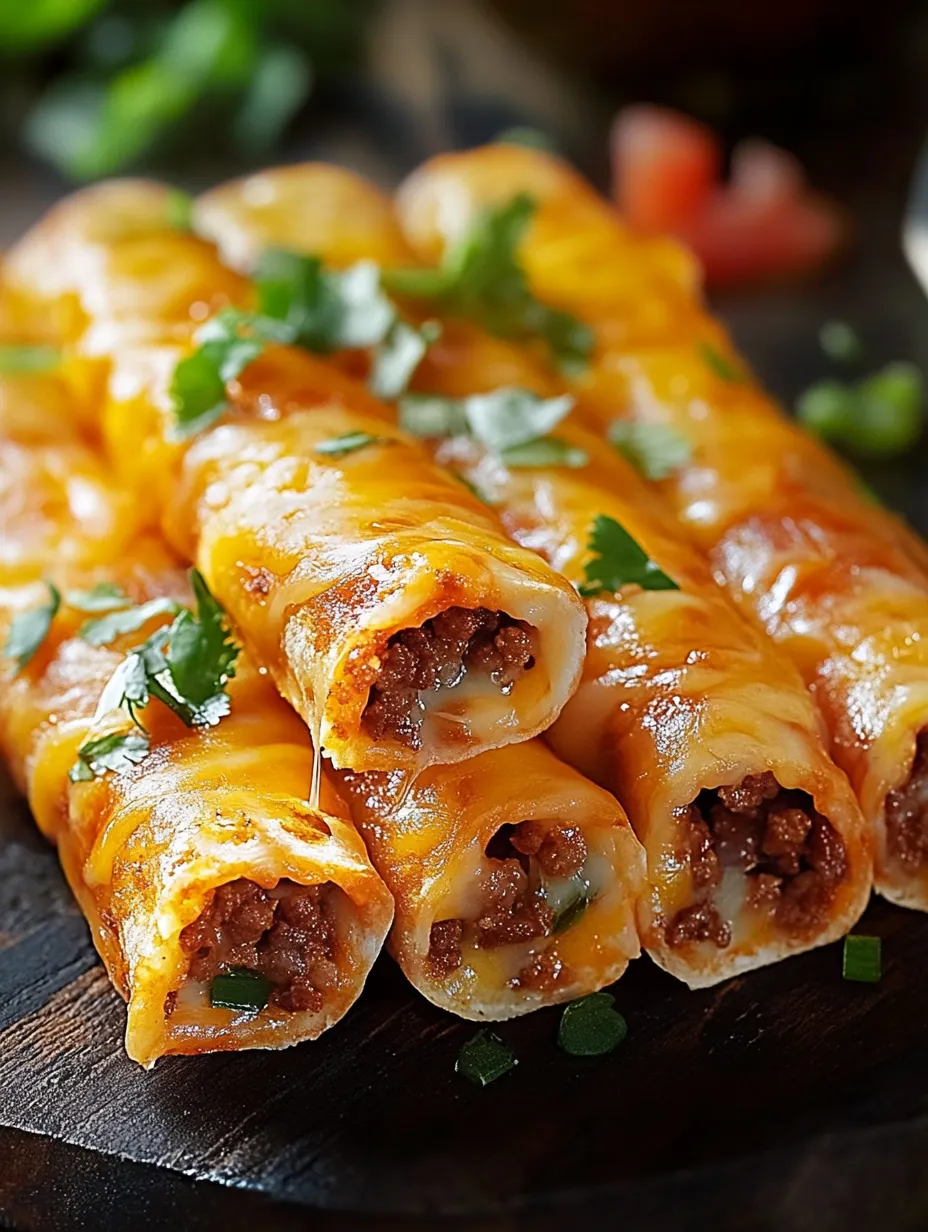
These cheesy taco sticks transform traditional taco night into a fun, handheld adventure that combines seasoned ground beef and melty cheese wrapped in golden pizza dough. I've been making these for game day gatherings and casual weekend meals when we need something satisfying but different from our usual routine.
I first created these when looking for creative ways to use leftover taco meat, and they've become a requested favorite whenever friends come over to watch sports. The combination of the crispy exterior and gooey cheese interior makes them irresistible.
Ingredients
- Ground beef: the foundation of our filling, use 80/20 for best flavor without excessive grease
- Taco seasoning mix: provides authentic Mexican flavor without measuring multiple spices
- Pillsbury Pizza Dough: creates a perfect golden exterior that's easier than making dough from scratch
- Colby jack and cheddar cheese sticks: add that essential stretchy cheese pull when bitten into
- Butter: enhances browning and creates a rich exterior
- Garlic powder: adds savory depth to the butter topping
- Dried parsley: brings color and a subtle herbaceous note to finish
Step-by-Step Instructions
- Preheat the Oven:
- Set your oven to 400°F and line a baking sheet with parchment paper. This temperature creates the perfect environment for the dough to rise and brown while the cheese melts but doesn't burn. The parchment prevents sticking and makes cleanup much easier.
- Cook the Beef:
- Brown your ground beef in a skillet over medium heat until no pink remains, breaking it into small crumbles as it cooks. Drain off excess fat to prevent soggy taco sticks. Add the taco seasoning according to package directions, typically with a small amount of water, and simmer until thickened. The seasoned beef should be moist but not watery.
- Prepare the Dough:
- Unroll the pizza dough onto a lightly floured surface and cut into 10 equal rectangles. Work gently to avoid overhandling the dough which can make it tough. Make sure each rectangle is large enough to wrap around the filling completely.
- Assemble the Taco Sticks:
- Place about two tablespoons of seasoned beef on each rectangle, spreading it slightly but leaving a border around the edges. Position a half cheese stick on top of the beef. Roll the dough around the filling, starting from a long edge, and pinch all seams firmly to seal. Place each stick seam side down on your prepared baking sheet to prevent them from opening during baking.
- Brush with Garlic Butter:
- Combine melted butter with garlic powder and dried parsley in a small bowl until well mixed. Use a pastry brush to generously coat each taco stick with this fragrant mixture. This adds flavor while helping the dough develop a beautiful golden color during baking.
- Bake to Perfection:
- Bake in your preheated oven for 12 to 15 minutes, watching carefully toward the end. Look for an evenly golden brown exterior and listen for a slight sizzle from the cheese inside. The dough should feel firm and sound hollow when tapped.
- Serve and Enjoy:
- Allow the taco sticks to cool for 3 to 5 minutes before serving to prevent mouth burns from the molten cheese. Arrange on a serving platter alongside small bowls of salsa, sour cream, and guacamole for dipping.
 Pin it
My family particularly loves the garlic butter topping on these taco sticks. My daughter once declared them "pizza tacos" and the name stuck in our household. Now they're a regular in our meal rotation, especially on movie nights when we want something handheld but heartier than popcorn.
Make-Ahead Instructions
These taco sticks can be assembled up to 24 hours in advance and stored covered in the refrigerator. Simply brush with the garlic butter mixture just before baking. If baking from refrigerated, add about 2 minutes to the cooking time. The beef filling can also be prepared up to 3 days ahead and stored separately until assembly time.
Freezing and Reheating
For longer storage, freeze the assembled but unbaked taco sticks on a baking sheet until solid, then transfer to a freezer bag. They'll keep for up to 3 months. When ready to enjoy, bake them directly from frozen at 375°F for about 20 minutes. Already baked taco sticks can be reheated in a 350°F oven for 10 minutes or until warmed through.
 Pin it
Serving Suggestions
Transform these taco sticks into a complete meal by serving alongside a fresh green salad with cilantro lime dressing. For a fiesta spread, pair with Mexican rice, refried beans, and a variety of toppings like diced avocado, fresh pico de gallo, and pickled jalapeños. They also make excellent appetizers for a crowd when cut into smaller portions after baking.
Customization Ideas
The beauty of these taco sticks lies in their versatility. Try using ground turkey or chicken for a lighter option, or black beans for a vegetarian version. Pepper jack cheese adds a nice kick, while a sprinkle of taco seasoning on the outside before baking intensifies the flavor. You can even add a thin layer of refried beans beneath the meat for extra creaminess.
Frequently Asked Questions
- → What type of cheese is best for taco sticks?
Colby jack and cheddar cheese sticks work great, but you can experiment with other melty cheeses like mozzarella or pepper jack for added flavor.
- → Can I make these taco sticks ahead of time?
Yes, you can assemble the taco sticks in advance, store them in the refrigerator, and bake them before serving.
- → What dipping sauces go well with cheesy taco sticks?
Salsa, guacamole, and sour cream are excellent choices. You can also try queso or a spicy chipotle mayo for variety.
- → How can I make these taco sticks spicier?
Add chopped jalapeños or a pinch of cayenne pepper to the seasoned beef filling for a spicy kick.
- → Can I use homemade pizza dough for this recipe?
Absolutely! Homemade pizza dough works well and can add a fresh, personal touch to the dish.