
 Pin it
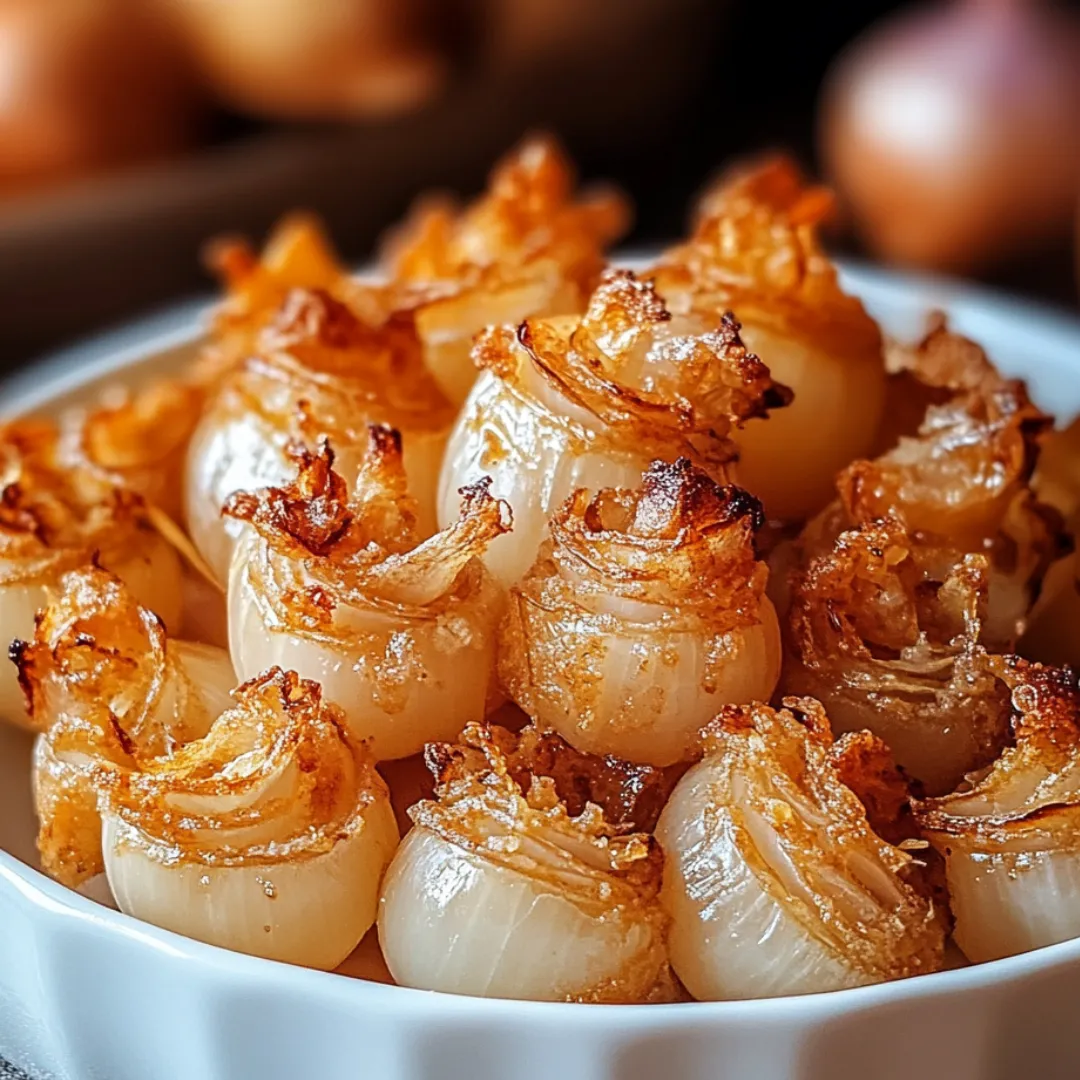
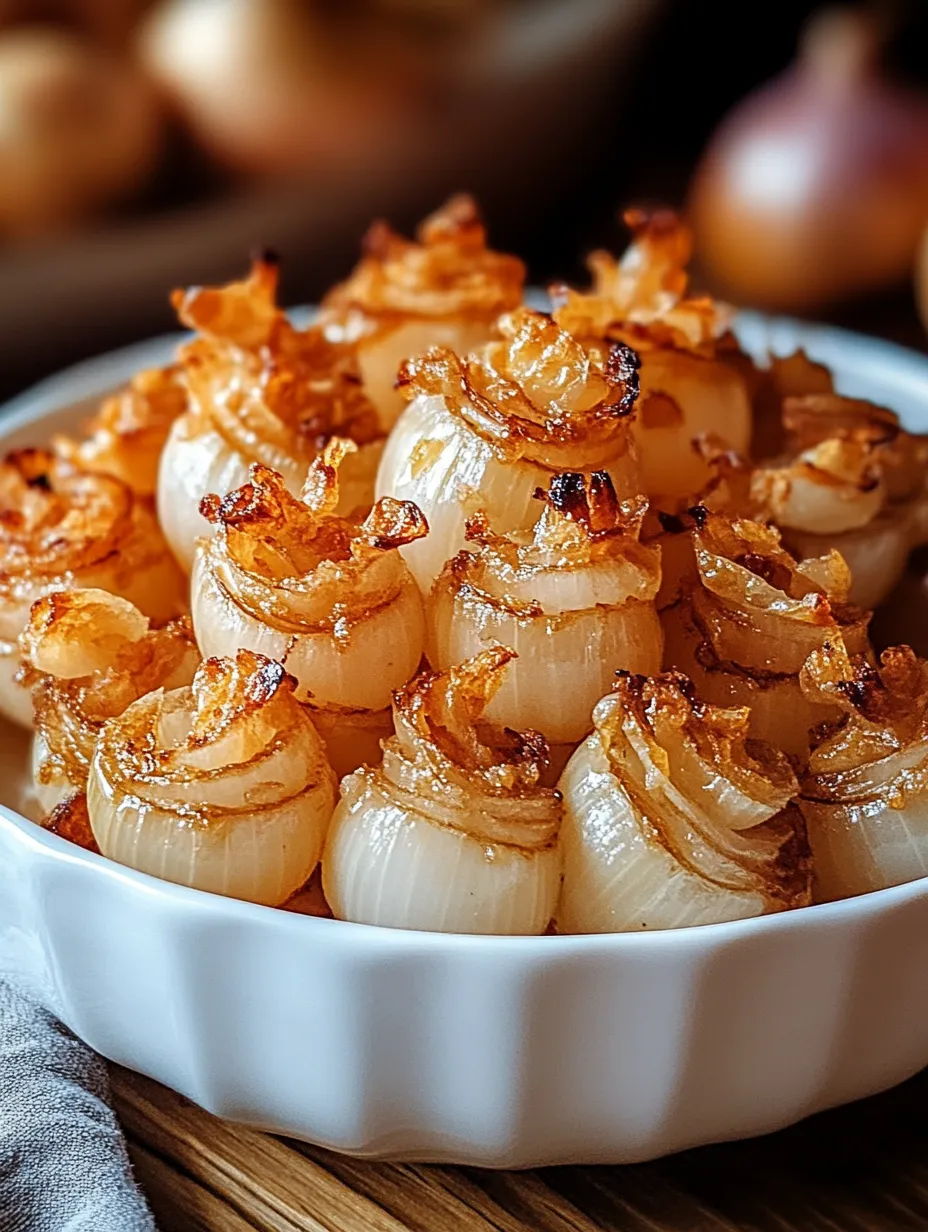
These Bite-Sized Blooming Onions transform the beloved restaurant appetizer into perfectly portioned, golden-crisp morsels that deliver all the flavor without the mess or guilt of the original. Each petal offers the satisfying crunch of seasoned coating giving way to tender, sweet onion that practically melts in your mouth. The contrast between the crispy exterior and the juicy interior creates an irresistible textural experience, while the carefully balanced spice blend provides warmth and depth without overwhelming heat. Whether baked or air-fried, these miniature delights retain the nostalgic appeal of their oversized inspiration while being infinitely more practical for sharing, dipping, and enjoying without the need for special cutting tools or deep fryers.
The first time I made these bite-sized bloomers was for a neighborhood football gathering where I wanted to serve something more interesting than the usual chips and dip. While slicing the onions, I skeptically wondered if the smaller format would capture the essence of the restaurant original. As the golden petals emerged from the oven, my doubts vanished—the aroma alone was enough to draw everyone to the kitchen. What truly convinced me was watching my neighbor's teenage son, who typically avoids anything remotely vegetable-like, return to the platter four times, dipping each crispy petal with increasing enthusiasm. Now these onion bites have become my signature contribution to gatherings, requested so often that I've learned to prep double batches and keep the ingredients on hand for impromptu entertaining.
Ingredients
- 2 large sweet onions (Vidalia or yellow), peeled: Form the foundation of this appetizer with their natural sweetness and perfect layering. Look for firm, heavy onions with tight, dry skin and no soft spots. Vidalia onions offer exceptional sweetness that balances beautifully with the savory coating, though standard yellow onions work well too. Size matters—choose onions approximately 3-4 inches in diameter for the ideal petal size. Fresh onions should have no sprouting and feel dense for their size. This ingredient becomes surprisingly transformed when properly prepared, losing its harsh raw bite and developing remarkable sweetness.
- ¾ cup all-purpose flour: Creates the base for the crisp coating that defines this appetizer. Unbleached all-purpose flour provides the ideal structure without heaviness. The flour should feel smooth between your fingers without lumps, indicating freshness. This foundation ingredient traps moisture during cooking, creating steam that helps tenderize the onion while the exterior becomes crisp. The protein content in all-purpose flour develops just enough structure to adhere to the onion without becoming tough.
- 1 tablespoon cornstarch: Provides exceptional crispness to the coating that flour alone cannot achieve. Look for pure cornstarch without additives. When added to flour, cornstarch prevents some gluten formation, resulting in a lighter, crispier texture. This key ingredient creates that characteristic shattering crunch when biting into each onion petal. The fine powder also helps the coating adhere evenly to the onion surfaces for consistent results.
- 1 teaspoon smoked paprika: Contributes rich color and subtle smokiness that elevates the entire dish. Choose genuine smoked paprika (not just colored paprika) for authentic flavor depth. It should have a vibrant red-brown color and pronounced smoky aroma. This ingredient creates the distinctive warm color of the coating while adding complexity that plain paprika cannot match. The subtle smoke notes complement the natural sweetness of the onions beautifully.
- ½ teaspoon garlic powder: Adds aromatic depth without the burning risk of fresh garlic. Select garlic powder without added salt for better seasoning control. It should smell intensely garlicky when opened—if the aroma is faint, it may be old and less potent. This ingredient infuses the coating with savory notes that permeate throughout cooking. The fine powder distributes evenly for consistent flavor in every bite.
- ½ teaspoon onion powder: Intensifies the natural onion flavor while adding savory dimension. Look for pure onion powder without fillers or salt. Fresh onion powder should have a pronounced onion scent and fine, even texture. This ingredient amplifies the onion flavor from within the coating, creating multiple layers of flavor complexity. The concentration of sulfur compounds provides depth that complements the fresh onion beneath.
- ½ teaspoon chili powder: Provides gentle warmth and complexity without overwhelming heat. Choose American-style chili powder blend rather than pure ground chili for balanced flavor. It should have a rich reddish-brown color and complex aroma combining several spices. This ingredient adds subtle heat and depth that develops during cooking. The balanced blend typically includes cumin and oregano notes that enhance the overall flavor profile.
- ¼ teaspoon black pepper: Adds essential spice and subtle heat that balances the coating. Freshly ground pepper provides significantly more aromatic compounds than pre-ground. It should have a strong, pungent aroma when freshly ground. This basic ingredient is crucial for proper seasoning balance and adds visual interest to the coating with its distinctive specks. The slight heat compounds develop during cooking, infusing throughout the coating.
- ½ teaspoon salt: Enhances all other flavors and helps draw moisture from the onions for better crispness. Kosher or sea salt provides clean flavor and better control than table salt. This fundamental ingredient is crucial for bringing all flavors into focus. The salt not only seasons the coating but also helps create the perfect texture by drawing out some moisture from the onion during cooking.
- 2 eggs: Create the essential binding layer that helps the coating adhere to the onions. Fresh eggs at room temperature blend more smoothly with milk for a consistent wash. The eggs should have bright, domed yolks and thick whites, indicating freshness. This key ingredient provides protein that sets during cooking, ensuring the coating remains attached to each onion petal. The fat in the yolks also adds richness that helps develop golden browning.
- ¼ cup milk (dairy or non-dairy): Thins the egg for proper coating consistency while adding subtle richness. Whole milk creates the richest wash, but any milk including plant-based alternatives works well. It should be at room temperature to blend smoothly with the eggs. This ingredient creates the perfect consistency for the binding layer—thick enough to adhere well but thin enough to create a light coating. The proteins and sugars contribute to beautiful browning during cooking.
- ½ cup mayonnaise: Forms the creamy base for the dipping sauce. Use real mayonnaise rather than salad dressing for best results. Quality mayonnaise should have a thick, glossy appearance and tangy aroma. This foundation ingredient provides rich mouthfeel and subtle tanginess that complements the crispy onions. The egg and oil emulsion creates the perfect consistency for clinging to each onion petal when dipped.
- 2 tablespoons ketchup: Adds sweetness, acidity, and color to the dipping sauce. Select ketchup with pronounced tomato flavor rather than overly sweet varieties. It should have a bright red color and balanced sweet-tangy profile. This ingredient brings essential acidity that cuts through the richness of the mayonnaise while adding familiar flavor notes. The natural sweetness balances the savory elements in both sauce and onions.
- 1 teaspoon hot sauce or chili garlic sauce: Provides customizable heat and depth to the dipping sauce. Choose a hot sauce with flavor complexity beyond pure heat. It should have balanced acidity and heat that complements other ingredients. This adaptable ingredient allows personalization of the heat level while adding crucial depth. Even a small amount contributes significant flavor dimensions without making the sauce excessively spicy.
Step-by-Step Instructions
 Pin it
- Step 1: Prepare the onions with precision
- Begin by cutting each peeled onion in half lengthwise, making sure to cut through the root end. This approach maintains the layers together while making the onion easier to handle. Place each half cut-side down on your cutting board for stability, then cut each half into quarters, again keeping the root end intact if possible. Working with one quarter at a time, gently separate the layers into individual petals, creating bite-sized pieces perfect for coating and eating. For larger onions, you may need to cut some of the outer layer petals in half crosswise to maintain consistent sizing. Inspect each petal and trim any brown spots. The goal is bite-sized pieces approximately 2-3 inches long that will cook evenly and be easy to handle. This careful preparation ensures each piece will have the perfect texture contrast between crisp coating and tender onion.
- Step 2: Create the perfect seasoned coating
- In a medium bowl, whisk together the all-purpose flour, cornstarch, smoked paprika, garlic powder, onion powder, chili powder, black pepper, and salt until completely combined. The cornstarch should be fully incorporated with no visible white streaks, and the spices should be evenly distributed throughout. This thorough mixing ensures consistent flavor and texture in every bite. The combination of flour and cornstarch creates the ideal crispy coatingGRAHAM, while the carefully balanced spices provide depth without overwhelming the natural sweetness of the onions. This dry mixture can be prepared in advance and stored in an airtight container until ready to use, making the final assembly process more efficient. The seasoned flour mixture is the foundation of the flavor profile, so don't be tempted to reduce the spices.
- Step 3: Prepare the egg wash binding layer
- In a separate bowl, thoroughly whisk together the eggs and milk until completely combined with no visible egg white streaks. The mixture should have a uniform pale yellow color and smooth consistency. This egg wash acts as the essential binding agent that helps the seasoned flour adhere to the onion petals. The protein in the eggs coagulates during cooking, creating a secure bond between the coating and onion while adding richness. The milk thins the eggs to the perfect consistency while contributing to better browning through its natural sugars. For dairy-free versions, any plant-based milk works well as a substitute. This mixture should be prepared just before coating to prevent settling and ensure consistent results throughout the batch.
- Step 4: Master the double-dredging technique
- Create an efficient dredging station with your bowl of seasoned flour mixture, egg wash, and a parchment-lined baking sheet for the coated petals. Working with one onion petal at a time, first dredge it in the flour mixture, shaking off any excess. Then dip completely in the egg wash, allowing any excess to drip off. Finally, return it to the flour mixture, pressing gently to ensure the coating adheres evenly to all surfaces. This double-dredging process is crucial for developing a substantial, crispy coating that will maintain its integrity during cooking. Place each coated petal on the parchment-lined baking sheet, making sure they don't touch to prevent sticking. Continue this process with all onion petals, working in batches to avoid crowding your dredging stations. For extra crispness, allow the coated petals to rest for 5-10 minutes before cooking, which helps the coating set and adhere better.
- Step 5: Choose your cooking method for optimal results
- Depending on your preference and equipment, you can either bake or air-fry these onion petals to crispy perfection. For baking: Preheat your oven to 425°F (220°C) and line a baking sheet with parchment paper, lightly spraying it with cooking oil to prevent sticking. Arrange the coated onion petals in a single layer with space between each piece to allow for proper air circulation. Lightly spray or brush the tops with oil to promote browning. Bake for 15-18 minutes, carefully flipping halfway through cooking for even browning. For air frying: Preheat your air fryer to 375°F (190°C). Working in batches to avoid overcrowding, arrange petals in a single layer in the basket, lightly spray with oil, and cook for 10-12 minutes, shaking the basket halfway through. With either method, the petals should develop a golden-brown color with crispy edges while the onion inside becomes tender. The visual cue of even golden-brown color is more reliable than strict timing, as onion thickness and appliance variations affect cooking time.
- Step 6: Prepare the creamy dipping sauce
- While the onion petals are cooking, combine mayonnaise, ketchup, hot sauce, garlic powder, paprika, and lemon juice in a small bowl. Whisk thoroughly until the mixture is completely smooth and uniform in color with no streaks. Taste and adjust seasoning with salt and additional hot sauce if desired. The sauce should have a pale pinkish-orange color and a creamy consistency that clings to a spoon. This balanced sauce combines richness, acidity, and subtle heat that perfectly complements the crispy onion petals. For the best flavor development, prepare the sauce at least 15 minutes before serving to allow the flavors to meld, and refrigerate until ready to use. The cool, creamy sauce creates a pleasing temperature contrast with the hot, crispy onion petals while balancing their savory notes with tangy richness.
- Step 7: Test for perfect doneness
- The ideal bite-sized blooming onion petals should be golden brown and crispy on the outside while tender but not mushy inside. To test for doneness, select one of the thicker petals and carefully break it in half. The coating should be crisp and well-attached, while the onion inside should be soft enough to bite through easily but still retain some structure. If the onions aren't tender enough, continue cooking for another 2-3 minutes. If the coating is browning too quickly while the onion remains too firm, reduce the temperature slightly and continue cooking. Perfect onion petals will have a layered texture experience: shattering crisp exterior giving way to tender, sweet onion with just enough bite to provide satisfaction. This balance is the hallmark of properly prepared blooming onion petals and worth the attention to cooking time.
- Step 8: Serve immediately for optimal experience
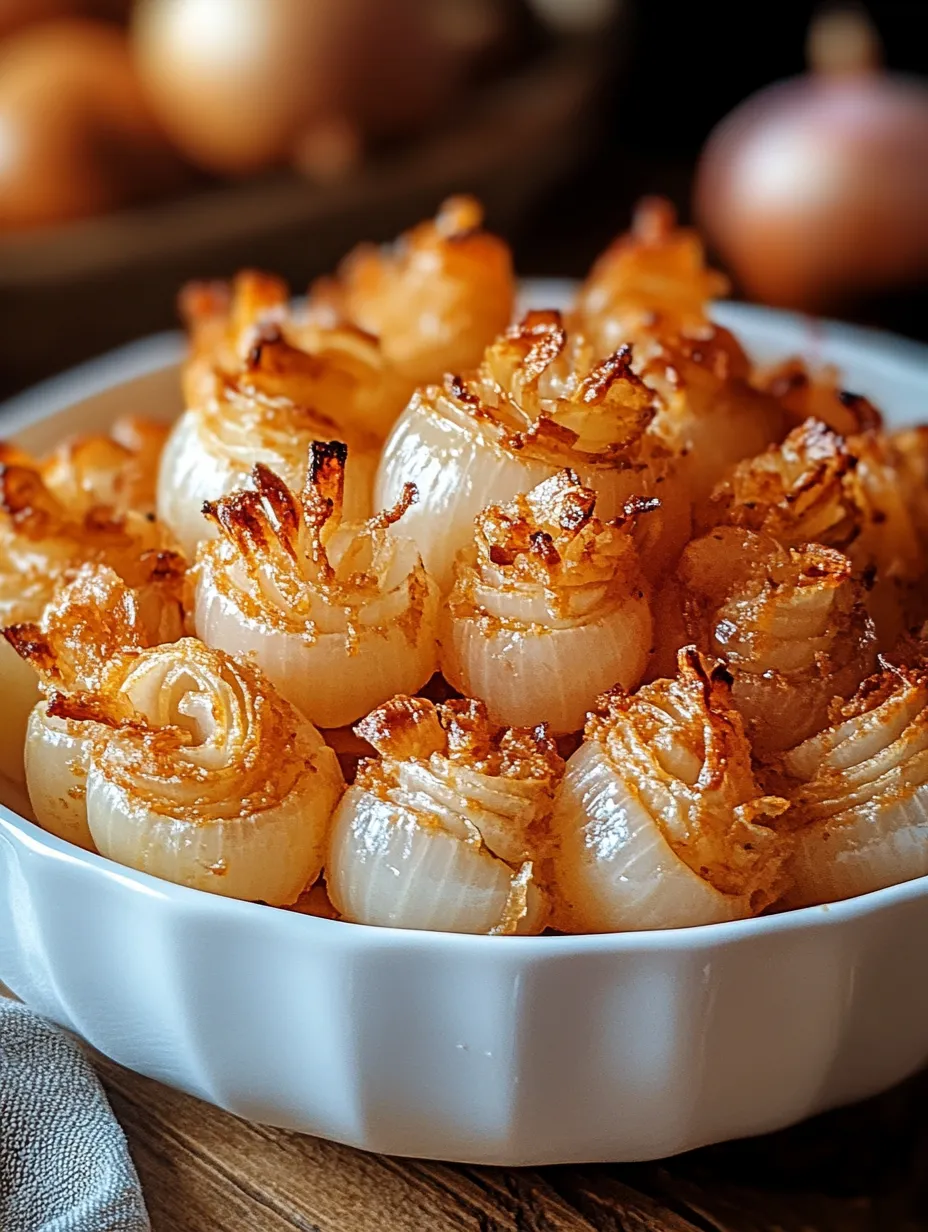
- Transfer the freshly cooked onion petals to a serving platter, arranging them with the most attractive side up for visual appeal. Sprinkle with freshly chopped parsley for a pop of color and fresh flavor if desired. Place the dipping sauce in a small bowl in the center or alongside the platter. These bite-sized blooming onions are at their absolute best when served immediately after cooking, while the contrast between crispy coating and tender onion is most pronounced. The textural perfection begins to diminish as they cool, though they remain delicious. For the most impressive presentation, serve on a dark-colored platter where the golden petals will stand out dramatically. If serving as part of a larger spread, position them where they'll be easily accessible, as they tend to disappear quickly once discovered by guests.
Perfect Party Appetizer Strategy
These Bite-Sized Blooming Onions have saved countless gatherings where I needed something both impressive and practical. Unlike their restaurant-sized counterparts that require special cutting techniques and deep fryers, these miniature versions deliver the same satisfying experience while being infinitely more practical for home entertaining. The individual pieces eliminate the awkward "how do I eat this" moment that often accompanies the traditional blooming onion.
What makes these particularly perfect for entertaining is their flexibility. I've served them as passed appetizers where guests can easily grab a petal or two while mingling, and I've incorporated them into seated appetizer plates where they maintain their dignity far better than segments pulled from a communal blooming onion. The individual portions ensure everyone gets the perfect combination of crispy coating and tender onion rather than fighting over the best pieces.
I've discovered that these onion bites create natural gathering points at parties. During a recent housewarming, I noticed distinct social clusters forming around each platter I'd distributed throughout the space. They seem to encourage conversation—perhaps because they're substantial enough to satisfy but not so filling that guests feel weighed down. This combination of impressive presentation and practical serving format makes them my go-to for gatherings where I want food to enhance rather than complicate the social experience.
Make-Ahead and Scaling Strategies
One of the qualities I most appreciate about these bite-sized bloomers is their adaptability to different party planning approaches. Through considerable experimentation, I've developed several strategies that allow me to incorporate them into even the most complex entertaining schedules without sacrificing quality.
For same-day preparation with minimal last-minute fuss, I complete all the cutting and coating up to four hours ahead, arranging the prepared petals on baking sheets lined with parchment paper. I cover them loosely with plastic wrap and refrigerate until about 20 minutes before cooking, then allow them to come to room temperature briefly before baking or air-frying. This approach means I can prepare them during a calmer moment earlier in the day, then cook them fresh just as guests arrive.
When planning further ahead, I've found that freezing works surprisingly well. After coating the onion petals, I arrange them in a single layer on a parchment-lined baking sheet and freeze until solid, then transfer to freezer bags. These can be cooked directly from frozen—just add about 3-4 minutes to the cooking time. The results are nearly indistinguishable from fresh, making this an excellent strategy for very large gatherings where preparing everything the day-of would be overwhelming.
For the dipping sauce, preparation up to three days ahead actually improves the flavor as the ingredients have time to fully meld. I store it in an airtight container in the refrigerator, then bring it to cool room temperature about 30 minutes before serving for the best consistency and flavor.
 Pin it
Creative Flavor Variations
While the classic spice blend creates a nostalgic flavor profile that most people immediately recognize and enjoy, I've developed several variations that offer exciting alternatives depending on the occasion or accompanying dishes. Each maintains the fundamental textural experience while introducing new flavor dimensions.
For an Italian-inspired version, I replace the standard spice blend with a mixture of dried oregano, basil, and grated Parmesan cheese incorporated directly into the flour mixture. The cheese creates additional crispness while adding umami notes that complement the sweet onions beautifully. I serve these with a marinara dipping sauce instead of the traditional sauce, creating bite-sized morsels reminiscent of onion rings but with Italian flavor notes.
Asian-inspired blooming onion bites have become another favorite variation. I add five-spice powder and a touch of ground ginger to the flour mixture, then serve them with a sweet chili dipping sauce or sriracha mayo. The warm spices pair surprisingly well with the natural sweetness of the onions, creating an unexpected but delightful flavor combination that works particularly well alongside other Asian-inspired appetizers.
For a truly American Southern twist, I incorporate buttermilk into the egg wash and add a pinch of cayenne to the flour mixture. The tanginess of the buttermilk enhances the natural sweetness of the onions while providing additional tenderness, and the subtle heat from the cayenne builds gradually with each bite. These pair perfectly with a ranch dipping sauce enhanced with fresh dill, creating an elevated version of classic American flavors.
I learned about the importance of proper onion preparation through a memorable kitchen failure when hosting a game day gathering. Rushing to get everything ready, I skipped the step of thoroughly drying the onion petals after separating them, reasoning that the flour would absorb any excess moisture. As I pulled the first batch from the oven, my heart sank—instead of the golden, crispy petals I expected, I found a soggy, pale disappointment with coating that slid right off the onions. With kickoff approaching and no time to start over, I had to serve them as-is, watching guests politely nibble while clearly wondering what went wrong. That experience taught me that seemingly small preparation details can make the difference between spectacular and subpar results. Now I always pat the separated petals dry with paper towels before coating, a simple step that ensures consistently crispy, golden results every time.
After making these Bite-Sized Blooming Onions countless times for gatherings large and small, I'm still amazed by how such a simple concept—essentially breaded and baked onion petals—can create such genuine delight. There's something almost magical about the transformation of ordinary onions into these golden, crispy morsels that consistently disappear within minutes of hitting the table. I've watched the most sophisticated guests abandon all pretense to reach for "just one more" and seen children who "hate onions" happily devour them by the handful. Perhaps what makes them so special is how they elevate a humble ingredient into something that feels both nostalgic and novel simultaneously. In our world of increasingly complex cuisine, there's something refreshingly honest about this unpretentious yet utterly satisfying creation that manages to spark joy with every crispy, flavorful bite.
Frequently Asked Questions
- → Can I make these ahead of time?
- For the best texture, coat the onion petals up to 2 hours ahead and keep refrigerated, then bake or air fry just before serving. The sauce can be made 2-3 days ahead and kept refrigerated in an airtight container.
- → Why use cornstarch in the flour mixture?
- The cornstarch helps create an extra crispy coating when baked or air-fried. It's a little trick that helps you get that restaurant-style crispiness without deep frying.
- → How can I make these spicier?
- To increase the heat level, add more chili powder to the flour mixture or a pinch of cayenne pepper. You can also add more hot sauce to the dipping sauce or even mix in some sriracha.
- → What can I use instead of eggs for the coating?
- For an egg-free version, try using 1/2 cup of buttermilk or mix 2 tablespoons of ground flaxseed with 6 tablespoons of water and let it sit for 5 minutes to create a sticky egg-like consistency.
- → What's the best way to reheat leftovers?
- To maintain crispiness, reheat in an air fryer at 350°F for 3-4 minutes or in an oven at 375°F for 5-7 minutes. Avoid using the microwave as it will make them soggy.