
 Pin it
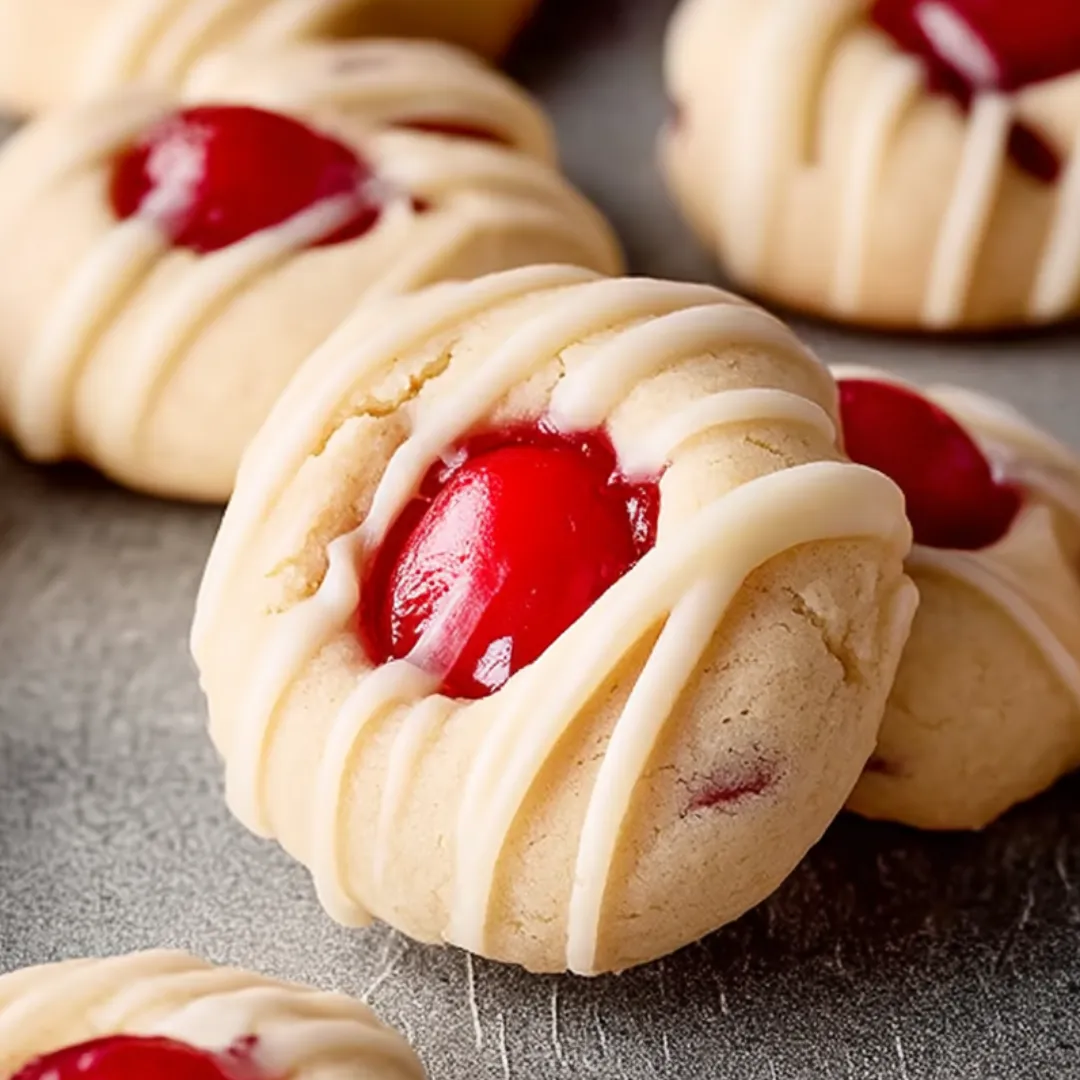
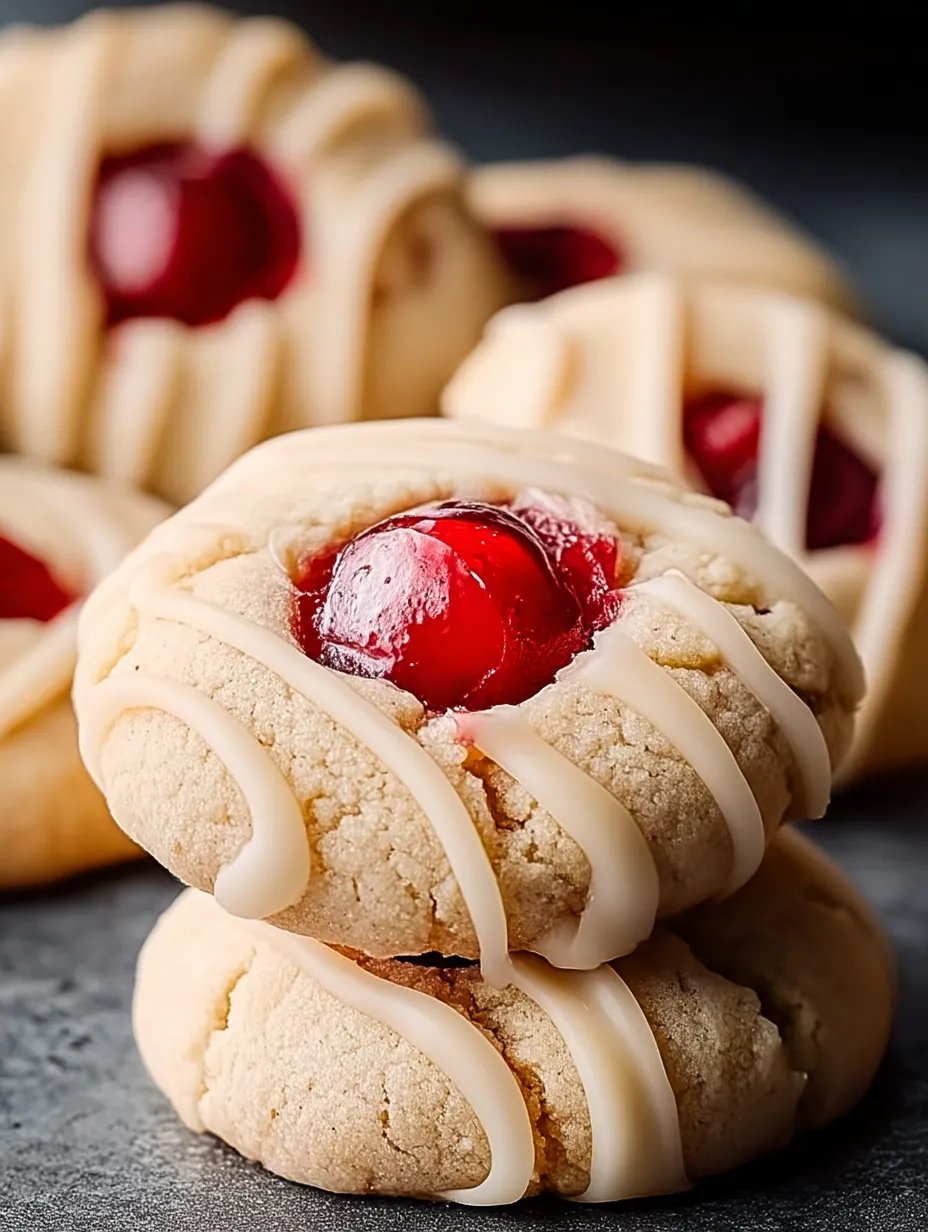
These charming Cherry Almond Cookies bring together the perfect marriage of sweet maraschino cherries and delicate almond flavor in a tender, cream cheese-enriched dough. Each cookie features a bright red cherry nestled in its center and a decorative drizzle of white chocolate that adds both visual appeal and a creamy sweetness. With their festive appearance and delightful taste, these cookies have long been a staple on Italian holiday cookie platters, but they're wonderful year-round for special occasions or simply brightening an ordinary day.
I first encountered these cookies at my grandmother's house during the Christmas season when I was just seven years old. Each year, she would create enormous cookie platters featuring at least a dozen different Italian cookie varieties, but these cherry-topped treats were always the first to disappear. I would deliberately save them for last on my plate, savoring the combination of almond-scented cookie and sweet cherry. When I finally asked her to teach me how to make them, I was surprised by how simple they were despite their elegant appearance. Now they're part of my own holiday tradition, and my children hover around the kitchen just as I once did, waiting for the first batch to cool enough to taste.
Ingredients
- ½ cup (1 stick) unsalted butter, softened: Creates tenderness and rich flavor in the dough. Look for good quality butter without added salt so you can control the seasoning. The butter should be soft enough that it yields easily to gentle pressure but isn't melting or oily—about 65°F is ideal.
- 8 ounces cream cheese, softened: Adds tanginess and creates an exceptionally tender texture. Full-fat cream cheese works best here; low-fat versions contain more moisture and can make the dough too soft. Like the butter, it should be softened to room temperature for easy incorporation.
- 1 cup light brown sugar, packed: Provides sweetness with subtle molasses notes that complement the almond flavor. When measuring, press the sugar firmly into the cup so it holds its shape when turned out. Fresh brown sugar should feel soft and moist, not hard or dried out.
- 1 egg: Binds the dough together and adds richness. A room temperature egg incorporates more easily than a cold one. Farm-fresh eggs with vibrant yolks will enhance the cookie's richness and color.
- ½ teaspoon salt: Balances the sweetness and enhances the other flavors. Fine sea salt or kosher salt dissolves more evenly in the dough than coarse varieties.
- 1 teaspoon almond extract: Provides the signature flavor that defines these cookies. Pure almond extract rather than imitation offers the most authentic taste. The extract should have a strong, sweet aroma reminiscent of marzipan.
- ½ teaspoon vanilla extract: Rounds out and deepens the almond flavor. Pure vanilla extract creates the best flavor profile; look for one with vanilla bean specks for the richest taste.
- 2 cups all-purpose flour: Forms the structure of the cookie. Unbleached all-purpose flour works perfectly here. For the most accurate measurement, spoon the flour into measuring cups and level with a knife rather than scooping directly from the bag.
- 20 ounces maraschino cherries, drained and patted dry: Creates the eye-catching center and sweet cherry flavor. Look for cherries with vibrant red color and minimal added ingredients. Proper drying is crucial—excess juice can cause the cookies to spread too much.
- ½ cup white chocolate chips: Forms the decorative drizzle that adds visual appeal and creamy sweetness. Choose high-quality white chocolate with cocoa butter listed in the ingredients (not palm oil) for the best flavor and melting properties.
 Pin it
Step-by-Step Instructions
- Step 1:
- Begin with proper preparation - Preheat your oven to 350°F (175°C) to ensure it reaches the correct temperature before baking begins. Line two baking sheets with parchment paper or silicone baking mats to prevent sticking and make cleanup easier. The consistent heat of a properly preheated oven is crucial for even baking, especially for these cream cheese-enriched cookies that require precise baking to maintain their tender texture without spreading too much. Take a moment to organize your workspace, gathering all ingredients and tools before starting. This preparation ensures a smooth baking process and helps prevent forgetting any components.
- Step 2:
- Create the butter-cream cheese base - In a large mixing bowl, combine the softened butter and cream cheese with the brown sugar. Using an electric mixer on medium speed (or a stand mixer with the paddle attachment), beat these ingredients together for about 2-3 minutes until the mixture becomes light and fluffy with a significantly lighter color than when you started. This creaming process incorporates air into the fat, creating tiny pockets that will help leaven the cookies during baking. Be sure to scrape down the sides of the bowl with a rubber spatula at least once during mixing to ensure all ingredients are evenly incorporated. The final texture should be smooth and creamy without any visible lumps of butter or cream cheese.
- Step 3:
- Incorporate the remaining wet ingredients - Add the egg, salt, almond extract, and vanilla extract to the creamed mixture. Beat on medium speed for about 1 minute until completely incorporated and the mixture looks smooth and glossy. The egg provides structure and binding while the extracts infuse the dough with their aromatic flavors. The salt, though seemingly minimal, plays a crucial role in enhancing the almond flavor and balancing the sweetness. Be careful not to overbeat after adding the egg, as this can incorporate too much air and cause the cookies to rise and then fall during baking.
- Step 4:
- Add the flour with care - Reduce the mixer speed to low and gradually add the flour, about half a cup at a time. This slow addition prevents flour from flying out of the bowl and allows it to incorporate evenly without overworking the dough. Mix just until no dry streaks remain and the dough comes together—usually about 30-45 seconds after the last addition of flour. Overworking the dough develops gluten, which can make cookies tough rather than tender. The finished dough should be soft and somewhat sticky but hold its shape. If it seems excessively sticky, it may need to be chilled longer in the next step.
- Step 5:
- Chill for the perfect texture - Cover the bowl with plastic wrap, pressing it directly onto the surface of the dough to prevent a skin from forming. Refrigerate for at least 30 minutes, though 1 hour is ideal. This chilling period serves several important purposes: it firms up the fats so the cookies won't spread too much during baking, allows the flour to fully hydrate, and gives the flavors time to meld. While the dough chills, drain the maraschino cherries in a colander, then spread them on paper towels and gently pat them dry. Removing excess moisture is crucial—wet cherries will release juice during baking that can affect the cookie's texture and appearance.
- Step 6:
- Shape with precision - When the dough has chilled, remove it from the refrigerator. Line your baking sheets with parchment paper if you haven't already. Using a teaspoon or small cookie scoop for consistency, portion out the dough and roll it between clean palms into 1-inch balls. Place them on the prepared baking sheets, spacing them about 2 inches apart to allow for slight spreading. You should be able to fit about 12 cookies per standard baking sheet. If the dough becomes too soft to work with at any point, return it to the refrigerator for 10-15 minutes to firm up again.
- Step 7:
- Create the signature indentation - Using your thumb or the back of a rounded measuring teaspoon, press down in the center of each dough ball to create a shallow indentation. The depression should be deep enough to hold a cherry but not so deep that it goes all the way through the cookie. If the edges of the cookies crack slightly during this process, gently smooth them with your fingertip. For the most uniform appearance, try to make all indentations approximately the same size and depth. These little wells will cradle the cherries and keep them centered during baking.
- Step 8:
- Add the cherry jewels - Place a well-dried maraschino cherry in each indentation, pressing it in gently so it's secure but not completely submerged in the dough. The cherries should nest in the wells with their tops visible, creating that signature polka-dot appearance when baked. If any cherry juice has accumulated on your work surface or hands, wipe it away before continuing to prevent staining the dough red. The cherries will slightly sink into the cookies as they bake, becoming part of the cookie rather than just a topping.
- Step 9:
- Bake to tender perfection - Place the cookie sheets in the preheated oven, one at a time for most even baking. Bake for 11-13 minutes, until the cookies are set and just barely beginning to turn golden at the edges. Don't wait for them to brown significantly—overbaking will make them dry rather than tender. The cookies may look slightly underdone in the center, but they will continue to set as they cool. The cream cheese in the dough prevents these cookies from browning quickly, so visual cues are subtle. Look for a matte finish on the surface rather than a wet sheen to indicate doneness.
- Step 10:
- Add the finishing touch - Allow the cookies to cool on the baking sheets for 5 minutes before transferring them to wire racks placed over parchment-lined baking sheets (to catch drips from the next step). Once the cookies are completely cool, place the white chocolate chips in a microwave-safe bowl and heat in 20-second intervals, stirring between each, until just melted and smooth. Transfer the melted white chocolate to a small zip-top bag and snip off a tiny corner. Drizzle the white chocolate artfully over the cookies in a zigzag pattern. Allow the chocolate to set completely before storing, which usually takes about 30 minutes at room temperature or 10 minutes in the refrigerator. The contrast between the snowy white chocolate, bright red cherry, and golden cookie creates that eye-catching, festive appearance that makes these cookies so special.
The finished cookies should have a tender, slightly cakey texture with a delicate almond flavor that complements the sweet maraschino cherry. The white chocolate drizzle adds a touch of elegance and a hint of creamy sweetness that brings all the flavors together beautifully.
Italian Cookie Traditions
These Cherry Almond Cookies hold a special place in Italian cookie traditions, particularly during the Christmas season. In many Italian-American families, holiday cookie baking is a multi-day affair resulting in trays overflowing with dozens of varieties of cookies, each with its own unique shape, flavor, and story.
I learned about these traditions firsthand from my grandmother, who would begin her holiday baking right after Thanksgiving. She explained that in Italy, different regions had their own signature cookies, and when Italian immigrants came to America, they brought these recipes with them, eventually sharing them across communities. These cherry-topped treats were always prominently featured on her cookie platters, their bright red centers making them stand out among the anise-flavored biscotti and chocolate-dipped butter cookies.
What fascinates me about Italian cookie traditions is the emphasis on visual appeal as well as flavor. Each cookie is designed to be beautiful as well as delicious, creating a feast for the eyes as well as the palate. This attention to aesthetics transforms the humble cookie into something celebratory and special, worthy of holidays and gatherings.
Over the years, I've continued this tradition in my own kitchen, though I've made a few adaptations along the way. My grandmother used a simple almond-flavored icing for her cookies, but I prefer the white chocolate drizzle, which adds an extra layer of flavor and a slightly more modern look. She would have appreciated the innovation while maintaining the spirit of the original.
Perfect Occasions for Sharing
While these cookies shine on Christmas cookie platters, their cheerful appearance and delicious flavor make them suitable for many other occasions throughout the year. Their red and white color scheme makes them perfect for Valentine's Day celebrations, where they offer a homemade alternative to store-bought chocolates.
For bridal showers, I often arrange them on tiered platters alongside other small sweets, where their elegant appearance fits perfectly with the festive atmosphere. The almond flavor pairs beautifully with champagne or prosecco, making them an ideal accompaniment to toasts and celebrations.
During cherry season in the summer, I sometimes make a variation using fresh sour cherries instead of maraschino cherries. This creates a more subtle color but adds a wonderful tartness that contrasts beautifully with the sweet cookie base and white chocolate topping. These summer versions have become a favorite for outdoor gatherings and picnics.
For holiday gift-giving, I stack these cookies in clear cellophane bags tied with red ribbon, creating a homemade present that's always well-received. Teachers, neighbors, and service providers all look forward to these annual treats, and I've received countless requests for the recipe over the years.
Perhaps most meaningfully, these cookies have become part of our family's regular Sunday dinner dessert rotation, transforming an ordinary end-of-weekend meal into something a little more special and creating sweet memories that don't require a holiday to be meaningful.
I learned the importance of properly drying the cherries the hard way during my first solo attempt at making these cookies. Rushing through the process, I placed wet cherries directly from the jar onto the cookie dough. During baking, the cherry juice ran everywhere, creating a sticky, red mess that looked nothing like my grandmother's perfectly formed cookies. Now I drain the cherries at the very beginning of my preparation and let them sit on paper towels throughout the mixing process, ensuring they're completely dry before they meet the dough.
 Pin it
Make-Ahead and Gifting Tips
These cookies work beautifully as make-ahead treats, which is particularly helpful during the busy holiday season. The dough can be prepared up to three days in advance and kept tightly wrapped in the refrigerator. You can even shape the cookies, create the indentations, and freeze them on baking sheets before transferring them to freezer bags for longer storage. When ready to bake, simply place the frozen dough balls on baking sheets, add the cherries, and bake directly from frozen, adding just 1-2 minutes to the baking time.
For the freshest presentation when giving these as gifts, I often pack the cookies in decorative tins with parchment paper between layers. The sturdy texture of these cookies means they travel well without crumbling, making them ideal for shipping to far-away friends and family. I've sent them as far as California from my East Coast kitchen, and they've arrived intact and delicious.
If packaging these cookies for a holiday cookie exchange, consider including a small card with the story behind them and serving suggestions. I like to mention that they pair wonderfully with coffee, tea, or even a glass of dessert wine, elevating the experience from a simple cookie to a thoughtful pairing.
For an extra special presentation, sometimes I'll package these cookies with a small bottle of amaretto liqueur for adults or a bottle of almond-scented hand cream for a themed gift that extends beyond the edible treat itself.
After making these cookies countless times over the years, I've developed a deep appreciation for the way they connect generations through the simple act of baking. When my daughter was old enough to help in the kitchen, these were the first cookies we made together. There was something magical about watching her tiny fingers press indentations into the dough, just as I had done as a child, just as my grandmother had shown me.
The recipe itself hasn't changed much over the decades, but each baker adds their own touch - my grandmother's careful rows of perfectly uniform cookies, my slightly more generous cherry portions, my daughter's enthusiastic (if somewhat erratic) chocolate drizzling. Each variation tells a story about the person who made them, while maintaining the essence of what makes these cookies special. In a world where so many things change rapidly, there's something profoundly comforting about a recipe that travels through time, collecting memories while retaining its ability to bring joy with every sweet, cherry-topped bite.
Frequently Asked Questions
- → Do I really need to chill the dough?
- Yes, chilling is important! It helps the cookies hold their shape while baking and prevents them from spreading too much. At least one hour is recommended, but you can chill it overnight for even better results.
- → Can I use fresh cherries instead of maraschino?
- Fresh cherries aren't recommended for this recipe as they release too much moisture when baking. Maraschino cherries provide the perfect texture and sweetness, plus that festive pop of color.
- → How should I store these cookies?
- Store in an airtight container at room temperature for up to 5 days. Place parchment paper between layers to prevent sticking. They can also be frozen for up to 3 months.
- → Can I substitute the almond extract?
- If you don't have almond extract or are avoiding nuts, you can substitute with additional vanilla extract. However, the almond flavor is classic for these cookies and pairs beautifully with the cherries.
- → Why is my white chocolate clumping when I try to melt it?
- White chocolate can be finicky to melt. Make sure to use short bursts in the microwave and stir well between each. If it's still clumping, try adding a teaspoon of vegetable shortening or coconut oil to help it melt smoothly.