
 Pin it
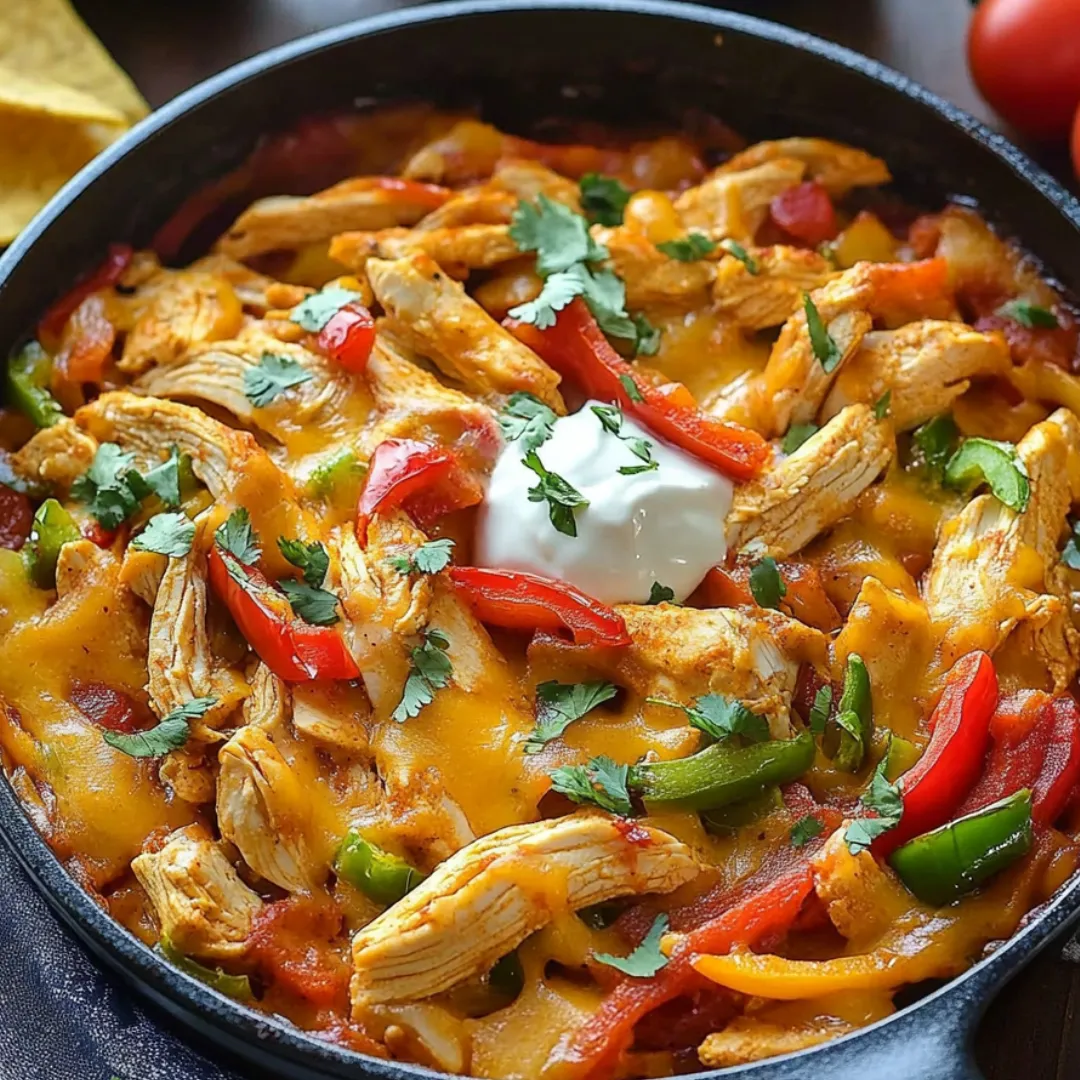
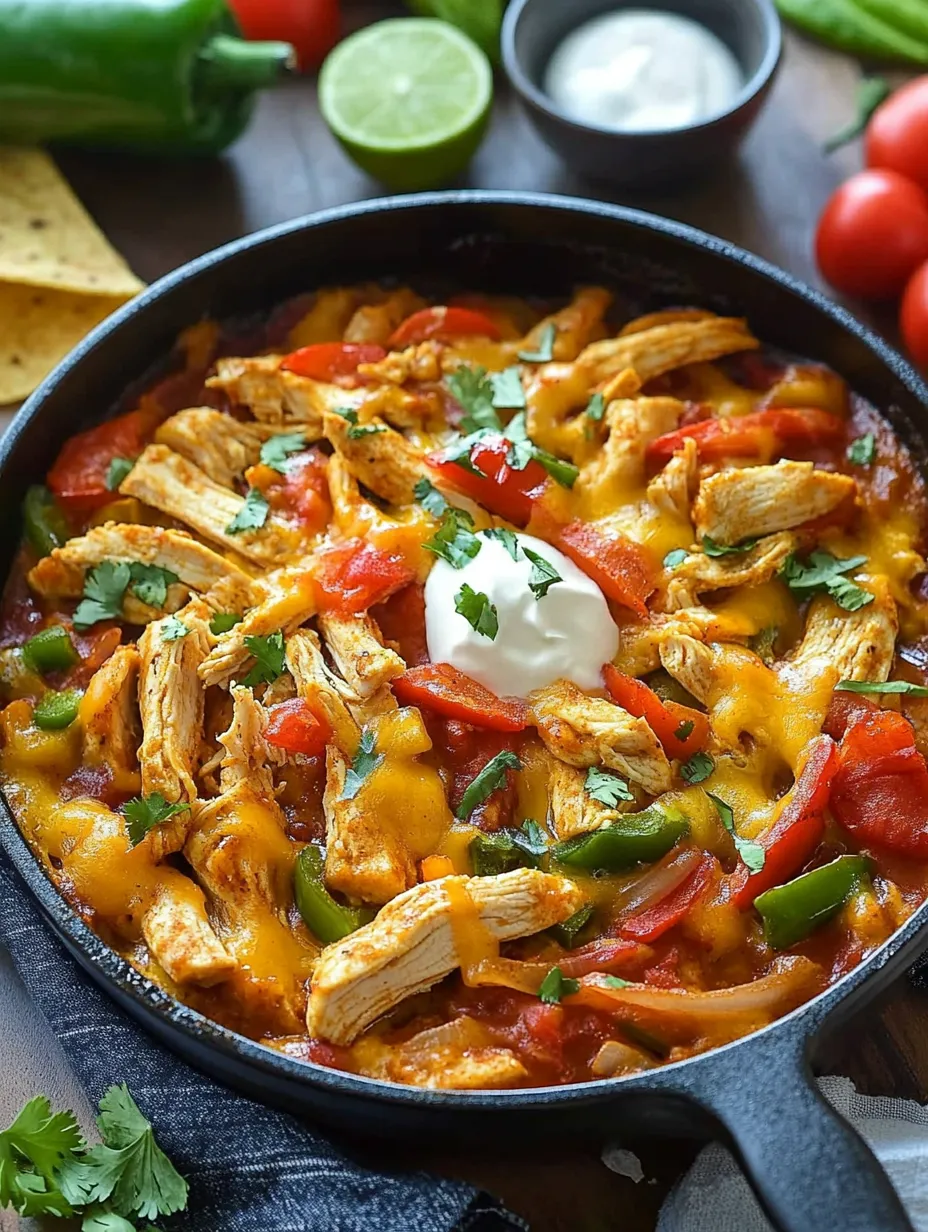
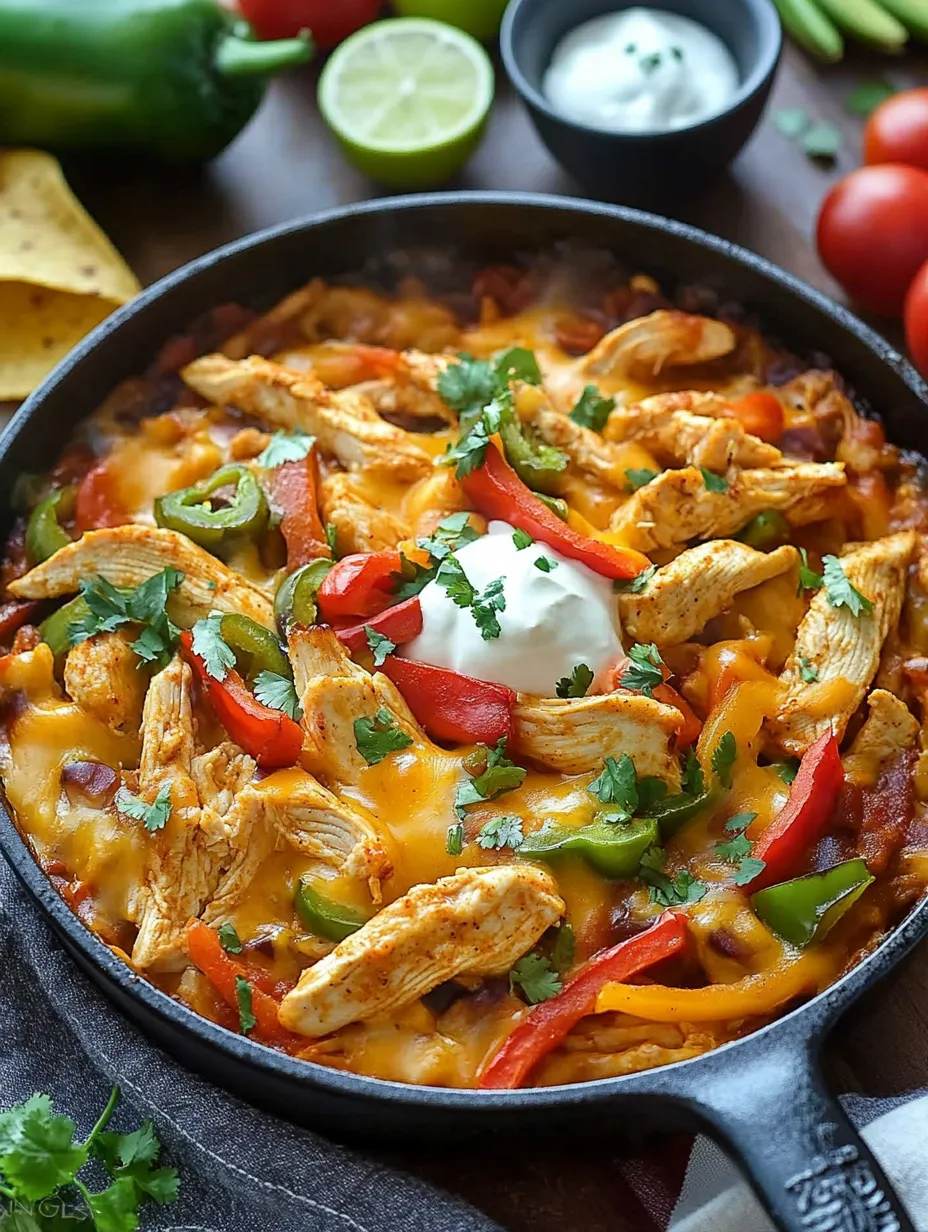
These cheesy chicken fajitas transforms the sizzling flavors of street-style fajitas into a comforting, one-pan meal that brings the Mexican restaurant experience straight to your dinner table. The tender chicken pieces nestle between colorful bell peppers and onions, all wrapped in a creamy, seasoned sauce and topped with melty cheese that forms an irresistible golden crust. Unlike traditional fajitas that require individual assembly, this casserole version combines all those beloved flavors in each satisfying spoonful – no tortillas required, though they make a wonderful accompaniment if desired.
I first made these chicken fajitas for my husband's birthday when I couldn't decide between making his favorite garlic butter steak or pasta with Alfredo sauce. The inspiration to combine both cravings into one dish was nothing short of magical. The look of pure delight on his face as he took that first bite convinced me this recipe needed to become part of our regular dinner rotation. Now it's our go-to choice whenever we want to turn an ordinary evening into something special without spending hours in the kitchen.
Ingredients You'll Need
- 1½ pounds boneless, skinless chicken thighs: Choose tender cuts like ribeye, tenderloin, or sirloin for the juiciest results; the natural fat helps carry all those wonderful flavors.
- 3 bell peppers (assorted colors): Using red, yellow, and green peppers adds beautiful color, moisture, and nutritional value; make sure to chop it finely so it blends seamlessly.
- 2 garlic cloves, minced: Fresh garlic provides that unmistakable aroma that dried just can't match; crush it with the side of your knife before mincing for the strongest flavor.
- 1 large yellow onion: Adds subtle sweetness and slight crunch; finely chopped ensures it blends seamlessly into the sauce.
- 1 cup sour cream: Adds richness and a pleasant tangy note that balances the savory elements; don't substitute with yogurt which can be too watery.
- 1 cup shredded cheddar cheese: Adds a salty, nutty depth that elevates the entire dish; always use freshly grated for the best flavor and meltability.
- 1 tablespoon olive oil: For searing, which creates that beautiful brown crust and seals in juices; a good quality olive oil makes a difference you can taste.
- 1 teaspoon ground cumin: Provides essential earthy warmth and subtle smokiness; freshly ground makes a noticeable difference.
- 1 teaspoon smoked paprika: Adds a subtle smokiness and gorgeous color to the dish; sweet or smoked varieties work well depending on your preference.
- Salt and pepper, to taste: Use kosher salt for seasoning the meat as its larger crystals distribute more evenly. Freshly ground black pepper delivers significantly more aroma and flavor than pre-ground.
 Pin it
Step-by-Step Cooking Instructions
- Prepare your workspace and ingredients:
- Before starting, preheat your oven to 375°F and line a large rimmed baking sheet with parchment paper for easy cleanup later. Having everything measured and ready makes the process flow smoothly. Finely chop your bell peppers, mince your garlic, and cut your onion into ½-inch strips, keeping them substantial enough to maintain some texture after cooking. Line a baking sheet with parchment paper for easy cleanup later. This preparation step makes the entire process much more enjoyable.
- Brown the chicken properly:
- Heat a large oven-proof skillet (cast iron works beautifully) over medium-high heat. Add 1tablespoon olive oil and swirl to coat the entire surface. Working in small batches (no more than half the skillet's surface should be covered), add the chicken pieces in a single layer, being careful not to overcrowd the pan (work in batches if necessary). Let them cook undisturbed for 2-3 minutes until a rich brown crust forms on the bottom. Using tongs, flip each piece individually and sear the remaining sides for another 1-2 minutes until all sides are beautifully browned but the center remains medium (internal temperature of 165°F for medium-rare). Transfer the seared chicken to a clean plate and tent loosely with foil to rest.
- Sauté the vegetables to perfection:
- In the same skillet, add the remaining tablespoon of olive oil along with the sliced bell peppers and onions. Cook over medium heat for 5-7 minutes, stirring occasionally. You want the vegetables to soften slightly while maintaining some crispness – they'll continue cooking in the oven. The key is developing those light caramelized edges on some pieces while keeping the bright colors intact. If browned bits from the chicken are stuck to the pan, use a wooden spoon to scrape them up as the vegetables release their moisture – these flavor particles are culinary gold.
- Create the creamy sauce base:
- Return the skillet to low heat and add the cooked chicken back to the pan with the vegetables. Drop spoonfuls of softened cream cheese around the skillet and add the sour cream. Sprinkle the fajita seasoning evenly over the entire surface of the pan, filling any gaps with your fingertips or a spoon. Allow the mixture to simmer gently for about 2 minutes, allowing the flavors to meld and the sauce to reduce slightly. Whisk in the shredded cheddar cheese until fully incorporated. Continue to simmer gently for 2-3 more minutes until the sauce coats the back of a spoon. Season to taste with salt and pepper as needed – remember that Parmesan is naturally salty, so taste before adding more salt at the beginning.
- Combine and finish the dish:
- Return the cooked chicken to the skillet with the vegetables. Drop spoonfuls of softened cream cheese over the top, creating complete coverage for that perfect cheesy crust. Transfer the skillet to the preheated oven and bake for 15-20 minutes until the cheese is completely melted, bubbly, and developing golden-brown spots on top. Allow the casserole to rest for 5 minutes before serving – this brief rest helps the juices redistribute through the meat and prevents the cheese from being scorching hot. If using tortillas, place them in the oven during the last 5 minutes of baking to warm through.
The Magic of Chicken Fajita Casserole
You Must Know
My grandmother always insisted on using European butter for special pasta dishes, claiming you could taste the difference in the final result. I was skeptical until I conducted a side-by-side test with this recipe. The higher fat content in European-style butter created a sauce with remarkable richness and complexity that standard butter couldn't match. While it's a small splurge, I've found it makes a noticeable difference in recipes where butter is the star, like this one. Now I keep a special butter just for my garlic butter sauce – it's become my signature touch that guests always comment on without knowing exactly what makes it special.
Perfect Pairings
The rich, indulgent nature of these chicken fajitas calls for sides that either complement or balance their decadence. Creamy mashed potatoes make an ideal companion, providing a velvety canvas for the sauce to pool into. For a lighter option that still captures the essence of the dish, try roasted asparagus or broccoli – their slight bitterness and crisp texture create a beautiful contrast to the tender steak and rich sauce. For those watching their carbohydrate intake, cauliflower mash offers the same comforting quality as potatoes while adding nutritional benefits. A simple green salad dressed with a bright vinaigrette can cut through the richness, cleansing the palate between bites and adding freshness to the meal. When serving these steak bites as an elegant appetizer, consider offering crusty bread for dipping into the extra sauce – no one should miss a drop of this liquid gold!
Make-Ahead Magic
One of this recipe's greatest strengths is its make-ahead potential. The chicken can be seasoned and cut up to 24 hours in advance, though bring it to room temperature before cooking for even browning. The garlic can be minced and stored in a small container in the refrigerator. For ultimate convenience, combine all sauce ingredients (except butter) in a small jar and refrigerate until needed. Noodles can be cooked earlier in the day, tossed with a tiny bit of oil to prevent sticking, and stored in the refrigerator—they'll need just 30 seconds in hot water to refresh before combining with the sauce.
Troubleshooting Tips
Even experienced cooks occasionally encounter challenges when preparing this dish. If your cheese leaks out during cooking, the meatballs likely weren't sealed completely – next time, double-check for cracks or thin spots when forming them. If they're browning too quickly in the pan, reduce the heat to medium; the goal is developing color without burning. For meatballs that fall apart during cooking, the mixture might be too wet – add an extra tablespoon or two of breadcrumbs to absorb excess moisture. For meatballs that stick together, a splash of warm water and gentle tossing usually separates them without diluting the sauce significantly.
 Pin it
Chef's Helpful Tips
I've been making variations of these garlic butter steak bites for years, but the addition of flank steak elevated them from supporting side to stunning main course. What makes this recipe particularly valuable in my kitchen arsenal is its adaptability—I've made it with whatever protein was on hand, adjusted the sauce ingredients based on my pantry, and even substituted different noodle varieties when needed. Yet the core technique remains the same, and the results are consistently delicious. There's something deeply satisfying about creating a meal that feels like a special restaurant treat but comes together with minimal time and effort in your own kitchen. Whether you're cooking for one or feeding a family, these lightning-fast noodles prove that extraordinary flavor doesn't require extraordinary effort.
Frequently Asked Questions
- → Can I use pre-cooked chicken?
- Absolutely! Use about 5-6 cups of rotisserie or leftover chicken to save prep time. Just add it when combining ingredients with the seasonings.
- → Is this recipe keto-friendly?
- Yes! With only 9.4g carbs per serving, it's perfect for keto or low-carb diets. Serve with cauliflower rice to keep it low-carb.
- → Can I make this ahead of time?
- You can prepare everything up to adding the cheese, refrigerate for up to 24 hours, then top with cheese and bake when ready to serve.
- → What can I serve with this casserole?
- Rice, cauliflower rice, tortillas, or a simple green salad all work great. Top with avocado, guacamole, extra sour cream, or salsa.
- → Can I freeze this casserole?
- Yes, it freezes well for up to 3 months. Thaw overnight in the refrigerator before reheating in a 350°F oven until hot throughout.