
 Pin it
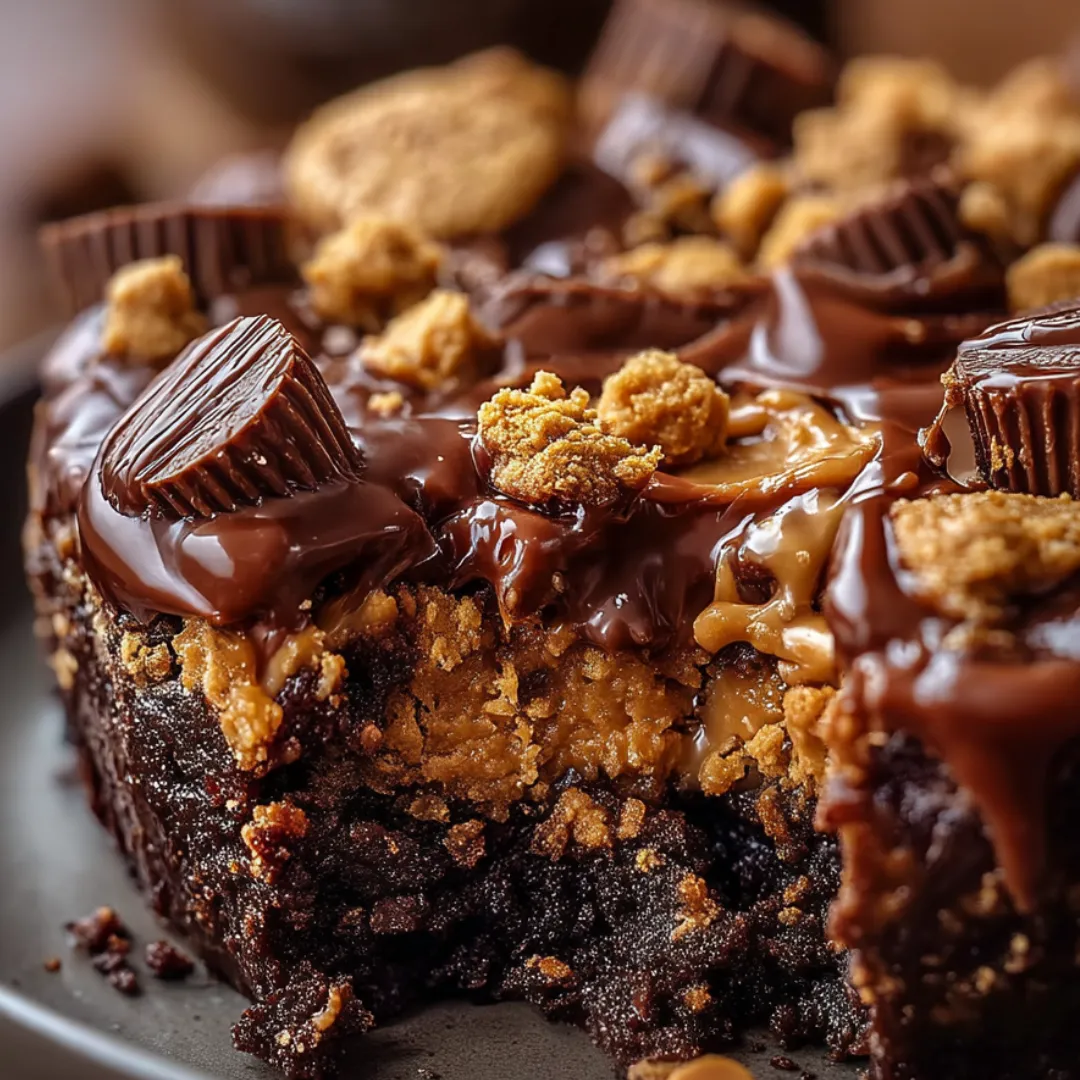
This irresistible Peanut Butter Cup Dump Cake transforms simple ingredients into a decadent dessert that delivers maximum flavor with minimal effort. The magic happens when chopped peanut butter cups melt into a buttery cake mixture, creating pockets of chocolate-peanut butter bliss throughout each bite. With its gooey interior and slightly crisp top, this dessert strikes the perfect balance between cake and cobbler – rich enough to satisfy serious sweet cravings while remaining light enough to enjoy any day of the week. Unlike fussy desserts requiring precise techniques, this forgiving recipe welcomes both novice and experienced bakers with its straightforward approach and consistently delicious results.
I first made this cake for my son's birthday when I was short on time but wanted something more special than a standard box mix. With guests due to arrive in an hour and no elaborate dessert prepared, I frantically searched my pantry and discovered a bag of mini peanut butter cups left from Halloween. This "emergency dessert" ended up stealing the show – my brother-in-law, who typically declines dessert, asked for seconds and then quietly requested the recipe before leaving. What began as a desperate solution has become our family's go-to celebration cake. The greatest compliment came when my daughter, who typically requests elaborate store-bought cakes for her birthday, specifically asked for "that peanut butter cup cake that's all melty inside" for her special day. Sometimes the best traditions start with the simplest recipes.
Ingredients
- 1 box chocolate cake mix (15.25 oz): Forms the cake-like structure while providing rich chocolate flavor. Any brand works well, though devil's food varieties offer more depth. The mix should be fresh without any hardened lumps.
- 1 cup creamy peanut butter: Creates ribbons of nutty flavor throughout the cake. Commercial brands like Jif or Skippy work best as they maintain their structure when heated. The peanut butter should be at room temperature for easy pouring.
- 1 cup milk: Adds moisture and helps activate the cake mix. Whole milk provides the richest results, though 2% also works well. The milk should be at room temperature to blend more easily with other ingredients.
- 1/2 cup unsalted butter, sliced: Creates a buttery, slightly crisp top layer as it melts during baking. European-style butter with higher fat content produces even richer results. The butter should be cold from the refrigerator, as it will be sliced and placed on top.
- 2 cups mini peanut butter cups, unwrapped: Provides pockets of melty chocolate-peanut butter goodness throughout the cake. Miniature cups distribute more evenly than full-size ones. They should be fresh without any bloom (whitish coating) on the chocolate.
- 1/2 cup semi-sweet chocolate chips (optional): Adds extra chocolate richness and gooey pockets. Choose good quality chips that melt well without becoming waxy. This optional addition is perfect for serious chocolate lovers.
- 1/4 teaspoon salt: Enhances both the chocolate and peanut butter flavors while balancing sweetness. Fine sea salt or kosher salt distributes most evenly. This small amount makes a significant difference in the overall flavor profile.
- 1 teaspoon vanilla extract: Rounds out the flavor with warm, aromatic notes. Pure vanilla extract rather than imitation offers the most complex flavor contribution. The extract should have a rich aroma without any alcohol smell overtones.
 Pin it
Step-by-Step Instructions
- Step 1:
- Preheat and prepare your baking dish - Begin by positioning a rack in the center of your oven and preheating to 350°F (175°C). This moderate temperature allows the cake to cook through properly while giving the peanut butter cups time to melt without burning. While the oven heats, lightly grease a 9×13-inch baking dish with butter or cooking spray, making sure to coat the corners and sides well to prevent sticking. A glass or ceramic dish works particularly well for this recipe as it conducts heat more gradually than metal, helping create that perfect gooey center. The proper pan preparation ensures your dessert will release cleanly and maintain its desirable texture contrast between the cake-like edges and softer center.
- Step 2:
- Prepare the peanut butter cups with care - Unwrap all the mini peanut butter cups, discarding the wrappers. If using full-sized cups instead of minis, quarter them to create more distributed pockets of flavor throughout the cake. For the most even distribution, halve the amount of peanut butter cups – you'll use half now and reserve half for a middle layer. Spread the first portion evenly across the bottom of the prepared baking dish, spacing them so they'll create distinct pockets of melty goodness rather than a single layer. This strategic placement ensures that every serving will include those prized pockets of chocolate-peanut butter flavor that make this cake so special. If you're including chocolate chips, scatter half of them between the peanut butter cups for additional chocolate richness.
- Step 3:
- Apply the dry cake mix strategically - Open the box of cake mix and evenly sprinkle the dry powder over the peanut butter cups. Unlike traditional cake preparation, you'll use the mix completely dry without pre-mixing with liquid ingredients. Ensure the powder covers the entire surface of the pan, reaching all the way to the edges and corners. Use a dry hand or spoon to spread it evenly if needed, creating a level layer. This might seem unusual if you're used to traditional cake making, but trust the process – the dry mix will absorb moisture from the other ingredients during baking, creating distinct textural zones within the finished dessert. The direct contact between the cake mix and peanut butter cups allows the chocolate and peanut butter flavors to infuse the cake as it bakes.
- Step 4:
- Add the remaining peanut butter cups - Sprinkle the remaining peanut butter cups (and chocolate chips, if using) over the dry cake mix layer. These pieces will create a middle layer of melty goodness in the finished cake, ensuring that every bite contains that perfect combination of chocolate and peanut butter. Distribute them evenly rather than creating clusters in certain areas. This middle layer is what gives the dessert its distinctive "surprise" element – just when you think you've reached the cake portion, you discover another pocket of melted peanut butter cup. It's these thoughtful details that transform a simple dump cake into something memorable and crave-worthy.
- Step 5:
- Prepare and add the liquid mixture - In a microwave-safe bowl or measuring cup, combine the peanut butter, milk, vanilla extract, and salt. Heat in 30-second intervals, stirring between each, until the peanut butter has melted enough to blend smoothly with the milk – typically 1-2 minutes total. The mixture should be smooth and pourable but not hot. This technique ensures the peanut butter distributes evenly throughout the cake rather than remaining in distinct clumps. Whisk the mixture until completely smooth, making sure the salt and vanilla are fully incorporated. The vanilla enhances both the chocolate and peanut butter flavors, while the salt balances the sweetness and intensifies the overall taste experience.
- Step 6:
- Pour the liquid ingredients effectively - Drizzle the peanut butter-milk mixture evenly over the entire surface of the dry cake mix, making sure to cover as much of the dry mix as possible. Pour in a circular pattern from the outside toward the center, moving slowly to ensure even distribution. Resist the urge to stir or mix the layers together – the beauty of a dump cake lies in its distinct layers that create varied textures in the finished dessert. Any small, dry spots will absorb moisture during baking, so don't worry if a few areas appear uncovered. This hands-off approach is what makes dump cakes so beginner-friendly while still yielding impressive results.
- Step 7:
- Add the butter for the perfect crust - Take the cold butter and slice it into approximately 16 thin pats. Distribute these butter pieces evenly across the top of the cake, spacing them so they'll melt and spread to cover most of the surface. The butter serves several important purposes: it adds richness, helps create a slightly crisp top layer that contrasts with the gooey interior, and contributes to the golden-brown finish that makes the cake visually appealing. As it melts during baking, the butter will combine with the cake mix to form a thin, almost cookie-like crust on top. This textural contrast is one of the distinctive characteristics that make dump cakes so satisfying.
- Step 8:
- Bake with attention to doneness cues - Place the baking dish on the center rack of your preheated oven and bake for 35-40 minutes. Begin checking at the 30-minute mark, as ovens vary in temperature. Look for specific visual cues rather than relying solely on timing: the cake is done when the edges are set and slightly pulled away from the sides of the pan, the top is golden brown with a slight crust formation, and the center still appears slightly soft but not liquid. A properly baked dump cake maintains a gooey, pudding-like center while developing cake-like edges – this textural variation is what makes it special. If the top is browning too quickly before the cake is set, loosely cover with aluminum foil for the remaining baking time.
- Step 9:
- Allow for crucial resting time - Once baked, remove the cake from the oven and place it on a heat-resistant surface or cooling rack. Allow it to rest for 15-20 minutes before serving. This resting period is essential as it allows the cake to set slightly while still maintaining its warm, gooey character. During this time, the melted peanut butter cups will begin to set just enough to create pockets of fudgy goodness rather than liquid pools. The cake will be too hot to taste properly directly from the oven, and the texture improves dramatically during this brief cooling period. The aromas of chocolate and peanut butter will fill your kitchen, building anticipation for the treat to come. This is the perfect time to prepare any accompaniments you plan to serve with the cake.
- Step 10:
- Serve with complementary additions - For the ultimate experience, serve the cake while still warm but not hot. Scoop portions rather than cutting them, as the gooey center won't yield clean slices. Each serving should show the distinct layers and textures that make this dessert special. For a truly indulgent treat, top each portion with a scoop of vanilla ice cream, which will begin to melt into the warm cake, creating a creamy sauce that mingles with the chocolate and peanut butter flavors. Alternatively, a dollop of lightly sweetened whipped cream provides a lighter counterpoint to the rich cake. For an extra touch of decadence, drizzle with warm chocolate sauce or additional melted peanut butter. Serve in bowls rather than plates to contain the ooey-gooey goodness.
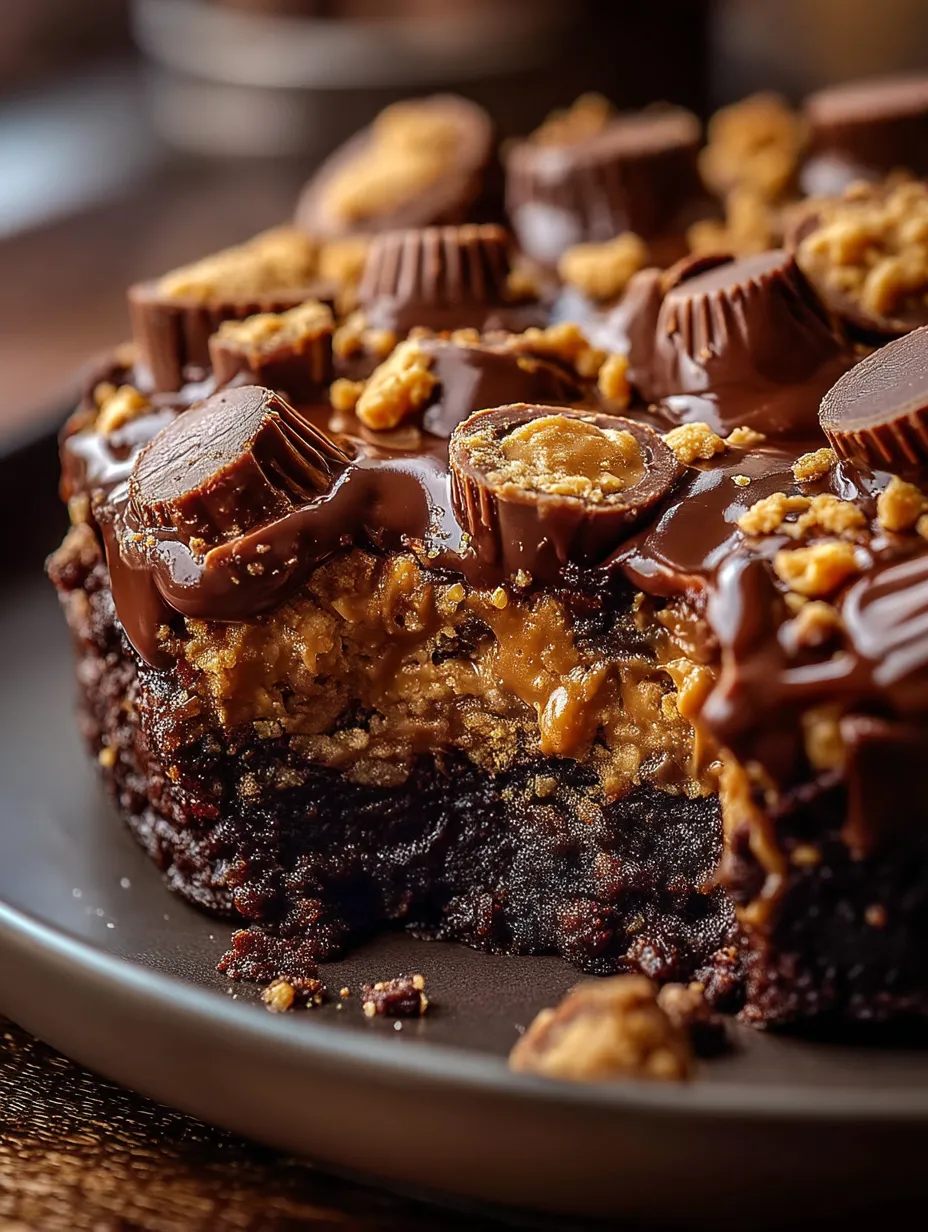
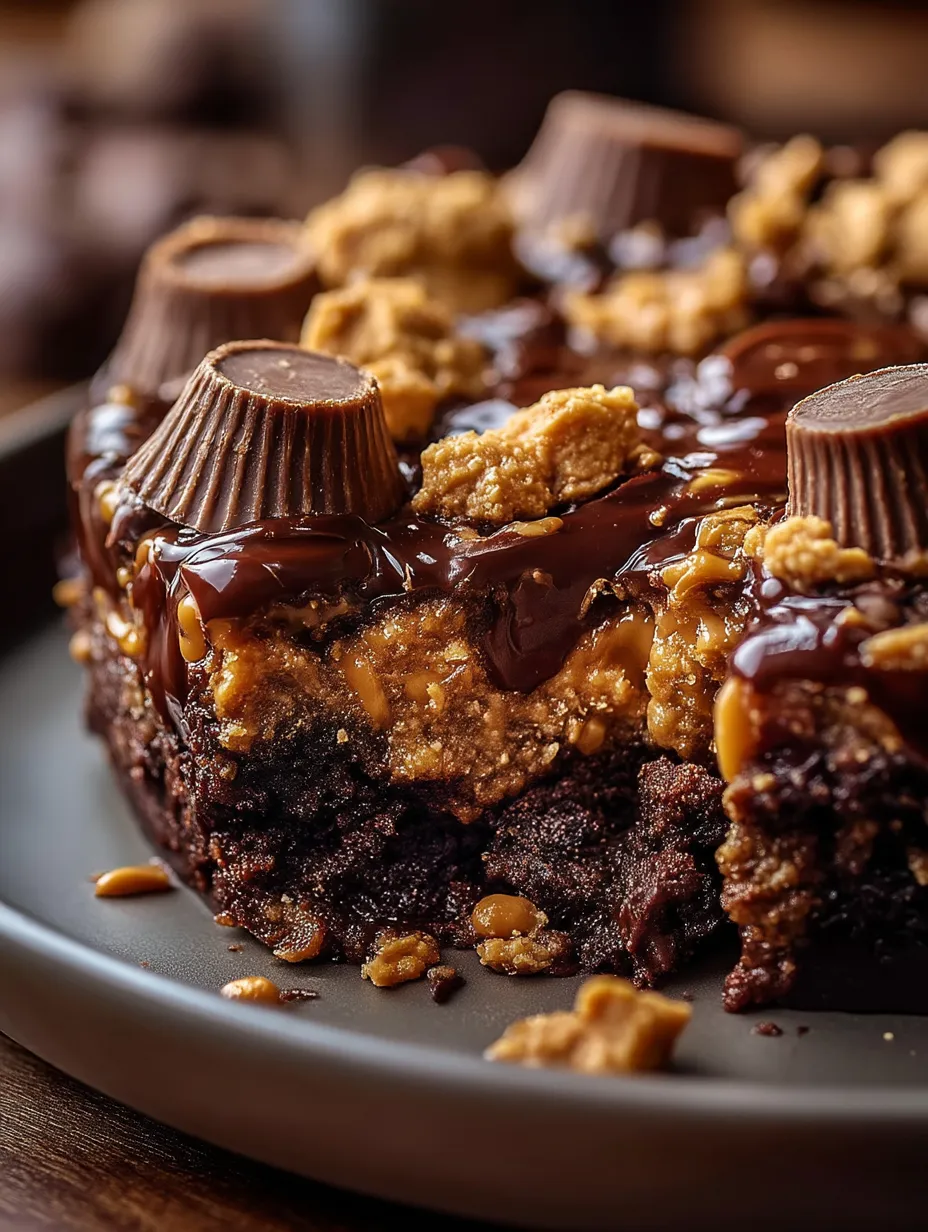
The finished Peanut Butter Cup Dump Cake should have a slightly crisp, golden top that gives way to a soft, cake-like layer, with pockets of melted peanut butter cups throughout and an almost pudding-like base where the cake mix has absorbed the liquid ingredients. The complex interplay of textures is what makes this simple dessert so satisfying.
The Beauty of Dump Cake Simplicity
What I find most fascinating about this Peanut Butter Cup Dump Cake is how it defies conventional baking wisdom yet produces consistently delicious results. Traditional cake-making emphasizes the importance of proper mixing techniques, exact measurements, and specific ingredient temperatures. Dump cakes throw much of that precision out the window, yet somehow create something magical.
I've always appreciated the forgiving nature of this dessert. One evening when making it for unexpected guests, I realized halfway through that I only had about three-quarters of the required peanut butter. Rather than abandoning the recipe, I proceeded with what I had, expecting a compromised result. To my surprise, the cake was still delicious—perhaps a bit less rich, but equally enjoyable. This adaptability makes dump cakes particularly suited to home baking, where perfect conditions and ingredients aren't always available.
The science behind why dump cakes work is interesting. The dry cake mix contains leavening agents that activate when they come in contact with the liquid ingredients. As the butter melts during baking, it combines with the cake mix to create a crust-like top, while the lower layers remain moist from the milk and peanut butter. This natural layering effect happens without any effort from the baker, creating a dessert with multiple textures in every bite.
What truly makes this recipe special is how it transforms humble, everyday ingredients into something that tastes like it required significant effort and skill. The contrast between the minimal preparation and the impressive result never fails to bring a sense of satisfaction—particularly when serving it to appreciative guests who have no idea how simple it was to create.
Perfect Occasions for Sharing
This Peanut Butter Cup Dump Cake has become my go-to dessert for numerous occasions, as it seamlessly transitions from casual family dinners to more special celebrations.
For after-school treats, I sometimes make a half batch in an 8x8 pan, which provides just enough sweetness to celebrate small victories or brighten ordinary weekdays. Served warm with a glass of cold milk, it creates a cozy moment for children to share their day's experiences. My daughter's friends now specifically ask if we're having "that melty peanut butter cake" when they come over to study.
During holiday gatherings, I elevate the presentation by serving it in individual ramekins with a sprinkle of sea salt on top and a side of vanilla bean ice cream. The personal portions create an elegant impression that belies the dessert's humble origins. Last Christmas, my mother-in-law—who prides herself on elaborate baking—asked for the recipe, assuming it involved complex techniques. Her surprise upon learning how simple it was became a favorite family story.
For summer potlucks and barbecues, I prepare the cake in a disposable aluminum pan, making transport easy and eliminating the worry of retrieving a dish afterward. I bring along a container of room-temperature ice cream that I scoop onto the warm cake just before serving. This simple dessert consistently disappears before more elaborate offerings, proving that comfort and flavor often trump complexity.
When bringing meals to friends during difficult times—after surgeries, bereavements, or new babies—this cake has proven to be particularly appreciated. Unlike fussy desserts that need immediate attention, recipients can enjoy it over several days, reheating portions as desired. The comfort factor of warm chocolate and peanut butter seems to provide a moment of sweetness during challenging periods.
I learned about the importance of proper cooling time through an embarrassing dinner party moment. Eager to impress my guests with this foolproof dessert, I served it immediately after removing it from the oven. As I scooped portions onto plates, the mixture ran like soup, creating a messy presentation that lacked the distinct textural contrast that makes this cake special. My friend, a more experienced baker, gently suggested we enjoy our coffee first and return to the dessert afterward. That brief 15-minute window transformed the desert completely – from flowing lava to the perfect gooey consistency with defined layers. Now I build that cooling time into my dinner party planning, removing the cake from the oven just before serving the main course so it reaches the ideal temperature and texture by dessert time.
 Pin it
Creative Variations to Try
While the classic version of this Peanut Butter Cup Dump Cake is perfect as is, I've developed several variations that offer delightful twists on the original recipe while maintaining its signature ease of preparation.
For chocolate lovers, I sometimes create a triple chocolate version by using chocolate milk instead of regular milk and adding a layer of dark chocolate chunks along with the peanut butter cups. This intensifies the chocolate experience while maintaining the beloved peanut butter contrast. To balance the additional sweetness, I add a pinch of espresso powder to the peanut butter-milk mixture, which deepens the chocolate flavor without adding any coffee taste.
During fall and winter months, I enjoy creating a spiced version by adding 1/2 teaspoon of cinnamon and a pinch of cayenne to the dry cake mix. These warming spices complement the chocolate and peanut butter beautifully while adding complexity that feels particularly appropriate during cooler weather. This variation pairs wonderfully with cinnamon ice cream instead of the traditional vanilla.
For those who prefer a less sweet dessert, I sometimes use a dark chocolate cake mix and natural peanut butter rather than commercial brands. This creates a more sophisticated flavor profile with deeper chocolate notes and a more pronounced peanut taste. A sprinkle of flaky sea salt on top just before serving enhances these complex flavors even further.
When serving to guests with nut allergies, I've successfully adapted the recipe using cookie butter (Biscoff spread) in place of peanut butter and substituting chopped chocolate-filled caramels for the peanut butter cups. This variation maintains the textural contrast and decadence of the original while being completely peanut-free.
For summer gatherings, I occasionally create a s'mores-inspired variation by using graham cracker crumbs as a base layer before the cake mix and replacing half the peanut butter cups with mini marshmallows. These marshmallows puff and lightly toast during baking, creating pockets of gooey sweetness reminiscent of a campfire favorite.
After years of making this Peanut Butter Cup Dump Cake for family gatherings, school functions, and comfort food cravings, I've come to appreciate how something so simple can create such joy. There's a certain magic in watching someone take their first bite – that moment of surprise as they discover the pockets of melted peanut butter cup, followed by the inevitable reaching for a second spoonful before they've even finished the first.
What I value most about this recipe is how it embodies what home baking should be: accessible, forgiving, and focused on pleasure rather than perfection. In our Instagram-perfect culinary culture, there's something refreshingly honest about a dessert that doesn't try to be sophisticated or photogenic, but simply delivers on flavor and comfort. It reminds me of desserts my grandmother made – created with love rather than precision, generous with both ingredients and portions.
I've shared this recipe countless times, scribbled on notecards and typed in text messages. Each time, I include the same note: "Don't be fooled by how easy this is – the taste defies the effort." Because ultimately, that's the true beauty of a great dump cake. It reminds us that sometimes the best things in life come not from complexity or striving, but from embracing simplicity and allowing ingredients to work their own magic.
Frequently Asked Questions
- → Can I use crunchy peanut butter instead of creamy?
- Yes, crunchy peanut butter works well and adds extra texture to the cake. Just make sure to warm it slightly before drizzling so it's easier to spread over the cake mix layer.
- → What if I don't have peanut butter cups?
- You can substitute with regular chocolate chips, peanut butter chips, or a combination of both. Other candy like chopped Snickers bars or Butterfinger pieces would also work well for similar flavor.
- → Can I make this dump cake ahead of time?
- Yes! You can prepare it up to a day ahead and refrigerate before baking. Add 5-10 minutes to the baking time if coming from the refrigerator. You can also bake it and reheat individual portions in the microwave when ready to serve.
- → How do I know when the dump cake is done?
- The edges should be set and pulling away slightly from the sides of the pan, while the center remains slightly gooey but not liquid. A toothpick inserted about 2 inches from the edge should come out with moist crumbs.
- → Can I make this recipe into individual servings?
- Absolutely! Divide the ingredients among 12 ramekins or a muffin tin with liners. Reduce the baking time to about 20-25 minutes, keeping an eye on them to ensure they don't overbake.