
 Pin it
These decadent chicken tikka masala transforms everyday ingredients into an extraordinary meal that satisfies both comfort food cravings and gourmet tastes. Each jumbo pasta shell cradles a rich filling of garlic-infused chicken and creamy ricotta, all enveloped in a silky homemade Alfredo sauce that bubbles to golden perfection in the oven. The contrast between the tender pasta, savory filling, and velvety sauce creates a multi-dimensional dish that delivers a perfect bite every time. While impressive enough for special occasions, this recipe is straightforward enough for weeknight cooking—proving that elevated comfort food doesn't require culinary school training or endless hours in the kitchen.
I first attempted this recipe on a rainy evening when I was craving something comforting yet special. As the aroma of garlic and paprika filled my kitchen, I knew I was onto something magical. When my husband—who typically approaches seafood with skepticism—went back for seconds and then asked if we could have it again the following week, I knew this dish was a keeper. It's now our go-to meal when we want to elevate a weeknight dinner or impress guests without spending hours in the kitchen.
Ingredients You'll Need
- 2 Large Boneless, Skinless Chicken Breasts: Choose pieces that are similar in size for even cooking. Thighs work beautifully too, offering tender, flavorful meat.
- 1 cup Ricotta Cheese: Creates a creamy, luxurious base for the filling. Full-fat provides the best texture and flavor.
- 1/2 cup Mozzarella Cheese (plus 1 1/2 cups for topping): Adds stretchy, melty goodness throughout the dish. Fresh mozzarella, shredded by hand, melts more smoothly than pre-shredded.
- 2 Cloves Garlic, minced: The aromatic foundation of the dish. Fresh garlic is essential here—pre-minced versions won't provide the same intensity.
- 2 Tablespoons Butter or Ghee: Creates a rich base for the sauce and helps carry the flavors of garlic and spices.
- 1 cup Heavy Cream: Forms the luxurious body of the sauce. Full-fat provides the richest texture, but half-and-half can work in a pinch.
- 1/2 cup Chicken Broth: Adds savory depth while keeping the sauce from becoming too heavy.
- 1/2 cup Grated Parmesan Cheese: Introduces a nutty, salty depth that elevates the overall flavor profile.
- 2 Tablespoons Olive Oil: The combination provides ideal searing medium with butter adding flavor and oil preventing burning.
- 1 Teaspoon Dijon Mustard: Adds subtle tanginess that balances the richness of the cream and cheese while enhancing the flavors of the chicken.
- ¼ Cup Freshly Grated Parmesan Cheese: Adds a final layer of flavor and texture that complements the Boursin perfectly.
- Fresh Herbs for Garnish: Adds vibrant color and a fresh, herbaceous note that cuts through the richness of the dish.
 Pin it
Step-by-Step Cooking Instructions
- Perfect Your Pasta Shells:
- Begin by bringing a large pot of water to a rolling boil. Add a generous tablespoon of salt—this is your only opportunity to season the pasta itself. Add the jumbo shells and cook for approximately 8-9 minutes, until they're al dente (still firm to the bite). They should be pliable enough to stuff without tearing, but not fully soft, as they'll continue cooking in the oven. Drain the shells and immediately rinse with cool water to stop the cooking process. Carefully separate any shells that may have nested together, and lay them out on a clean kitchen towel to prevent them from sticking to each other. This attention to the pasta's texture ensures your shells will maintain their structure while absorbing the sauce's flavors during baking.
- Season the Chicken Perfectly:
- Pat the chicken breasts completely dry with paper towels to ensure proper searing. Season both sides of the chicken breasts generously with 1teaspoon salt and ½teaspoon black pepper. Seasoning the meat directly before searing ensures that the flavor penetrates deeply as it cooks. Heat a large, heavy-bottomed skillet over medium-high heat. Add 2tablespoons of olive oil and allow it to heat until shimmering but not smoking. Carefully add the seasoned chicken breasts to the pan, leaving space between each piece. Let them cook undisturbed for 4-5 minutes until a deep golden crust forms, then flip and cook for another 4 minutes until the chicken is nearly cooked through but still slightly pink in the center. Immediately transfer to a clean plate to prevent overcooking. The goal is juicy, tender chicken—not tough, rubbery ones.
- Build the Aromatic Foundation:
- Return the same skillet to medium heat, taking advantage of the flavorful fond (browned bits) left from searing the chicken. Add the butter and allow it to melt completely. Once the butter stops foaming, add the minced garlic and optional red pepper flakes if you enjoy a hint of heat. Sauté for about 30-45 seconds until fragrant, stirring constantly to prevent burning. The garlic should soften and become aromatic but not take on any color—garlic turns bitter when browned, which would compromise the delicate flavor of the sauce. Add the shredded chicken to the pan along with 1teaspoon of Italian seasoning, ½teaspoon salt, and ½teaspoon black pepper. Stir continuously to ensure the chicken is evenly coated with the garlic butter and seasonings. Cook for about 2 minutes, just long enough for the chicken to absorb the flavors and for any excess moisture to evaporate. Remove from heat and let cool slightly while you prepare the cheese mixture.
- Blend the Creamy Cheese Mixture:
- In a large mixing bowl, combine 1cup of ricotta cheese, ½cup of shredded mozzarella, and ¼cup of grated Parmesan. The combination of these three cheeses creates layers of flavor—mild creaminess from the ricotta, stretchy meltiness from the mozzarella, and savory depth from the Parmesan. Crack in 1 egg, which will help bind the filling during baking, preventing it from becoming watery or crumbly. Add 1tablespoon of chopped fresh parsley for color and bright flavor. Mix until thoroughly combined into a smooth, uniform mixture. Fold in the cooled garlic butter chicken, ensuring it's evenly distributed throughout the cheese mixture. The filling should be thick and substantial, neither too wet nor too dry.
- Master the Homemade Alfredo Sauce:
- Return the same skillet to medium heat. Add the remaining 4tablespoons of butter and allow it to melt completely. Once the butter stops foaming, add the minced garlic and optional red pepper flakes if you enjoy a hint of heat. Sauté for about 30-45 seconds until fragrant, stirring constantly to prevent burning. The garlic should soften and become aromatic but not take on any color—garlic turns bitter when browned, which would compromise the delicate flavor of the sauce. Gradually pour in the heavy cream while stirring continuously. Add ½cup of grated Parmesan cheese in small handfuls, stirring between additions to ensure it melts completely into the sauce without clumping. Once all the cheese is incorporated and the sauce is smooth, add the fresh lemon juice and stir to combine. This crucial acidic component balances the richness of the cream and cheese while highlighting the flavors of the chicken.
- Reunite and Finish:
- Gently return the seared chicken breasts to the skillet, including any juices that have accumulated on the plate—these contain valuable flavor. Carefully fold the chicken into the sauce, ensuring each piece is well-coated. Allow everything to simmer together for just 1-2 minutes to warm the chicken through and let it absorb some of the sauce's flavor. Be careful not to cook the chicken any longer, as it will become tough. The residual heat of the sauce will complete the cooking process perfectly.
- Assemble with Care:
- Transfer your chicken and sauce mixture to a 9×13-inch baking dish, spreading it in an even layer. Use your spatula to smooth the top, ensuring even thickness throughout the dish for consistent baking. Press down gently to eliminate any large air pockets, but don't overdo it or you'll deflate the batter. The casserole should be level across the top to ensure the cornflake topping will distribute evenly. At this point, you could cover and refrigerate the dish for up to two days if you're preparing ahead. Bake in a preheated oven at 375°F (190°C) for 25-30 minutes until the edges are bubbling and the topping has turned a beautiful golden brown. The casserole should be heated through completely, with the cheese fully melted and incorporated throughout the chicken mixture. If the crust edges or topping begins to crisp too quickly, you can place it under the broiler for 2-3 minutes, watching carefully to prevent burning. The contrast between the crispy, golden top and the fluffy interior of the chicken is one of the dish's signature pleasures.
- Rest Before Serving:
- Once baked, allow the casserole to rest for 5-10 minutes before serving. This resting period allows the filling to set slightly, making it easier to portion and serve. It also prevents mouth burns from too-hot filling. Serve generous scoops that include both the chicken filling and pasta topping, making sure everyone gets some of the crispy edges. A simple green salad with a light vinaigrette provides refreshing contrast to the rich, creamy main dish. For a party spread, include other finger foods like garlic knots or mozzarella sticks to continue the Italian theme. A selection of dipping sauces—ranch dressing, garlic aioli, or additional marinara—allows guests to customize each bite.
I learned about the importance of thoroughly drying chicken before searing through a kitchen mishap early in my cooking journey. Rushing to get dinner on the table, I once skipped this step and added wet chicken to a hot pan, creating a splattering mess and chicken that steamed rather than seared. Now I always take an extra minute to pat the chicken completely dry with paper towels—this simple step ensures a beautiful golden crust and minimizes dangerous oil splatters. That failed dinner party taught me that sometimes the simplest techniques make the biggest difference in cooking success.
Creative Variations
The basic recipe creates a magnificent meal, but don't be afraid to make it your own. For a Mediterranean twist, add halved cherry tomatoes and baby spinach during the last minute of cooking, then finish with crumbled feta instead of Parmesan. Seafood lovers can create a mixed seafood version by adding bay scallops or bite-sized pieces of firm white fish along with the chicken. For a touch of elegance, add a splash of white wine or vermouth when deglazing the pan before adding the broth. Those avoiding dairy can substitute full-fat coconut milk for the heavy cream, creating a tropical variation with a hint of exotic flavor.
Perfect Pairings
While these stuffed shells stand beautifully on their own, a few simple sides can elevate the experience. A crisp green salad with a light vinaigrette provides refreshing contrast to the rich, creamy main dish. For a party spread, include other finger foods like garlic knots or mozzarella sticks to continue the Italian theme. A selection of dipping sauces—ranch dressing, garlic aioli, or additional marinara—allows guests to customize each bite.
Make-Ahead Strategies
While this dish comes together quickly, you can streamline preparation even further for busy evenings. Clean and season the chicken up to 12 hours ahead, storing it covered in the refrigerator. The creamy sauce base (before adding chicken) can be made up to two days in advance and gently reheated before continuing with the recipe. For entertaining, have all ingredients measured and prepped in advance, storing them in separate containers. When guests arrive, you'll only need about 15 minutes of active cooking time to bring everything together, allowing you to enjoy their company instead of being stuck in the kitchen.
 Pin it
Troubleshooting Common Issues
Even experienced cooks occasionally encounter challenges. If your sauce breaks or appears curdled, lower the heat immediately and whisk in a tablespoon of cold cream to help it re-emulsify. For chicken that turned out tough or rubbery, remember for next time that chicken continues cooking even after removed from heat—it's better to slightly undercook it initially. If your sauce isn't thickening properly, try a gentle simmer for a few extra minutes, or whisk a teaspoon of cornstarch with cold water and add it to the simmering sauce. For a sauce that's too thick, simply thin with additional warm broth until you reach your desired consistency.
My most memorable experience with this dish came during a power outage last winter. Working by candlelight with a gas stove, I prepared this for my family as we huddled around the kitchen island for warmth. The aromatic garlic and paprika filled our darkened home with comforting scents, and the rich, creamy dish provided not just nourishment but a sense of normalcy during an unsettling time. My teenage daughter, typically critical of "non-takeout" meals, declared it better than any restaurant version she'd tried. Since then, it's become our tradition to make this dish whenever we need a reminder of home's comforts—proving that sometimes the most special recipes are born from the simplest moments.
Frequently Asked Questions
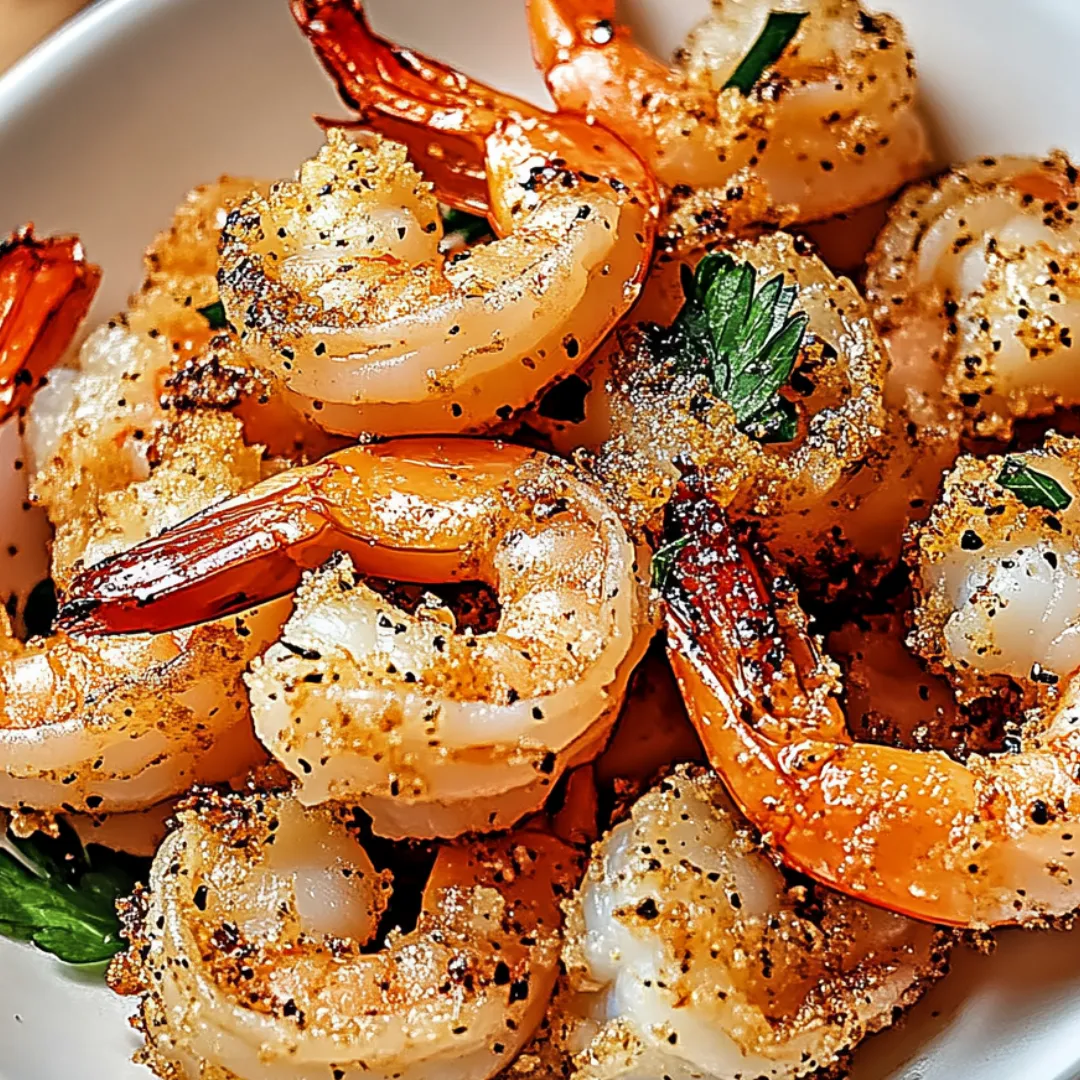
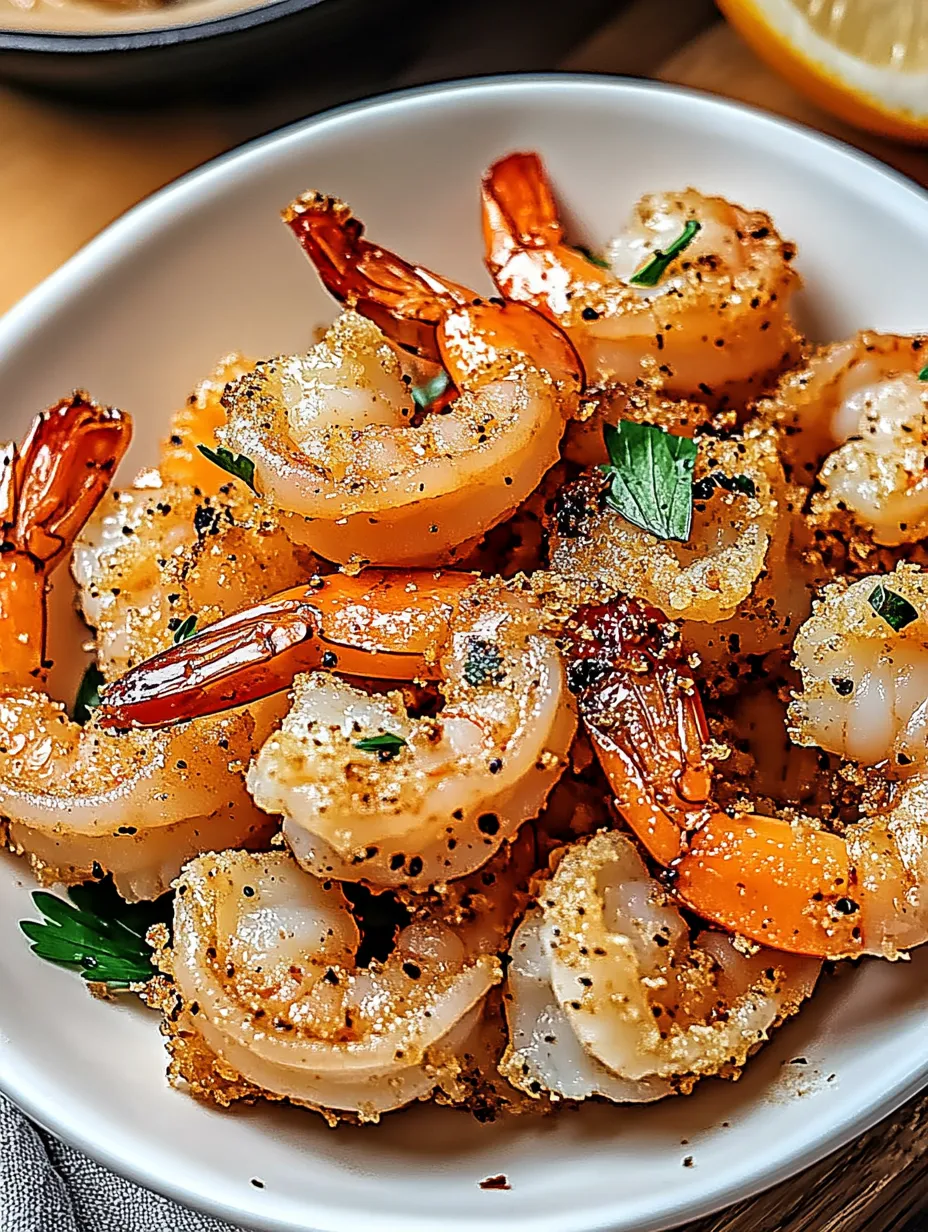
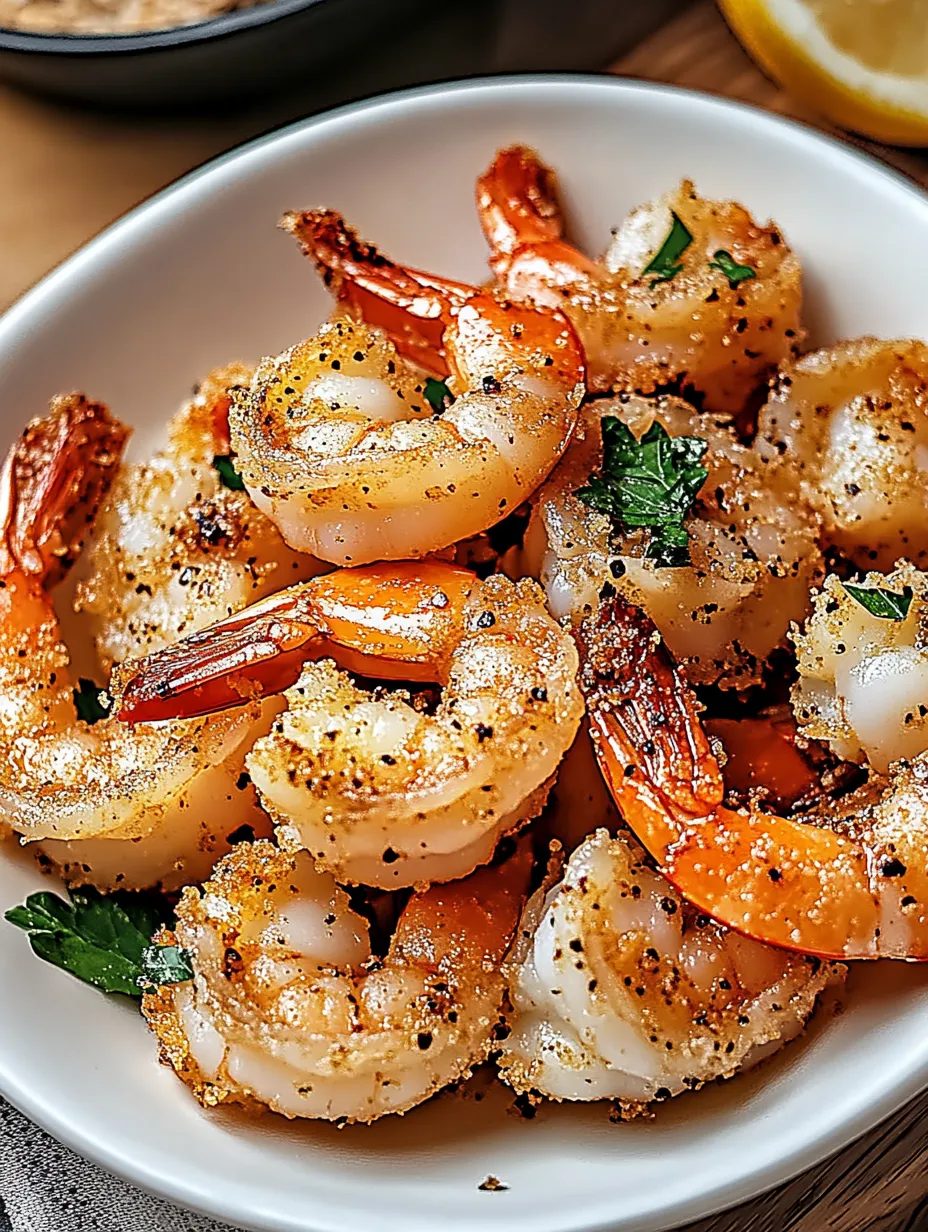
- → Can I make this recipe without deep frying?
- Yes, you can air fry the shrimp at 380°F for 8-10 minutes, flipping halfway through. Spray or brush with oil first for better crispiness. The texture won't be exactly the same but still delicious.
- → What can I substitute for Shaoxing wine?
- Dry sherry is the best substitute. You can also use rice wine vinegar, dry white wine, or simply omit it if unavailable. It adds depth of flavor but isn't essential.
- → What is five-spice powder and is it necessary?
- Chinese five-spice is a blend of star anise, cloves, cinnamon, Sichuan peppercorns, and fennel seeds. It's optional in this recipe but adds complexity. If unavailable, you can still make delicious salt and pepper shrimp without it.
- → Can I use pre-cooked shrimp?
- It's not recommended as pre-cooked shrimp will become tough and rubbery when fried again. Raw shrimp produces the best texture and flavor for this dish.
- → What can I serve with salt and pepper shrimp?
- This dish pairs wonderfully with steamed rice, vegetable stir-fry, or noodles. It also works great as an appetizer or part of a larger Chinese meal with other dishes.