
 Pin it
This soul-warming dish transforms simple chicken breasts into a memorable meal through the magic of slow simmering in a rich, velvety gravy. The stovetop method ensures perfectly tender chicken as it gently cooks in its flavorful sauce, allowing the meat to absorb all those wonderful seasonings. Each forkful delivers that perfect combination of savory meat and silky gravy that defines true comfort food. While deeply rooted in Southern cooking traditions, this accessible recipe requires no specialized skills or equipment – just basic ingredients and a little patience. The result is a cozy, satisfying dinner that feels like it took hours but comes together in under an hour.
I first learned this recipe during a particularly tight month when fancy ingredients weren't in the budget but I still wanted Sunday dinner to feel special. My grandmother's technique of using the same pan for every step – from frying bacon to simmering the finished dish – created layers of flavor that made this simple meal taste like something much more elaborate. Now it's my go-to when friends come over unexpectedly or when I need a comforting dinner after a long day. The moment that rich aroma fills the kitchen, it feels like home no matter what kind of day you've had.
Ingredients You'll Need
- 2 Large Chicken Breasts: Sliced horizontally to create 4 thinner cutlets that cook more quickly and evenly while absorbing maximum flavor
- 4 Strips Thick-Cut Bacon: Provides the foundational flavor and necessary fat for frying the chicken. Choose smoked bacon for extra depth
- 2 cups All-Purpose Flour: Creates the perfect coating for the chicken and thickens the gravy. Measure precisely for best results
- 1 teaspoon Garlic Powder: Adds savory depth without the bite of fresh garlic, which would burn during the frying process
- 1 teaspoon Onion Powder: Contributes sweet aromatic notes throughout the dish. Don't substitute onion salt as it affects seasoning
- ¾ teaspoon Black Pepper: Provides pleasant heat that balances the richness of the gravy
- ¼ teaspoon Cayenne Pepper: Adds subtle warmth without overwhelming spiciness. Adjust according to your heat preference
- 2½ cups Low-Sodium Chicken Broth: Forms the flavorful liquid base of the gravy. Low-sodium allows better seasoning control
- ⅓ cup Heavy Cream: Creates silky richness in the gravy. Don't substitute milk or half-and-half as they may curdle
- 4 tablespoons Butter: Works with flour to create a roux that thickens the gravy perfectly
- 1 teaspoon Worcestershire Sauce: Provides umami depth that makes the gravy taste like it simmered all day
- ½ teaspoon Poultry Seasoning: A convenient blend of herbs that perfectly complements chicken
- Vegetable Oil for Frying: Has a high smoke point needed for achieving that golden crust on the chicken
- Salt to taste: Added gradually to control the overall seasoning of the dish
 Pin it
Step-by-Step Cooking Instructions
- Begin with the Bacon Foundation:
- Start by placing your bacon strips in a cold, large skillet, then turn the heat to medium. This gradual heating renders the fat more effectively while crisping the bacon perfectly. Cook for about 8-10 minutes, turning occasionally, until the bacon reaches your desired crispness. Remove the bacon to a paper towel-lined plate but leave those precious drippings in the pan – they're liquid gold for flavoring our chicken. Reserve about 3 tablespoons of the bacon drippings in the skillet and save the crispy bacon for garnishing later. This bacon foundation creates the first layer of flavor that makes this dish so special.
- Prepare Your Chicken for Success:
- While the bacon cooks, prepare the chicken by slicing each breast horizontally to create four thinner cutlets. Place them between sheets of plastic wrap and gently pound to an even ¾-inch thickness. This ensures quick, even cooking and maximum tenderness. In a shallow dish, combine 1½ cups of the flour (reserving the rest for the gravy), garlic powder, onion powder, black pepper, and cayenne pepper, mixing thoroughly. Season each chicken piece with a pinch of salt, then dredge in the seasoned flour mixture, shaking off any excess. The even coating will create a beautiful crust that seals in moisture while providing texture to grab onto that luscious gravy.
- Achieve the Perfect Golden Crust:
- Add about ¼ cup of vegetable oil to the reserved bacon drippings in the skillet and heat over medium-high until shimmering but not smoking. Carefully place the flour-coated chicken pieces in the hot oil, being careful not to overcrowd the pan – work in batches if necessary. Cook for 4-5 minutes per side until deeply golden brown and nearly cooked through (about 155°F internal temperature). The chicken will finish cooking in the gravy later. Transfer the browned chicken to a clean plate and cover loosely with foil to keep warm. This perfect golden crust not only looks appetizing but also adds tremendously to the flavor profile of the finished dish.
- Create Your Flavor-Packed Roux:
- Pour off all but about 2 tablespoons of the oil from the skillet, being careful to preserve those flavorful browned bits at the bottom of the pan. Return the skillet to medium heat and add the butter, allowing it to melt completely. Once melted, sprinkle in the remaining ½ cup of flour, whisking constantly to create a smooth paste. Continue cooking this roux for about 2-3 minutes until it turns a light golden color and smells nutty. This cooking process eliminates the raw flour taste and creates the foundation for a silky-smooth gravy. The color development in this step is crucial – too light and the gravy will taste floury, too dark and it may become bitter.
- Develop Your Luscious Gravy:
- Gradually add the chicken broth to the roux, about ½ cup at a time, whisking continuously to prevent lumps from forming. Each addition should be fully incorporated before adding more liquid. Once all the broth is added, continue to simmer and whisk for about 5 minutes until the mixture begins to thicken noticeably. Reduce the heat to medium-low and stir in the heavy cream, Worcestershire sauce, and poultry seasoning. Allow the gravy to simmer gently for another 2-3 minutes, stirring occasionally, until it reaches a silky consistency that coats the back of a spoon. Taste and adjust seasoning with salt and additional black pepper if needed.
- Reunite Chicken and Gravy:
- Return the browned chicken pieces to the skillet, nestling them into the gravy. Spoon some of the gravy over each piece to ensure they're well-coated. Cover the skillet and reduce heat to low. Allow the chicken to simmer gently in the gravy for about 8-10 minutes, or until the internal temperature reaches 165°F and the chicken is perfectly tender. This gentle finishing process allows the chicken to absorb the gravy's flavors while remaining incredibly juicy. Occasionally spoon more gravy over the chicken as it simmers to build layers of flavor on each piece.
- Finish with Flair:
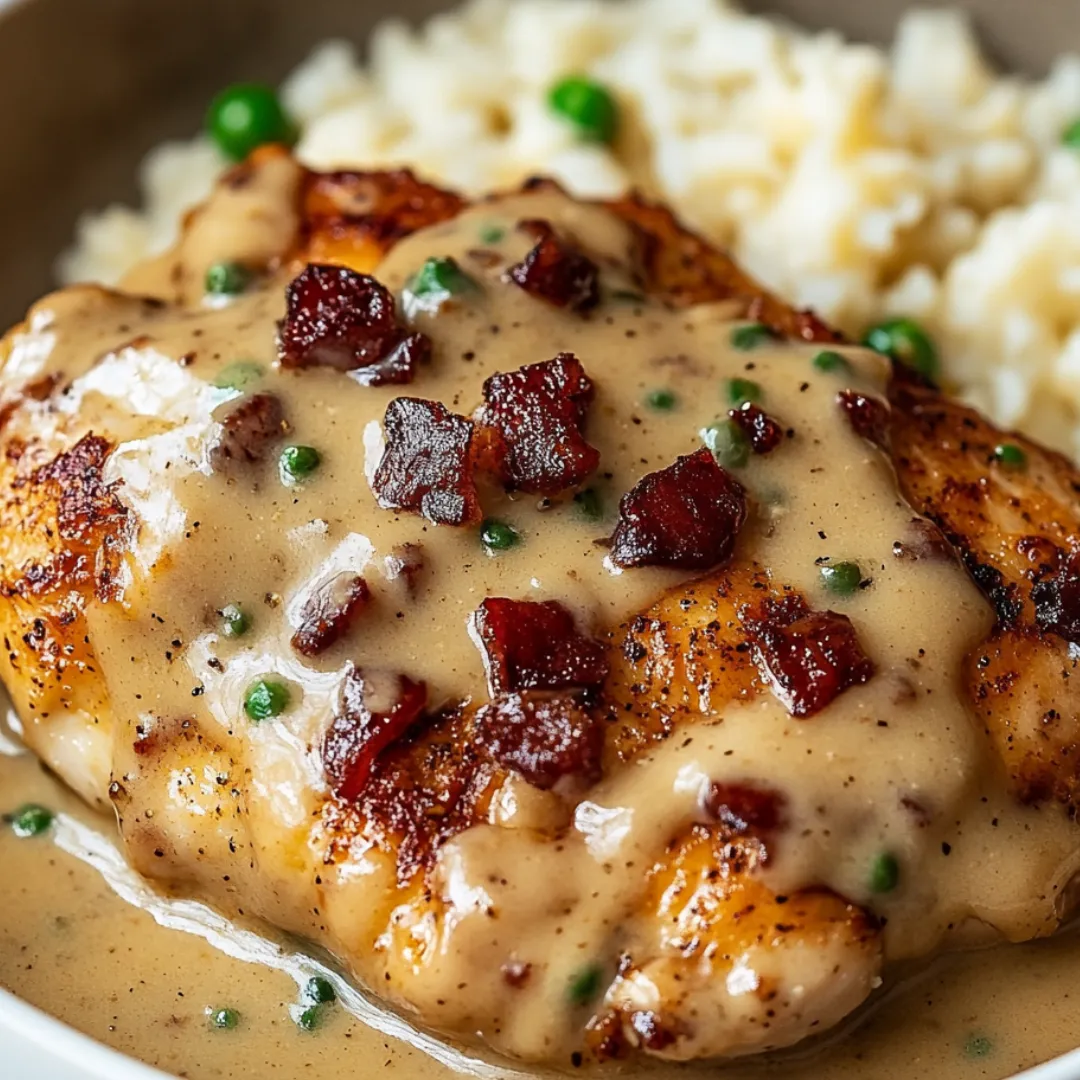
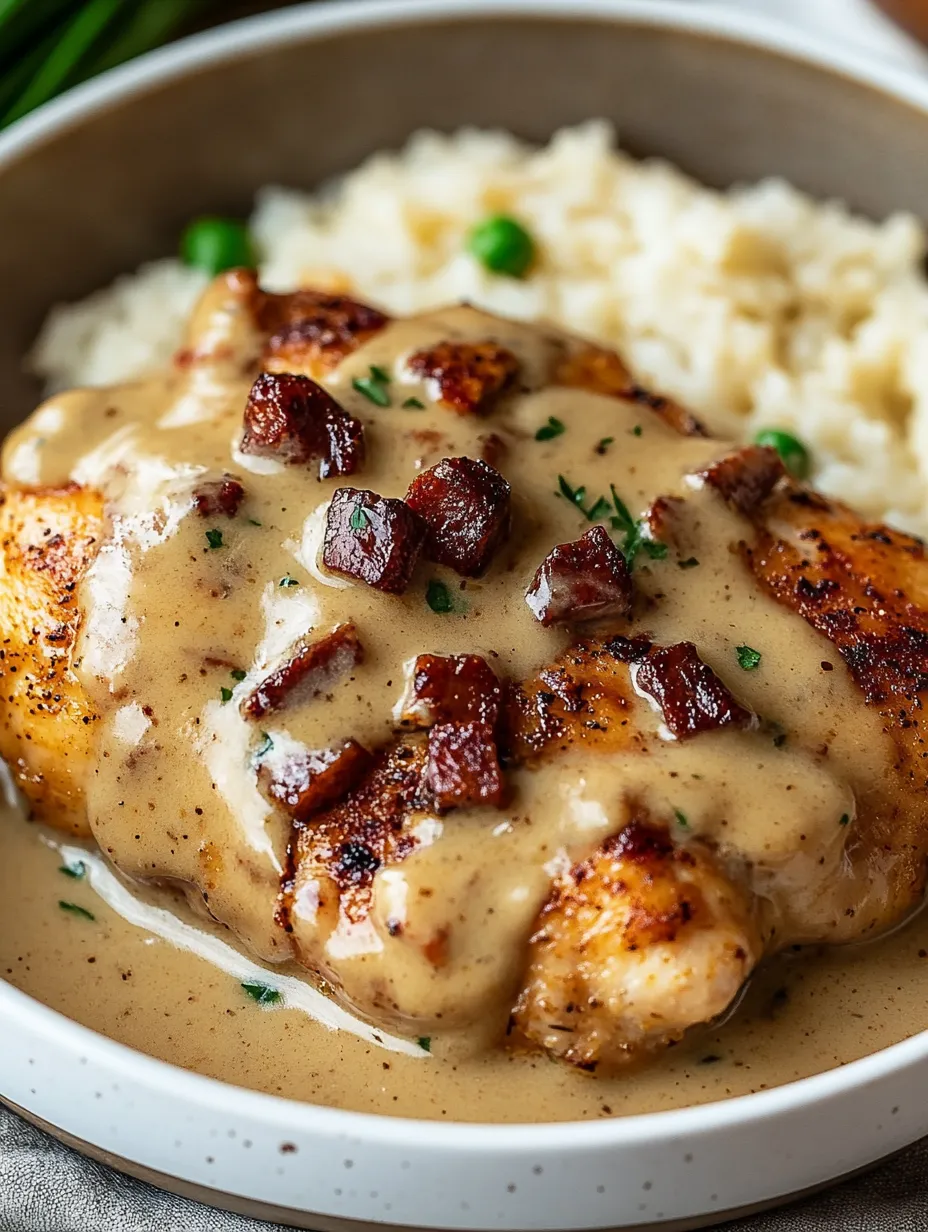
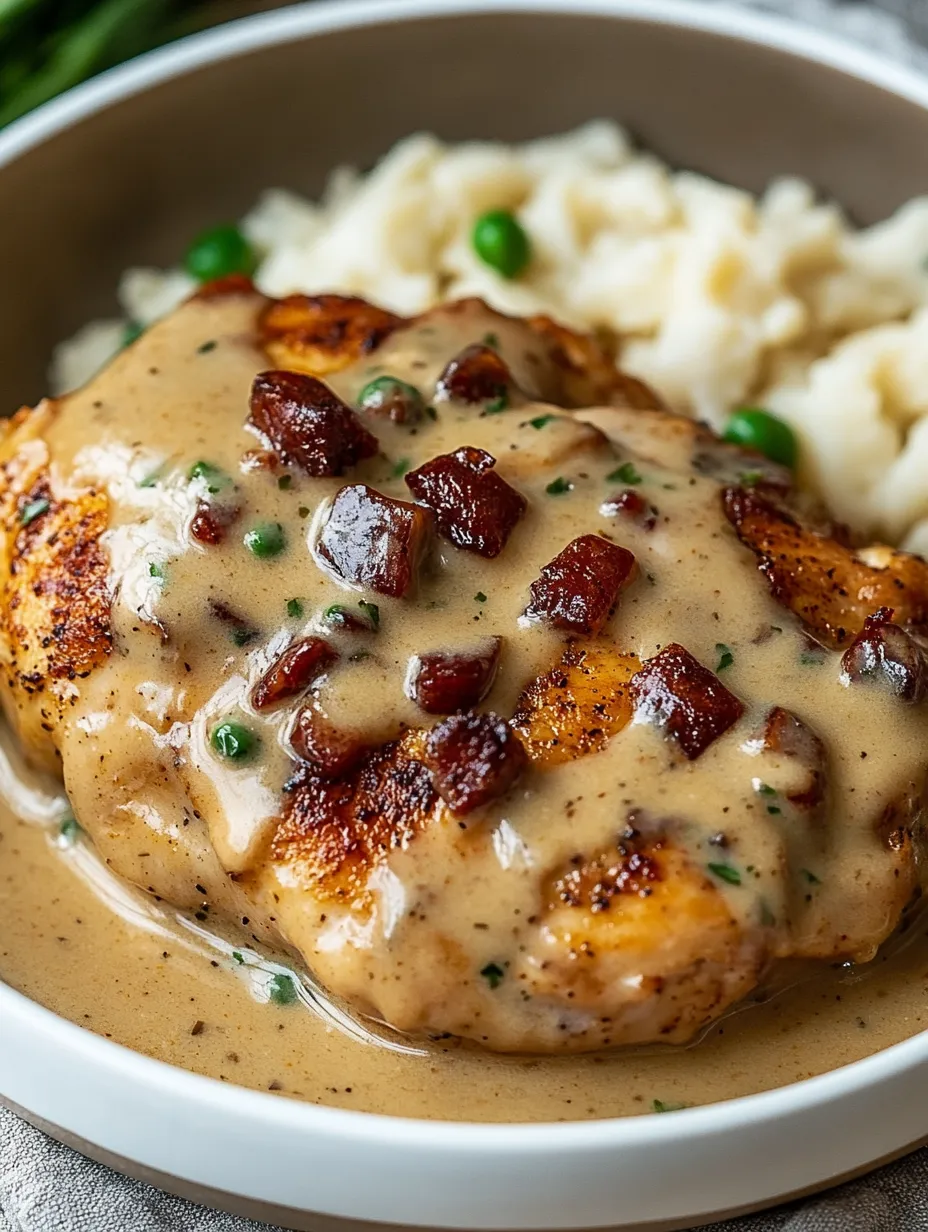
- Once the chicken is fully cooked, crumble the reserved crispy bacon and sprinkle it over the dish just before serving. This adds a wonderful textural contrast and reinforces that initial bacon flavor that formed the foundation of our dish. If desired, add a sprinkle of fresh parsley for a pop of color and freshness. Serve the chicken immediately, generously spooning additional gravy over each portion. The finished dish should be gloriously saucy, with the gravy thick enough to coat the chicken but still pourable for serving over side dishes.
I learned the importance of properly dredging chicken from my grandmother, who always insisted on thoroughly coating each piece and then letting it rest for a few minutes before frying. She called it 'letting the flour get friendly with the chicken.' When I rushed this step once, much of the coating fell off during cooking, and the gravy didn't thicken properly. Now I always give the floured chicken that short rest, and it makes all the difference in creating that perfect crust that becomes one with the gravy during simmering. These small details are what transform a simple dish into something truly memorable.
Perfect Pairings
This saucy chicken begs for sides that complement its rich gravy. Creamy mashed potatoes create the ideal landing place for all that delicious sauce, while steamed rice soaks it up beautifully for a different textural experience. For a complete Southern-inspired meal, serve alongside collard greens or green beans seasoned with a touch of bacon. Buttermilk biscuits make excellent gravy dippers and round out the comfort food experience. A simple side salad with a light vinaigrette can provide refreshing contrast to the richness of the main dish.
Make-Ahead Magic
While this dish is best enjoyed fresh, you can prepare elements ahead of time for easy assembly. The seasoned flour mixture can be prepared up to a week in advance and stored in an airtight container. For partially prepped dinner, brown the chicken and make the gravy separately, then refrigerate both (separately) for up to 24 hours. Reheat the gravy gently on the stovetop until bubbling, then add the browned chicken and continue with step 6. The completed dish can be refrigerated for up to 3 days and gently reheated on the stovetop with a splash of additional broth if needed.
Troubleshooting Tips
If your gravy develops lumps despite careful whisking, strain it through a fine-mesh sieve before returning it to the pan and continuing with the recipe. Should your gravy become too thick, simply thin it with additional chicken broth, adding a tablespoon at a time until reaching the desired consistency. Conversely, if it's too thin, create a slurry by mixing 1 tablespoon flour with 2 tablespoons cold water and whisk this into the simmering gravy until thickened.
Flavor Variations
This versatile recipe welcomes customization while maintaining its comforting essence. For a mushroom version, sauté 8 ounces of sliced mushrooms after removing the chicken and before making the gravy. For herbal notes, add 1 teaspoon of fresh thyme leaves or ½ teaspoon dried thyme to the gravy. Introducing ¼ cup of white wine to deglaze the pan after browning the chicken adds sophisticated depth. For a Southern twist, add ¼ teaspoon of ground sage to the flour mixture and a dash of hot sauce to the finished gravy.
 Pin it
Leftover Love
Transform leftover smothered chicken into incredible next-day meals. Shred the chicken and mix with the gravy to create filling for pot pies topped with store-bought puff pastry. Alternatively, serve the shredded chicken and gravy over split biscuits for a twist on chicken and dumplings. For a quick lunch, chop the chicken and fold it with the gravy into cooked pasta for an instant chicken pasta bake – top with cheese and broil until bubbly. The versatility of these leftovers means you can enjoy this comfort food in new ways throughout the week.
I discovered my favorite version of this recipe during a winter power outage when I had to cook on a camp stove. Working by candlelight forced me to rely on my senses rather than timers or thermometers – I listened for the proper sizzle of the roux, felt the right resistance when stirring the thickening gravy, and smelled when the seasonings had bloomed perfectly in the sauce. That night taught me that this dish is more about technique and intuition than precise measurements. Now even with all modern conveniences, I still close my eyes occasionally while cooking to reconnect with those sensory cues that signal each stage of this beloved recipe is developing just right.
Frequently Asked Questions
- → Can I use chicken thighs instead of breasts?
- Yes! Boneless, skinless chicken thighs work wonderfully and stay even more tender. The cooking time will be about the same.
- → What can I substitute for half-and-half?
- You can use whole milk for a lighter sauce or heavy cream for a richer result. Non-dairy milk will work but won't have the same richness.
- → What is Kitchen Bouquet and is it necessary?
- Kitchen Bouquet is a browning sauce that adds color and subtle flavor. It's optional - your gravy will taste delicious without it, just lighter in color.
- → Can I make this ahead of time?
- Yes! It actually tastes even better the next day. Reheat gently on the stovetop or in the microwave at 50% power to prevent the sauce from breaking.
- → What sides go well with smothered chicken?
- Classic sides include mashed potatoes, rice, green beans, collard greens, or cornbread. Anything that can soak up that delicious gravy works perfectly!