
 Pin it
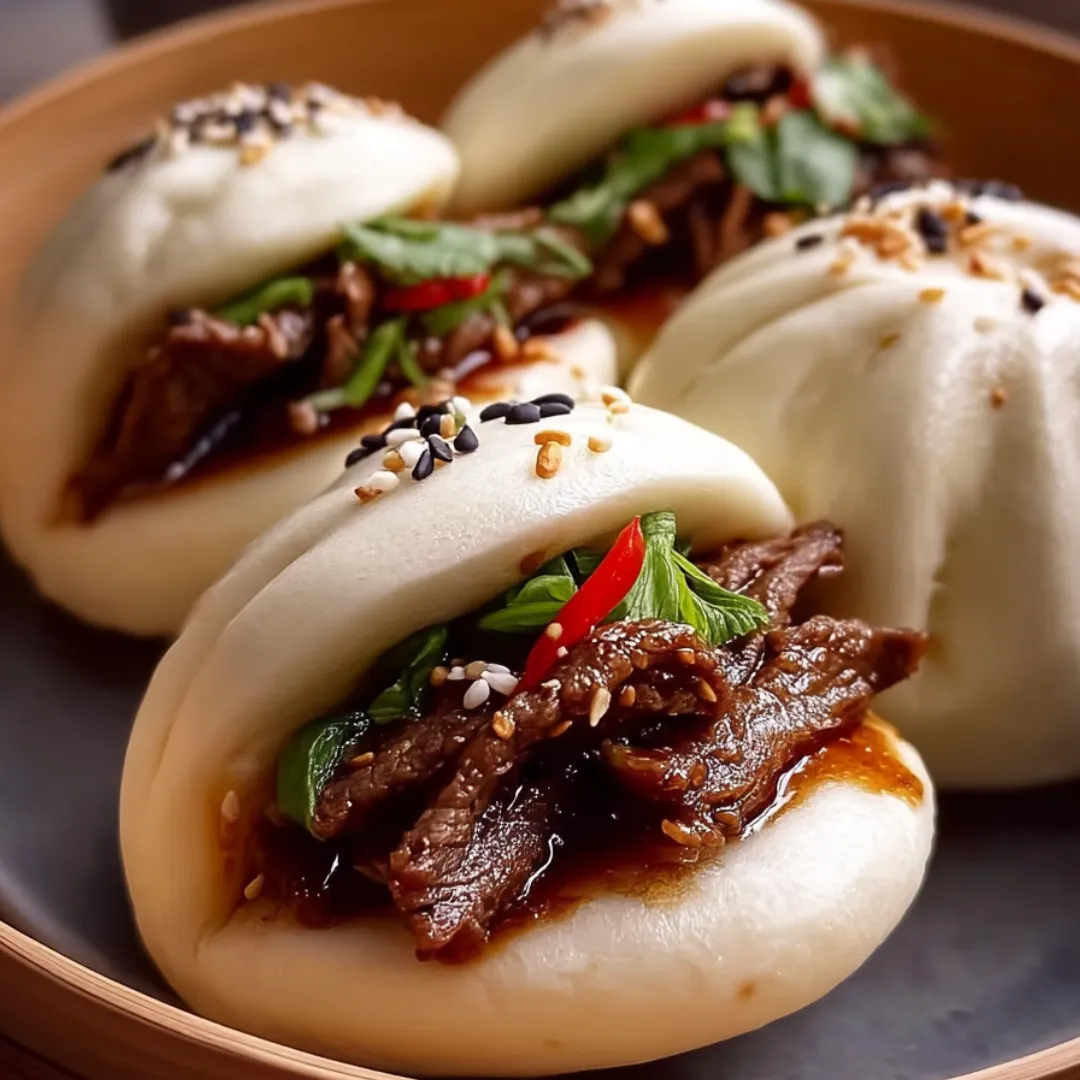
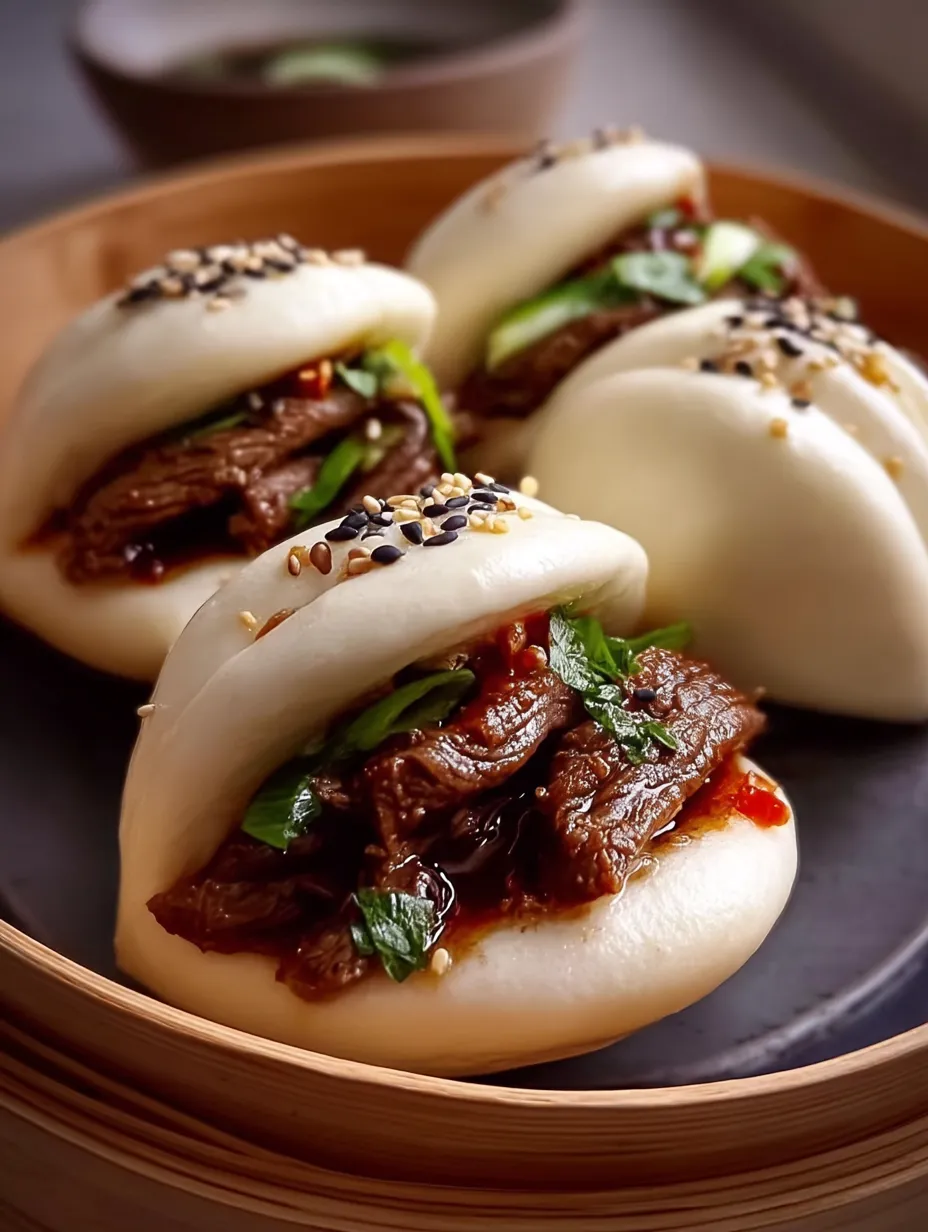
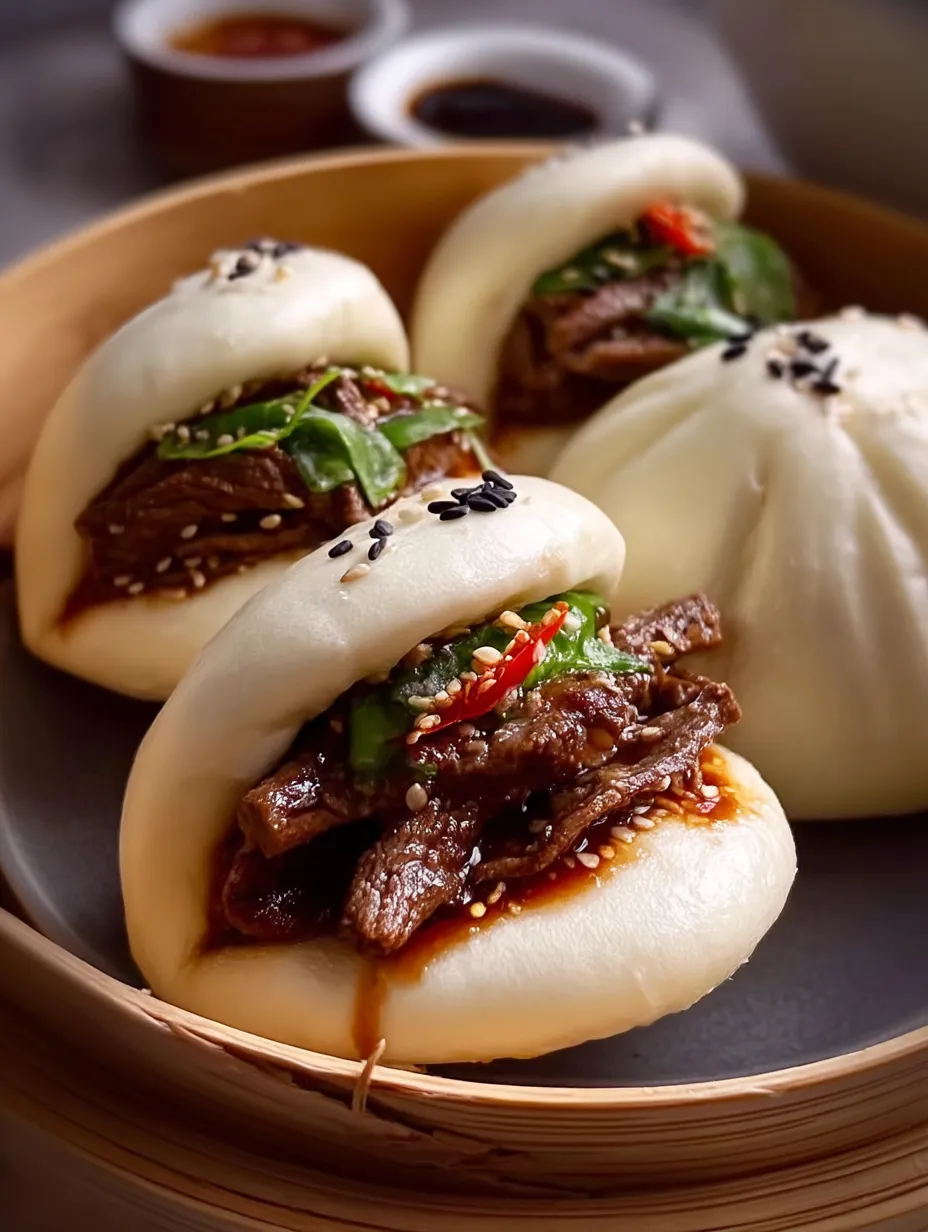
These irresistible Tender Beef Bao Buns deliver the perfect combination of pillowy soft steamed dough encasing a succulent, umami-rich beef filling that melts in your mouth with each bite. Unlike many Asian recipes that require specialized ingredients or techniques, these bao feature accessible components while maintaining authentic flavors, making them approachable for home cooks of all skill levels. The gentle steaming process creates a uniquely tender texture that you simply can't achieve through other cooking methods, resulting in a delightful contrast between the slightly sweet dough and the savory, aromatic filling. Whether served as an impressive appetizer, a satisfying snack, or the centerpiece of an Asian-inspired meal, these handcrafted buns will transport your taste buds straight to the bustling street markets of Asia.
I first attempted making bao buns after returning from a trip to Taiwan, where I became completely enamored with the soft, pillowy texture and flavorful fillings found in every night market we visited. Back home, facing a serious bao craving with no authentic Asian restaurants nearby, I decided to try creating them myself. My first batch was a disaster—dense, chewy dough with under-seasoned filling—nothing like the ethereal pockets I had enjoyed abroad. After several disappointing attempts and much research, I finally unlocked the secrets to creating that perfect, cloud-like dough and deeply flavored filling. The moment my family tried the successful version, these buns became our most requested weekend project. My teenage son, who typically avoids kitchen duties, now eagerly helps fold the dough around the filling, creating his own signature pleating style. What began as an attempt to recreate vacation memories has become a cherished family tradition that connects us to cultures and flavors we might otherwise not experience in our small town.
Ingredients
- 2½ cups all-purpose flour: Creates the foundation for the soft, fluffy buns. Look for unbleached flour for the best flavor. For an even lighter texture, substitute ½ cup with cake flour, which has less protein and produces more tender results.
- 1 teaspoon active dry yeast: Provides the leavening that creates the signature fluffy texture. Be sure your yeast is fresh and not expired for proper rising. If using instant yeast, you can mix it directly with the dry ingredients without proofing.
- 2 tablespoons sugar: Adds subtle sweetness to the dough that balances the savory filling. Regular granulated sugar works perfectly. This sweetness is characteristic of authentic bao buns and shouldn't be reduced.
- ¾ cup warm milk: Creates a tender dough with rich flavor. The milk should be warm (about 110°F), not hot, to activate the yeast without killing it. For a dairy-free alternative, unsweetened almond or soy milk works well.
- 1 tablespoon vegetable oil: Adds suppleness to the dough. Any neutral oil works here. The small amount of fat improves the dough's texture and helps prevent sticking during steaming.
- 1 pound beef chuck or short rib, thinly sliced: Provides the tender, flavorful filling. These cuts have enough fat to remain juicy after cooking. For a leaner option, flank steak works well if sliced thinly against the grain and not overcooked.
- 3 tablespoons soy sauce: Delivers the essential umami foundation for the filling. Use regular or low-sodium based on your preference. The deep, salty flavor infuses the meat as it cooks.
- 2 tablespoons hoisin sauce: Contributes sweet and savory complexity to the filling. This thick, fragrant sauce adds depth that makes the filling extraordinary. If unavailable, mix 1 tablespoon of molasses with 1 tablespoon of additional soy sauce.
- 1 tablespoon sesame oil: Adds distinctive nutty aroma and flavor. Toasted sesame oil provides the strongest flavor impact. Even this small amount significantly enhances the authenticity of the filling.
- 3 cloves garlic, minced: Provides aromatic depth to the filling. Fresh garlic offers the brightest flavor, but in a pinch, 1 teaspoon of garlic powder can substitute. The garlic should be finely minced to distribute evenly throughout the filling.
- 1-inch piece ginger, grated: Adds bright, spicy notes that balance the rich beef. Fresh ginger provides the most vibrant flavor. If substituting dried, use only ¼ teaspoon as it's more concentrated.
- 3 green onions, thinly sliced: Contributes fresh, mild onion flavor and color contrast. Use both white and green parts for the best flavor balance. Reserve some green parts for garnish if desired.
- 1 tablespoon cornstarch mixed with 2 tablespoons water: Creates a silky thickness in the sauce that clings to the beef. This slurry helps the sauce coat the meat evenly without being runny inside the buns.
 Pin it
Step-by-Step Instructions
- Step 1:
- Prepare the dough with care - Begin by combining the yeast with warm milk (approximately 110°F – it should feel warm to the touch but not hot) and 1 teaspoon of the sugar in a small bowl. Let this mixture sit for about 5-10 minutes until it becomes frothy, which indicates the yeast is active and ready to work. In a large mixing bowl, combine the flour with the remaining sugar and a pinch of salt, whisking to distribute the ingredients evenly. Make a well in the center and pour in the yeast mixture along with the vegetable oil. Mix with a wooden spoon until a shaggy dough forms, then turn it out onto a lightly floured surface. Knead the dough for 8-10 minutes until it becomes smooth, elastic, and slightly tacky but not sticky. The kneading process is crucial for developing the gluten structure that will create those perfectly fluffy buns. The dough should pass the windowpane test – when a small piece is stretched, it should form a thin membrane without tearing. Shape the dough into a ball and place it in a lightly oiled bowl, turning once to coat the surface with oil to prevent drying.
- Step 2:
- Allow for proper rising time - Cover the bowl with a damp kitchen towel or plastic wrap and place it in a warm, draft-free location to rise. The ideal temperature is around 75-80°F – too cool and the rise will be slow; too warm and the yeast may become overactive. Let the dough rise until doubled in size, which typically takes about 1 to 1½ hours depending on the ambient temperature. This rising period is essential for developing both flavor and that signature light texture. A properly risen dough will spring back slowly when gently poked with a finger. If it springs back immediately, it needs more time; if it collapses, it has over-risen. The patience required during this step will be rewarded with exceptionally fluffy buns. While the dough rises, you can prepare the filling, allowing both components to be ready at the optimal time.
- Step 3:
- Create the flavorful beef filling - While the dough rises, prepare the filling. Heat a large skillet or wok over medium-high heat. Add the sesame oil, and once it's shimmering, add the minced garlic and grated ginger. Stir-fry for about 30 seconds until fragrant but not browned, as burnt garlic will impart bitterness. Add the thinly sliced beef to the pan, increasing the heat to high, and cook for 2-3 minutes, stirring frequently, until the meat is no longer pink. The goal is to cook the beef quickly to keep it tender. Reduce the heat to medium and add the soy sauce, hoisin sauce, and half of the sliced green onions, stirring to coat the meat evenly. Let the mixture simmer for about 5 minutes until the beef is tender and the sauce has begun to reduce slightly. Stir in the cornstarch slurry and cook for an additional 1-2 minutes until the sauce thickens and coats the meat glossily. Remove from heat and allow the filling to cool completely before assembling the buns. A hot filling would start cooking the dough prematurely and release steam that could prevent proper sealing.
- Step 4:
- Prepare your steaming setup - While the filling cools and the dough completes its rise, prepare your steaming equipment. Fill a large pot or wok with about 2 inches of water and place your steamer basket on top, making sure the water doesn't touch the bottom of the basket. If using a bamboo steamer, soak it in water for 20 minutes before using to prevent burning. Cut several 3-inch squares of parchment paper to place under each bun during steaming, which prevents sticking. Alternatively, you can use cabbage leaves as natural, environmentally friendly steamer liners. If you don't have a traditional steamer, you can create a makeshift one by placing a heat-proof plate on an elevated rack inside a large, lidded pot. The key is creating a setup where the buns will be exposed to steam without touching water. Having this prepared in advance ensures a smooth transition from assembly to cooking.
- Step 5:
- Divide and shape the dough properly - Once the dough has doubled in size, gently punch it down to release excess air bubbles. Turn it out onto a lightly floured surface and knead briefly for about 1 minute to redistribute the yeast. Using a bench scraper or sharp knife, divide the dough into 12 equal portions. A kitchen scale can be helpful for ensuring uniformity, but you can also roll the dough into an even log and cut it into equal segments. Roll each piece into a smooth ball by cupping it in your palm and using circular motions against the work surface. Cover the dough balls with a clean kitchen towel to prevent them from drying out as you work. Working with one piece at a time, use a rolling pin to roll each ball into a round disc about 4-5 inches in diameter. The edge should be slightly thinner than the center, which helps create an evenly thick bun when folded. The ideal thickness is about ¼ inch in the center, tapering to ⅛ inch at the edges.
- Step 6:
- Master the filling and folding technique - Place about 1½ tablespoons of the cooled beef filling in the center of each dough circle. Be careful not to overfill, as this will make sealing difficult and may cause the buns to burst during steaming. Hold the dough circle in your non-dominant hand and use your dominant hand to pinch and pleat the edges, working your way around the circle. The traditional pleating method creates about 10-12 pleats around the circumference, but the exact number isn't critical – what matters is that the bun is sealed completely. Pinch the gathered pleats together at the top and give them a gentle twist to secure. Place each filled bun on a prepared parchment square, seam-side up or down based on your preference. Traditionally, bao are placed seam-side down for serving, but seam-side up provides a decorative appearance. Leave about 1 inch between buns on your steamer tray, as they will expand during cooking.
- Step 7:
- Allow for second rising - Cover the filled buns with a clean kitchen towel and let them rest for about 20-30 minutes. This second rising period is shorter than the first but equally important. During this time, the dough will relax and slightly puff up again, resulting in a lighter texture after steaming. The buns should increase in size by about 30% during this rest. This second rise also gives the gluten structure time to relax, which prevents the buns from shrinking or becoming tough during steaming. Meanwhile, bring the water in your steamer to a gentle boil. The water should be simmering with steady steam production, but not boiling so vigorously that the water might touch the buns or that the violent movement could affect their shape. If using a bamboo steamer, you may need to add hot water during the steaming process, so keep a kettle of hot water nearby.
- Step 8:
- Steam the buns to perfection - Once the buns have completed their second rise and the water is producing steady steam, carefully transfer the buns (on their parchment squares) to the steamer basket. Leave space between them as they will expand further during cooking. Cover with the steamer lid, being careful not to let condensation drip onto the buns by wrapping the lid in a clean kitchen towel if necessary. Steam the buns for exactly 12-15 minutes depending on their size. Resist the urge to check on them during this time, as opening the lid releases the steam and can cause the buns to collapse. The finished buns should be significantly increased in size, with a bright white, fluffy appearance. They should feel light and springy when gently touched. Turn off the heat but do not remove the lid immediately—let the buns rest in the residual steam for 2-3 minutes. This gradual cooling prevents the dramatic temperature change that can cause buns to wrinkle or collapse.
- Step 9:
- Cool and serve properly - After the short rest in the covered steamer, carefully remove the lid, tilting it away from you to avoid any dripping condensation. Using tongs or a spatula, transfer the buns to a serving plate. The buns should be handled gently, as they are at their most delicate when hot. Allow them to cool for about 3-5 minutes before serving. This brief cooling period allows the structure to set slightly while still serving them warm. If not serving immediately, you can keep them warm by leaving them in the steamer with the heat turned off for up to 30 minutes. For the most authentic presentation, serve the buns open-faced or with the gathered seam on the bottom, perhaps with a small dish of additional sauce for dipping. Traditional accompaniments might include chili oil, black vinegar, or additional hoisin sauce thinned with a little soy sauce or water.
- Step 10:
- Store and reheat with care - If you have leftover buns, allow them to cool completely before storing to prevent condensation that could make them soggy. Place cooled buns in an airtight container, separating layers with parchment paper, and refrigerate for up to 3 days. For longer storage, freeze the buns in a single layer on a baking sheet until solid, then transfer to a freezer bag or container. They will keep for up to 3 months. To reheat refrigerated buns, sprinkle them lightly with water, wrap in a damp paper towel, and microwave for 30 seconds, or re-steam for 2-3 minutes until heated through. For frozen buns, do not thaw first; instead, steam them for 8-10 minutes until hot in the center. The reheated buns won't be quite as fluffy as fresh ones, but they'll still be delicious. If the dough seems dry after reheating, brushing the surface lightly with a bit of water before reheating can help restore moisture.
The Art of Perfect Bao Dough
What fascinates me most about making bao buns is the transformation of simple ingredients into something that feels magical. The dough, in particular, requires attention to detail that reveals the true artistry behind this seemingly humble food.
I discovered the importance of dough temperature through much trial and error. Too cold, and the yeast remains sluggish, resulting in dense buns; too warm, and the yeast becomes overactive, leading to a coarse texture and yeasty flavor. I now measure the milk temperature with a thermometer for consistent results, aiming for exactly 110°F—warm enough to activate the yeast but not hot enough to kill it.
The flour selection also makes a significant difference. After experimenting with various combinations, I found that substituting about 20% of the all-purpose flour with cake flour creates that perfect tender-yet-structured texture that distinguishes exceptional bao. The lower protein content in cake flour results in less gluten development, yielding a softer bite. For those seeking authentic results, Chinese flour labeled as "bao flour" or "low-gluten flour" can be found in Asian markets and creates even more authentic results.
Perhaps the most crucial element is proper kneading. Unlike bread dough, which benefits from vigorous kneading to develop strong gluten, bao dough requires a more gentle approach. I knead just until the dough passes the windowpane test—where a small piece can be stretched thin enough to see light through without tearing. This indicates sufficient gluten development for structure without creating the chewiness that would ruin the delicate mouthfeel.
The double rising process might seem time-consuming, but I've found it non-negotiable for achieving that perfect texture. The first rise develops flavor and structure, while the shorter second rise after filling allows the dough to recover from handling and creates that signature light, airy quality. When I've attempted shortcuts by skipping or shortening either rise, the results have been noticeably inferior—denser and less flavorful.
Serving and Presentation Ideas
These Tender Beef Bao Buns lend themselves to various serving styles depending on the occasion and your personal preferences.
For casual family meals, I serve them straight from the steamer, family-style on a large platter garnished with thinly sliced green onions and accompanied by small dishes of dipping sauces. A simple sauce of soy sauce, rice vinegar, and a touch of chili oil offers a perfect complement to the rich filling. My children enjoy customizing their dipping mixtures, experimenting with different ratios of sweet hoisin, spicy chili crisp, and tangy vinegar.
When entertaining guests, I elevate the presentation by serving individual buns in small bamboo steamer baskets lined with banana leaf or parchment paper. This not only keeps them warm longer but also creates an impressive visual that honors their Asian origins. I sometimes create a bao bar, offering the beef buns alongside others filled with different ingredients like char siu pork or mushrooms, allowing guests to sample various flavors.
For a complete meal, I serve the buns with simple sides like cucumber salad dressed with rice vinegar and sesame oil, pickled daikon radish, or a light miso soup. The cool crunch of the cucumber and the bright acidity of pickles provide the perfect counterpoint to the rich, savory buns.
When serving as appetizers for a gathering, I make mini versions, using about half the amount of dough and filling per bun. These two-bite morsels are perfect for cocktail parties, allowing guests to enjoy them while mingling. I arrange these smaller buns on a large serving platter, alternating them with colorful vegetable garnishes for visual appeal.
For an interesting fusion approach that's been popular at recent dinner parties, I've served the buns open-faced, topped with additional garnishes like quick-pickled carrots, cilantro, and a drizzle of sriracha mayo. This presentation style allows guests to appreciate the visual contrast between the snow-white bun and colorful fillings before folding them closed to eat.
I learned the importance of sealing technique through an embarrassing dinner party mishap. Rushing to prepare bao for guests, I hastily filled and sealed the buns without proper attention to creating a tight closure. Midway through steaming, several buns burst open, spilling their filling into the steamer and creating an unsightly mess. The remaining intact buns were unevenly cooked as the escaping steam disrupted the cooking environment. Since that disaster, I've been meticulous about sealing, ensuring each pleat is properly formed and the gathered edges are pinched firmly together with a slight twist. This careful attention takes only seconds more per bun but makes the difference between professional-quality results and potential disappointment. Now I demonstrate this technique to anyone who shows interest in learning to make bao, emphasizing that this small detail significantly impacts both appearance and eating experience.
 Pin it
Creative Variations to Try
While the beef filling in this recipe is exceptional, the versatile bao dough lends itself to countless creative variations that I've developed over years of experimentation.
For a vegetarian option that's equally satisfying, I often prepare a filling of finely diced shiitake mushrooms sautéed with the same aromatics used in the beef version. The mushrooms provide a meaty texture and umami flavor that even dedicated carnivores enjoy. Adding a small amount of diced, firm tofu absorbs the savory sauce beautifully while contributing protein. This variation has become a staple when entertaining friends with various dietary preferences.
During autumn months, I sometimes create a five-spice pork filling using ground pork seasoned with Chinese five-spice powder, hoisin sauce, and finely chopped water chestnuts for textural contrast. The warm notes of star anise, cloves, and cinnamon in the five-spice blend create a warming variation perfect for cooler weather. This version pairs particularly well with a side of quick-pickled daikon radish, whose bright acidity balances the rich, aromatic filling.
For special occasions, I've developed a luxurious filling of finely diced shrimp and scallops seasoned with ginger, garlic, a touch of fish sauce, and fresh cilantro. The seafood cooks quickly in the steam, resulting in perfectly tender pieces bathed in a flavorful sauce. A small amount of water chestnut adds welcome crunch to this more delicate variation.
When preparing bao for children or those who prefer milder flavors, I create a filling of ground chicken seasoned simply with soy sauce, a touch of honey, and finely minced green onions. This approachable variation maintains the spirit of traditional bao while offering a flavor profile that appeals to less adventurous eaters.
Perhaps my most unconventional but surprisingly successful creation has been dessert bao. By omitting the garlic and increasing the sugar slightly in the dough, then filling the buns with a mixture of sweetened red bean paste or chocolate-hazelnut spread, I've created a delightful sweet version that bridges culinary traditions. These sweet buns, dusted with a little powdered sugar after steaming, have become requested birthday treats in our household.
After years of making these Tender Beef Bao Buns for family meals, dinner parties, and cultural celebrations, I've come to appreciate how they represent more than just a delicious food item. They embody the careful balance of technique and intuition that characterizes great cooking across all cultures. Each step—from mixing the perfect dough to sealing the filled buns—requires attention that connects the cook to generations of tradition.
What I find most meaningful about making bao is how they've helped my family connect with culinary traditions beyond our own background. My children, initially hesitant about unfamiliar foods, have developed not only a taste for these flavors but also an appreciation for the care and technique involved in their preparation. Watching them proudly demonstrate their bao-folding techniques to friends has shown me how food preparation serves as both cultural education and creative expression.
I often think about how making these buns connects us across time and distance to the countless hands that have performed these same actions for centuries, perfecting techniques and passing them down through generations. In our fast-paced world of convenience foods, there's something profoundly satisfying about participating in this continuity—taking simple ingredients and, through careful technique and patient attention, transforming them into something that brings such joy to those we share it with.
Frequently Asked Questions
- → Can I make the dough ahead of time?
- Yes! You can prepare the dough up to 24 hours in advance and store it in the refrigerator. Just bring it to room temperature for about 30 minutes before shaping the buns. You can also freeze the shaped, uncooked buns for up to a month - just add 3-4 minutes to the steaming time when cooking from frozen.
- → What if I don't have a steamer?
- You can create a makeshift steamer by placing a heat-proof plate on an elevated surface (like balls of aluminum foil) in a large pot with water at the bottom. Just make sure the water doesn't touch the plate. Cover with a lid and steam as directed. Alternatively, you can use a metal colander placed over a pot of boiling water.
- → Can I use other fillings instead of beef?
- Absolutely! This bao bun dough works wonderfully with many fillings. Try pulled pork, shredded chicken, tofu with vegetables, mushrooms, or even a sweet filling like red bean paste. Just make sure any meat fillings are fully cooked before adding them to the buns.
- → Why didn't my buns turn out white and fluffy?
- For the classic white bao appearance, make sure to use all-purpose or low-protein flour (cake flour works well too). Steam the buns over high heat with plenty of water, and don't open the lid during steaming as the drop in temperature can cause the buns to collapse. Also, using a bit of vinegar in the steaming water helps keep the buns white.
- → What dipping sauces pair well with beef bao?
- These bao buns pair beautifully with several dipping sauces: try a simple mix of soy sauce, rice vinegar, and a touch of chili oil; a sweet and spicy sauce made with hoisin and sriracha; or a quick sauce of soy sauce, minced garlic, sesame oil, and a splash of lime juice.