
 Pin it
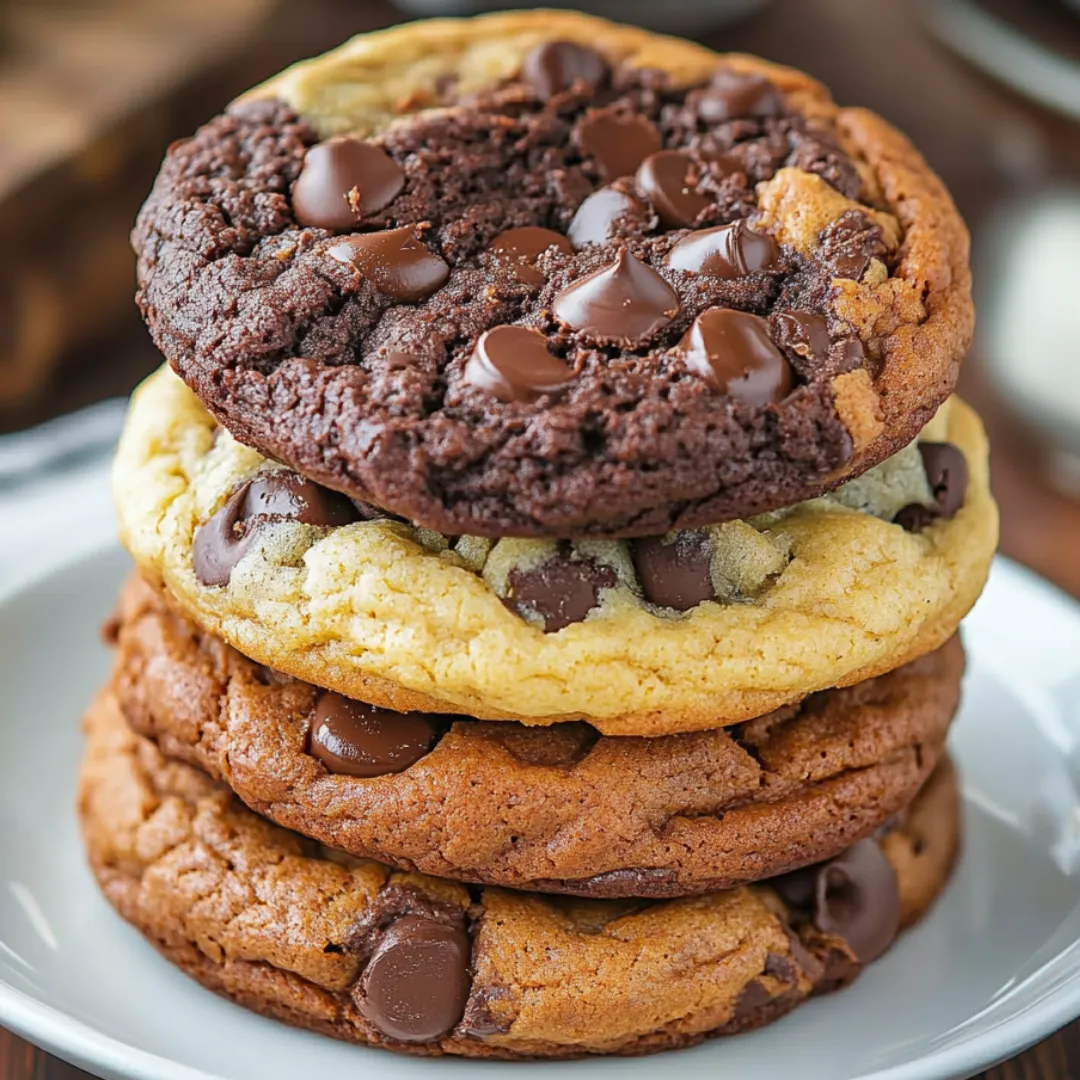
Imagine biting into a treat that combines the golden, buttery edges of a perfect chocolate chip cookie with the fudgy richness of a decadent brownie. That's exactly what these brookies deliver - the best of both worlds in one irresistible package. These two-toned delights feature a crisp edge where the cookie meets the pan, a chewy middle where flavors meld together, and an indulgent chocolate experience that satisfies every sweet craving imaginable.
I first discovered brookies during my weekend explorations of New York City bakeries years ago. After trying that first magical combination at a famous Brooklyn bakery, I became obsessed with recreating them at home. It took several batches of trial and error (which my neighbors happily helped taste-test), but this version captures that perfect 60/40 ratio of cookie to brownie that makes these treats so addictive. When I brought these to my son's school bake sale last month, they sold out within minutes, and three parents asked for the recipe!
Ingredients You'll Need
- For the Chocolate Chip Cookie Layer:
- 1¾ cups all-purpose flour: Measure properly by spooning into the measuring cup and leveling off for the right texture; this creates the perfect structure
- ½ teaspoon baking soda: Provides just enough lift without making the cookies too cakey
- ¾ teaspoon salt: Enhances the cookie's sweetness and chocolate flavors
- ¾ cup unsalted butter, room temperature: The foundation for a rich, buttery cookie; room temperature is crucial for proper creaming
- ½ cup granulated sugar: Creates those slightly crisp edges we all love
- ¾ cup light brown sugar, packed: Adds moisture and that classic caramel undertone
- 1 large egg, room temperature: Binds everything together; room temperature helps achieve even mixing
- 2 teaspoons vanilla extract: Adds depth and warmth to the cookie flavor
- 1 cup semi-sweet chocolate chips: The perfect amount for chocolate in every bite without overwhelming
- For the Brownie Layer:
- ½ cup unsalted butter: When melted with chocolate, creates that fudgy brownie base
- ½ cup semi-sweet chocolate chips: Melted with butter, this forms the chocolate foundation of the brownie batter
- ¾ cup all-purpose flour: Just enough for structure without making brownies too cakey
- 3 tablespoons unsweetened cocoa powder: Intensifies the chocolate flavor for a more decadent brownie
- ¼ teaspoon baking soda: Provides subtle lift while maintaining that dense, fudgy texture
- ¼ teaspoon salt: Balances the sweetness and enhances chocolate notes
- ¾ cup granulated sugar: Creates that shiny top brownies are known for
- ¼ cup light brown sugar, packed: Adds moisture and depth of flavor
- 1 teaspoon vanilla extract: Complements the chocolate notes perfectly
- 1 large egg plus 1 egg yolk, room temperature: The extra yolk contributes to the fudgy texture
- ½ cup milk chocolate chips: Folded in to create gooey chocolate pockets throughout
 Pin it
Step-by-Step Cooking Instructions
- Prepare the Cookie Dough First:
- In a medium bowl, whisk together flour, baking soda, and salt until evenly combined. This ensures your leavening agents are distributed evenly throughout the cookie dough. In a separate larger bowl, beat the room temperature butter using an electric mixer until light and creamy, about 1 minute. Add both granulated and brown sugars to the butter and beat on medium-high speed until the mixture becomes light and fluffy, approximately 2-3 minutes. This creaming process incorporates air into the dough, which is crucial for proper texture. Beat in the egg and vanilla extract until fully incorporated and the mixture looks smooth and glossy.
- Complete the Cookie Dough:
- Reduce the mixer speed to low and gradually add the dry ingredient mixture to the wet ingredients, mixing just until no flour streaks remain. Be careful not to overmix, as this can develop too much gluten and result in tough cookies. Using a rubber spatula, gently fold in the semi-sweet chocolate chips until evenly distributed throughout the dough. Cover the bowl with plastic wrap, pressing it directly onto the surface of the dough to prevent it from drying out. Refrigerate for at least 1 hour or up to overnight. This chilling step is non-negotiable - it firms up the butter and allows the flavors to meld while preventing the cookies from spreading too much during baking.
- Create the Brownie Batter:
- While the cookie dough is chilling, prepare your brownie batter. In a small saucepan over low heat, melt the butter and ½ cup of semi-sweet chocolate chips together, stirring frequently to prevent scorching. Once completely smooth, remove from heat and let cool for about 5 minutes - you don't want it so hot that it cooks the eggs when added. Meanwhile, in a medium bowl, whisk together flour, cocoa powder, baking soda, and salt until well combined and no cocoa lumps remain.
- Finish the Brownie Batter:
- Pour the slightly cooled chocolate-butter mixture into a large bowl. Add both granulated and brown sugars, whisking vigorously until completely incorporated and the mixture looks smooth and shiny. Whisk in the vanilla extract, then add the egg and extra yolk, whisking until the mixture thickens slightly and becomes glossy, about 1 minute. Using a rubber spatula, gently fold in the dry ingredient mixture until just combined with no flour streaks visible. Finally, fold in the milk chocolate chips. The brownie batter will be thicker than traditional brownie batter - more like a soft cookie dough - which is exactly what you want for brookies.
- Preheat and Prepare:
- When ready to bake, preheat your oven to 350°F (175°C). Line two baking sheets with parchment paper - don't skip this step as it prevents sticking and makes cleanup easier. Remove the chilled chocolate chip cookie dough from the refrigerator and let it sit at room temperature for about 10 minutes to make it easier to scoop.
- Shape the Brookies:
- Using a cookie scoop or tablespoon measure, scoop approximately 2 tablespoons of chocolate chip cookie dough and place it on the prepared baking sheet. Right next to it (touching), scoop about 2 tablespoons of brownie batter. Gently pinch the two doughs together at the seam so they'll bake as one cookie but maintain their distinct halves. Leave about 2 inches between each brookie as they will spread during baking. For the prettiest presentation, place the cookie half on the left and brownie half on the right consistently across your trays.
- Bake to Perfection:
- Place the baking sheets in the preheated oven and bake for 12-13 minutes. You'll know they're done when the chocolate chip side is golden around the edges but still soft in the center, and the brownie side has a shiny, set top. Don't overbake - these cookies are best when the centers remain slightly soft for that perfect chewy texture. If baking both sheets at once, rotate them halfway through baking for even browning.
- Cool Properly:
- Once baked, remove the baking sheets from the oven and allow the brookies to cool on the sheets for exactly 10 minutes. This cooling period allows them to set up properly without becoming too firm. After 10 minutes, transfer them to a wire cooling rack to cool completely. Though they're delicious warm, they develop even better texture and flavor once fully cooled.
My first attempt at making brookies was a complete disaster - I tried mixing the two batters in the pan, creating a marbled effect. While tasty, they looked nothing like the distinct half-and-half cookies I'd fallen in love with at the bakery! Now I always use the side-by-side method and make sure my brownie batter is thick enough to hold its shape. I've found that chilling the cookie dough is absolutely essential - the one time I skipped this step, the cookie half spread too quickly and completely engulfed the brownie portion.
Storage Solutions
These brookies stay fresh in an airtight container at room temperature for up to 4 days, though they rarely last that long in my house! For longer storage, place them in a freezer-safe container with parchment paper between layers and freeze for up to 3 months. To enjoy from frozen, let them thaw at room temperature for about an hour, or microwave individual cookies for 15-20 seconds for that just-baked warmth.
Perfect Pairings
While these brookies are divine on their own, they reach new heights when paired with certain accompaniments. A scoop of vanilla ice cream nestled between two brookies creates an ice cream sandwich that elevates both desserts. For an after-dinner treat, serve with a glass of cold milk or a shot of espresso to balance the sweetness and bring out the chocolate notes. During the holidays, I add a small drop of peppermint extract to the brownie batter for a festive twist that pairs beautifully with hot cocoa.
Troubleshooting Tips
If your brookies spread too much during baking, your cookie dough likely wasn't chilled enough. Pop the remaining dough back in the refrigerator for 30 minutes before baking the next batch. If the two halves aren't staying together, try overlapping them slightly more and firmly pinching the seam. For brookies that are too pale, your oven may be running cool - increase the temperature by 25 degrees for the next batch or extend the baking time by 1-2 minutes.
 Pin it
Make It Your Own
These brookies are endlessly customizable. Try adding chopped walnuts or pecans to either dough for texture, or swap in white chocolate chips for a striking visual contrast against the dark brownie. During holiday seasons, I sometimes press a candy piece into the center of each brookie right after baking - peanut butter cups or caramel-filled chocolates work wonderfully. For a more grown-up version, add a teaspoon of instant espresso powder to the brownie batter to enhance the chocolate flavor with subtle coffee notes.
I've been baking these brookies for years now, and they never fail to impress. There's something magical about watching someone take their first bite and experience that moment of surprise when they realize they're getting two distinct desserts in one. My favorite feedback came from my daughter's teacher, who told me these reminded her of the specialty cookies she used to splurge on at a fancy bakery in Chicago. That's exactly what I love about this recipe - it brings that special bakery experience right into your home kitchen, without requiring professional baking skills or equipment.
Frequently Asked Questions
- → Why do I need to chill the chocolate chip cookie dough?
- Chilling prevents the cookies from spreading too much during baking, giving you thicker, chewier cookies. It also allows the flavors to develop more fully for a richer taste.
- → Can I make the doughs ahead of time?
- Yes, both doughs can be made up to 3 days ahead and refrigerated. You can also freeze the shaped brookies for up to 3 months and bake them directly from frozen, adding 2-3 minutes to the baking time.
- → How do I know when brookies are done baking?
- The edges should be set and the tops should look dry, but the centers will still appear slightly underdone. They'll continue to cook from residual heat after removing from the oven.
- → What if my two doughs aren't sticking together well?
- Make sure to firmly pinch the doughs together. If they're still not adhering, you can try pressing them together with the back of a spoon. The heat during baking will help them fuse as well.
- → Can I use different types of chocolate chips?
- Absolutely! Feel free to experiment with white chocolate, dark chocolate, or even peanut butter chips for variety. You can also add nuts or other mix-ins to either dough.