
 Pin it
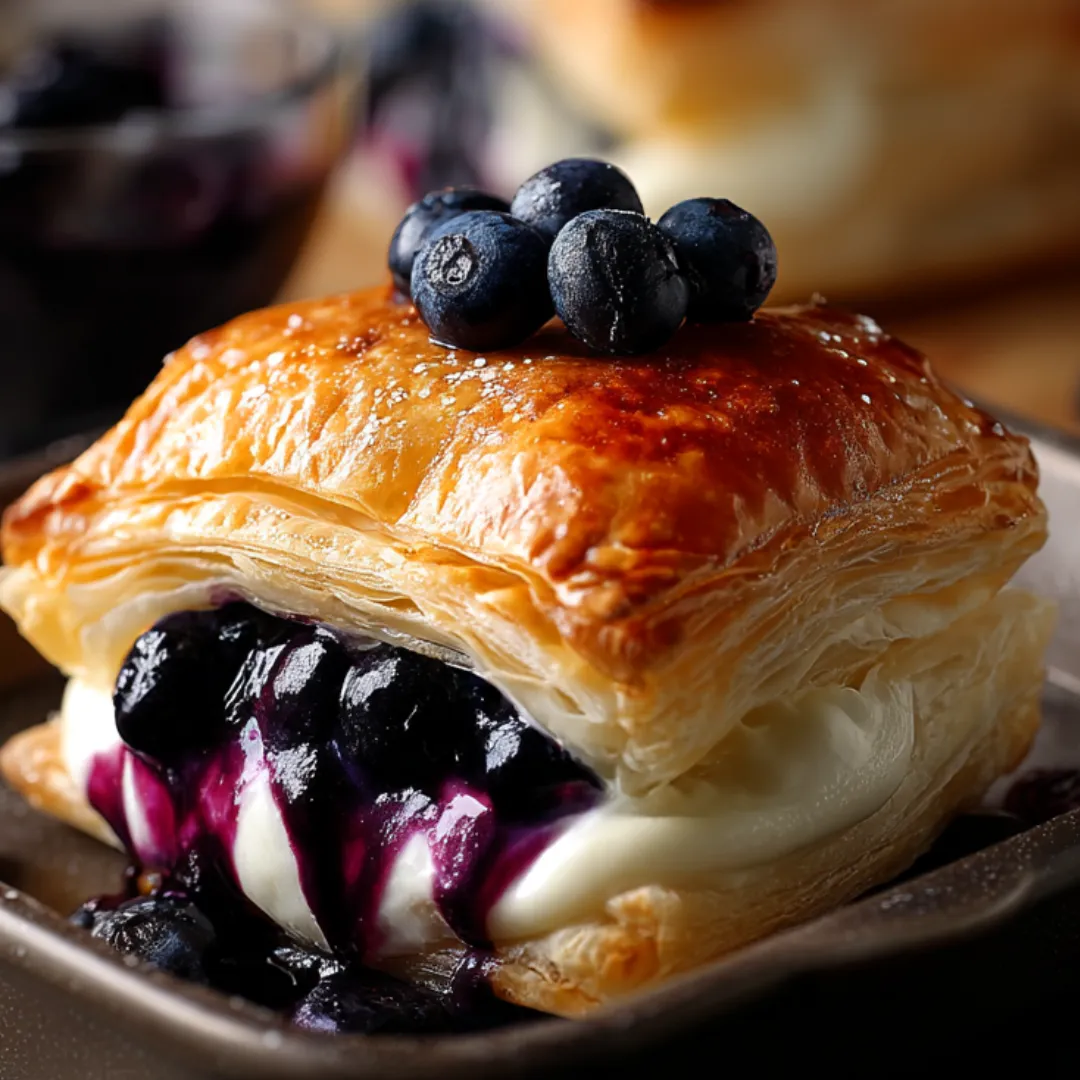
These Blueberry Cream Cheese Puff Pastries transform simple ingredients into stunning bakery-worthy treats with minimal effort. Each pastry delivers a perfect harmony of textures—shattering, butter-rich puff pastry giving way to a luscious cream cheese filling studded with juicy blueberries that burst with bright flavor. The contrast between the flaky, golden exterior and the creamy, fruity interior creates an irresistible bite that feels both indulgent and refined. Unlike many impressive-looking pastries that require advanced baking skills, these beautiful treats rely on store-bought puff pastry to create professional results with everyday convenience, making them perfect for both special occasions and spontaneous weekend baking projects.
I stumbled across this recipe concept during a particularly hectic weekend when unexpected guests were coming for brunch. With little time to prepare and few ingredients on hand, I found myself staring at a package of puff pastry, some cream cheese, and fresh blueberries from the farmers market. The resulting pastries—quickly assembled with those basic ingredients—became the surprise hit of the gathering. My friend Sarah, who typically avoids sweets, ended up taking two and asked for the recipe before leaving. What began as a last-minute solution has become my signature offering for morning gatherings and even teacher appreciation events at my children's school. The combination of impressive appearance and manageable preparation makes these pastries my go-to when I need something that looks like I spent hours in the kitchen, even when I only had minutes to spare.
Ingredients
- 1 package puff pastry (2 sheets, thawed): Forms the flaky, buttery base of these delicious pastries. Look for all-butter puff pastry for the richest flavor, though standard versions work well too. The pastry should be thawed according to package directions—typically 30-40 minutes at room temperature or overnight in the refrigerator. Properly thawed pastry will be cold but pliable, without any frozen spots or excessive softness. This foundation ingredient creates the characteristic layers that puff dramatically during baking, resulting in the delicate, crisp texture that contrasts beautifully with the creamy filling.
- 4 oz cream cheese, softened: Provides the rich, tangy base for the filling. Select full-fat cream cheese for the creamiest texture and most luxurious mouthfeel. The cream cheese must be properly softened—leave it at room temperature for about 30 minutes before using. It should yield easily to gentle pressure but still hold its shape rather than being runny. This key ingredient creates the smooth, velvety filling that balances the crisp pastry and juicy berries, while its slight tanginess offsets the sweetness of the other components.
- ¼ cup granulated sugar: Sweetens the cream cheese filling to perfect balance. Regular white granulated sugar works best as it dissolves readily into the cream cheese. The sugar should be fine and free-flowing, not clumped from moisture exposure. This ingredient not only provides sweetness but also helps stabilize the cream cheese filling. The specific amount creates a filling that's sweet enough to complement the tart berries without becoming cloying or overpowering the natural dairy flavor of the cream cheese.
- 1 teaspoon vanilla extract: Adds aromatic depth to the cream cheese filling. Use pure vanilla extract rather than imitation for the cleanest, most authentic flavor. The extract should have a rich caramel-brown color and pronounced vanilla aroma. This ingredient enhances the overall flavor profile with warm, sweet notes that complement both the cream cheese and blueberries. The vanilla bridges the flavors of the filling components, creating a more cohesive taste experience.
- 1 cup fresh blueberries: Provide bursts of juicy sweetness and vibrant color. Choose firm, plump berries with a deep blue-purple color and slight silvery bloom on the surface, indicating freshness. The berries should be completely dry before using to prevent excess moisture in the pastries. This star ingredient creates pockets of intense flavor and beautiful purple-blue hue that makes the pastries visually striking. Fresh berries maintain their shape and texture better during baking than frozen ones, though thawed frozen berries can work when fresh aren't available.
- 1 tablespoon lemon zest: Contributes bright citrus notes that enhance the blueberries. Use only the colored outer portion of the lemon peel, avoiding the bitter white pith beneath. Fresh zest should be aromatic and slightly moist with essential oils. This ingredient adds complexity to the filling, bringing out the natural flavors of the blueberries while adding its own citrusy dimension. The oils in the zest infuse throughout the filling during baking, creating a more sophisticated flavor profile.
- 1 tablespoon cornstarch: Thickens the natural juices released by the berries during baking. The cornstarch should be free-flowing and pure white, without any lumps or off odors. This practical ingredient prevents the blueberry juices from making the pastry soggy by absorbing and thickening them as they heat. The small amount used stabilizes the filling without creating a starchy texture or taste, allowing the natural flavors to shine through while maintaining the structural integrity of the pastry.
- 1 large egg, lightly beaten (for egg wash): Creates a golden, shiny finish on the pastry. The egg should be at room temperature for the smoothest wash. When beaten, it should be uniform in color with no streaks of white or yolk visible. This finishing ingredient is crucial for achieving that bakery-quality appearance, promoting even browning and adding an attractive gloss to the pastry surface. The proteins in the egg wash help seal the pastry folds while the fat contributes to the rich golden color development during baking.
- ½ cup powdered sugar (for glaze): Forms the base for the optional sweet finishing glaze. The sugar should be fine, smooth, and free of lumps for the smoothest glaze. Sift it if necessary before using. This final touch ingredient creates a beautiful white drizzle that adds visual appeal and a touch of extra sweetness to the finished pastries. The fine texture of powdered sugar dissolves easily to create a smooth glaze that sets with a slight crust, adding another textural element to the pastries.
- 1 tablespoon milk (for glaze): Thins the powdered sugar to drizzling consistency. Any type of milk works, though whole milk creates a slightly richer glaze. The specific amount may need adjustment depending on desired thickness. This practical ingredient transforms dry powdered sugar into a pourable glaze. The milk provides just enough liquid to create a smooth consistency while allowing the glaze to set properly once applied to the pastries.
- ½ teaspoon vanilla extract (for glaze): Adds flavor depth to the simple sugar glaze. As with the filling, pure vanilla extract provides the best flavor. This final flavoring ingredient prevents the glaze from being one-dimensionally sweet, adding aromatic complexity that complements the pastry as a whole. The subtle vanilla notes tie the glaze to the filling, creating flavor continuity throughout the pastry.
 Pin it
Step-by-Step Instructions
- Step 1: Prepare your workspace properly
- Begin by ensuring your work area is ready for efficient assembly. Preheat your oven to 400°F (200°C), positioning a rack in the middle for even heat distribution. Line a large baking sheet with parchment paper, which prevents sticking and makes cleanup easier. If you have a second baking sheet, prepare it as well, as the pastries need space between them for proper puffing. Remove the puff pastry from the refrigerator only when you're ready to work with it—keeping it cold is essential for achieving those beautiful, flaky layers. Gather all filling ingredients and measuring tools before starting to ensure smooth assembly. Lightly dust a clean, flat work surface with flour for rolling the pastry. Having everything organized before you begin makes the process much more manageable and prevents the pastry from warming up too much while you search for ingredients.
- Step 2: Create the perfect cream cheese filling
- In a medium mixing bowl, combine the softened cream cheese, granulated sugar, and 1 teaspoon vanilla extract. The cream cheese must be properly softened for the smoothest result—it should yield easily to a spatula but still maintain some structure. Using an electric mixer on medium speed or a wooden spoon with a strong arm, beat these ingredients together until the mixture becomes smooth, light, and fluffy with no visible lumps, about 2-3 minutes. The texture should be similar to a thick frosting—spreadable but able to hold its shape. Scrape down the sides of the bowl with a spatula several times during mixing to ensure all ingredients are fully incorporated. This filling should be smooth enough to spread easily but thick enough to stay in place during baking. Once properly mixed, set the filling aside while preparing the blueberries.
- Step 3: Prepare the blueberry mixture with care
- In a separate small bowl, combine the fresh blueberries, lemon zest, and cornstarch, tossing gently with a spoon until the berries are evenly coated. Handle the berries carefully to avoid crushing them, which would release their juices prematurely. The cornstarch should lightly coat each berry, creating a thin, dusty layer that's barely visible. This coating will thicken the natural juices released during baking, preventing them from making the pastry soggy. The lemon zest should be distributed throughout, providing little specks of yellow among the blue berries. This simple preparation step maximizes the flavor of the berries while ensuring they maintain their integrity during baking. The finished mixture should look dry rather than wet or juicy—any visible liquid at this stage means your berries may have been crushed.
- Step 4: Handle the puff pastry correctly
- On your lightly floured work surface, carefully unfold one sheet of thawed puff pastry, taking care not to crack the dough at the fold lines. If the pastry feels too stiff, let it sit at room temperature for 2-3 more minutes—it should be cold but pliable. Using a rolling pin, gently roll the sheet into a slightly larger rectangle, about 10x12 inches, just enough to smooth out the fold lines and thin the pastry slightly. The dough should be approximately ⅛-inch thick. Work quickly and with a light touch to prevent warming the butter layers in the pastry, which would inhibit proper puffing. Avoid excessive rolling, which can compress the layers too much. Repeat this process with the second sheet of pastry. Keep any pastry you're not immediately working with in the refrigerator to maintain the proper temperature.
- Step 5: Cut and fill with precision
- Using a sharp knife or pizza cutter, divide each rolled pastry sheet into six equal squares, creating a total of 12 squares approximately 4x4 inches each. Transfer half the squares to your prepared baking sheets, spacing them at least 2 inches apart to allow for expansion during baking. Place approximately 1 tablespoon of the cream cheese mixture in the center of each square, spreading it slightly into a small circle while leaving about a 1-inch border around the edges. The cream cheese should be in a thick layer rather than spread thin. Next, spoon about 1 tablespoon of the blueberry mixture on top of the cream cheese, distributing the berries evenly rather than piling them. Again, maintain the clean border around the edges of the pastry. This measured assembly ensures that each pastry has the perfect balance of filling without being overstuffed, which could cause leakage during baking.
- Step 6: Create professional-looking pastries
- For each filled square, take two opposite corners and fold them toward the center, overlapping them slightly over the filling. The corners should meet or slightly overlap at the center, creating a diamond-like shape with the filling visible in the open areas. Press down gently where the dough overlaps to help it stick together. This folding technique allows some of the colorful filling to peek through while creating a secure structure that won't open during baking. Once folded, brush each pastry with the lightly beaten egg wash, coating all exposed pastry surfaces but avoiding the filling. The egg wash should be applied in a thin, even layer—too much will pool and create uneven browning. This brushing step ensures a golden, shiny finish on the pastry and helps seal the folded corners together during baking.
- Step 7: Bake to golden perfection
- Place the baking sheet(s) in the preheated oven and bake for 18-20 minutes, or until the pastries have puffed significantly and turned a deep golden brown. The perfect pastry will have visibly separated layers around the edges and a rich amber color rather than pale beige. During baking, resist the urge to open the oven door, especially in the first 15 minutes, as the temperature drop can prevent proper puffing. If your oven heats unevenly, rotate the baking sheet halfway through cooking time. The pastries are done when the exposed dough is crisp and golden with no doughy or pale areas, particularly at the folded corners. The filling should be bubbling slightly, with blueberries that have softened but still maintained their shape. These visual cues are more reliable than strict timing, as ovens vary significantly.
- Step 8: Finish and serve with care
- Once baked, remove the pastries from the oven and transfer them immediately to a wire cooling rack. Allow them to cool for at least 10 minutes before adding the optional glaze—this cooling period allows the filling to set slightly while the pastry remains crisp. For the glaze, whisk together the powdered sugar, milk, and ½ teaspoon vanilla extract in a small bowl until smooth. The consistency should be thick enough to hold its shape briefly when drizzled but thin enough to fall in a steady stream from a spoon. Adjust with tiny amounts of additional milk or powdered sugar if needed. Using a spoon or a small piping bag, drizzle the glaze in a zigzag pattern across the pastries. Allow the glaze to set for about 5 minutes before serving. These pastries are best enjoyed slightly warm or at room temperature on the day they're made, when the contrast between crisp pastry and soft filling is most pronounced.
The Secret to Perfect Puff Pastry
After making these pastries countless times, I've discovered that the true secret to their success lies in understanding how to work with puff pastry. Unlike other doughs that benefit from gentle handling and warming to room temperature, puff pastry requires a completely different approach. The magic of puff pastry comes from its many alternating layers of dough and butter, which create that signature airy, flaky texture when exposed to heat—but only if those layers remain distinct and cold until baking begins.
Temperature management is absolutely crucial. I keep the pastry in the refrigerator until the moment I'm ready to work with it, and I work quickly to prevent the butter layers from softening. If at any point during preparation the pastry feels too soft or warm to the touch, I immediately pause and return it to the refrigerator for 10-15 minutes to firm up. Even five minutes of sitting at room temperature can be enough to compromise those delicate butter layers, resulting in pastry that's dense and greasy rather than light and crisp.
I've also found that the baking surface makes a significant difference. A heavy-duty baking sheet conducts heat more evenly than a thin one, promoting more consistent rising. Parchment paper not only prevents sticking but also seems to help with even browning along the bottom. And perhaps most importantly, a properly preheated oven is non-negotiable—the instant heat shock when the cold pastry hits the hot oven is what creates that dramatic puff.
Through trial and error, I've learned that less filling actually produces a better result than more. Overfilling makes the pastries difficult to seal and often leads to leakage during baking, while a restrained amount of filling allows the pastry to rise properly around it, creating that perfect ratio of crisp dough to creamy center. This "less is more" approach runs counter to my natural inclination to be generous with delicious fillings, but consistently delivers superior results.
Seasonal Fruit Adaptations
One of the qualities I love most about these pastries is how beautifully they showcase whatever fruit is at its seasonal peak. While blueberries create a classic version that's available year-round thanks to good frozen options, adapting to seasonal fruits keeps this recipe in regular rotation throughout the year with ever-changing flavor profiles.
In late spring, fresh strawberries make an exceptional substitution. I hull and dice them into small pieces, which releases less moisture than sliced berries. The bright red color against the cream cheese creates a particularly beautiful presentation, and their natural sweetness often means I can reduce the sugar in the cream cheese mixture slightly. A touch of fresh basil minced and added to the filling creates an unexpected but delightful herbal note that complements strawberries perfectly.
Summer brings a wealth of options. Black cherries, pitted and halved, create an elevated, sophisticated pastry with deeper flavor notes. Their natural almond undertones inspire me to sometimes add a few drops of almond extract to the cream cheese mixture. Peaches work beautifully when diced small and tossed with a bit of extra cornstarch to manage their abundant juices. Their floral sweetness pairs wonderfully with a touch of cinnamon in the cream cheese.
Fall welcomes apple season, requiring a slight technique adjustment. I dice the apples very small and briefly sauté them with cinnamon, nutmeg, and a touch of butter before cooling completely and using in the filling. This pre-cooking ensures the apples become tender during the relatively short baking time. The warming spices make these autumn variations especially comforting as the weather cools.
Even winter offers possibilities with pears or frozen fruits. Bosc pears, which hold their shape well during baking, create a delicate, sophisticated filling when combined with a hint of cardamom in the cream cheese. And when fresh options are limited, premium frozen fruit (thawed and very well drained) steps in admirably, allowing these beloved pastries to appear on our table year-round.
 Pin it
Make-Ahead and Storage Strategies
Through considerable experimentation, I've developed several approaches to fit these pastries into busy schedules without sacrificing their distinctive fresh-baked quality. For morning events or brunches when time is tight, I often complete most of the preparation the night before.
The filling components can be prepared 24 hours in advance and stored separately in the refrigerator—the cream cheese mixture in an airtight container and the blueberry mixture in another. The cornstarch in the blueberry mixture prevents it from becoming too juicy during storage. When ready to assemble, I let the cream cheese mixture sit at room temperature for about 15 minutes to become spreadable again.
For the most time-efficient approach, I assemble the pastries completely (up to the point of egg wash) the night before, arrange them on parchment-lined baking sheets, cover loosely with plastic wrap, and refrigerate overnight. In the morning, I simply brush with egg wash and bake, adding perhaps 2-3 extra minutes to the baking time to account for the chilled dough. This method works beautifully and actually seems to enhance the pastry layers, as the extended refrigeration time firms up the butter layers even more thoroughly.
For storage after baking, these pastries are best enjoyed the day they're made, but can be kept at room temperature in an airtight container for up to 24 hours. After that, refrigeration is necessary, though the pastry will lose some of its crispness. To refresh day-old pastries, a few minutes in a 325°F oven crisps them up nicely. I avoid freezing fully baked pastries, as the texture suffers significantly, but unbaked assembled pastries freeze exceptionally well for up to one month. I freeze them solid on a baking sheet, then transfer to freezer bags, and bake directly from frozen, adding about 5-7 minutes to the baking time.
I learned about the importance of proper filling amounts through an embarrassing brunch disaster. Eager to impress my husband's new boss and his wife, I prepared these pastries for a weekend gathering at our home. Determined to make them extra-special, I generously doubled the amount of filling in each pastry, imagining how impressed everyone would be with these indulgent treats. As I proudly opened the oven door to retrieve my masterpieces, I found a tray of sad, collapsed pastries swimming in a sea of liquefied filling that had burst through the dough and caramelized into a sticky mess. With guests due in twenty minutes and no backup plan, I frantically made emergency cinnamon toast while my husband ran to the bakery. That mortifying experience taught me that in pastry-making, more isn't always better, and the recipe proportions are precisely calibrated for a reason. Now I measure my filling with disciplined restraint, resulting in consistently perfect pastries—and significantly less pre-entertaining anxiety.
After making these Blueberry Cream Cheese Puff Pastries countless times over the years, I'm still delighted by how reliably they impress while requiring so little active effort. There's something deeply satisfying about producing bakery-quality pastries in my home kitchen with such straightforward techniques. I particularly appreciate how they bridge the gap between sophisticated and approachable—elegant enough for special occasions yet simple enough for everyday enjoyment. While I've experimented with countless variations and refinements, the basic formula remains unbeatable: buttery, flaky pastry + creamy, tangy filling + fresh, vibrant fruit. This winning combination creates not just delicious pastries but also moments of genuine pleasure at my table, as the simple act of biting through shattering layers into sweet, creamy filling reminds us that sometimes the most basic pleasures are the most profound. In our increasingly complex world, there's something wonderfully grounding about this honest, straightforward delight.
Frequently Asked Questions
- → Can I use other fruits instead of blueberries?
- Absolutely! Raspberries, blackberries, diced strawberries, or even thinly sliced peaches work beautifully. Just make sure to toss them with the cornstarch to help thicken their juices.
- → How do I store leftover pastries?
- Store them in an airtight container at room temperature for 1-2 days. For longer storage, refrigerate for up to 3-4 days. Reheat in a 300°F oven for 5-7 minutes to crisp them up again.
- → Can I freeze these pastries?
- Yes! You can freeze them either before or after baking. For unbaked pastries, freeze on a baking sheet then transfer to a freezer bag. Bake from frozen, adding 5-7 minutes to the cooking time.
- → What if my puff pastry gets too warm while working with it?
- If your puff pastry becomes too soft or warm, pop it in the refrigerator for 15-20 minutes to firm up. Cold puff pastry creates the best layers when baked.
- → Can I make these without the glaze?
- Definitely! The pastries are delicious with just a dusting of powdered sugar, or even plain. The cream cheese and blueberry filling provides plenty of flavor on its own.