
 Pin it
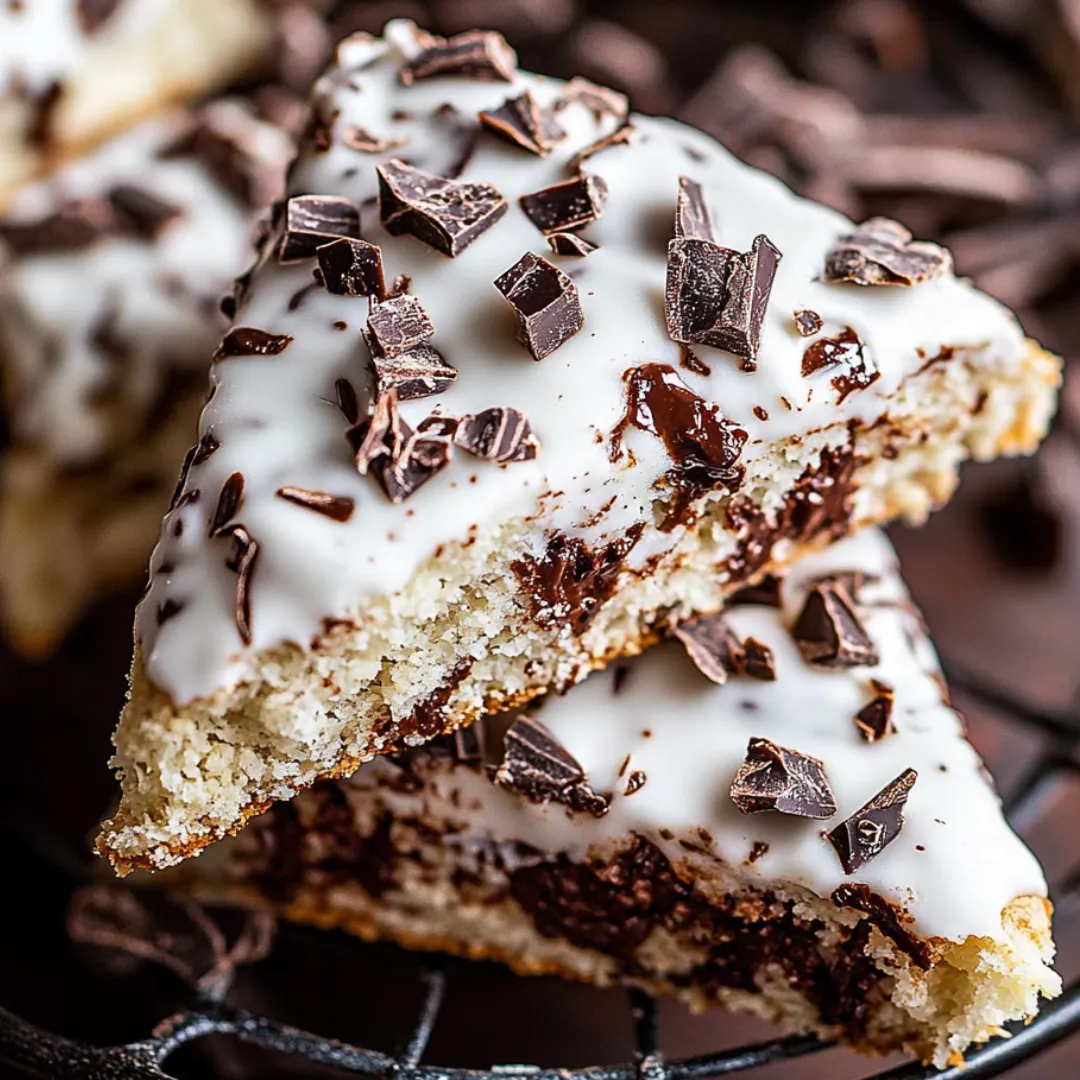
This chocolate coconut scone recipe transforms simple ingredients into a bakery-worthy treat that will transport you to a cozy café with every bite. The rich dark chocolate chunks melt perfectly against the coconut-infused dough, creating an irresistible combination that feels both indulgent and comforting.
I first made these scones for my daughter's birthday brunch and they disappeared faster than any other treat on the table. Now they've become our special Sunday morning tradition when we want something that feels a little more special than ordinary breakfast fare.
Ingredients
- All purpose flour: Provides the perfect structure for these tender scones
- Sweetened coconut flakes: Create texture and amplify the tropical flavor
- Dark chocolate: Adds rich pockets of melty goodness throughout each bite
- Coconut cream: Brings moisture and enhances the coconut flavor profile
- Coconut extract: Intensifies the tropical notes without overwhelming
- Vanilla extract: Adds warmth and depth to balance the coconut
- Cold butter: Ensures those perfect flaky layers we all crave in scones
- Powdered sugar: Creates a smooth glaze that sets beautifully on top
Step-by-Step Instructions
- Prepare Your Station:
- Preheat your oven to 400°F and prepare your baking sheet with parchment paper. This temperature is crucial for creating that perfect golden exterior while keeping the inside tender. Having everything ready before you start mixing ensures a smooth process.
- Create Coconut Flour Base:
- Pulse most of your coconut flakes in a food processor until they become fine and granular. This transforms the coconut into almost a flour consistency that will distribute that tropical flavor throughout every bite of your scones.
- Mix Dry Ingredients:
- Combine your coconut flour with regular flour, sugar, baking powder, and salt. This stage is where you build the foundation of your scones. Be sure to whisk thoroughly to eliminate any lumps and ensure even distribution of the leavening agents.
- Prepare Chocolate:
- Chop your chocolate bars into various sizes from chunks to tiny shards. The different sizes create delightful texture contrasts with some pieces melting completely and others remaining as delicious pockets of chocolate throughout the scones.
- Incorporate Butter:
- Work your cold butter cubes into the dry ingredients until the mixture resembles coarse sand. This step is crucial for creating those flaky layers. The key is to work quickly to keep the butter cold which will create steam pockets during baking.
- Form Your Dough:
- Add the wet ingredients and stir just until combined. The dough should be slightly dry but hold together when pressed. Overworking the dough at this stage will develop too much gluten resulting in tough scones, so use a light hand.
- Shape and Cut:
- Press the dough into an 8inch circle about 1inch thick and cut into eight equal wedges. The thickness matters for proper baking, too thin and they will burn, too thick and they will be undercooked in the middle.
- Bake to Perfection:
- Transfer to your prepared baking sheet and bake until the edges turn golden brown. You will know they are done when they feel set on the outside but still have a slight give when pressed in the center.
 Pin it
I am particularly fond of using high quality dark chocolate with at least 70% cacao content in these scones. My grandmother always said that when chocolate is a star ingredient, buy the best you can afford. The first time I made these with premium chocolate, my husband declared them better than anything from our local bakery.
Make Ahead Options
These scones can be assembled the night before and refrigerated unbaked. Simply prepare the recipe through the cutting stage, place the shaped scones on a baking sheet, cover with plastic wrap, and refrigerate overnight. In the morning, preheat your oven and bake them fresh adding a couple extra minutes to the baking time. The cold butter in the refrigerated dough actually enhances the flakiness of the final product.
The Secret to Perfect Scones
The key to achieving that perfect scone texture lies in how you handle the dough. Cold ingredients and minimal mixing are crucial. I always chill my butter in the freezer for about 15 minutes before cutting it into cubes. Work quickly with your fingers when incorporating the butter so your body heat doesn't warm it too much. The little pockets of cold butter create steam during baking which results in those delightful flaky layers that make scones so special.
 Pin it
Serving Suggestions
While these scones are absolutely divine on their own, they can be elevated further by serving them alongside complementary flavors. A cup of hot coffee with a splash of coconut cream echoes the tropical notes in the scones. For a more substantial brunch, pair them with fresh fruit and a dollop of lightly sweetened coconut whipped cream. During the holiday season, I like to serve these on a tiered tray with other small treats for a festive afternoon tea that always impresses guests without requiring hours in the kitchen.
Coconut Selection Tips
Not all coconut products are created equal, and your selection can significantly impact the final flavor. Look for coconut cream that lists coconut as the first ingredient with minimal additives. For the coconut flakes, I prefer the sweetened variety in this recipe as it caramelizes slightly during baking, but you can use unsweetened if you prefer a less sweet scone. Toast a portion of your coconut flakes for the topping to add another dimension of flavor and a beautiful golden color contrast against the white icing.
Frequently Asked Questions
- → How do I ensure the scones have a tender crumb?
Using cold butter and handling the dough gently prevents overmixing, which ensures a tender, flaky texture.
- → Can I substitute dark chocolate with another type of chocolate?
Yes, you can use milk or white chocolate, but dark chocolate pairs best with coconut's sweetness.
- → What’s the best way to store these scones?
Store them in an airtight container at room temperature for 2 days or freeze them for up to 3 months.
- → Can I make these scones dairy-free?
Yes, substitute the butter with a plant-based alternative and ensure the chocolate is dairy-free.
- → Can I adjust the sweetness of these scones?
Yes, you can reduce the sugar in the scone batter to lessen the overall sweetness to your taste.
- → What type of coconut cream works best?
Use full-fat coconut cream for the best flavor and texture in both the dough and icing.