
 Pin it
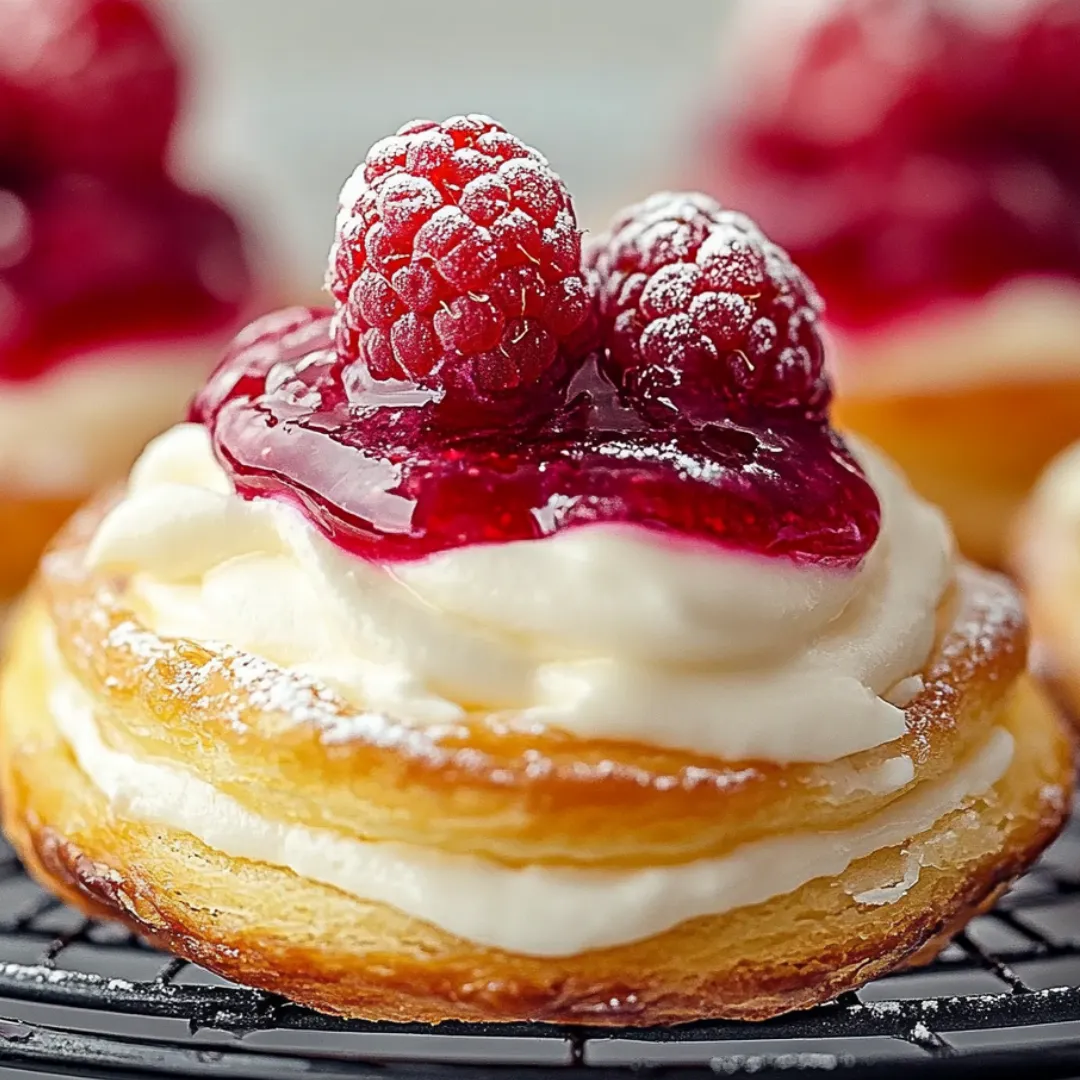
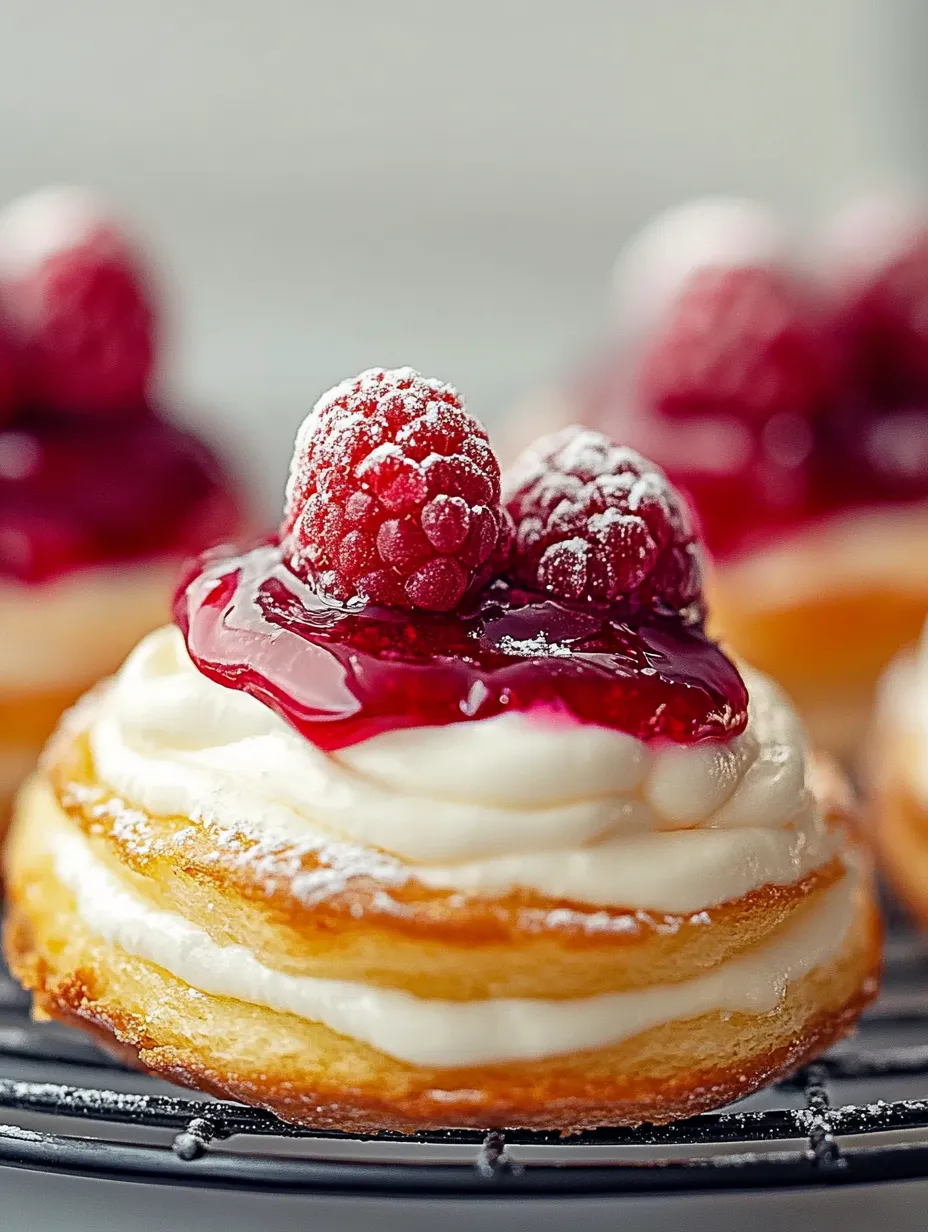
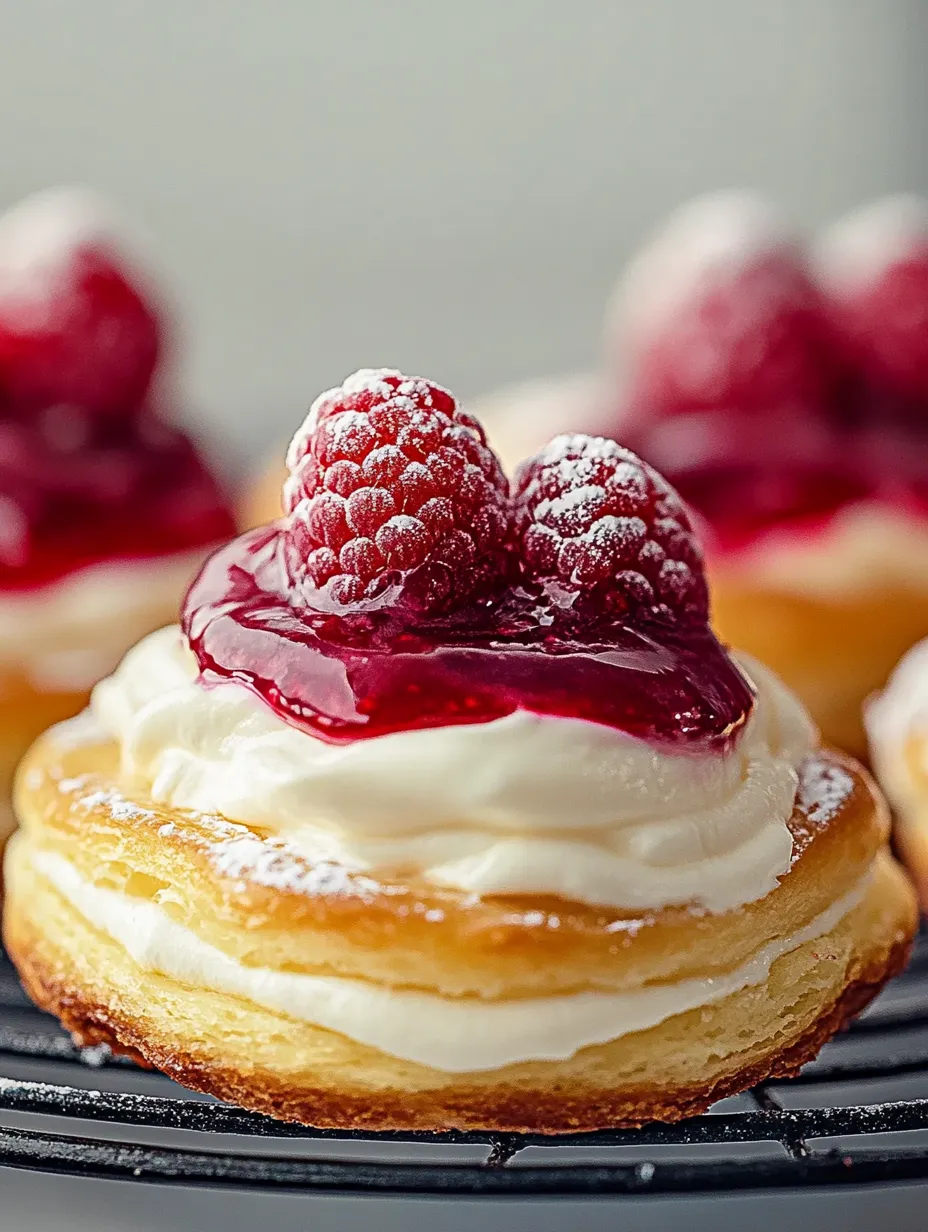
The unmistakable aroma of buttery Danish pastry wafting through the kitchen creates a special kind of anticipation. These delightful Danish sweet treats – with their tender, flaky layers wrapped around velvety pastry cream and crowned with bright raspberry gems – bridge the gap between everyday comfort and special occasion elegance. Unlike store-bought versions with their sometimes artificial aftertaste, homemade Danish pastries showcase the natural harmony of butter, fresh berries, and vanilla-scented cream that simply can't be mass-produced. The process of crafting them by hand connects us to centuries of baking tradition while filling our homes with the promise of something extraordinary.
The first time I attempted Danish pastries was for my mother's birthday brunch. Despite my nervousness about working with yeasted dough, the forgiving nature of this recipe turned what could have been a kitchen disaster into a triumph. The look on everyone's faces as I brought the platter of golden, raspberry-studded pastries to the table made the effort worthwhile. My brother, normally reserved with compliments, asked if I'd been 'secretly training with professional bakers.' That moment cemented these Danish treats as part of our family celebration tradition, appearing at nearly every gathering since.
Ingredients You'll Need
- 150 ml (2/3 cup) milk: The foundation of your dough; warm it just until lukewarm as too hot will kill the yeast and too cold won't activate it properly
- 2 teaspoons instant yeast: Provides the necessary rise without the need for proofing; ensure it's fresh for best results
- 1 large egg plus 1 egg yolk: Creates richness and structure in the dough; the extra yolk adds a beautiful golden color and tender texture
- 50 grams (1/4 cup) sugar: Balances the dough with subtle sweetness that complements the filling without overwhelming it
- 1/2 teaspoon vanilla extract: Enhances the buttery flavor; pure extract makes a noticeable difference over artificial varieties
- 1/2 teaspoon salt: Critical for flavor development; don't skip this as unsalted dough tastes flat and undeveloped
- 375 grams (3 cups) all-purpose flour: Provides the structure; measure by scooping into your measuring cup and leveling off for accuracy
- 57 grams (4 tbsp) unsalted butter: Creates those lovely tender layers; quality butter with high fat content yields better results
- 150 grams (1 1/4 cup) fresh raspberries (plus 36 more for topping): The star of the filling; their sweet-tart flavor cuts through the richness of the pastry
- 75 grams (1/3 cup) granulated sugar (for filling): Balances the natural tartness of the berries without making them cloyingly sweet
- Lemon zest (optional): Brightens the berry filling with citrus notes that wake up your taste buds
- 1 portion of pastry cream: Adds luxurious creaminess; make this first as it needs time to set properly
 Pin it
Step-by-Step Cooking Instructions
- Begin with the Pastry Cream Foundation:
- This component needs proper chilling time, so start here. Combine 2 cups of milk with 1/3 cup of sugar in a saucepan over medium heat, stirring occasionally until it reaches a gentle simmer. Meanwhile, in a separate bowl, whisk together 4 egg yolks, 1/4 cup sugar, and 1/4 cup cornstarch until smooth. When the milk mixture is hot but not boiling, slowly stream about half of it into the egg mixture while whisking constantly (this tempers the eggs, preventing scrambling). Pour this mixture back into the remaining hot milk and return to the heat. Cook, whisking continuously, until it thickens significantly and begins to bubble. Remove from heat, whisk in 2 tablespoons of butter and 1 teaspoon vanilla extract. Transfer to a bowl, press plastic wrap directly onto the surface to prevent a skin from forming, and refrigerate until completely chilled, at least 2 hours or overnight.
- Prepare Your Dough Base:
- Warm the milk until it reaches approximately 100°F (38°C) – it should feel just warm to the touch, not hot. Sprinkle the instant yeast over the milk, stir gently, and let it rest for 5-10 minutes until slightly foamy. In a large mixing bowl, combine the egg, egg yolk, sugar, vanilla extract, and salt, whisking until well blended. Pour in the milk-yeast mixture and stir to combine. Begin adding the flour gradually, about a cup at a time, mixing after each addition. Once the dough starts coming together, work in the softened butter. Turn the dough onto a lightly floured surface and knead for 10-12 minutes until it becomes smooth, elastic, and pulls away cleanly from your hands. The kneading develops the gluten structure needed for those perfect layers, so don't rush this step.
- Allow for Proper Rising:
- Shape your kneaded dough into a ball and place it in a lightly greased bowl. Cover with a damp kitchen towel (not dripping wet, just slightly damp) to prevent the surface from drying out. Let the dough rise in a warm, draft-free spot for about 45 minutes, or until it has approximately doubled in size. The ideal rising temperature is around 75-80°F (24-27°C). You'll know the dough is ready when you gently press it with your finger and the indentation remains rather than springing back immediately. While waiting, prepare your raspberry filling to give it time to cool before assembly.
- Create the Raspberry Filling:
- Combine the raspberries, granulated sugar, a pinch of salt, and 4 tablespoons of butter in a saucepan over medium heat. As the berries warm, they'll release their juices. Gently mash some of the berries with a wooden spoon while leaving others whole for texture contrast. Simmer the mixture, stirring occasionally, for about 8-10 minutes until it thickens slightly and some of the liquid evaporates. Remove from heat and stir in the lemon zest if using. Transfer to a bowl and allow it to cool completely to room temperature. The filling will continue to thicken as it cools, reaching the perfect consistency for spreading without soaking into your dough.
- Shape Your Danish Treats:
- When the dough has doubled in size, gently punch it down to release air bubbles and transfer to a floured work surface. Roll it into a large rectangle approximately 12x16 inches and about 1/4-inch thick. Spread the cooled raspberry filling evenly across the surface, leaving a 1/2-inch border along one long edge. Starting from the opposite long edge, roll the dough tightly into a log, pinching the seam to seal. With a sharp knife, cut the log into 12 equal pieces, each about 1.5 inches thick. Arrange the pieces on a parchment-lined baking sheet, leaving about 2 inches between each roll. Cover loosely with plastic wrap and let rise again for 45 minutes until puffy.
- Add the Final Touches:
- Preheat your oven to 350°F (175°C). When the rolls have completed their second rise, use the back of a round measuring spoon or your thumb to create a deep indentation in the center of each roll. Fill each depression with a generous tablespoon of the chilled pastry cream. Top each cream-filled center with three fresh raspberries. Lightly beat an egg with a splash of water to create an egg wash, then gently brush the exposed dough (avoiding the cream and berries) to ensure a golden, shiny finish when baked. This egg wash makes the difference between pale, dull pastries and professionally glazed ones.
- Bake to Golden Perfection:
- Place the baking sheet in the preheated oven and bake for 15-18 minutes, or until the pastries are deep golden brown. Keep an eye on them starting at the 12-minute mark, as oven temperatures can vary significantly. You want the dough to be completely cooked through but not overly browned. The pastry cream may bubble slightly but shouldn't brown. Remove from the oven and allow to cool on the baking sheet for 5 minutes before transferring to a wire rack to cool completely. These Danish treats are delicious warm but will be easier to handle once they've cooled for about 20 minutes.
I learned about the windowpane test from my grandmother, who was known for her tender pastries. During my first attempt, I stopped kneading too early, resulting in dough that tore rather than stretched. The finished pastries were tasty but lacked that distinctive layered pull-apart texture that makes Danish pastries special. Now I make a point of properly testing the dough during kneading, and the difference in the final texture is remarkable. I also discovered that letting the raspberry filling cool completely before spreading it on the dough prevents the filling from seeping out during baking – a lesson learned after a particularly messy (though still delicious) batch that left fruit juices caramelized on my baking sheet.
The Perfect Pastry Cream
Mastering pastry cream opens doors to countless dessert possibilities beyond these Danish treats. The key lies in the continuous whisking once the mixture returns to heat – even a moment's pause can result in lumps or scorching. I use a figure-eight motion with my whisk, making sure to reach the corners of the pot where burning typically starts. The pastry cream is ready when it coats the back of a spoon and holds a clean line when you run your finger through it. For variations, consider infusing the milk with lavender, cardamom, or coffee beans (strain before using), or fold in stiffly whipped cream after chilling for a lighter version called crème légère that pairs beautifully with the tart raspberries.
Seasonal Adaptations
While raspberries create a classic version of these Danish pastries, the basic technique welcomes seasonal substitutions. In summer, try blackberries or blueberries, cooking them slightly less as they tend to break down more quickly than raspberries. Fall calls for diced apples or pears sautéed with cinnamon and brown sugar until tender but not mushy. Winter citrus season brings opportunities for orange or grapefruit segments tossed with a bit of sugar and zest. Spring strawberries need minimal cooking – just enough to release some juices and soften slightly. The pastry cream remains a constant, providing that luxurious base that complements any fruit variation you choose.
Troubleshooting Common Issues
Every baker occasionally encounters challenges, even with reliable recipes. If your dough isn't rising properly, check your yeast's expiration date and ensure your rising environment isn't too cool. For dough that's too sticky to work with, gradually add small amounts of flour during kneading until it reaches a tacky but manageable consistency. If your pastry cream develops lumps, pass it through a fine-mesh sieve while still hot. When the finished Danish treats seem dry, they may have been slightly overbaked – next time, check them a minute or two earlier. Remember that humidity, altitude, and even the protein content of different flour brands can affect your results, so don't hesitate to make small adjustments based on your specific conditions.
 Pin it
Make-Ahead Strategies
These Danish treats fit beautifully into busy schedules with some advance planning. The pastry cream can be made up to three days ahead and stored, covered, in the refrigerator. The dough can be prepared and stored, tightly wrapped, in the refrigerator overnight after its first rise – just let it come to room temperature for about 30 minutes before rolling out. You can even freeze the shaped, unbaked rolls (before adding pastry cream and berries) for up to a month; thaw overnight in the refrigerator, then let rise at room temperature for about an hour before proceeding with the final assembly and baking. Fully baked pastries freeze surprisingly well for up to three months – reheat directly from frozen in a 300°F oven for 8-10 minutes for a just-baked taste.
My journey with these Danish treats began as an attempt to recreate a memory from a small European bakery I visited years ago. While my first batches were decent, they lacked that professional touch I remembered. Over time, I've learned that the little details – properly activating the yeast, kneading the dough sufficiently, allowing adequate rising time – make all the difference between good and exceptional pastries. Now when I make these for friends, their eyes widen with that same delight I felt in that distant bakery. There's something wonderfully satisfying about mastering a recipe that connects you to baking traditions while creating new memories around your own table. These Danish sweet treats have become my signature contribution to brunches and celebrations – a bit of homemade magic that never fails to bring joy.
Frequently Asked Questions
- → Can I use frozen raspberries for this recipe?
- Yes, you can use frozen raspberries for the cooked filling, but fresh raspberries work best for the topping. If using frozen, don't thaw them first—cook them directly from frozen, but you may need to cook slightly longer to reduce excess moisture.
- → What if I don't have time to make pastry cream from scratch?
- You can use instant vanilla pudding mix as a shortcut. Prepare according to package directions but use 25% less milk than called for to get a thicker consistency. You can also find ready-made pastry cream in some specialty grocery stores.
- → Can I make these with other fruits?
- Absolutely! Strawberries, blueberries, blackberries, or even sliced peaches work wonderfully. Just adjust sugar levels based on the sweetness of your fruit—less for sweeter fruits and more for tart ones.
- → How can I tell when the dough has risen enough?
- The dough should roughly double in size. A good test is to gently press it with your finger—if the indentation remains, it's ready. If it springs back completely, it needs more time.
- → What's the best way to reheat these pastries?
- For the best texture, reheat in a 300°F oven for 5-7 minutes. Microwaving will warm them but won't restore the crisp texture. If frozen, reheat at 350°F for 8-10 minutes without thawing first.