
 Pin it
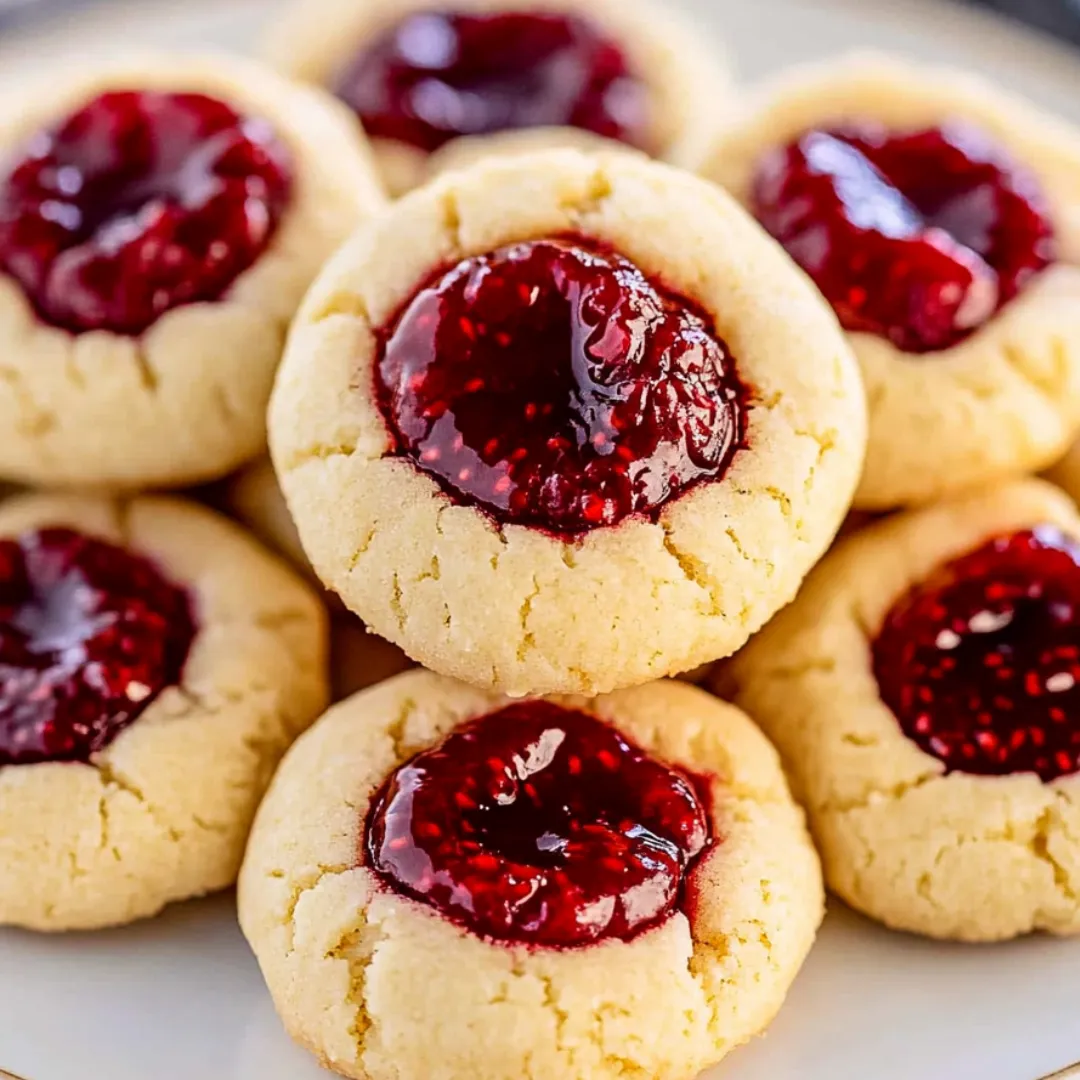
These charming raspberry thumbprint cookies combine a buttery, melt-in-your-mouth shortbread base with a vibrant raspberry jam center that creates the perfect sweet-tart balance in every bite. The cookies feature a tender crumb that contrasts beautifully with the jammy center, making them irresistible to anyone who tries them. Their elegant appearance belies how simple they are to make, requiring just a handful of pantry staples and minimal effort for maximum impact. Whether served alongside afternoon tea or packaged as heartfelt gifts, these classic cookies never fail to delight.
I first made these cookies for my daughter's birthday tea party, and they've become our family's most-requested treat. My husband, who typically passes on sweets, can't resist these—he says the balance of buttery cookie with the slightly tart raspberry center is what makes them special. Last Christmas, I packaged these in small gift boxes for neighbors, and three different people asked for the recipe before New Year's! What I love most is how something so simple can bring such genuine delight to everyone who tries them.
Ingredients You'll Need
- 1 cup unsalted butter, room temperature: The foundation for that rich, melt-in-your-mouth texture; must be soft but not melted
- 2/3 cup granulated sugar: Provides just the right amount of sweetness without overpowering the delicate butter flavor
- 1/2 teaspoon vanilla extract: Enhances the cookie's flavor profile with warm aromatic notes
- 1 large egg yolk, room temperature: Enriches the dough while maintaining tenderness; save the white for another use
- 2 1/4 cups all-purpose flour: Creates the perfect structure; measure by spooning into measuring cups and leveling for accuracy
- 1/2 teaspoon salt: Balances the sweetness and enhances the buttery flavor
- 3/4 cup high-quality raspberry jam: The star of the filling; choose jam with seeds for authentic berry texture or seedless for a smoother center
 Pin it
Step-by-Step Cooking Instructions
- Prepare Your Workspace:
- Begin by preheating your oven to 350°F (175°C) and lining two baking sheets with parchment paper. This preparation ensures you're ready to bake as soon as your dough is shaped. The parchment prevents sticking and makes cleanup easier. Allow your butter to reach genuine room temperature before starting; this typically takes about 1 hour on the counter and is essential for proper dough formation.
- Cream Butter and Sugar:
- In a large mixing bowl, combine the softened butter and granulated sugar. Using an electric mixer on medium speed, beat them together until the mixture becomes light and fluffy, approximately 3 minutes. Don't rush this crucial step – proper creaming incorporates air into the dough, which helps create that tender, melt-in-your-mouth texture. Stop once to scrape down the sides of the bowl with a rubber spatula to ensure even mixing.
- Add Egg Yolk and Vanilla:
- Add the room temperature egg yolk and vanilla extract to your butter-sugar mixture. Beat on medium speed until fully incorporated and the mixture appears smooth and uniform, about 1 minute. The egg yolk enriches the dough while adding just enough moisture to bind the ingredients together. Using just the yolk instead of a whole egg keeps the cookies tender rather than cakey.
- Incorporate Dry Ingredients:
- In a separate bowl, whisk together the flour and salt to ensure even distribution. With your mixer on low speed, gradually add this flour mixture to the wet ingredients, about 1/2 cup at a time. Mix just until the flour disappears and a soft dough forms – this should take no more than 1-2 minutes total. Overmixing at this stage can develop gluten, resulting in tough cookies, so stop mixing as soon as the dough comes together.
- Shape the Cookie Dough:
- Using a tablespoon or small cookie scoop for consistency, portion the dough into 1-inch balls. Roll each portion between your palms to create smooth, even balls. Place them on your prepared baking sheets, leaving about 2 inches between each cookie to allow for minimal spreading during baking. You should get approximately 24-30 cookies, depending on their exact size.
- Create the Thumbprints:
- Using your thumb or the back of a rounded 1/2 teaspoon measuring spoon, gently press an indentation into the center of each dough ball. Press deep enough to create a well for the jam, but be careful not to press all the way through to the baking sheet. If the edges crack slightly, gently press them back together with your fingertips. The indentation should be about 1/2 inch wide and deep enough to hold approximately 1/2 teaspoon of jam.
- Fill with Raspberry Jam:
- Stir your raspberry jam well to loosen it for easier handling. Using a small spoon, carefully fill each indentation with approximately 1/2 teaspoon of jam. Avoid overfilling, as the jam may bubble and overflow during baking. For the neatest results, consider transferring your jam to a small piping bag or zip-top bag with a corner snipped off to pipe precise amounts into each indentation.
- Bake to Golden Perfection:
- Place your cookie sheets in the preheated oven and bake for 12-15 minutes, or until the cookies are set and the edges turn a light golden brown. Don't overbake – these cookies should remain pale on top with just a hint of color around the bottom edges. If baking both sheets at once, rotate them halfway through baking for even browning. The jam will look liquid while hot but will set as the cookies cool.
My first attempt at these cookies taught me a valuable lesson about patience. I tried to move them while they were still warm, and not only did the jam run, but several cookies broke apart! Now I make sure to let them cool completely on the baking sheet before even thinking about transferring them. Another tip I've discovered over the years: warming the jam slightly before filling the cookies makes it easier to work with, resulting in smoother, more professional-looking centers.
Perfect Presentation
Whether you're serving these cookies at a special event or giving them as gifts, presentation can elevate them from delicious to unforgettable. For holiday celebrations, consider using different colored jams - raspberry for red, apricot for orange, and blueberry for blue - to match seasonal themes. When packaging as gifts, place cookies in a single layer separated by parchment paper to prevent sticking, and tie with a ribbon that complements the vibrant jam centers. For afternoon tea, serve on a tiered stand alongside other petite treats for an elegant display.
Storage Solutions
These cookies maintain their delightful texture for several days when stored properly. Once completely cooled, place them in an airtight container at room temperature, separating layers with parchment paper to prevent sticking. They'll stay fresh for up to 5 days. For longer storage, these cookies freeze beautifully for up to 3 months. Thaw at room temperature for about an hour before serving. The buttery base and jam center actually work together to keep these cookies moist and delicious even days after baking.
Flavor Variations
While raspberry jam creates the classic version of these cookies, don't hesitate to experiment with other flavors. Strawberry preserves offer a sweeter profile, while blackberry jam provides deeper berry notes. Apricot preserves create a sophisticated flavor combination with the buttery cookie base, and fig jam adds an unexpected gourmet twist. For holiday baking, consider orange marmalade with a pinch of cinnamon in the dough, or try lemon curd for spring and summer gatherings. Each variation maintains the cookie's charm while offering a new flavor experience.
 Pin it
Make-Ahead Tips
These cookies are perfect for planning ahead. The dough can be prepared up to 3 days in advance and stored, tightly wrapped, in the refrigerator. When ready to bake, allow the dough to come to room temperature for about 30 minutes for easier handling. You can also form the cookies, create the thumbprints, and refrigerate them on the baking sheets for up to 24 hours before filling and baking. For even longer prep, freeze the shaped but unfilled cookies for up to a month, then thaw overnight in the refrigerator before filling and baking.
I remember my grandmother making these cookies every Christmas, meticulously measuring ingredients and taking her time with each thumbprint. When I first tried recreating them as an adult, I rushed through the process and ended up with cookies that spread too much and had overflowing jam. Now I honor her patience, taking time with each step, and the results are always worth it. There's something deeply satisfying about creating these beautiful cookies that connect generations through a simple yet perfect combination of buttery shortbread and sweet fruit preserves.
Frequently Asked Questions
- → Can I use salted butter instead of unsalted?
- Yes, you can use salted butter, but omit any additional salt from the recipe. The cookies will have a slightly different flavor profile but will still be delicious.
- → How do I store these cookies and how long do they last?
- Store in an airtight container at room temperature for up to 5 days, or refrigerate for up to 1 week. You can also freeze them for up to 3 months in a freezer-safe container.
- → Why did my jam run during baking?
- If your jam spreads too much during baking, try making deeper indentations in the cookies and chilling the filled cookies for 15-20 minutes before baking. Also, thicker preserves tend to hold their shape better than runny jams.
- → Can I make the dough ahead of time?
- Absolutely! The dough can be refrigerated for up to 3 days before baking. Just bring it back to room temperature until soft enough to scoop and shape.
- → What other flavors work well with these cookies?
- These cookies are versatile! Try strawberry, blackberry, or apricot jam. You could also add almond extract instead of vanilla, or roll the cookies in chopped nuts before baking for extra texture.