
 Pin it
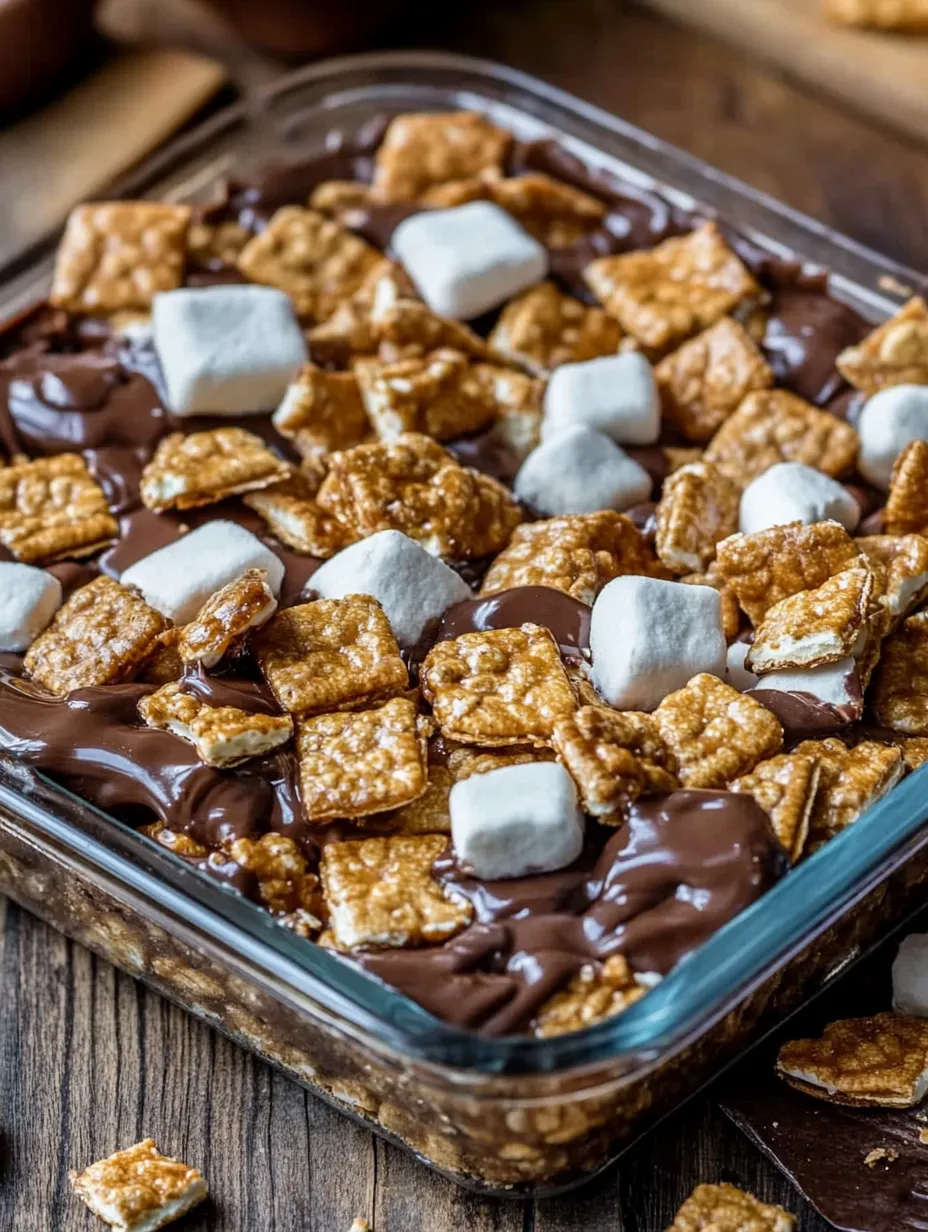
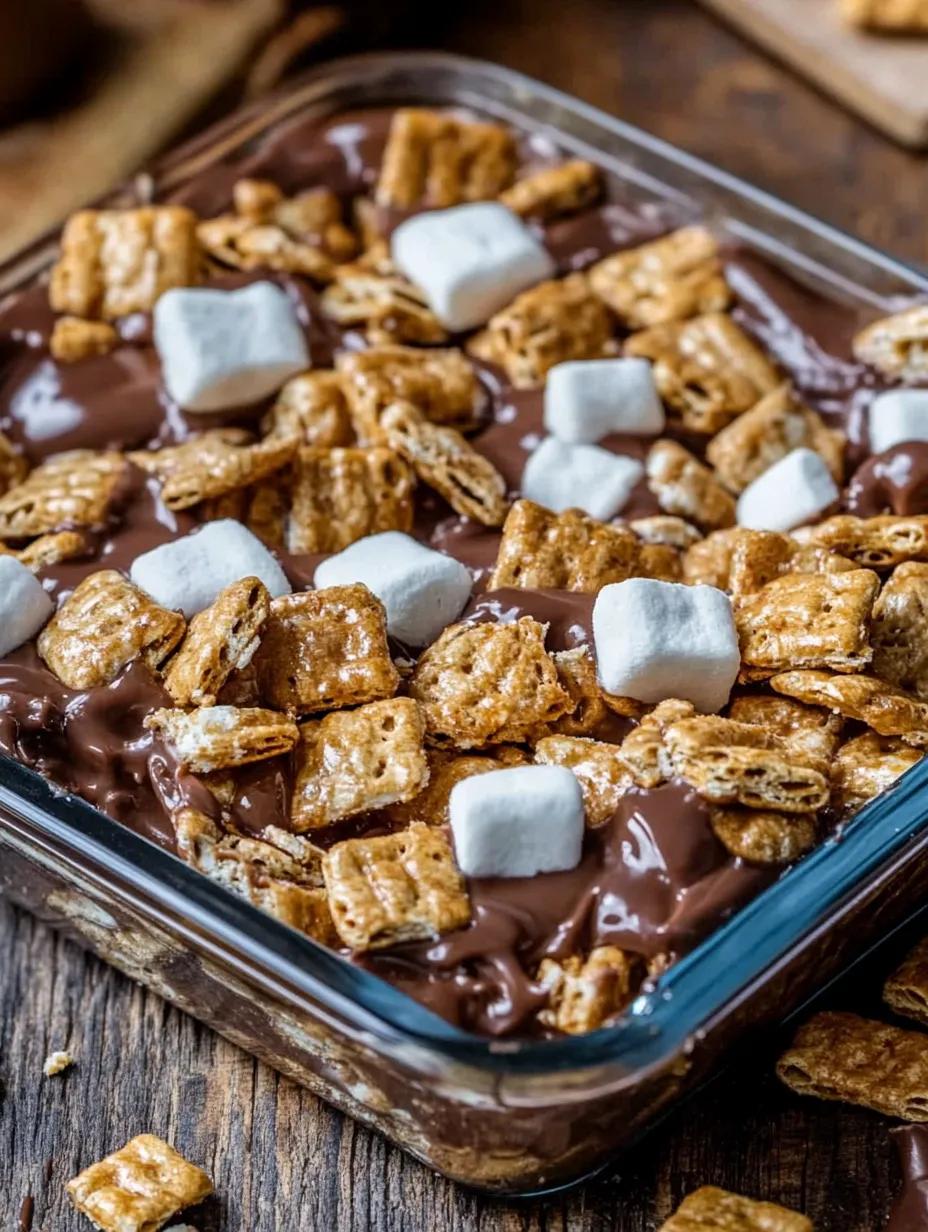
These irresistible Golden Grahams S'mores Bars deliver all the nostalgic flavors of campfire s'mores in a convenient, no-bake treat perfect for any occasion. The delightful contrast between gooey marshmallows, smooth milk chocolate, and crunchy Golden Grahams cereal creates a textural masterpiece that captures the essence of summer's favorite dessert without requiring an open flame. These bars strike the perfect balance between chewy and crispy, making them impossible to resist whether served at backyard gatherings, potlucks, or simply as an indulgent weeknight treat.
The first time I made these bars was for my niece's birthday party that had been planned as a backyard camping theme. When an unexpected thunderstorm forced us to move everything indoors, I needed a quick solution to deliver the promised s'mores experience without access to the fire pit. These bars saved the celebration! The children's faces lit up with the same joy they would have had roasting marshmallows, and several parents discreetly asked for the recipe before leaving. Since then, I've made these bars countless times, tweaking the ratio of ingredients until reaching this perfect balance of gooeyness and crunch.
Ingredients
- 6 cups mini marshmallows, divided: The star ingredient that creates that signature s'mores stretch and chew. Use fresh, soft marshmallows for best results—hard or stale ones won't melt properly. We'll use 5 cups in the melted mixture and reserve 1 cup to fold in whole, creating pockets of pillowy marshmallow throughout the bars. This two-stage addition mimics the partially melted texture of a freshly made campfire s'more. Mini marshmallows work better than large ones because they melt more quickly and evenly, and the reserved ones create perfect little pockets throughout the bars.
- 1½ cups milk chocolate chips: Provides the smooth, creamy chocolate element essential to authentic s'mores flavor. Choose good quality milk chocolate chips with a high cocoa butter content for superior melting and flavor. Dark chocolate can be substituted for a less sweet version, but milk chocolate best replicates traditional s'mores taste. Avoid chocolate bars chopped into pieces, as they often contain less cocoa butter than chips and may not melt as smoothly. Fresh chocolate chips will melt more readily and have better flavor than ones that have been in your pantry for months.
- 5 tablespoons butter: Creates richness and helps achieve the perfect chewy texture while preventing sticking. Unsalted butter is preferred as it allows better control of the overall saltiness, but salted works in a pinch—just reduce any additional salt in the recipe. The butter should be at room temperature for easier incorporation with the other ingredients. This ingredient is crucial for the right consistency and helps the bars hold together without becoming too firm or brittle when cooled.
- ¼ cup corn syrup: Acts as a binding agent and helps create that signature gooey texture. Light corn syrup is traditional, though dark can be used for a slightly more caramelized flavor. This ingredient prevents sugar crystallization, ensuring your bars stay soft and chewy even after cooling. If you prefer to avoid corn syrup, substitute ¼ cup granulated sugar mixed with 1 tablespoon water as noted in the recipe, though the texture will be slightly different. The corn syrup also contributes to the glossy appearance that makes these bars so appealing.
- 7 cups Golden Grahams cereal: Provides the graham cracker element and satisfying crunch. This honeyed graham cereal perfectly replicates the flavor of graham crackers while maintaining its crispness better than actual crackers would when mixed with the other ingredients. Make sure the cereal is fresh for maximum crunch—stale cereal will quickly become soggy. While other graham-flavored cereals could work in a pinch, Golden Grahams' unique honey notes and sturdy texture make it the ideal choice for these bars. The amount can be adjusted up to 8 cups if you prefer a higher ratio of crunch to gooey marshmallow.
 Pin it
Step-by-Step Instructions
- Step 1: Prepare your workspace and tools
- Before beginning, gather all ingredients and measure them accurately—precision matters for the perfect texture. Line a 9×13-inch baking pan with parchment paper, leaving overhang on the long sides to create handles for easy removal later. Alternatively, generously butter the pan, making sure to coat the sides as well as the bottom. This thorough preparation prevents the sticky mixture from cementing to the pan. Gather a large saucepan (at least 4-quart capacity), a heat-resistant rubber spatula for stirring, and a second spatula lightly coated with butter or cooking spray for pressing the mixture into the pan. Having everything ready before starting is crucial, as you'll need to work quickly once the ingredients are melted.
- Step 2: Melt the base mixture with care
- Place a large saucepan over low heat—this gentle approach is essential to prevent scorching. Add 5 cups of the mini marshmallows (reserving 1 cup for later), all the milk chocolate chips, butter, and corn syrup to the pan. The order doesn't matter, as everything will melt together. Using your rubber spatula, stir the mixture continuously with gentle, sweeping motions that scrape the bottom of the pan to prevent any hot spots from burning. Watch for the marshmallows to lose their shape and the chocolate to melt completely, creating a smooth, glossy mixture—this typically takes 4-6 minutes. Patience is key; resist the temptation to increase the heat, as this can cause the chocolate to seize or the marshmallows to burn. The mixture is ready when it's completely smooth with no visible marshmallow or chocolate pieces.
- Step 3: Combine with cereal using proper technique
- Once the marshmallow-chocolate mixture is completely melted and smooth, immediately remove the saucepan from the heat. Working quickly before the mixture begins to set, add the Golden Grahams cereal to the saucepan. Using your rubber spatula, fold the cereal into the melted mixture with a gentle turning motion rather than aggressive stirring, which could crush the cereal. Continue folding until the cereal is mostly coated, though it's perfectly fine if not every piece is completely covered—this creates appealing texture variation in the finished bars. The mixture will be very sticky and increasingly difficult to stir as it cools, so maintain a steady, efficient pace without rushing.
- Step 4: Add the reserved marshmallows for texture contrast
- When the cereal is nearly incorporated, add the reserved cup of mini marshmallows to the mixture. Fold these in gently and briefly—just enough to distribute them throughout but not long enough for them to melt completely. These partially incorporated marshmallows create delightful pockets of pure marshmallow in the finished bars, mimicking the experience of a freshly made campfire s'more with areas of melted and intact marshmallow. The heat from the mixture will slightly soften these marshmallows without fully melting them, creating that perfect textural contrast. Work quickly during this step as the mixture continues to set up rapidly as it cools.
- Step 5: Transfer and shape with minimal compaction
- Immediately transfer the mixture to your prepared 9×13-inch pan. Using your buttered spatula or the back of a buttered spoon, gently press the mixture into an even layer, working from the center outward to fill the corners. Apply just enough pressure to ensure the mixture holds together without compacting it too firmly, which would make the bars dense rather than pleasantly chewy. If the mixture sticks to your spatula, rewipe it with a little butter or spray with cooking spray. Work efficiently as the mixture becomes more difficult to shape as it cools. For a perfectly even top, you can lay a piece of parchment paper over the bars and use your hands to gently press and smooth the surface.
- Step 6: Allow proper cooling time for ideal texture
- Let the bars cool completely at room temperature, which typically takes about 1 hour. Resist the temptation to refrigerate them to speed up the process, as rapid cooling can affect the texture and make them too firm. The bars need this time to set properly while maintaining their perfect chewy-yet-crisp consistency. The cooling period also allows the flavors to meld and develop, resulting in a more cohesive taste experience. If your kitchen is particularly warm, you may need slightly longer cooling time. You'll know they're ready when the surface no longer feels tacky to a gentle touch.
- Step 7: Cut with precision for clean servings
- Once completely cooled, use the parchment paper handles to lift the entire slab out of the pan and transfer to a cutting board. For the cleanest cuts, use a large, sharp knife dipped in hot water and wiped dry between cuts. This prevents the sticky mixture from clinging to the blade. Cut into squares or rectangles of your desired size—smaller pieces work well for serving a crowd, while larger bars make a more substantial treat. For the most precise squares, measure with a ruler and mark cutting lines with small indentations before slicing through. Once cut, the bars can be served immediately or stored for later.
- Step 8: Store properly to maintain freshness
- If not serving immediately, store the bars in an airtight container at room temperature, placing pieces of parchment or wax paper between layers to prevent sticking. Properly stored, they'll maintain their best texture and flavor for up to 3 days. For longer storage, wrap individual bars in plastic wrap, then place in a freezer-safe container or zip-top bag and freeze for up to 1 month. Thaw frozen bars at room temperature for about 20-30 minutes before serving. Avoid refrigerating the bars, as this can make them unpleasantly hard and cause condensation that softens the cereal's crunch when brought back to room temperature.
The Perfect Nostalgic Treat
These Golden Grahams S'mores Bars hold a special place in my heart because they bring back memories of summer evenings with my family. Growing up in the Midwest, we had a tradition of Friday night bonfires during summer months where we'd gather around the fire pit telling stories and making s'mores until well past sunset. Even as adults, my siblings and I continue this tradition when we all manage to visit home at the same time.
When I moved to a city apartment without outdoor space, I desperately missed those bonfire evenings and the ritual of making s'mores. These bars became my solution—a way to capture those summer memories regardless of where I lived. The familiar flavors transport me back to those perfect evenings under the stars, even when I'm serving them at an indoor dinner party in the middle of winter.
What makes these bars special is how they manage to deliver all the essential elements of a traditional s'more in a form that's actually easier to eat. No more marshmallows falling into the fire or chocolate that refuses to melt properly. Every bite delivers the perfect balance of flavors and textures that sometimes proves elusive when making traditional s'mores over a campfire.
A Versatile Crowd-Pleaser
One of the greatest strengths of these Golden Grahams S'mores Bars is their universal appeal. I've yet to encounter someone who doesn't light up with childlike joy upon tasting them. They bridge generational gaps beautifully—seniors appreciate the nostalgic flavors of their youth, parents love sharing a treat that reminds them of childhood camping trips, and children are simply delighted by the sweet, gooey goodness.
I've served these bars at summer backyard gatherings, winter holiday parties, school bake sales, and office potlucks. Without fail, they're the first dessert to disappear and always generate requests for the recipe. Their portable nature makes them perfect for picnics and packed lunches, while their impressive flavor belies their simple preparation.
For my nephew's outdoor graduation party, I prepared a triple batch arranged on a tiered serving platter. Despite having several other dessert options available, these bars created a gathering point as guests shared their own s'mores memories while reaching for seconds and thirds. There's something about the combination of chocolate, marshmallow, and graham flavor that sparks conversation and creates community—exactly what the best recipes should do.
 Pin it
Creative Variations to Try
While the classic recipe captures everything wonderful about traditional s'mores, I've enjoyed experimenting with variations that maintain the spirit of the original while introducing new flavor dimensions. These adaptations have become favorites for different occasions and seasons throughout the year.
For fall gatherings, I sometimes substitute cinnamon chips for half of the milk chocolate chips. The warm spice notes complement the honey flavors in the Golden Grahams perfectly and create a cozy autumnal twist that pairs beautifully with a mug of hot apple cider. This version has become my standard contribution to pumpkin carving parties and Thanksgiving potlucks.
During winter holidays, a version with dark chocolate chips and a half teaspoon of peppermint extract creates a festive flavor combination reminiscent of hot cocoa with candy canes. The cooling mint against the rich chocolate offers a sophisticated flavor profile that adults particularly appreciate, while still maintaining the fun, nostalgic quality that makes these bars so beloved.
For a more decadent version perfect for special celebrations, try drizzling the cooled bars with additional melted chocolate or adding a layer of peanut butter chips to the melting mixture. The peanut butter addition creates a flavor reminiscent of popular candy cups while maintaining the distinctive s'mores character.
I learned about the importance of temperature control the hard way during a chaotic holiday baking session. Attempting to multitask, I turned the heat higher than recommended to speed up the melting process while I worked on another recipe. Within minutes, I smelled the unmistakable aroma of burning marshmallows and discovered a lumpy, separated mess in my saucepan. The chocolate had seized from the excessive heat, creating grainy clumps rather than the smooth, glossy mixture needed. Not only did I waste ingredients, but I also had to scrub burnt marshmallow from my favorite saucepan—a time-consuming consequence of my impatience. This experience taught me that properly executed simplicity always trumps rushed complexity.
After making these Golden Grahams S'mores Bars countless times over the years, I'm still charmed by their ability to evoke such joy and nostalgia with so little effort. There's something deeply satisfying about creating a treat that connects people to happy memories while making new ones. Whether I'm serving them to first-time guests or longtime friends who request them by name, these bars consistently create moments of shared pleasure that transcend their simple ingredients. In our complex world of artisanal everything, there's something wonderfully grounding about a dessert that reminds us that sometimes the most memorable flavors come from the simplest combinations—and that childhood favorites still have the power to delight us at any age.
Frequently Asked Questions
- → Can I use different cereal instead of Golden Grahams?
- Yes! Regular graham crackers (crushed) work well, or try Cinnamon Toast Crunch for a cinnamon twist. Any crunchy, graham-flavored cereal will work great.
- → Why are my bars too hard?
- This usually happens if the mixture gets overheated. Be sure to use low heat when melting ingredients and remove from heat immediately once melted.
- → Can I add other mix-ins to these bars?
- Definitely! Try adding chopped nuts, peanut butter chips, or even crushed Oreos for different flavor variations. Just fold them in with the cereal.
- → How long do these bars stay fresh?
- Stored in an airtight container at room temperature, these bars stay fresh for up to 3 days. Don't refrigerate as they'll become too hard.
- → Can I speed up the setting time?
- For faster setting, you can place the pan in the refrigerator for 15-20 minutes. Just don't forget to remove them before they get too firm!