
 Pin it
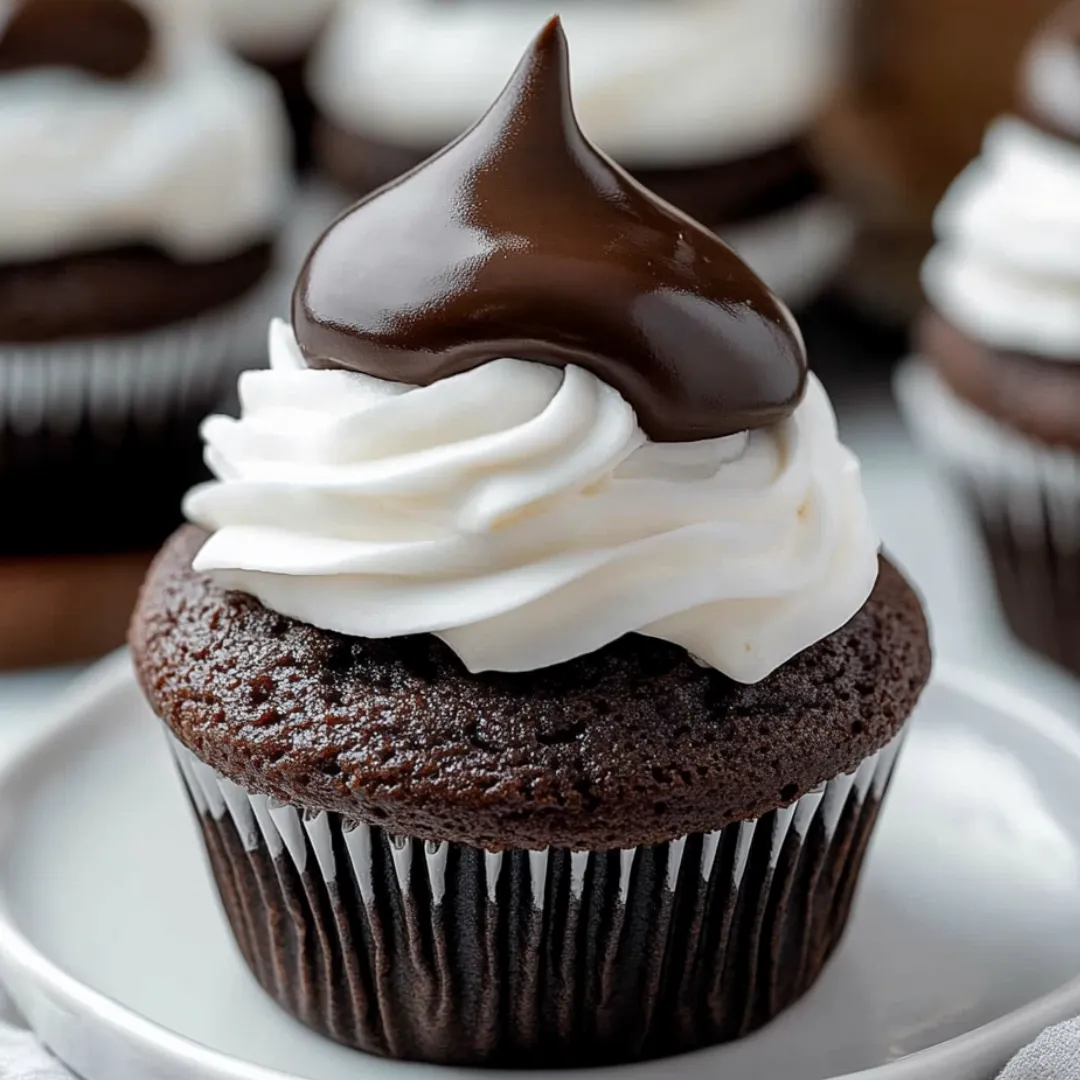
These show-stopping hi hat cupcakes combine moist chocolate cake with a towering swirl of fluffy marshmallow frosting, all encased in a thin, crackable chocolate shell. The dramatic presentation creates an impressive dessert that's as fun to eat as it is beautiful to behold. The textural contrast between the tender cake, pillowy frosting, and snappy chocolate coating offers a delightful sensory experience with each bite – making these treats perfect for special occasions or whenever you want to bring a touch of bakery-quality elegance to your home kitchen.
I first attempted these cupcakes for my daughter's birthday after she spotted them at a bakery and fell in love with their dramatic appearance. My initial try was a complete disaster—the frosting collapsed and the chocolate seized! After some research and practice, I perfected the technique and now these are our family's most requested celebration dessert. The delighted expressions when I bring them out make the extra effort completely worthwhile, and I've discovered that working with the marshmallow frosting is actually quite therapeutic once you get the hang of it.
Key Ingredients
- Quality Cocoa Powder: Forms the foundation of the chocolate cupcake flavor. Dutch-processed cocoa provides a smoother, deeper chocolate taste than natural cocoa, creating that sought-after rich flavor without bitterness. The alkaline processing in Dutch cocoa also helps create a darker, more tender crumb.
- Espresso Powder: Though it won't make the cupcakes taste like coffee, this secret ingredient significantly intensifies the chocolate flavor. It works by enhancing the natural flavor compounds in cocoa, giving the cupcake a more complex, rounded chocolate profile.
- Buttermilk: Creates a more tender, moist crumb through its acidity, which breaks down tough gluten strands. This ingredient is crucial for achieving that perfect soft texture that contrasts beautifully with the frosting and shell.
- Corn Syrup: Essential for creating stable marshmallow frosting that holds its dramatic height. The corn syrup prevents sugar crystallization, helping maintain that smooth, fluffy texture even when refrigerated.
 Pin it
Step-by-Step Instructions
- Prepare the Baking Environment:
- Preheat your oven to 350°F (175°C) and line a standard 12-cup muffin tin with paper liners. The liners not only prevent sticking but also help maintain the cupcakes' shape during and after baking. Position your oven rack in the center for even heat distribution.
- Combine Dry Ingredients:
- In a large mixing bowl, whisk together 1½ cups all-purpose flour, 1 cup granulated sugar, ½ cup high-quality cocoa powder, 1 teaspoon espresso powder, 1 teaspoon baking powder, and ½ teaspoon baking soda until completely integrated. This thorough mixing ensures even distribution of leavening agents and prevents bitter pockets of baking powder or soda in the finished cupcakes.
- Mix Wet Ingredients:
- In a separate bowl, whisk ¾ cup buttermilk, ½ cup vegetable oil, 2 large eggs, and 2 teaspoons vanilla extract until smooth and fully combined. The oil, rather than butter, contributes to the cupcakes' moisture retention and soft texture even after refrigeration.
- Create the Batter:
- Pour the wet ingredients into the dry ingredients and gently stir just until combined and no dry pockets remain. Overmixing activates gluten development, which would result in tough, dense cupcakes instead of the tender crumb we're aiming for.
- Bake to Perfection:
- Divide the batter evenly among the prepared cupcake liners, filling each about two-thirds full. Bake in the preheated oven for 16-18 minutes, until a toothpick inserted into the center comes out clean or with just a few moist crumbs. Allow the cupcakes to cool completely on a wire rack before frosting.
- Prepare Marshmallow Frosting:
- In a medium saucepan, combine 1½ cups granulated sugar, ⅔ cup light corn syrup, and ⅓ cup water. Heat over medium, whisking occasionally, until the mixture comes to a boil. Continue cooking until it reaches exactly 240°F (115°C) on a candy thermometer—this specific temperature creates the perfect marshmallow consistency.
- Create Meringue Base:
- While the sugar mixture heats, beat 4 egg whites in a stand mixer until frothy. Add ½ teaspoon cream of tartar and continue beating until soft peaks form. The cream of tartar stabilizes the egg whites, helping them maintain their volume during and after mixing.
- Combine for Fluffy Perfection:
- With the mixer running on medium speed, carefully pour the hot sugar mixture in a slow, steady stream down the side of the bowl into the whipped egg whites. Avoid pouring directly onto the beaters to prevent splattering and burns. Increase speed to high and continue beating for 5-7 minutes until the frosting is thick, glossy, white, and cool to the touch.
- Frost with Height:
- Transfer the marshmallow frosting to a piping bag fitted with a large round tip. Pipe a generous swirl onto each cooled cupcake, creating a tall, conical shape. Start from the outside edge and work your way up, maintaining even pressure for a smooth finish. The frosting should stand at least 2 inches tall for that classic hi hat appearance.
- Chill for Stability:
- Refrigerate the frosted cupcakes for at least 30 minutes to set the marshmallow frosting. This crucial step ensures the frosting holds its shape during the chocolate dipping process.
- Create Chocolate Shell:
- In a microwave-safe bowl deep enough for dipping, combine 2 cups chocolate chips (milk or semi-sweet) with 3 tablespoons coconut oil. Microwave in 30-second intervals, stirring between each, until completely smooth. The coconut oil thins the chocolate to the perfect consistency for dipping and helps create a shell that breaks cleanly when bitten.
- Execute the Dip:
- Working quickly but carefully, invert each chilled cupcake and dip the frosting into the chocolate mixture. Allow excess chocolate to drip off before turning right-side up. The chocolate will begin setting almost immediately upon contact with the cold frosting.
Mastering the Marshmallow Frosting
Creating the perfect marshmallow frosting took me several attempts to master. My first try was a sticky disaster because I didn't use a candy thermometer and guessed at the sugar temperature. I've since learned that precision is key—too low a temperature and the frosting won't set properly; too high and you'll get something closer to hard candy than fluffy marshmallow.
I also discovered that the cream of tartar is non-negotiable. Without it, the frosting tends to deflate after whipping, losing that impressive height. Another game-changer was learning to pour the hot sugar mixture down the side of the bowl rather than directly into the egg whites—this gradual incorporation prevents cooking the eggs and results in that perfectly fluffy texture.
 Pin it
Chocolate Shell Secrets
The chocolate coating process intimidated me initially, but I've refined it through trial and error. The biggest revelation was discovering that the ratio of chocolate to coconut oil is crucial. Too little oil makes the coating too thick and difficult to bite through, while too much prevents it from setting properly.
Temperature management is another key factor. The frosting must be thoroughly chilled before dipping—room temperature frosting will melt into the chocolate, creating a sticky mess. Conversely, the chocolate needs to be warm enough to flow smoothly but not so hot that it melts the frosting on contact. I've found that waiting until the chocolate cools slightly after melting, but before it begins to thicken, creates the perfect dipping consistency.
I learned about the importance of quality ingredients when making these for a school bake sale. Trying to economize, I used a store-brand cocoa powder and chocolate chips. The cupcakes lacked depth of flavor, and the chocolate coating had a waxy texture that didn't snap properly when bitten. When I remade them with premium Dutch-processed cocoa and couverture chocolate chips, the difference was remarkable. The investment in quality ingredients elevates these cupcakes from good to exceptional, particularly since the chocolate flavor is central to the experience.
The technique that completely transformed these cupcakes for me was understanding how to properly temper the chocolate coating. In my early attempts, the coating would bloom (develop a whitish haze) after setting or wouldn't snap cleanly when bitten. I discovered that adding coconut oil not only helps thin the chocolate to the proper consistency but also creates a more forgiving coating that sets with a beautiful shine and perfect texture without requiring traditional tempering methods. This simple addition made these bakery-worthy cupcakes achievable for home bakers without specialized equipment or techniques.
Frequently Asked Questions
- → Why does my frosting need to reach 240°F?
- This temperature (soft-ball stage) ensures the sugar syrup will properly set when mixed with the egg whites. It creates a stable marshmallow that holds its shape when piped and dipped in chocolate.
- → Can I make these cupcakes ahead of time?
- Yes, but it's best to complete them within 24 hours of serving. The cupcakes can be baked a day ahead, and the assembled hi hats will keep in the refrigerator for up to 2 days.
- → Why do the cupcakes need to be chilled before dipping?
- Chilling firms up the marshmallow frosting so it holds its shape when dipped in the warm chocolate coating. If you skip this step, the frosting might collapse or melt.
- → Can I use store-bought marshmallow fluff instead?
- Store-bought marshmallow fluff is too soft for this application. The homemade version is stiffer and can hold its shape when piped high and dipped in chocolate.
- → Why add coconut oil or shortening to the chocolate coating?
- The fat thins the chocolate, making it easier to dip the cupcakes. It also creates a smoother coating that sets with a nice sheen and snap, but remains easier to bite through than pure chocolate.