 Pin it
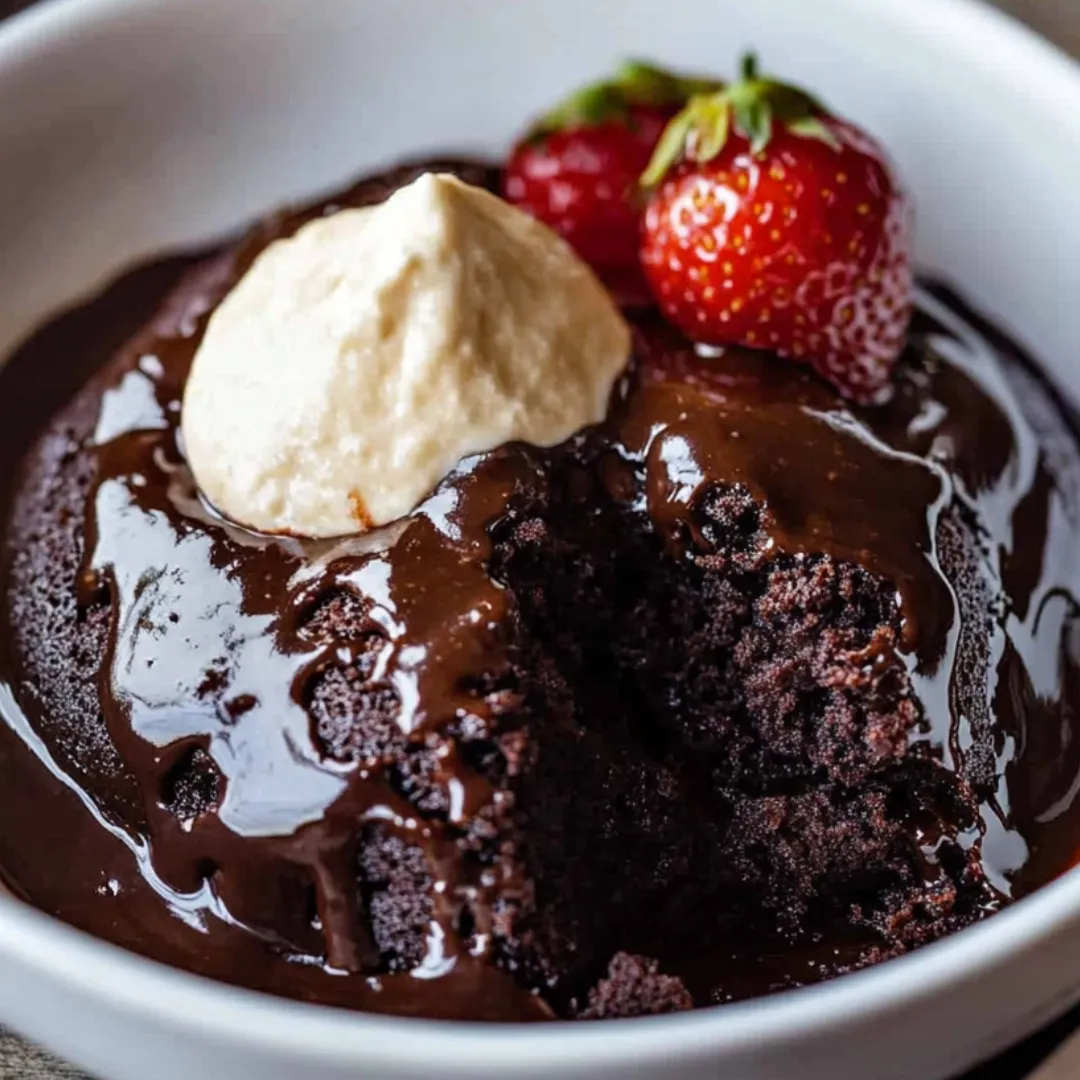
This magical hot fudge pudding cake creates its own rich sauce while baking, forming two distinct layers – a tender chocolate cake floating atop a pool of warm, gooey fudge sauce. The contrast between the cakey top and the molten chocolate underneath delivers an indulgent dessert experience without complicated techniques or equipment. With just one batter and a simple pour-over mixture, this self-saucing dessert transforms in the oven into a comforting chocolate treat that's equally perfect for weeknight cravings or dinner party finales.
The first time I made this cake, my kitchen filled with the most incredible chocolate aroma that drew my usually disinterested teenager downstairs to investigate. When I served it warm with vanilla ice cream melting into the pudding layer, even my husband – who typically passes on dessert – asked for seconds. What I love most is how the simple, humble ingredients transform into something that looks and tastes like it required much more effort than it actually did.
Key Ingredients
- Unsweetened Cocoa Powder: Forms the foundation of the deep chocolate flavor in both the cake and pudding layers. Dutch-processed cocoa creates a richer, more intense chocolate experience, while natural cocoa adds subtle fruity notes to complement the sweetness.
- Brown Sugar: The molasses content helps create that perfect sticky pudding texture under the cake layer. The caramel notes enhance the chocolate complexity with minimal effort.
- Instant Espresso Powder: Though optional, this secret ingredient amplifies the chocolate flavor without adding coffee taste. The small amount works with chocolate's natural flavor compounds to create depth and richness you can't achieve with cocoa alone.
- Butter: Contributes richness and helps create that perfect fudge sauce consistency. The fat content ensures a luxurious mouthfeel in the finished pudding.

Step-by-Step Instructions
- Prepare Your Baking Dish:
- Preheat your oven to 350°F and lightly grease an 8x8 inch square baking dish. The square shape ensures even baking and perfect serving portions. A ceramic or glass baking dish works best as it conducts heat more gradually than metal, allowing the layers to form properly without overbaking the cake.
- Create the Cake Base:
- In a medium bowl, whisk together flour, granulated sugar, half the cocoa powder, baking soda, and salt. This thorough mixing ensures the leavening agents and dry ingredients are evenly distributed for consistent texture. Make a well in the center of these dry ingredients.
- Blend the Wet Ingredients:
- Pour milk, melted butter, vegetable oil, and vanilla extract into the well you created in the dry ingredients. If using, add the teaspoon of espresso powder at this stage. Stir until just combined – a few small lumps are perfectly fine and prevent overmixing, which could make the cake tough rather than tender.
- Transfer to Baking Dish:
- Spread the batter evenly in your prepared dish. It will seem relatively thin compared to traditional cake batters, but this is exactly what you want for the perfect ratio of cake to pudding. Smooth the top gently with a spatula for even baking.
- Prepare the Magic Topping:
- In a separate bowl, whisk together the brown sugar and remaining cocoa powder. Sprinkle this mixture evenly over the cake batter, covering the entire surface. This creates the foundation for the pudding layer that will develop beneath the cake.
- Add the Transformation Liquid:
- Without stirring, gently pour hot water over the entire surface. The water should be very hot but not boiling – about the temperature of hot tea. This temperature activates the process that creates distinct layers while baking. It will look very soupy at this stage, which is exactly right.
- Bake to Perfection:
- Carefully transfer the dish to the preheated oven and bake for 35-40 minutes until the top appears set but still slightly soft in the center. A toothpick inserted into just the cake layer (not all the way to the bottom) should come out with moist crumbs but not raw batter.
The Magic of Self-Saucing Cakes
The science behind this cake fascinated me the first time I made it. During baking, the cake batter rises to the top while the brown sugar, cocoa, and water sink to create a rich pudding sauce underneath. It's like getting two distinct desserts in one dish with minimal effort.
My mother explained that this type of dessert was popular during her childhood because it was economical – using simple pantry staples to create something that felt special without expensive ingredients. Her version always had a thinner cake layer and abundant sauce, which I've recreated here. Modern recipes often have thicker cake proportions, but I find the original ratio of mostly pudding with just enough cake to be perfect.

Serving Suggestions
This pudding cake reaches peak deliciousness about 30 minutes after coming out of the oven. At this point, the cake has cooled just enough to hold its structure while the pudding layer remains warm and pourable but not scalding.
When I serve this at dinner parties, I time the baking so it comes out of the oven as we're finishing the main course. By the time we're ready for dessert, it's at the perfect temperature. The contrast of the warm cake with cold vanilla ice cream creates a temperature and texture experience that elevates this humble dessert to something truly special.
For family dessert night, I like to set out little bowls of optional toppings – toasted chopped nuts, fresh berries, or a splash of heavy cream – letting everyone customize their portion. The pudding cake serves as a wonderful canvas for these additions while remaining delicious on its own.
I discovered the perfect timing for this cake through several happy accidents. Once, when hosting a dinner party, I forgot to lower the temperature for my temperamental old oven. The cake baked faster than expected, but I noticed that letting it rest longer before serving created the ideal pudding consistency. Another time, I was called away unexpectedly just as I finished mixing, so I refrigerated the unbaked dish for a few hours before baking. The extra hydration time for the flour resulted in an even more tender cake layer.
The technique that revolutionized this recipe for me was learning the proper way to pour the hot water. In my early attempts, I'd pour directly onto the cake batter, creating holes in the surface. My mother taught me to pour over the back of a large spoon held just above the surface, which disperses the water gently and evenly. This small adjustment made a tremendous difference in the final appearance and texture of the cake layer.
Frequently Asked Questions
- Why did my cake not form two distinct layers?
- The key is to pour the hot pudding mixture gently over the cake batter and not mix them together. Also, make sure your oven is fully preheated and the baking dish isn't too large, which can cause the layers to thin out.
- Can I make this ahead of time?
- This dessert is best served warm, about 30 minutes after baking. You can reheat individual portions in the microwave for 20-30 seconds to restore the warm pudding texture if made earlier in the day.
- Is the espresso powder necessary?
- No, it's optional. The espresso powder enhances the chocolate flavor without adding coffee taste, but the cake will still be delicious without it.
- What can I serve with this pudding cake?
- Vanilla ice cream is the classic pairing, but whipped cream, a dusting of powdered sugar, or fresh berries also work beautifully. The warm cake with cold ice cream creates a delicious temperature contrast.
- Can I substitute the dairy ingredients?
- Yes, you can use plant-based milk and butter substitutes to make this dairy-free. The texture may be slightly different but the self-saucing effect will still work.