
 Pin it
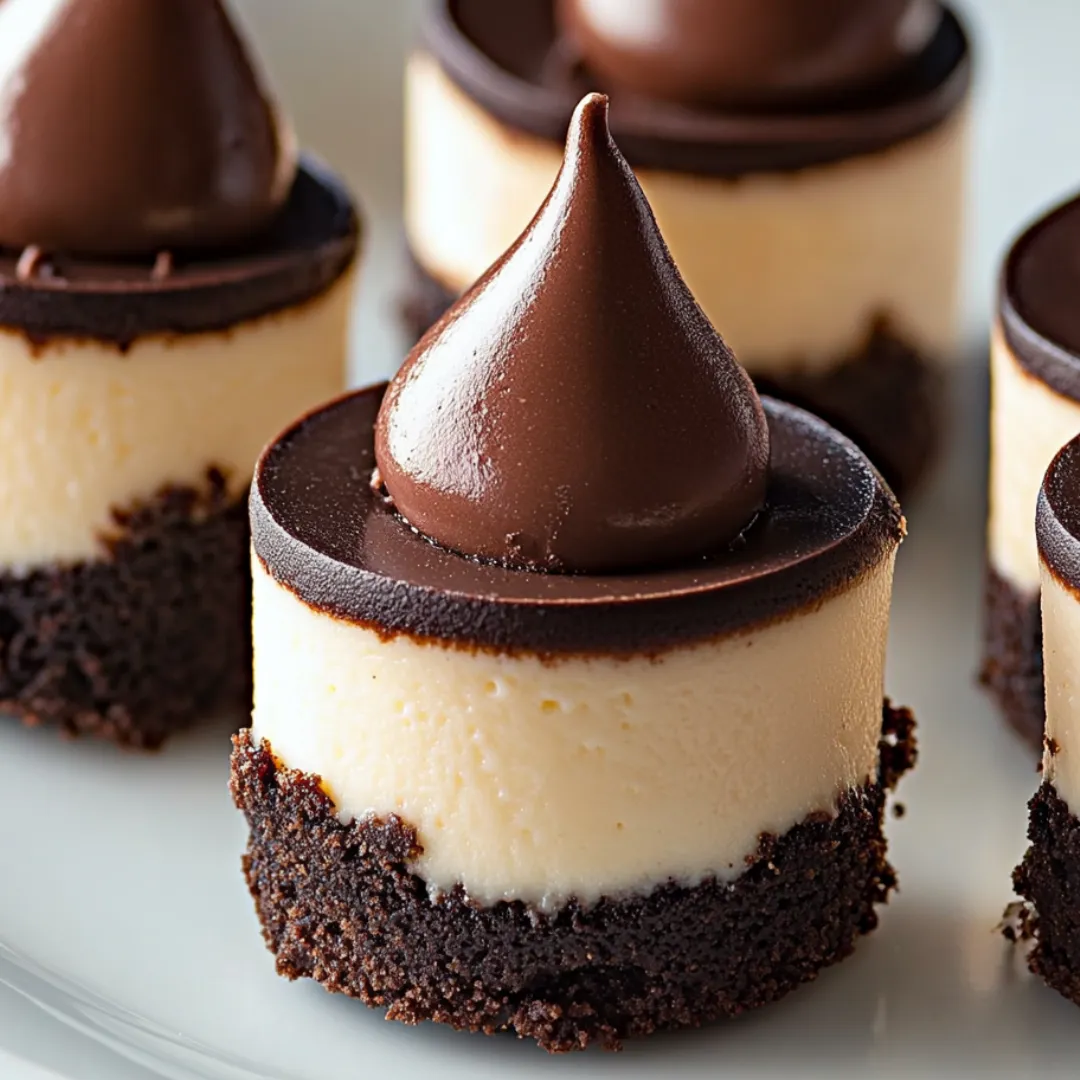
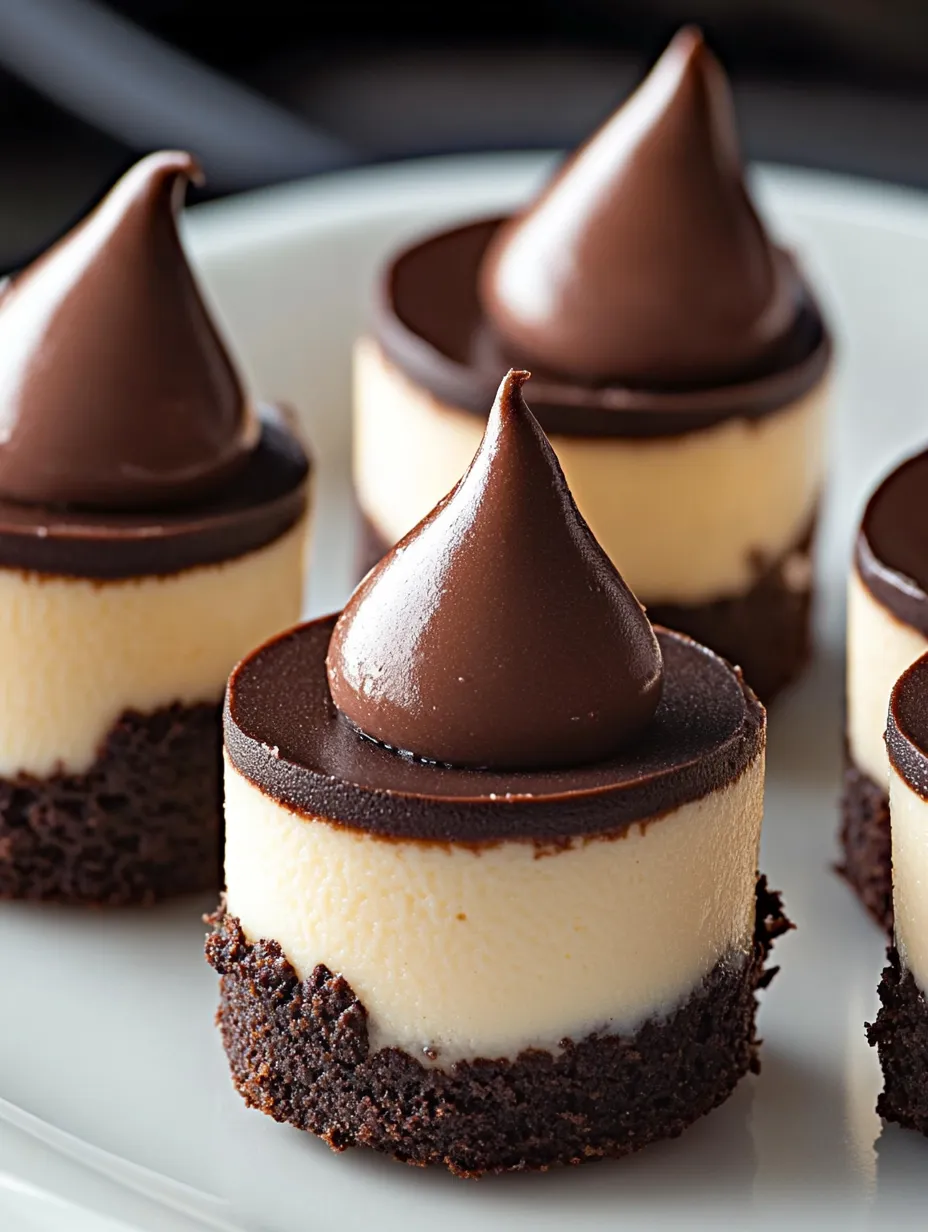
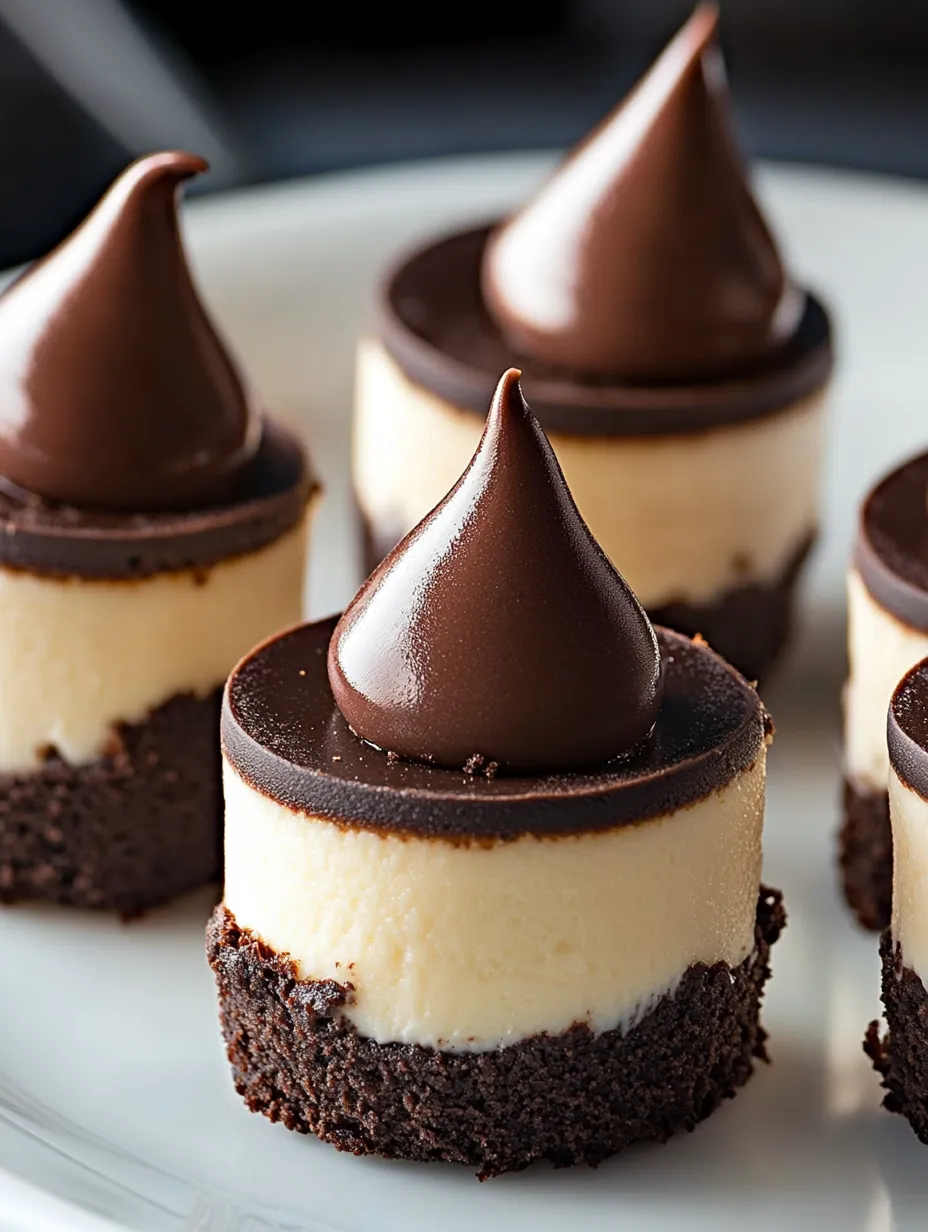
These Mini Chocolate Cheesecake Bites combine the best of two beloved desserts: rich, creamy cheesecake and decadent chocolate. Each bite-sized treat features a buttery graham cracker crust that provides the perfect crunchy foundation for the velvety chocolate cheesecake filling. Crowned with a glossy chocolate ganache, these miniature desserts deliver maximum flavor in a perfectly portioned package. Elegant enough for special occasions yet simple enough for everyday indulgences, these cheesecake bites satisfy chocolate cravings while offering the classic tang of cheesecake in every bite.
I first made these mini cheesecakes for my sister's baby shower, and they disappeared faster than any other dessert on the table! What surprised me most was how my father, who typically avoids rich desserts, ate three in quick succession. The secret is the balance between the chocolate and the slight tanginess of the cream cheese – it keeps the sweetness in check while still delivering deep chocolate satisfaction. Now these little treats are requested at every family gathering.
Ingredients You'll Need
- 1½ cups Graham Cracker Crumbs: Creates a sturdy, flavorful base; about 10-12 full sheets of graham crackers
- ¼ cup Granulated Sugar: Adds sweetness to the crust while helping it hold together
- ¼ teaspoon Cinnamon (optional): Brings a subtle warmth that enhances the chocolate flavor
- 6 tablespoons Unsalted Butter, melted: Binds the crumbs together and adds rich flavor to the crust
- 16 ounces Cream Cheese, softened: The foundation of the cheesecake; must be at room temperature for a smooth filling
- ⅔ cup Granulated Sugar: Sweetens the filling without overpowering the chocolate flavor
- 2 teaspoons Vanilla Extract: Enhances the chocolate while adding depth to the overall flavor
- ¼ teaspoon Salt: Balances the sweetness and intensifies the chocolate flavor
- ¼ cup Sour Cream: Adds tanginess and creates a smoother, creamier texture
- 2 Large Eggs: Provides structure while keeping the filling rich and custardy
- 1 cup Semi-Sweet Chocolate Chips: Brings intense chocolate flavor to the filling
- ¼ cup Heavy Cream: Helps melt the chocolate for the filling and creates a silky texture
- For Ganache Topping: ½ cup Heavy Cream and ½ cup Semi-Sweet Chocolate Chips
 Pin it
Step-by-Step Cooking Instructions
- Create Your Perfect Crust:
- Begin by preheating your oven to 325°F (163°C) and lining a standard muffin tin with paper liners. In a medium bowl, combine 1½ cups graham cracker crumbs with ¼ cup granulated sugar and ¼ teaspoon cinnamon if using. Stir to distribute the dry ingredients evenly. Pour in 6 tablespoons of melted butter and mix until the crumbs are uniformly moistened and resemble wet sand. The mixture should hold together when pressed between your fingers. Spoon approximately 1½ tablespoons of the crust mixture into each muffin cup. Using the bottom of a shot glass or measuring cup, press the crumbs firmly into an even layer. This creates a compact base that won't crumble when serving. Bake the crusts for 8 minutes until they're lightly golden around the edges, then remove from the oven and allow them to cool while preparing the filling.
- Melt Your Chocolate Perfectly:
- Place 1 cup of semi-sweet chocolate chips and ¼ cup heavy cream in a microwave-safe bowl. Heat in 30-second intervals at 50% power, stirring between each interval until the chocolate is completely melted and smooth. This gradual melting prevents the chocolate from seizing or burning. Allow the melted chocolate to cool slightly while preparing the rest of the filling – it should be fluid but not hot to the touch when incorporated into the cheesecake mixture. If you prefer not to use a microwave, you can melt the chocolate using a double boiler method by placing the bowl over a pan of simmering water, ensuring the bottom of the bowl doesn't touch the water.
- Create Your Silky Cheesecake Filling:
- In a large mixing bowl, beat 16 ounces of softened cream cheese with an electric mixer on medium speed until completely smooth and free of lumps, about 2 minutes. Scrape down the sides of the bowl frequently to ensure no cream cheese is missed. Add ⅔ cup granulated sugar, 2 teaspoons vanilla extract, and ¼ teaspoon salt, then beat for another 2 minutes until the mixture becomes light and fluffy. Add ¼ cup sour cream and mix until incorporated. Reduce the mixer speed to low and add the eggs one at a time, beating just until each is incorporated. Over-beating after adding eggs can introduce too much air, which can cause cracks in the cheesecakes. Finally, pour in the cooled melted chocolate mixture and beat on low speed until fully combined and no streaks remain, creating a uniform chocolate batter.
- Fill and Bake With Precision:
- Using a cookie scoop or spoon, divide the cheesecake filling evenly among the prepared crusts, filling each cup nearly to the top. Tap the muffin tin gently on the counter a few times to release any trapped air bubbles, which helps prevent cracks during baking. Place the muffin tin in the center of your preheated oven and bake for 18-22 minutes. The cheesecakes are done when the edges appear set but the centers still have a slight jiggle when the pan is gently shaken. Avoid opening the oven door during baking as temperature fluctuations can cause the cheesecakes to crack or sink. Once baked, turn off the oven, crack the door open, and let the cheesecakes cool in the oven for about 10 minutes. This gradual cooling helps prevent the tops from cracking.
- Cool and Chill For Perfect Texture:
- After the initial cooling in the oven, remove the muffin tin and allow the cheesecakes to continue cooling at room temperature for 30 minutes. The cheesecakes will continue to set during this time. Once they've cooled to room temperature, transfer the muffin tin to the refrigerator and chill the cheesecakes for at least 3 hours or preferably overnight. This chilling time is crucial for developing the proper cheesecake texture and flavor. The longer they chill, the more the flavors will meld together and intensify. A properly chilled cheesecake will have a firm yet creamy texture that melts in your mouth.
- Create a Glossy Ganache Topping:
- About 30 minutes before serving, prepare the chocolate ganache topping. Pour ½ cup heavy cream into a small saucepan and heat over medium-low heat until it begins to simmer around the edges – do not let it come to a full boil. Remove from heat and immediately add ½ cup of semi-sweet chocolate chips to the hot cream. Let stand for 2 minutes without stirring to allow the chocolate to begin melting. After 2 minutes, whisk slowly from the center outward until the mixture becomes smooth and glossy. Allow the ganache to cool for about 5-10 minutes, stirring occasionally. It should thicken slightly but remain pourable. The perfect ganache will coat the back of a spoon and slowly drip off.
- Finish With a Professional Touch:
- Once the ganache has cooled slightly, remove the chilled cheesecakes from the refrigerator. If using paper liners, carefully peel them off now for a more elegant presentation. Spoon approximately 1-2 teaspoons of ganache onto the center of each cheesecake. Use the back of the spoon to gently spread the ganache to the edges, creating a smooth, glossy top. Work with one cheesecake at a time, as the ganache will begin to set quickly on the cold cheesecakes. Return the topped cheesecakes to the refrigerator for 15-20 minutes to allow the ganache to set completely before serving. For a beautiful finishing touch, garnish with a light dusting of cocoa powder, a raspberry, or a small mint leaf just before serving.
I learned about the importance of room temperature ingredients the hard way. The first time I made these, I was in a hurry and used cream cheese straight from the refrigerator. Despite beating it for what felt like forever, I couldn't get rid of the tiny lumps throughout my filling. Now I always leave my cream cheese out for at least two hours before starting, and I've never had lumpy cheesecake since. When my neighbor complained that her cheesecakes always had lumps, I shared this simple tip, and she was amazed at how much smoother her next batch turned out.
Storing and Freezing Tips
These mini cheesecakes keep beautifully in the refrigerator for up to five days when stored in an airtight container. For longer storage, freeze them without the ganache topping. Place the cheesecakes on a baking sheet until frozen solid, then wrap each one individually in plastic wrap and store in a freezer bag for up to three months. Thaw overnight in the refrigerator and add the fresh ganache topping before serving. This make-ahead capability makes them perfect for planning ahead for special occasions.
Creative Variations
While the classic chocolate version is irresistible, this versatile recipe welcomes many variations. For a mint chocolate version, add ¼ teaspoon of peppermint extract to the filling and sprinkle the ganache with crushed mint candies. Create a mocha flavor by dissolving 1 tablespoon of instant espresso powder in the heavy cream before melting the chocolate for the filling. For a festive touch, add 2-3 tablespoons of colorful sprinkles to the filling for a birthday cake-inspired treat, or swirl in 2 tablespoons of raspberry jam before baking for a chocolate-raspberry combination.
Perfect Pairings
These rich chocolate cheesecake bites pair beautifully with coffee or tea, creating a perfect balance to the dessert's sweetness. For an elegant dessert course, serve with a small glass of ruby port or a dessert wine like Late Harvest Zinfandel. Fresh berries served alongside provide a bright, acidic contrast that cuts through the richness. During the holidays, a dollop of peppermint whipped cream transforms these into a seasonal specialty that complements traditional holiday flavors.
 Pin it
Last-Minute Adjustments
If your ganache becomes too thick to spread smoothly, warm it gently over a double boiler or microwave in 5-second bursts, stirring between each until it reaches the desired consistency. If it's too thin, refrigerate for 5-10 minutes, stirring occasionally until it thickens slightly. For cheesecakes that sink in the middle after baking, embrace the dip as a perfect well for extra ganache or fresh berries. If you notice the cheesecakes browning too quickly during baking, place a sheet of aluminum foil loosely over the top to shield them from direct heat.
I discovered a brilliant hack for these cheesecakes completely by accident. One day I was out of graham crackers but had a package of chocolate sandwich cookies in the pantry. I used the cookies (filling and all) to make the crust, and the result was incredible – even more chocolatey and with a wonderful contrast to the filling. My family now requests this version specifically for special occasions! Sometimes the best cooking discoveries come from necessity and improvisation.
Frequently Asked Questions
- → Can I make these ahead of time?
- Yes, these mini cheesecakes are perfect for making ahead. They can be stored in the refrigerator for up to 3 days or frozen for up to 2 months.
- → How do I know when the cheesecakes are done baking?
- The centers should be mostly set but still have a slight jiggle. They'll continue to set as they cool. Avoid overbaking, which can cause cracks.
- → Can I use a regular-sized muffin tin?
- Yes, but you'll need to adjust the baking time to about 22-25 minutes and will get fewer cheesecakes, around 12 instead of 24.
- → How do I make these gluten-free?
- Use gluten-free graham crackers for the crust. Make sure your chocolate chips and other ingredients are certified gluten-free as well.
- → Why did my cheesecakes crack?
- Cheesecakes typically crack from overbaking or cooling too quickly. Try baking for a shorter time or letting them cool in the oven with the door slightly open.