
 Pin it
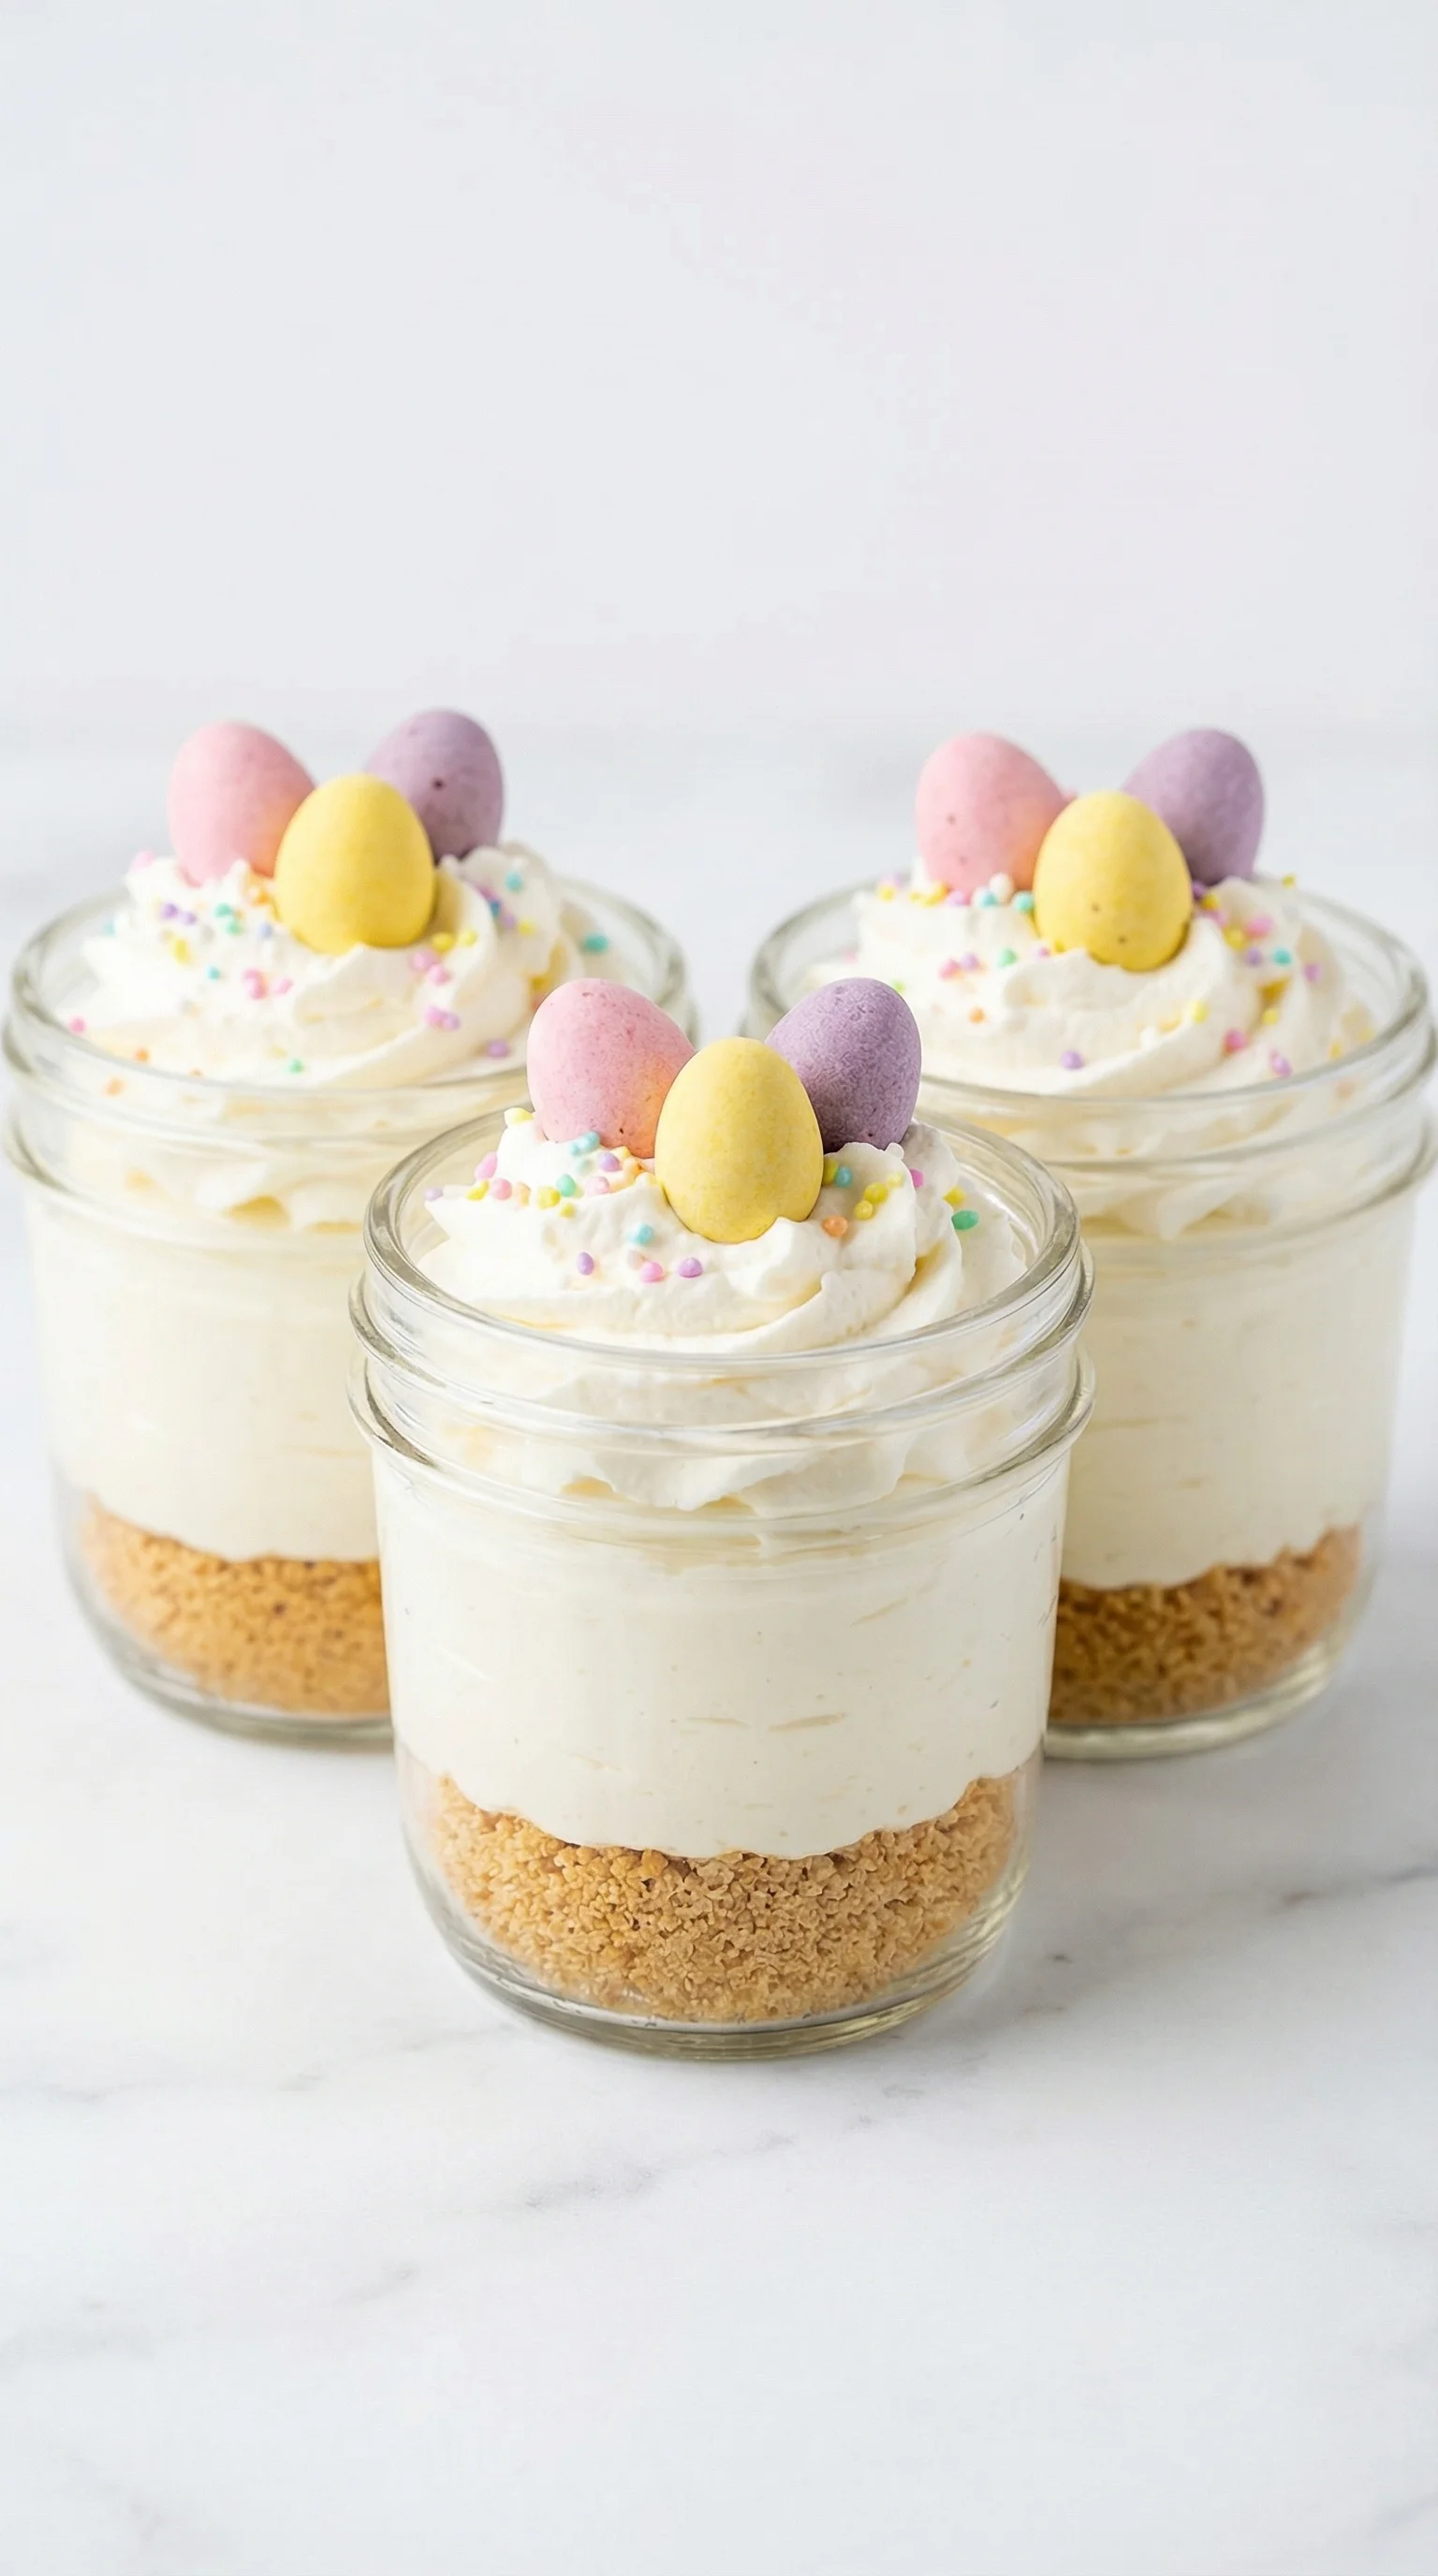
These mini Easter cheesecake jars are a charming no-bake treat perfect for spring gatherings. The creamy layers combined with a buttery crumb base make for an easy yet impressive dessert that brightens up any table. Lightly tinted pastel colors and festive toppings add a playful touch that kids and adults alike will adore.
I first made these little jars for a family brunch and their cute presentation stole the show. Now they’re my go-to when I want a fuss-free but festive dessert.
Ingredients
- Graham cracker crumbs or digestive biscuits: these form a buttery, crunchy base that holds the cheesecake together. Look for fresh and crispy crackers for the best texture
- Unsalted butter: melted to bind the crumbs and create richness. Use a good quality butter for flavor
- Sugar: adds just the right hint of sweetness to the crust
- Salt: balances the sweetness and enhances the overall taste
- Cream cheese: softened for easy mixing and that classic creamy cheesecake flavor. Full fat gives the best texture and taste
- Powdered sugar: blends smoothly without graininess and sweetens the filling
- Vanilla extract: adds warmth and depth to the cheesecake
- Lemon juice: brightens the flavor and cuts through the richness
- Heavy whipping cream: chilled to whip up fluffy peaks that lighten the texture
- Gel food coloring: optional for pastel shades that make these jars festive and fun
- Lemon zest or almond extract: optional flavor boosters if you want to experiment
- Mini chocolate eggs, jelly beans, pastel sprinkles, and dyed shredded coconut: for charming decorations
Step-by-Step Instructions
- Make the Crumb Base:
- Combine graham cracker crumbs, sugar, salt, and melted butter in a bowl. Stir until the mixture looks like wet sand. The texture should hold together when pressed which signals it’s ready to be packed.
- Pack the Crust:
- Spoon 2 to 3 tablespoons of the crumb mixture into each jar. Use the back of a spoon to press firmly so the crust forms a solid base. This is important for supporting the filling later. Set jars aside.
- Whip the Cream:
- In a cold mixing bowl whip the heavy cream until it holds medium stiff peaks. This means when you lift the beaters the cream stands up but the tips curl over slightly. Chill the whipped cream while you prepare the rest.
- Beat the Cream Cheese:
- In another bowl beat the softened cream cheese with powdered sugar, vanilla extract, and lemon juice until smooth and fluffy. This usually takes about 1 to 2 minutes with a hand mixer. Make sure no lumps remain for a silky texture.
- Fold it Together:
- Gently fold the whipped cream into the cream cheese mixture in two additions. Use a spatula to fold carefully until no streaks remain. Avoid over mixing as you want to keep the lightness from the whipped cream.
- Add Color Optional:
- Divide the filling into separate bowls if using colors. Add a few drops of gel food coloring to each and mix lightly to get pastel shades. Keep it subtle for a pretty spring palette.
- Fill the Jars:
- Use a piping bag or spoon to fill each jar with the cheesecake mixture on top of the crust. Leave some space for toppings so they don’t get buried.
- Chill:
- Cover the jars and refrigerate for at least two hours or up to 24 hours to let the cheesecake set fully. Longer chilling will help develop the texture and flavors.
- Decorate:
- Just before serving sprinkle on the dyed shredded coconut for grass effect, add sprinkles, and nestle mini chocolate eggs or jelly beans on top. Adding toppings last keeps them fresh and crisp.
- Serve Cold:
- Enjoy these jars chilled straight from the fridge with small spoons for a perfect creamy crunchy bite.
My favorite part is the crumb base which adds a buttery crunch that contrasts with the silky filling. One Easter we made these with my nieces who loved pressing the crumbs into the jars and choosing their toppings. It turned into a fun family activity that brought even more joy to the dessert.
Storage Tips
Store any leftover cheesecake jars covered in the refrigerator and consume within three days for the best freshness. If you want to make them ahead keep the crumb base and filling separate until ready to assemble and chill. Toppings like sprinkles and mini eggs should always be added just before serving to avoid moisture making them soggy.
Ingredient Substitutions
You can swap graham cracker crumbs for crushed digestive biscuits or even vanilla wafers for a slightly different crust flavor. Butter can be replaced by coconut oil for a dairy-free option but the texture will change slightly. Cream cheese can be substituted with mascarpone for a richer taste or an equal amount of ricotta blended smooth. Heavy cream may be replaced with coconut cream for a dairy-free version but whipping results vary.
Serving Suggestions
Serve these mini cheesecake jars as a light dessert after spring lunches or Easter brunches. They also work well for birthday parties or baby showers with their cheerful colors. Pair them with a cup of green tea or a mild coffee to balance the sweetness. For an adult twist try sprinkling a little toasted almond or pistachio on top to enhance texture and flavor.
Cultural Context
Cheesecake in portable jars taps into the growing trend of individual servings that are easy to transport and share. The no-bake style draws inspiration from traditional chilled desserts popular in warmer regions. Decorating with pastel colors and candy nests reflects the symbolic themes of Easter linked to rebirth and springtime celebrations.
Frequently Asked Questions
- What type of crust works best for the jars?
Graham cracker crumbs or digestive biscuits combined with melted butter create a firm, flavorful base that holds well in small jars.
- How can I achieve the perfect filling texture?
Whip the heavy cream to medium-stiff peaks before folding gently into the cream cheese mixture. This keeps the filling light and creamy without losing volume.
- Can I prepare these dessert jars ahead of time?
Yes, prepare and chill them for at least 2 hours or up to 24 hours for best setting and flavor development.
- What optional flavors enhance the filling?
Lemon juice adds brightness while vanilla extract deepens the richness; almond extract or lemon zest can also be mixed in for subtle variations.
- How should I decorate the jars for a festive look?
Top with green-dyed shredded coconut to mimic grass, pastel sprinkles, and mini chocolate eggs or jelly beans placed just before serving for freshness.
