
 Pin it
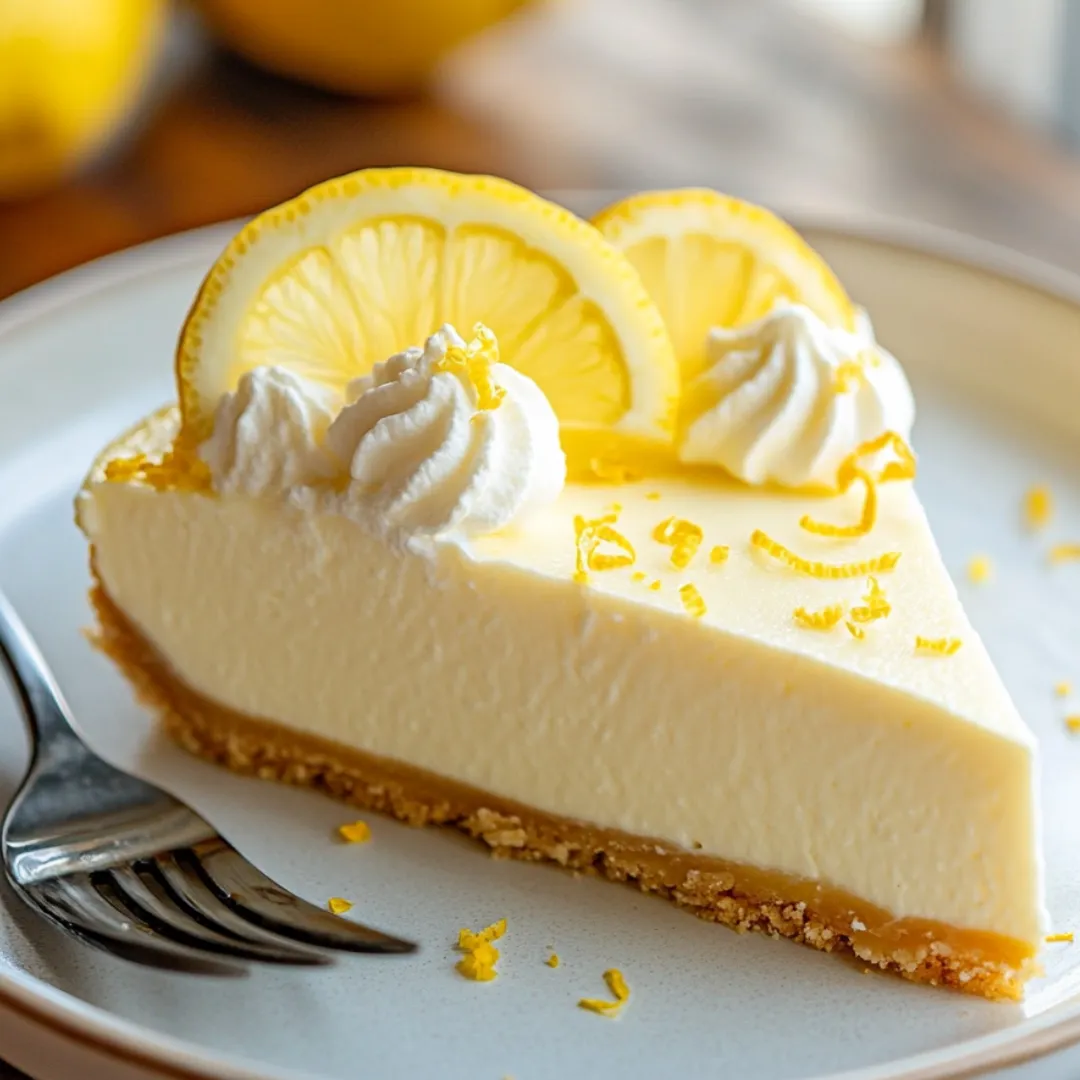
This bright, zesty dessert delivers the perfect balance of sweet and tangy flavors in a creamy, cloud-like filling that sits atop a crisp graham cracker crust. The no-bake preparation means you can create an impressive dessert without turning on your oven – ideal for warm weather or busy days when you need a quick sweet fix. The combination of condensed milk and fresh lemon creates a magical chemical reaction that naturally thickens the filling while providing authentic citrus flavor. Whether served as a refreshing finish to a hearty meal or as the star of a summer gathering, this effortless pie consistently receives rave reviews for its luxurious texture and vibrant taste.
I first discovered this recipe during a particularly brutal summer heatwave when turning on the oven was unthinkable. Looking for something cool and refreshing, I experimented with this no-bake approach and was amazed by the results. The pie was devoured within minutes at our neighborhood gathering, with guests insisting it must have come from a gourmet bakery. Now it's my signature dessert for spring and summer occasions – light enough after a barbecue but special enough for celebrations. My mother-in-law, who has been baking for over fifty years, even requested the recipe after trying it at our Mother's Day lunch!
Ingredients You'll Need
- 1 pre-made graham cracker crust (9-inch): Provides the perfect crunchy base for your creamy filling. Store-bought saves time, but homemade brings extra flavor
- 1 can (14 oz) sweetened condensed milk: Creates the silky-smooth base that magically thickens when combined with acid from the lemons
- 1/2 cup freshly squeezed lemon juice (about 2-3 lemons): Delivers bright, authentic flavor while helping the filling set. Fresh juice is essential here
- 1 tablespoon lemon zest: Intensifies the citrus flavor with essential oils from the lemon peel. Use organic lemons if possible
- 1/2 cup heavy cream: Transforms into a light, fluffy texture when whipped and folded into the filling. Must be cold for proper whipping
- 2 tablespoons powdered sugar: Sweetens and stabilizes the whipped cream without the grittiness of granulated sugar
- Fresh whipped cream (for topping): Creates a decorative and delicious finish. Can be prepared while the pie chills
- Extra lemon zest or thin lemon slices (for garnish): Adds visual appeal and hints at the flavor within. Optional but recommended
 Pin it
Step-by-Step Cooking Instructions
- Prepare Your Lemon Base:
- In a medium-sized mixing bowl, combine the sweetened condensed milk and lemon zest, stirring until well incorporated. The zest will infuse the condensed milk with essential oils, creating a deeper lemon flavor throughout the filling. Next, slowly add the freshly squeezed lemon juice while stirring continuously. You'll notice the mixture begin to thicken almost immediately – this is the citric acid reacting with the proteins in the condensed milk, creating a natural thickening effect without any heat or additional thickeners. Continue stirring for about a minute until smooth and slightly thickened. Set this mixture aside while you prepare the next component.
- Whip the Cream to Perfection:
- In a separate clean, chilled bowl, pour the cold heavy cream and add the powdered sugar. Using an electric mixer with whisk attachments, begin beating on low speed to incorporate the sugar without splattering. Gradually increase to medium-high speed and continue beating until soft peaks form – this is when the cream holds its shape but the tips of the peaks fold over gently when the beaters are lifted. Be careful not to overwhip, as the cream can quickly turn grainy and begin to separate. The perfect whipped cream should be smooth, fluffy, and hold its shape without being too stiff.
- Create the Light, Airy Filling:
- Using a rubber spatula, gently fold one-third of the whipped cream into the lemon mixture to lighten it. Folding rather than stirring preserves the air bubbles in the whipped cream, resulting in a lighter texture. Once incorporated, add the remaining whipped cream and continue folding with a light hand, using a down-across-up-and-over motion. Turn the bowl as you fold until the mixture is uniform in color with no streaks of white remaining. The filling should be pale yellow, fluffy, and mousse-like in consistency. This careful folding technique ensures your pie will have the perfect airy texture rather than deflating into a dense filling.
- Fill Your Waiting Crust:
- Gently spoon the lemon filling into the prepared graham cracker crust, starting from the center and working outward. Use the back of a spoon or an offset spatula to spread the filling evenly, creating a smooth, slightly domed surface. Take care not to press too firmly, which would compress the filling and lose the air you've incorporated. The filling should come just to the top edge of the crust without overflowing. Smooth the top with long, gentle strokes for a professional-looking finish that will showcase your garnishes beautifully.
- Chill for Texture Development:
- Cover the pie lightly with plastic wrap, being careful not to let it touch the surface of the filling, which could mar your smooth top. Refrigerate for at least 4 hours, though overnight chilling yields the best results. This extended chilling time allows the filling to fully set and the flavors to meld and intensify. The texture will transform from soft and mousse-like to a more sliceable consistency that holds its shape when cut. Patience during this step rewards you with a perfectly set pie that slices cleanly and delivers the ideal texture.
- Add Finishing Touches:
- Just before serving, prepare a fresh batch of whipped cream for the topping. In a chilled bowl, whip 1 cup of heavy cream with 3 tablespoons of powdered sugar until medium peaks form. Spoon or pipe decorative dollops around the perimeter of the pie or across the entire surface, depending on your preference. Garnish with additional lemon zest, thin lemon slices, or even small mint leaves for a professional presentation. These final touches not only enhance the appearance but also signal to guests the bright lemon flavor they're about to enjoy.
- Serve with Style:
- For the cleanest slices, dip a sharp knife in hot water and wipe dry between cuts. Slice the pie into 8-10 portions, depending on your preference. If desired, serve each slice with an additional small dollop of fresh whipped cream and a mint sprig. The pie is best enjoyed cold, straight from the refrigerator, when the contrast between the crisp crust and creamy filling is at its peak. For a special touch, offer fresh berries on the side – raspberries and blueberries pair particularly well with the lemon flavor.
I learned the importance of fresh lemon juice the hard way. During a particularly busy holiday season, I tried using bottled juice as a shortcut – the pie never properly set, resulting in a soupy mess that had to be served in bowls rather than slices! The natural acids in fresh lemon juice are crucial for the chemical reaction that thickens the filling. Now I always keep lemons on hand and consider the few minutes of juicing time well worth the guaranteed perfect results. My family can immediately tell the difference between pies made with fresh versus bottled juice – the flavor is incomparably brighter and more authentic.
Seasonal Variations
While classic lemon is perfect year-round, this versatile recipe adapts beautifully to seasonal twists. In summer, try folding 1 cup of fresh blueberries into the filling before pouring it into the crust, creating beautiful purple-blue bursts throughout the pie. For fall, substitute half the lemon juice with orange juice and add 1/4 teaspoon of cinnamon to the filling for a subtle warmth. During winter holidays, a version with cranberry juice (reducing the amount to 1/3 cup due to increased acidity) and a sprinkle of sugared cranberries on top creates a festive presentation perfect for December gatherings.
Crust Alternatives
Though the recipe calls for a pre-made graham cracker crust for convenience, homemade versions offer opportunities for customization. A traditional graham cracker crust made with 1 1/2 cups graham cracker crumbs, 1/3 cup melted butter, and 3 tablespoons sugar delivers superior flavor and texture. For interesting variations, try a gingersnap crust for spicy warmth, a shortbread crust for buttery richness, or a chocolate cookie crust for a striking color contrast with the yellow filling. Each alternative brings a different complementary flavor to enhance the lemon filling.
Dietary Adaptations
This versatile recipe can accommodate various dietary needs. For a gluten-free version, use a gluten-free cookie crust or a nut-based crust made from ground almonds or pecans. Those watching sugar intake can use low-fat condensed milk and reduce the powdered sugar in the whipped cream. While a dairy-free version requires more significant changes, coconut cream can replace the heavy cream, and sweetened condensed coconut milk works as a substitute for traditional condensed milk, though the texture will be slightly different.
Troubleshooting Tips
If your filling seems too runny after mixing, your lemons may have been less acidic than usual. Add an additional tablespoon of lemon juice and allow the mixture to sit for 5 minutes to thicken before proceeding. For a filling that's too tart, fold in an extra tablespoon of powdered sugar with the whipped cream to balance the flavors. If your whipped cream deflates during folding, the cream may have been too warm – chill the entire mixture for 15 minutes, then gently fold in an additional 1/4 cup of freshly whipped cream to restore the light texture.
 Pin it
Make-Ahead and Storage Guidelines
This pie is ideal for making up to two days ahead, making it perfect for entertaining. Store it in the refrigerator, covered loosely with plastic wrap, for up to three days. After this time, the crust may begin to soften, though the filling remains delicious. While freezing is not recommended for the completed pie (the texture of the filling becomes grainy when thawed), you can freeze the prepared crust for up to a month, allowing you to quickly assemble the pie when needed. Always add whipped cream topping and garnishes just before serving for the freshest presentation.
I discovered my favorite serving hack completely by accident at a summer gathering when my refrigerator was overcrowded. I placed the fully chilled pie in the freezer for just 30 minutes before serving to make room for other dishes. That brief freezing time gave the pie a semifreddo-like quality – still creamy but slightly more firm, almost like an ice cream pie. Now I deliberately give the pie this quick freeze before special occasions; it makes slicing incredibly neat and creates a refreshing texture that's especially welcome on hot days. These little discoveries are what make cooking such a joy – sometimes the best techniques come from necessity rather than planning!
Frequently Asked Questions
- → Can I use bottled lemon juice instead of fresh?
- Fresh lemon juice provides the best flavor, but bottled will work in a pinch. Reduce the amount slightly as bottled juice tends to be more concentrated.
- → How far in advance can I make this pie?
- You can make this pie up to 2 days in advance. The crust may soften slightly over time but will still taste delicious.
- → Can I freeze this lemon pie?
- Yes! This pie freezes beautifully for up to 2 months. Thaw overnight in the refrigerator before serving.
- → What can I use instead of graham crackers for a gluten-free option?
- Gluten-free graham crackers work well, or try a crust made from crushed gluten-free cookies or a combination of almond flour and melted butter.
- → Why did my filling not set properly?
- The acid in lemon juice helps thicken the condensed milk. Make sure you're using the full amount of lemon juice and allowing enough chilling time for the pie to set completely.