
 Pin it
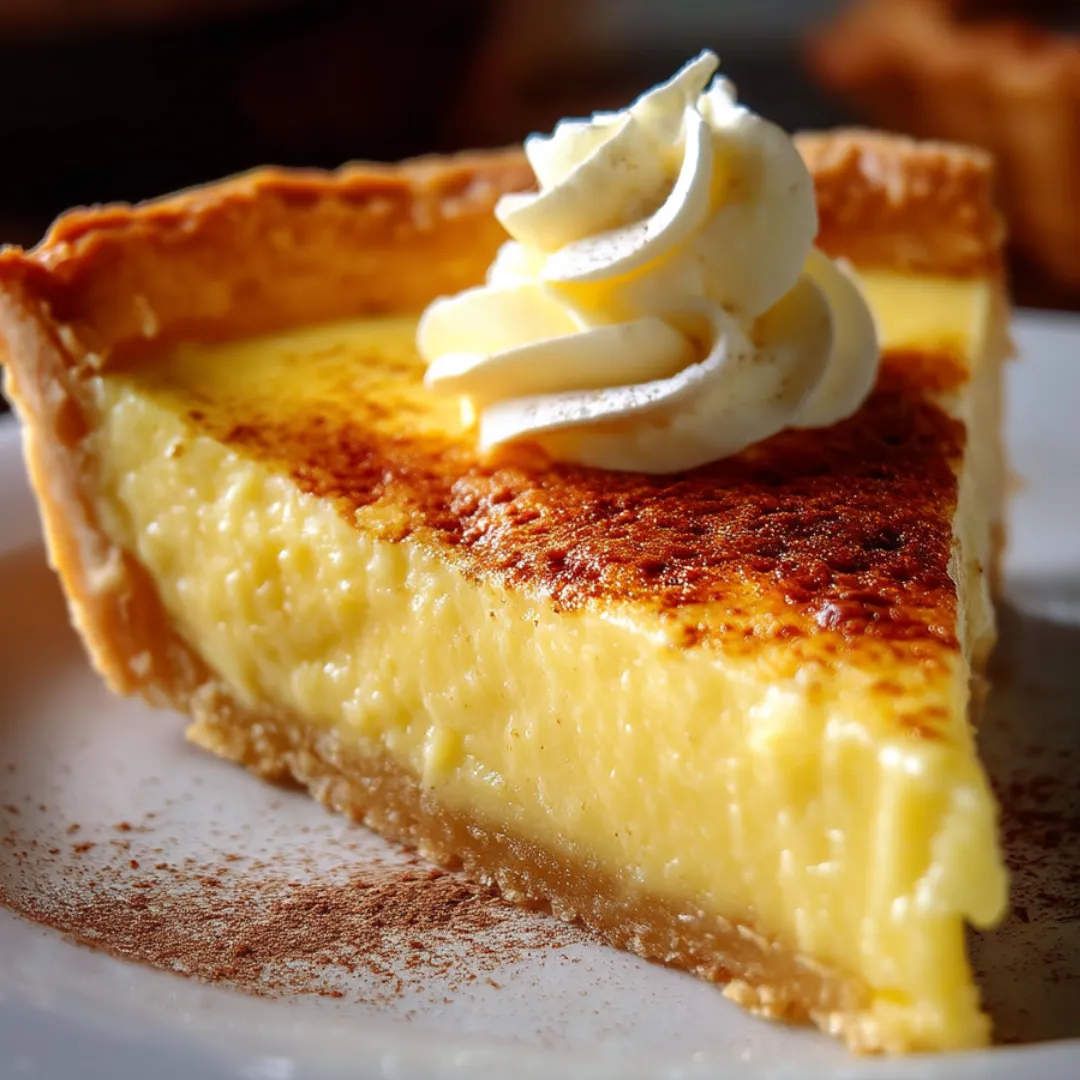
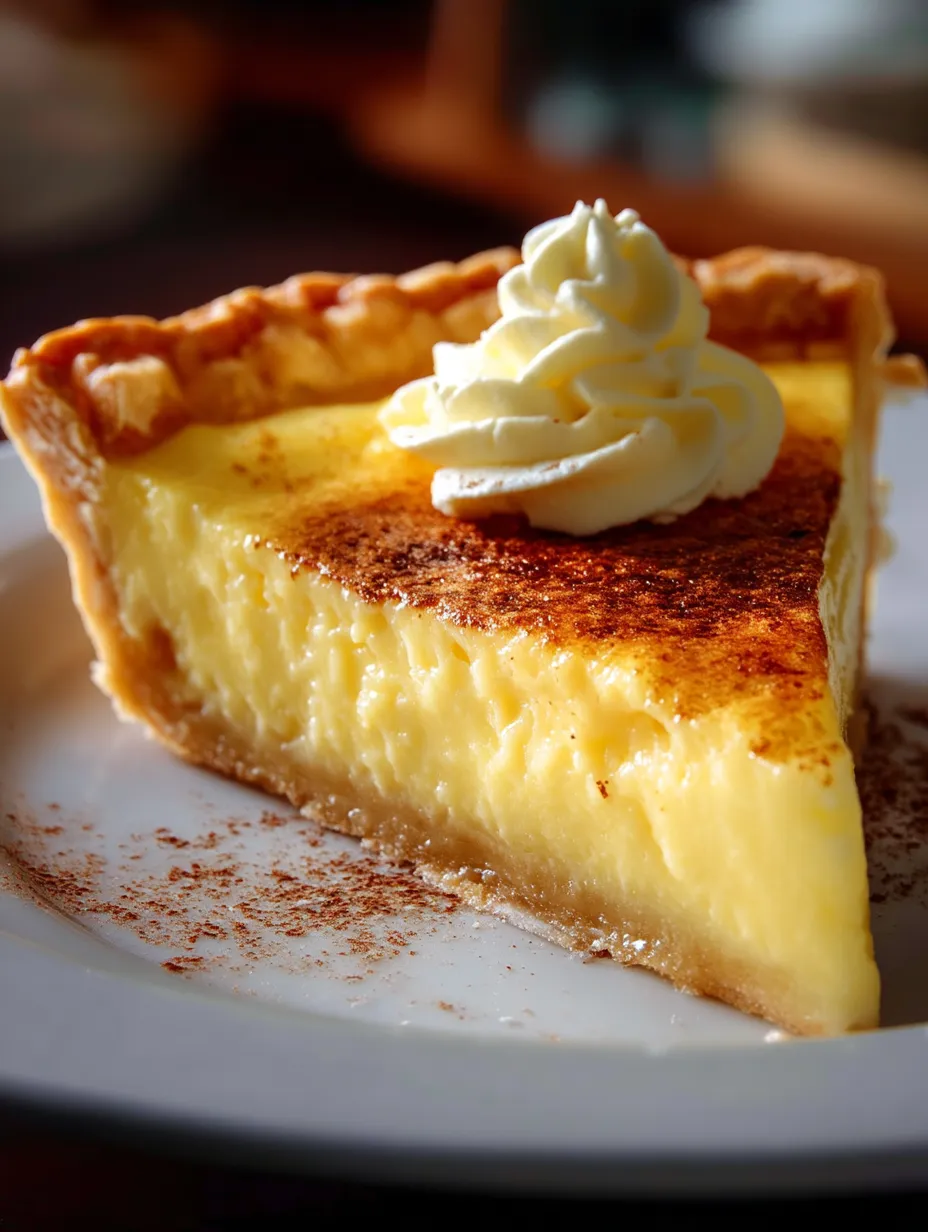
This remarkable Old Fashioned Custard Pie celebrates the art of simple, traditional baking with its silky-smooth filling and buttery, flaky crust. The delicate custard sets to a perfect consistency—firm enough to slice cleanly yet soft enough to melt on your tongue with each bite. A whisper of nutmeg floats through the vanilla-scented custard, creating that unmistakable aroma that has drawn people to kitchen windows for generations. This humble pie proves that sometimes the most basic ingredients—eggs, milk, sugar, and vanilla—create the most extraordinary flavors when treated with care and respect.
I first attempted this pie as a newlywed, desperate to recreate the custard pie my husband reminisced about from his grandmother's kitchen. With no family recipe to guide me, I experimented with various ratios until finally achieving that perfect silky texture. When I served it at our first holiday gathering, my father-in-law took one bite and fell silent. After a moment, he looked up with slightly misty eyes and said, "This tastes just like Mom's." That simple statement meant more than any culinary award ever could. Since then, this pie has become our family's celebration tradition, marking birthdays, holidays, and achievements with its humble perfection. The greatest compliment came years later when my own children began requesting it for their special occasions, proving that some flavors truly are timeless.
Ingredients
- 1 unbaked 9-inch pie crust: Forms the buttery foundation. Homemade provides the best flavor, but a quality store-bought crust works well too. The crust should be rolled to about ⅛-inch thickness with edges crimped decoratively. If making from scratch, look for a recipe with butter for flavor and a touch of shortening for flakiness.
- 4 large eggs: Creates the custard's structure and silky texture. Farm-fresh eggs with bright orange yolks provide the richest color and flavor. They should be at room temperature to incorporate more smoothly into the mixture.
- ¾ cup granulated sugar: Adds sweetness without overwhelming the delicate egg flavor. Pure cane sugar dissolves most smoothly. The amount is carefully calibrated—just enough to sweeten without making the custard cloying.
- 2½ cups whole milk: Provides the creamy base for the custard. Farm-fresh or organic milk with higher fat content creates the most luxurious texture. The milk should be gently warmed before mixing with the eggs to help the custard set properly.
- 1 teaspoon pure vanilla extract: Enhances the custard's aroma and flavor. Pure extract rather than imitation offers more complex notes. Madagascar bourbon vanilla works particularly well with the egg-rich filling.
- ¼ teaspoon salt: Balances the sweetness and enhances the vanilla notes. Fine sea salt dissolves most evenly throughout the custard. This small amount makes a significant difference in the overall flavor profile.
- ¼ teaspoon freshly grated nutmeg: Contributes the signature warm spice note. Freshly grated nutmeg has dramatically more flavor than pre-ground. The nutmeg should be grated just before using to capture its volatile oils.
 Pin it
Step-by-Step Instructions
- Step 1:
- Prepare your oven and pie crust properly - Begin by positioning a rack in the lower third of your oven and preheating to 350°F (175°C). This placement allows the bottom crust to bake properly without the top browning too quickly. If using homemade pie dough, roll it to approximately ⅛-inch thickness and carefully transfer it to a 9-inch pie plate. Gently press the dough into the corners without stretching it, which can cause shrinkage during baking. Create a decorative edge by crimping the dough between your fingers or pressing with a fork. For the best results, chill the prepared crust in the refrigerator for 15-20 minutes while preparing the filling. This brief chilling helps prevent the butter in the crust from melting too quickly, resulting in a flakier texture when baked.
- Step 2:
- Warm the milk to the ideal temperature - In a medium saucepan, gently heat the whole milk until it's warm but not hot—around 110°F (43°C) if you're using a thermometer. This step might seem fussy, but it's crucial to the custard's texture. Warm milk allows the eggs to cook evenly without curdling and helps the custard set perfectly in the oven. Heat the milk over medium-low heat, stirring occasionally to prevent a skin from forming on top. When you see tiny bubbles just beginning to form around the edges, but before it simmers, remove it from the heat. Allow it to cool for about 5 minutes if it gets too hot—milk that's too hot can scramble the eggs when added, resulting in an unpleasant texture.
- Step 3:
- Create the egg and sugar base with care - While the milk warms, in a large mixing bowl, whisk together the eggs and sugar until well combined. The right technique makes a difference here—whisk thoroughly enough to completely incorporate the sugar, but not so vigorously that you incorporate too much air. You're looking for a smooth mixture where the sugar has begun to dissolve, and the eggs have a slightly lightened color. This usually takes about 1-2 minutes of steady whisking by hand. The consistency should be thick and almost ribbon-like when the whisk is lifted. This base will ensure your custard has the perfect sweetness and structure once baked.
- Step 4:
- Combine wet ingredients using the tempering method - Here's where patience yields perfection. To prevent the hot milk from cooking the eggs, you'll use a technique called tempering. While whisking the egg mixture constantly, very slowly pour about ½ cup of the warm milk in a thin stream into the eggs. This gradually raises the temperature of the eggs without cooking them. Continue whisking while adding another ½ cup of warm milk in the same manner. Once those portions are incorporated, the eggs have been sufficiently tempered, and you can more quickly add the remaining milk while continuing to whisk. This careful combination ensures a perfectly smooth custard without any cooked egg bits. Add the vanilla extract and salt, whisking to distribute evenly throughout the mixture.
- Step 5:
- Add the signature spice properly - Sprinkle the freshly grated nutmeg over the surface of the custard mixture. If possible, grate the nutmeg directly over the bowl using a microplane or nutmeg grater to capture all of its aromatic oils. Whisk gently to distribute the nutmeg throughout the custard. The nutmeg provides that distinctive warm note that makes this pie instantly recognizable as an old-fashioned custard pie. The aroma should be present but subtle—complementing rather than overwhelming the vanilla and egg flavors. For a different twist, some bakers prefer to sprinkle the nutmeg on top of the custard just before baking instead, creating a beautiful speckled surface.
- Step 6:
- Strain for silky smoothness - For the ultimate in smooth texture, pour the custard mixture through a fine-mesh sieve into a large measuring cup or bowl with a pouring spout. This extra step, though optional, removes any tiny bits of egg that might have coagulated during the tempering process or any small pieces of nutmeg that weren't fully incorporated. The result is a silky-smooth custard that practically glides into the pie crust. The straining process also helps eliminate any air bubbles that might have been incorporated during whisking, leading to a more uniform baked texture.
- Step 7:
- Fill the crust and prepare for baking - Remove the chilled pie crust from the refrigerator and place it on a rimmed baking sheet, which will catch any potential spills during baking and make transferring the delicate pie easier. Carefully pour the strained custard mixture into the unbaked pie shell, filling it to about ¼ inch below the rim. Avoid overfilling, as the custard will expand slightly during baking. If you notice any air bubbles on the surface, gently pop them with the tip of a knife. The baking sheet not only catches spills but also helps the bottom crust bake more evenly by conducting heat directly to the bottom of the pie plate.
- Step 8:
- Bake with precision - Place the baking sheet with the pie on it in the preheated oven on the lower-third rack. Bake for 45-50 minutes, but start checking at the 40-minute mark as oven temperatures can vary. The custard is perfectly done when the edges are set but the center still has a slight wobble when gently shaken—similar to how gelatin moves. Another visual cue is the appearance of a dome in the center that's puffed about one inch higher than the edges. The pie will continue to set as it cools, so it's better to pull it out a bit early than to overbake it. If the crust edges begin browning too quickly, shield them with strips of aluminum foil or a pie crust shield after about 25 minutes of baking.
- Step 9:
- Cool properly for the perfect texture - Once baked, carefully remove the pie from the oven and place it on a wire cooling rack. The cooling process is just as important as the baking. Let the pie cool completely at room temperature, which takes about 2 hours. During this time, the custard will continue to set and develop its flavor. As it cools, you'll notice the center will gradually sink back down to become level with the edges—this is precisely what should happen and indicates you've baked it correctly. Avoid the temptation to refrigerate the pie before it has cooled completely at room temperature, as this can cause condensation to form on the surface, potentially creating a watery layer.
- Step 10:
- Chill for serving perfection - After the pie has cooled completely to room temperature, cover it loosely with plastic wrap and refrigerate for at least 2 hours or overnight before serving. This chilling time is crucial for developing the optimal flavor and texture. A properly chilled custard pie will slice cleanly and have the perfect mouthfeel—firm enough to hold its shape but still meltingly tender on the tongue. When serving, use a sharp knife dipped in hot water and wiped clean between cuts for the neatest slices. A dollop of lightly sweetened whipped cream makes a simple but perfect accompaniment, though many custard pie purists prefer it unadorned to fully appreciate its delicate flavor.
When done correctly, your Old Fashioned Custard Pie should have a smooth, golden-yellow surface with perhaps a light speckle of nutmeg, a perfectly set filling that quivers slightly when moved, and a flaky, golden crust. The aroma should be rich with vanilla and warm spice notes, inviting everyone to the table.
The Art of Custard Perfection
What fascinates me most about this seemingly simple pie is the delicate chemistry behind its creation. A proper custard is a study in transformation—the magical moment when humble ingredients like eggs and milk shift from liquid to solid through the careful application of heat.
The key to this metamorphosis lies in understanding the proteins in egg yolks. When heated gently in the presence of liquid, these proteins unwind and reconnect with each other, creating a network that traps moisture and thickens the mixture. Too little heat, and the custard remains soupy; too much, and the proteins contract too tightly, squeezing out moisture and creating a curdled texture. This is why baking temperature and timing are so crucial to custard perfection.
I learned this lesson the hard way during my early attempts. Impatient with the slow baking process, I once increased the oven temperature to speed things along. The result was a pie with rubbery edges and a soupy center—the worst of both worlds! Another time, I let my attention wander and left the pie in the oven too long, resulting in a filling that had separated and wept clear liquid. These failures taught me to respect the delicate nature of custard and the importance of patience in baking.
The addition of sugar also plays a scientific role beyond sweetening. Sugar actually raises the temperature at which eggs coagulate, giving you a wider margin of error when baking. Too little sugar, and the eggs set too quickly and firmly; too much, and the custard may never properly set. The ¾ cup measure in this recipe represents that perfect balance point for a 9-inch pie.
Serving Through the Seasons
One of the lovely qualities of this Old Fashioned Custard Pie is how it can be adapted throughout the year to complement seasonal ingredients and celebrations.
In summer, I often serve slices topped with fresh berries—plump blackberries or raspberries provide a beautiful color contrast and tart counterpoint to the sweet custard. The addition of lemon zest to the custard filling during summer months adds a bright note that feels especially refreshing during hot weather.
Autumn brings the opportunity to lean into warming spices. I sometimes increase the nutmeg slightly and add a pinch of cinnamon and clove, transforming the pie into a perfect partner for Thanksgiving dinner. A drizzle of maple syrup over the top before serving adds another layer of fall flavor that guests always appreciate.
Winter holidays call for more festive presentations. I've found that a light dusting of cocoa powder through a paper doily creates a beautiful pattern on the surface that makes the pie feel special enough for Christmas dinner. Served alongside cranberry compote, the combination of creamy, sweet custard and tart berries creates a memorable dessert experience.
When spring arrives, I celebrate by infusing the warm milk with lavender buds or a splash of orange blossom water before straining and continuing with the recipe. These subtle floral notes complement the delicate egg flavor beautifully and make the pie feel appropriate for Easter gatherings or Mother's Day celebrations.
I learned the importance of proper cooling through an embarrassing dinner party mistake. Pressed for time, I refrigerated a still-warm custard pie before serving it to guests. When I proudly removed it from the refrigerator, I was mortified to find a layer of wateriness on the surface—what bakers call "weeping." My grandmother later explained that this happens when condensation forms on the warm custard and then gets trapped by cold air. Now I plan ahead, making the pie the previous day to allow proper cooling time, resulting in that perfectly silky texture that makes this dessert so special.
 Pin it
Treasured Variations
While the classic recipe is perfection in its simplicity, family traditions have led me to develop several variations that honor the original while offering new flavor dimensions.
For holiday gatherings, I sometimes create a maple custard version by replacing ¼ cup of the sugar with pure maple syrup (Grade B for the strongest flavor) and adding an extra egg yolk for richness. The woodsy sweetness of real maple syrup adds complexity that pairs beautifully with winter meals and feels especially appropriate for Thanksgiving.
When cooking for those who appreciate more pronounced flavors, I make a brown butter variation. This involves browning the butter for the pie crust until it develops nutty, caramelized notes, then chilling it before proceeding with the crust recipe. I also infuse the warming milk with a split vanilla bean instead of using extract, creating tiny flecks of vanilla throughout the custard that signal the care taken in preparation.
For a lighter summer version, I sometimes replace a portion of the whole milk with buttermilk, which adds a subtle tanginess that complements fresh berries beautifully. The acidity in buttermilk also creates an even more tender custard texture that feels refreshing in warm weather.
When baking for someone who loves chocolate, I've developed a chocolate-bottomed variation. After chilling the shaped pie crust, I melt 2 ounces of bittersweet chocolate and brush a thin layer over the bottom and sides, then chill again until set. The chocolate creates a barrier that keeps the crust crisp while adding an unexpected flavor contrast to the vanilla custard.
My grandmother's Pennsylvania Dutch heritage inspired a spiced custard variation where I add a pinch each of cinnamon, ginger, and clove alongside the nutmeg. This spice blend creates a warming complexity reminiscent of eggnog and makes the pie feel especially appropriate for Christmas gatherings.
After years of baking this pie for family gatherings, holidays, and comfort during difficult times, I've come to see it as more than just a dessert. This Old Fashioned Custard Pie represents a connection to generations past, when bakers transformed humble ingredients into something that nourished both body and spirit.
What I treasure most about sharing this recipe is watching people's expressions as they take their first bite. There's often a moment of surprise—"I'd forgotten how good simple custard can be"—followed by a wistful smile as memories of childhood desserts surface. Even those too young to have nostalgia for this classic seem to recognize something fundamentally comforting in its creamy sweetness.
In our modern world of complicated desserts with elaborate presentations and unusual flavor combinations, there's something profoundly satisfying about returning to this basic recipe that has stood the test of time. The same ingredients and techniques that delighted our great-grandparents still create magic today, proving that true culinary wisdom doesn't always require innovation—sometimes it simply asks us to preserve what's already perfect.
Frequently Asked Questions
- → Why did my custard pie crack on top?
- Cracks usually occur from overbaking. The pie is done when the edges are set but the center still has a slight jiggle (it will continue setting as it cools). Also, baking at too high a temperature can cause cracking.
- → Can I use a different milk in this recipe?
- Yes, though it will affect the richness. Whole milk works best for creaminess, but you can use 2% for a lighter version. For extra richness, replace half a cup of milk with heavy cream. Non-dairy milks will work but may produce a less creamy result.
- → How do I know when my custard pie is done?
- The pie is done when the edges are set but the center still has a slight wobble when gently shaken. A knife inserted about 1 inch from the edge should come out clean. The center will continue to set as it cools.
- → Should custard pie be refrigerated?
- Yes, because it contains eggs and milk, custard pie should be refrigerated after it has cooled to room temperature. It will keep in the refrigerator for up to 3 days.
- → Can I make this pie without a premade crust?
- Absolutely! You can make a homemade pie crust using your favorite recipe. Just prepare and shape the crust in your pie plate before adding the custard filling, no need to pre-bake the crust.