
 Pin it
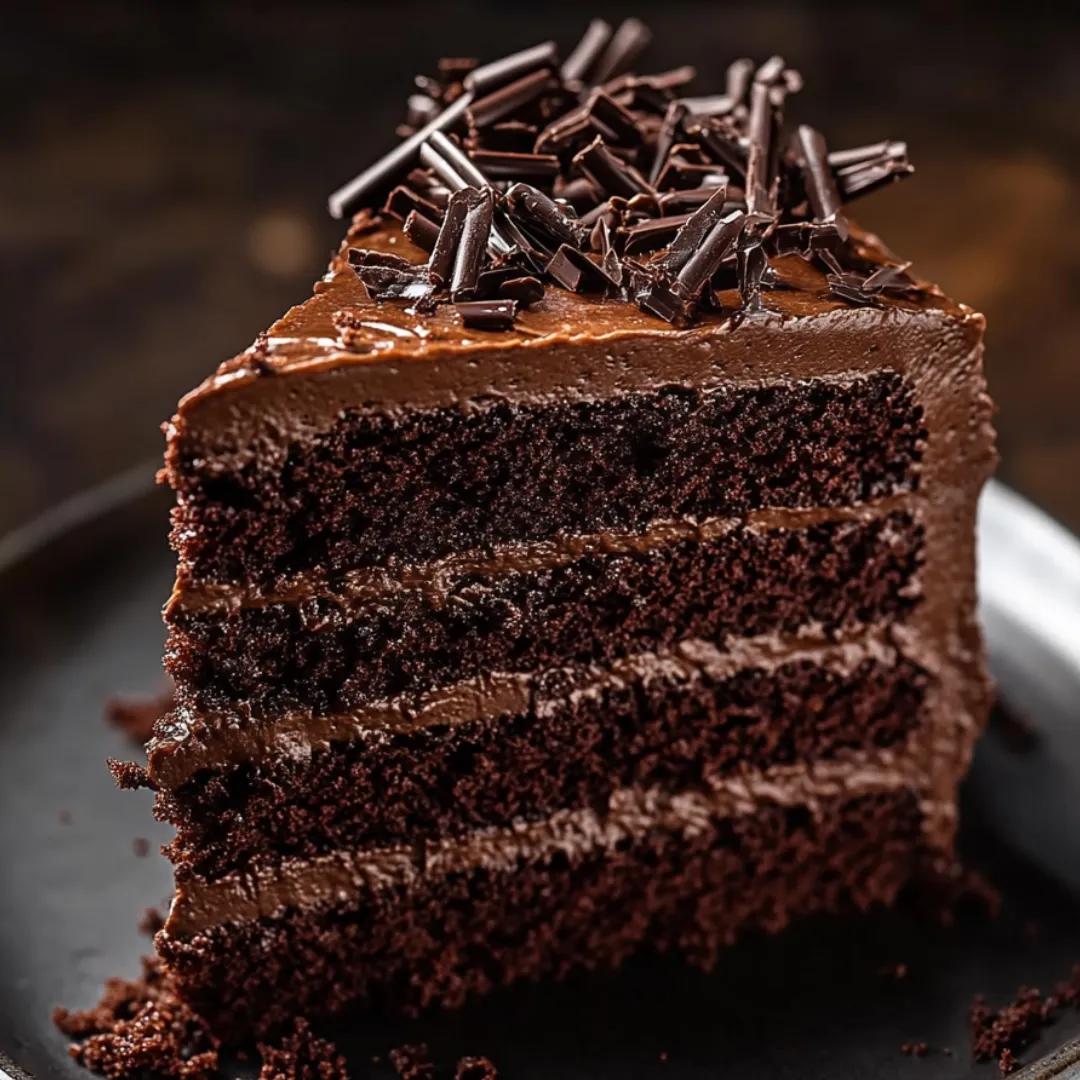
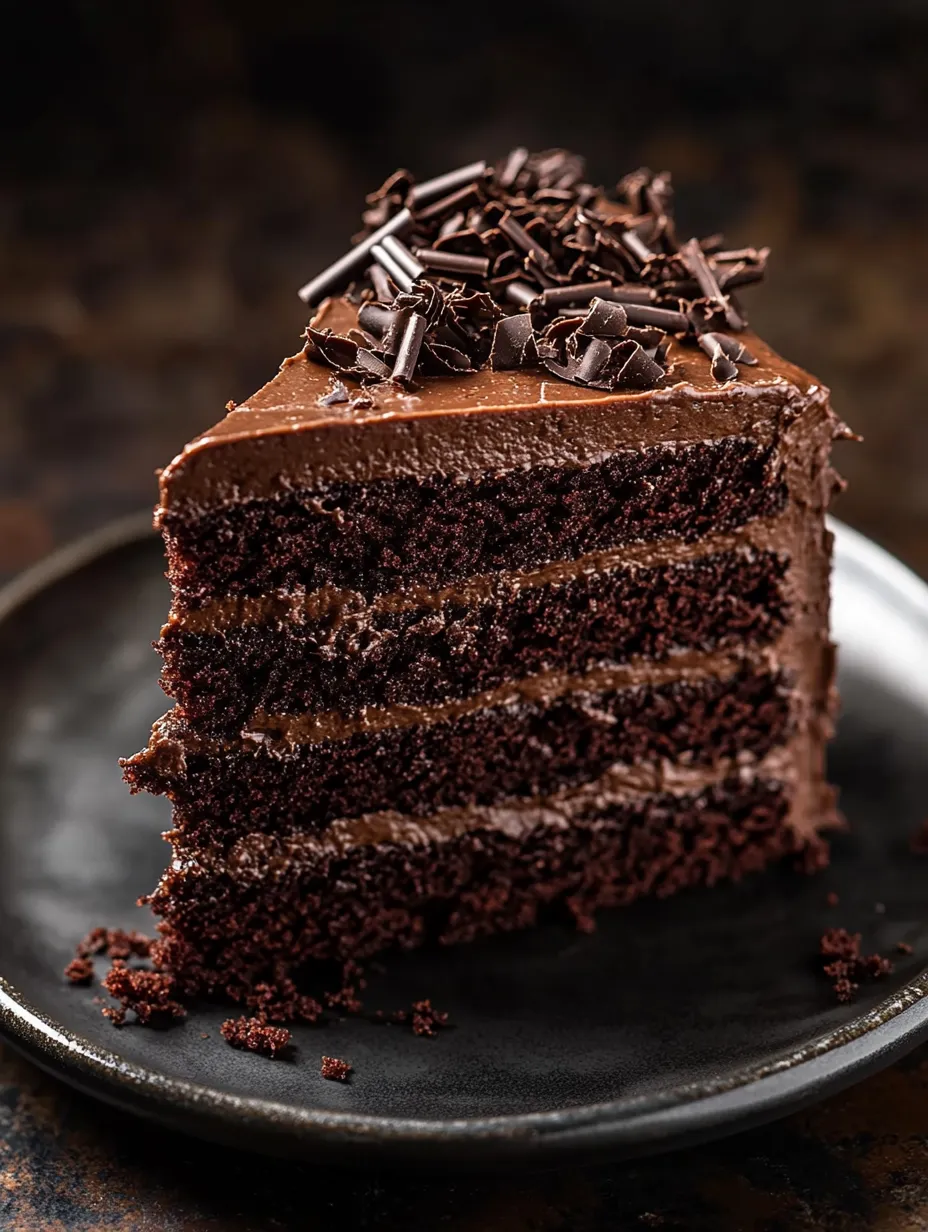
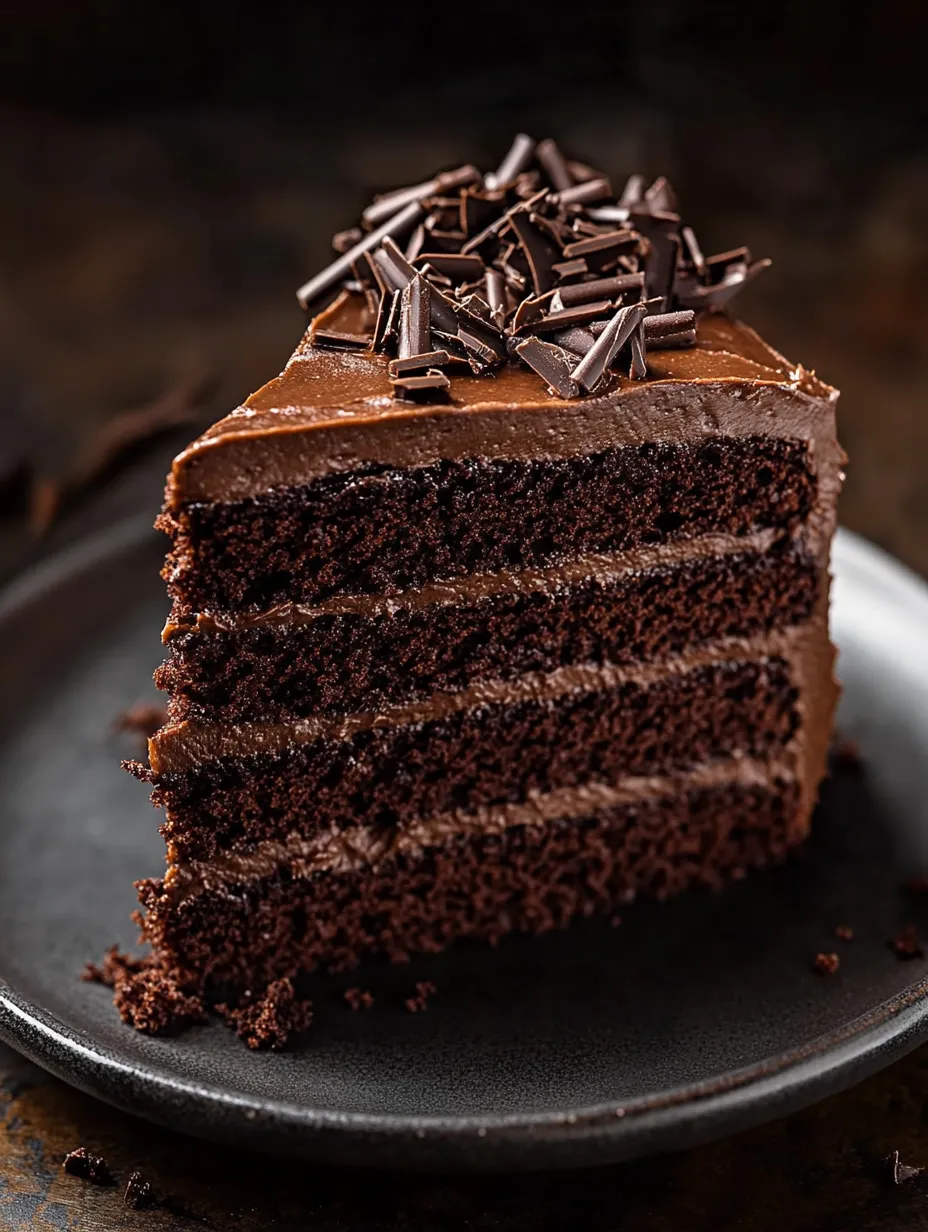
This deeply decadent Devil's Food Cake delivers an intense chocolate experience that truly lives up to its sinful name. With its impossibly moist crumb and rich chocolate flavor, this cake stands as the delicious opposite of light and airy angel food cake. Each forkful offers a perfect balance of deep cocoa notes and buttery sweetness, all wrapped in a silky chocolate buttercream that melts on your tongue. Whether for birthdays, celebrations, or simply satisfying a serious chocolate craving, this showstopper dessert promises to delight even the most discerning chocolate lovers.
I started making this Devil's Food Cake years ago when planning my husband's birthday celebration. He's always claimed to 'not be a cake person,' but the look on his face when he took that first bite told me I'd found his exception! The chocolate intensity was exactly what he'd been missing in other cakes. Now it's become our family's celebration cake, requested for every birthday and special achievement. Last Christmas, my mother-in-law (who guards her family recipes fiercely) actually asked me for this recipe - perhaps the highest compliment I've ever received in the kitchen!
Ingredients You'll Need
- 2 cups all-purpose flour: Creates the structure of the cake while allowing for a tender crumb; measure by spooning into measuring cups and leveling for accuracy
- ¾ cup unsweetened cocoa powder: Provides the deep chocolate flavor; use regular cocoa powder, not Dutch-processed, for proper chemical reactions
- 2 teaspoons baking powder: Works with baking soda to create the perfect rise and texture
- 1 teaspoon baking soda: Reacts with the acidic ingredients to give lift and tenderness
- ½ teaspoon salt: Enhances all the flavors and balances sweetness
- ½ cup vegetable oil: Creates exceptional moisture that lasts for days
- ½ cup unsalted butter, room temperature: Adds richness and flavor that oil alone can't provide
- 1 cup granulated sugar: Provides sweetness and structure
- 1 cup light brown sugar, packed: Adds moisture and depth with its slight molasses flavor
- 3 large eggs, room temperature: Binds ingredients while adding structure
- 1 large egg yolk, room temperature: The extra yolk enriches the cake with fat for ultimate tenderness
- 2 teaspoons vanilla extract: Enhances the chocolate flavor with aromatic depth
- ¾ cup sour cream, room temperature: The secret to incredible moisture and slight tanginess that complements chocolate
- ¾ cup hot coffee: Blooms the cocoa powder, intensifying the chocolate flavor dramatically
For the Chocolate Buttercream
- 10 ounces quality semi-sweet chocolate, chopped: Creates an intensely flavored frosting with superior mouthfeel
- 1 cup heavy cream: Forms the base of a ganache that gets incorporated into the buttercream
- 1 tablespoon light corn syrup: Gives the frosting a beautiful shine and silky texture
- 2 cups unsalted butter, room temperature: Creates the creamy base for the buttercream
- 1 teaspoon vanilla extract: Complements the chocolate with warm aromatic notes
- ¼ teaspoon salt: Balances sweetness and enhances chocolate flavor
 Pin it
Step-by-Step Cooking Instructions
- Prepare Your Baking Environment:
- Position a rack in the center of your oven and preheat to 350°F (175°C). This temperature is crucial for proper rising and texture development. While waiting for the oven to reach temperature, prepare two 9-inch round cake pans by spraying thoroughly with nonstick baking spray. Cut parchment paper circles to fit the bottoms of your pans, press them in place, and spray again. This double insurance prevents any sticking and ensures your cakes release perfectly.
- Sift the Dry Ingredients:
- In a medium bowl, sift together the flour, cocoa powder, baking powder, baking soda, and salt. This step is non-negotiable - sifting eliminates lumps, especially in cocoa powder, and ensures even distribution of leavening agents. Whisk the sifted ingredients once more to ensure thorough mixing. Set aside while you prepare the wet ingredients.
- Cream the Fats and Sugars:
- In the bowl of a stand mixer fitted with the paddle attachment (or using a hand mixer), beat the butter on medium speed until creamy, about 1 minute. Add both granulated and brown sugars and the oil, then increase to medium-high speed and beat until the mixture becomes notably lighter in both color and texture, approximately 4 minutes. Scrape down the sides and bottom of the bowl halfway through to ensure even mixing. This extended creaming process incorporates air and is essential for a tender cake.
- Add Eggs and Vanilla:
- Reduce the mixer speed to medium. Add the eggs one at a time, beating well after each addition until fully incorporated before adding the next. Add the additional egg yolk and vanilla extract, then beat until the mixture is smooth and uniform. Scrape down the sides and bottom of the bowl to ensure everything is well mixed. The mixture should now be light, fluffy, and considerably increased in volume.
- Incorporate Dry Ingredients and Sour Cream:
- Reduce the mixer speed to low. Add one-third of the sifted dry ingredients to the bowl and mix just until mostly incorporated. Add half the sour cream and mix briefly, followed by another third of the dry ingredients. Add the remaining sour cream, mix, and finish with the final portion of dry ingredients. Mix only until the last streaks of flour disappear - overmixing at this stage will develop gluten and result in a tough cake.
- Add Hot Coffee:
- With the mixer on the lowest speed, carefully pour in the hot coffee. Allow it to sit for about 30 seconds to begin blooming the cocoa powder, then mix just until the batter is smooth and uniform. The batter will be relatively thin - this is exactly what you want for a moist cake. Scrape the bottom and sides of the bowl one final time to ensure everything is well incorporated.
- Bake to Perfection:
- Divide the batter evenly between your prepared pans, using a scale if you have one for perfect precision. Smooth the tops with an offset spatula. Tap the pans firmly against the counter a few times to remove any large air bubbles. Bake in your preheated oven for 35-40 minutes, or until a toothpick inserted into the center comes out clean or with just a few moist crumbs. The cakes should spring back when lightly touched in the center.
- Cool Properly:
- Place the cake pans on cooling racks and allow the cakes to cool in their pans for exactly 20 minutes. This cooling period allows the cakes to set enough to be handled without falling apart. After 20 minutes, run a thin knife around the edges to loosen, then carefully invert onto the cooling racks. Peel off the parchment paper and allow to cool completely before frosting. Rushing this cooling process will result in a gummy texture and melted frosting.
- Prepare the Chocolate Buttercream:
- Place the chopped chocolate in a medium heatproof bowl. In a small saucepan, heat the heavy cream and corn syrup until it just comes to a boil. Immediately pour the hot cream mixture over the chocolate and let sit undisturbed for 1 minute to begin melting the chocolate. Whisk until completely smooth and glossy. Allow this ganache to cool to room temperature, stirring occasionally.
- Finish the Buttercream:
- In the clean bowl of your stand mixer fitted with the paddle attachment, beat the butter on medium speed until exceptionally creamy and pale, about 3-4 minutes. Reduce the speed to low and gradually pour in the cooled chocolate ganache. Once all the ganache is incorporated, add the vanilla extract and salt, then increase the speed to medium and beat until the frosting is light, fluffy, and uniform in color. If the frosting is too soft to spread, refrigerate for 30-60 minutes, then re-whip briefly before using.
- Assemble Your Masterpiece:
- Place one cake layer on a serving plate or cake stand. Spread approximately 1 cup of the chocolate buttercream evenly over the top. Place the second cake layer on top, flat side up. Apply a thin layer of buttercream over the entire cake (this is your 'crumb coat') and refrigerate for 15-20 minutes to set. After chilling, apply the remaining buttercream generously over the top and sides of the cake, creating smooth sides or decorative swirls as desired. For a dramatic finish, you can press chocolate shavings or crumbs around the sides of the cake.
My grandmother always said patience makes perfect cakes, and nowhere is this more true than with Devil's Food Cake. The first time I made this recipe, I rushed the cooling process and ended up with a cake that fell apart when I tried to frost it. Now I make the cake layers a day ahead, wrap them well in plastic wrap once completely cool, and assemble the next day. This not only makes the process less stressful but actually improves the cake's flavor as it gives the chocolate notes time to develop.
Deep Chocolate Origins
The fascinating history of Devil's Food Cake dates back to the early 1900s when dramatic food names were all the rage. First appearing in Sarah Tyson Rorer's cookbook in 1902, it was likely named for its sinfully rich taste and slightly reddish hue that comes from the natural reaction between cocoa powder and baking soda. This cake represented pure indulgence during a time when most desserts were much simpler. The rich, moist texture was achieved through innovative use of ingredients like coffee and sour cream - techniques that modern bakers still employ for the ultimate chocolate experience.
Perfect Occasions
While this cake is stunning enough for special celebrations, don't save it only for birthdays and anniversaries. It's equally at home as the star of a dinner party dessert table or as a luxurious weekend treat for a family that appreciates chocolate. During holiday seasons, consider decorating it with seasonal elements - fresh berries in summer, gold sprinkles for New Year's, or crushed peppermint around Christmas time. The rich chocolate flavors pair beautifully with a scoop of coffee or vanilla ice cream for an elevated dessert experience.
 Pin it
Storage Wisdom
This cake actually improves over the first 24 hours as the flavors meld and develop. Store it at room temperature under a cake dome or in a cake keeper for up to 3 days. For longer storage, refrigerate for up to a week, but always bring slices to room temperature before serving for the best flavor and texture. If you want to freeze portions, wrap individual slices tightly in plastic wrap and then foil; they'll keep for up to three months. Thaw overnight in the refrigerator then bring to room temperature before enjoying.
I've made countless chocolate cakes over the years, but this Devil's Food Cake remains my ultimate favorite. There's something almost magical about the way the first bite silences a room full of chattering guests, replaced by closed eyes and appreciative murmurs. It's the cake that converts people who claim they 'don't really like cake' and the recipe friends consistently request for their own special occasions. The deep chocolate flavor paired with that incredibly moist texture creates an experience that's worth every calorie and moment of preparation. In a world of trendy desserts that come and go, this classic recipe proves that sometimes, the devil really is in the delicious details.
Frequently Asked Questions
- → Can I substitute the coffee in this recipe?
- Yes, you can use hot water instead of coffee. However, coffee enhances the chocolate flavor without making the cake taste like coffee. If you're concerned about caffeine, decaf coffee works perfectly.
- → Why does this recipe call for room temperature ingredients?
- Room temperature ingredients blend more evenly and create a smoother, more uniform batter. Cold ingredients can cause the batter to curdle or result in a denser cake texture.
- → Can I make this cake in advance?
- Absolutely! This cake actually improves in flavor after a day. You can make it up to 5 days ahead and store it in the refrigerator. Just bring it to room temperature before serving for the best flavor and texture.
- → What makes Devil's Food Cake different from regular chocolate cake?
- Devil's Food Cake is typically richer, darker, and more moist than regular chocolate cake. It usually contains a higher ratio of chocolate and often includes sour cream or buttermilk for tanginess and moisture.
- → Can I freeze this cake?
- Yes, you can freeze the unfrosted cake layers for up to 3 months, tightly wrapped in plastic wrap and foil. The completed frosted cake can be frozen for up to 1 month. Thaw overnight in the refrigerator before bringing to room temperature to serve.