
 Pin it
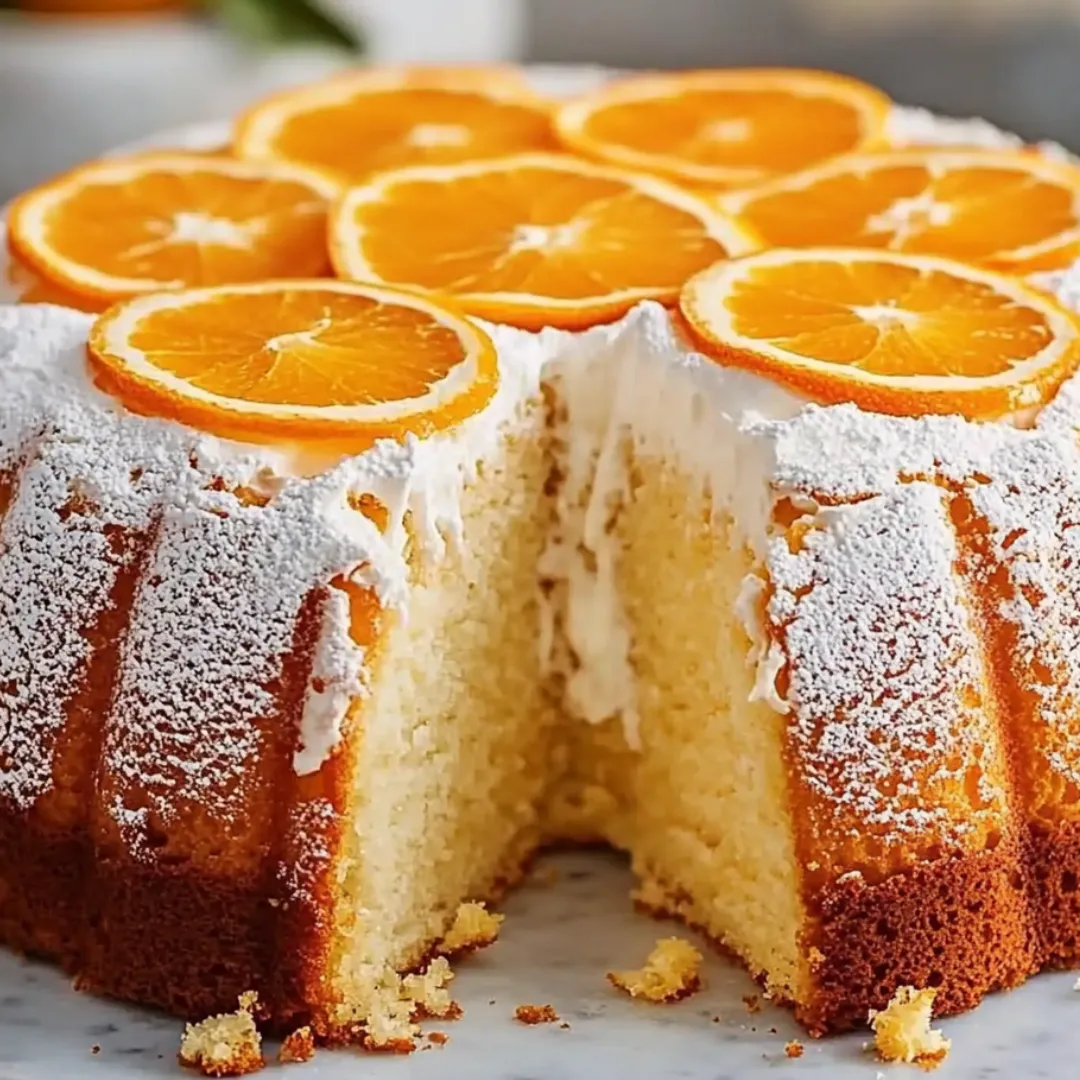
This heavenly Orange Chiffon Cake captures the bright essence of fresh oranges in a cloud-like texture that melts in your mouth with each bite. The delicate balance of sweet and tangy citrus flavors infuses the impossibly light cake, while a simple orange glaze adds just the right finishing touch. Unlike denser cakes, this chiffon creation manages to feel substantial yet airy at the same time – making it the perfect dessert when you want something satisfying that won't weigh you down.
I first attempted this cake for my mother's birthday several years ago, as oranges have always been her favorite fruit. The process of folding in those stiff egg whites intimidated me initially, but when we cut into that first perfectly risen cake, I was hooked. The look on her face when she tasted that fresh orange flavor was worth every minute of preparation. Now it's become our special occasion tradition, and I've perfected my folding technique with each new baking session.
Ingredients You'll Need
- 7 large eggs, separated and at room temperature: Room temperature eggs whip up to a much greater volume than cold eggs; separating them carefully ensures no yolk contaminates the whites
- 2 cups all-purpose flour: Provides structure while still allowing for a tender crumb; sift it to remove any lumps for the airiest texture
- 1½ cups granulated sugar: Sweetens the cake perfectly while helping create that fine texture; don't substitute with liquid sweeteners
- 3 teaspoons baking powder: Provides the proper rise; make sure it's fresh (less than 6 months old) for optimal leavening power
- 1 teaspoon salt: Enhances the orange flavor and balances sweetness; fine sea salt works beautifully here
- ¾ cup water: Adds necessary moisture without weighing down the batter; use filtered water for the purest flavor
- ½ cup canola oil: The secret to chiffon cake's moisture that lasts for days; its neutral flavor lets the orange shine
- 4 teaspoons grated orange zest: The essential flavor component, containing the aromatic oils that give true orange character
- 2 teaspoons vanilla extract or orange extract: Rounds out the flavor profile; orange extract intensifies the citrus notes
- ½ teaspoon cream of tartar: Stabilizes the egg whites, helping them maintain their volume during folding and baking
- For the glaze: 1 cup powdered sugar, ½ teaspoon orange zest, 1 tablespoon orange juice, 1 tablespoon heavy cream - Creates a smooth, pourable consistency with concentrated orange flavor
 Pin it
Step-by-Step Cooking Instructions
- Prepare Your Oven and Ingredients:
- Position a rack in the lower third of your oven and preheat to exactly 325°F. This moderate temperature is crucial for the proper rise and texture of your chiffon cake. Take your eggs out of the refrigerator at least 30 minutes before beginning, as room temperature eggs whip to much greater volume. Carefully separate the eggs, placing the whites in a completely clean, grease-free mixing bowl (even a speck of egg yolk or oil will prevent proper whipping). Place the yolks in a separate medium bowl and set both aside.
- Mix Your Dry Foundation:
- In a large bowl, sift together the flour, sugar, baking powder, and salt. Sifting isn't just an extra step – it's essential for incorporating air and removing any lumps that would weigh down your cake. After sifting, whisk the ingredients together to ensure even distribution of the leavening agents throughout the flour. This uniform mixture creates the perfect foundation for your cake's structure.
- Combine Wet Ingredients:
- In your bowl with the egg yolks, add the water, canola oil, freshly grated orange zest, and your choice of extract. The vibrant orange flecks of zest will perfume the mixture with essential oils that carry intense flavor. Whisk these ingredients together until smooth and well combined. You'll notice the mixture won't fully integrate (oil and water don't mix naturally), but aim for as much incorporation as possible.
- Create Your Batter Base:
- Pour the wet yolk mixture into the bowl with your dry ingredients. Using a whisk or spatula, blend everything together with gentle but thorough motions until you have a smooth, cohesive batter without any pockets of dry flour. The batter will be relatively thick at this stage. Be careful not to overmix, which can develop the gluten in the flour and toughen your cake.
- Whip the Egg Whites:
- Add the cream of tartar to your bowl of egg whites. Using a stand mixer with the whisk attachment (or a hand mixer if necessary), begin beating on medium-low speed until the whites become frothy. Increase to medium-high speed and continue beating until stiff, glossy peaks form. This takes approximately 4 minutes in a stand mixer but may take longer with a hand mixer. You'll know they're ready when you lift the beater and the peaks stand straight up without flopping over, and the whites have a shiny appearance.
- Master the Folding Technique:
- This crucial step determines the final texture of your cake. Using a large, wide rubber spatula, transfer about one-third of the whipped egg whites to your batter. Gently cut through the center of the mixture with the edge of your spatula, then scoop under and fold over. Rotate the bowl and repeat until mostly incorporated. This first addition lightens the batter, making it easier to fold in the remainder. Add the remaining egg whites in two more batches, folding with the same gentle motion until no large white streaks remain but the mixture is still airy and cloud-like. Overmixing at this stage will deflate the air bubbles you've worked so hard to create.
- Fill the Pan Properly:
- Pour your completed batter into an ungreased 10-inch tube pan with removable bottom. This may seem counterintuitive, but an ungreased pan is essential – the batter needs to cling to the sides as it rises. Pour the batter in gradually, and gently tap the pan on the counter once or twice to release any large air bubbles. Use a spatula to smooth the top into an even layer.
- Bake with Precision:
- Place the filled pan on the lowest rack of your preheated oven. Bake for 50-55 minutes, until the top springs back when lightly touched and a toothpick inserted near the center comes out clean. Resist the urge to open the oven door during the first 45 minutes of baking, as this can cause your cake to fall. The cake will rise dramatically above the pan edge and develop a beautiful golden color.
- Cool Upside Down:
- The moment the cake comes out of the oven, immediately invert the entire pan onto a work surface, balancing it upside down over three heatproof glasses. This unusual but essential step prevents your cake from collapsing as it cools. The suspended position allows air to circulate while gravity helps maintain the cake's structure. Allow it to cool completely in this position, which takes about 2 hours.
- Release and Glaze:
- Once fully cooled, gently run a thin knife or offset spatula around both the outer and inner edges of the pan to release the cake. Remove it from the pan and place on a serving plate. For the glaze, whisk together the powdered sugar, orange zest, and orange juice in a small bowl until smooth. If the glaze is too thick, add the heavy cream a little at a time until it reaches a pourable consistency that will still set nicely. Drizzle the glaze over the cooled cake, allowing it to cascade down the sides for a beautiful finish.
I learned the importance of the upside-down cooling process the hard way. During my second attempt at this cake, I was in a hurry and only cooled it upside down for about 30 minutes before flipping it right-side up. The seemingly perfect cake slowly but surely collapsed into a dense, rubbery disc. Now I set a timer and won't touch the cake until it's completely cool – patience truly is a virtue in chiffon cake making!
The Chiffon Difference
Understanding what makes a chiffon cake unique helps appreciate this special dessert. Unlike angel food cake, which relies solely on egg whites for structure and contains no fat, chiffon cake incorporates both egg yolks and oil, creating a moister, more flavorful result while still maintaining incredible lightness. And unlike traditional butter cakes, the use of oil instead of solid fat keeps the cake soft even when refrigerated. This particular orange variation captures the brightness of citrus in a dessert that feels both indulgent and refreshing at the same time.
Serving Suggestions
This versatile cake shines in various settings. For an elegant dessert, serve thin slices alongside fresh berries and a dollop of lightly sweetened whipped cream. For brunch, omit the glaze and dust with powdered sugar instead for a less sweet option that pairs beautifully with coffee. During winter months, consider adding a sprinkle of cardamom to the batter to complement the orange with warm spice notes. The cake also makes a wonderful base for trifles – cube it and layer with orange curd and whipped cream for a show-stopping dessert.
Storage Success
One of the beauties of this cake is its keeping quality. Store at room temperature in an airtight container or under a cake dome for up to 4 days. The oil in the batter helps maintain moisture far longer than butter-based cakes. If you need to preserve it longer, wrap individual slices in plastic wrap and then foil before freezing for up to 3 months. Allow frozen slices to thaw completely at room temperature while still wrapped to maintain moisture. Resist the urge to refrigerate the cake, as the dry environment can compromise its delicate texture.
 Pin it
Troubleshooting Tips
Even experienced bakers occasionally encounter challenges with chiffon cakes. If your cake doesn't rise as expected, your egg whites may have been underbeaten or deflated during folding. If the cake rises but then falls significantly, your oven temperature might be off (use an oven thermometer to verify) or the cake was removed from the pan before cooling completely. For a cake that's too dry, you may have overbaked it slightly – remember that carryover cooking continues even after removing from the oven, so err on the side of slightly underbaking.
After years of making this orange chiffon cake, I've discovered it's not just the recipe but the rhythm of creating it that brings me joy. The methodical separation of eggs, the magical transformation of glossy egg whites, and that moment when the perfectly baked cake emerges tall and proud from the oven. There's something deeply satisfying about mastering a technique that once seemed intimidating. Each time I serve this cake, I'm reminded that the most impressive desserts aren't always the most complicated – sometimes it's the simple classics, executed with care and attention to detail, that truly capture hearts and taste buds alike.
Frequently Asked Questions
- → Why do you cool the cake upside down?
- Cooling upside down prevents the cake from collapsing while it cools. The delicate, airy structure needs gravity's help to maintain its height and fluffiness.
- → Can I use a bundt pan instead of a tube pan?
- It's not recommended. Chiffon cakes need to cling to the straight sides of an ungreased tube pan as they rise and cool. Bundt pans have decorative sides that make removal difficult.
- → Why shouldn't I grease the pan?
- The batter needs to cling to the sides of the pan as it rises and while it cools upside down. A greased pan would prevent this and could cause your cake to fall.
- → Can I make this with other citrus fruits?
- Yes! This recipe works beautifully with lemon, lime, or grapefruit zest and juice. Just substitute equal amounts in both the cake and glaze.
- → How do I know when my egg whites are beaten to stiff peaks?
- When you lift the beater, the egg whites should stand up straight without folding over at the tips. The mixture will be glossy and hold its shape.