
 Pin it
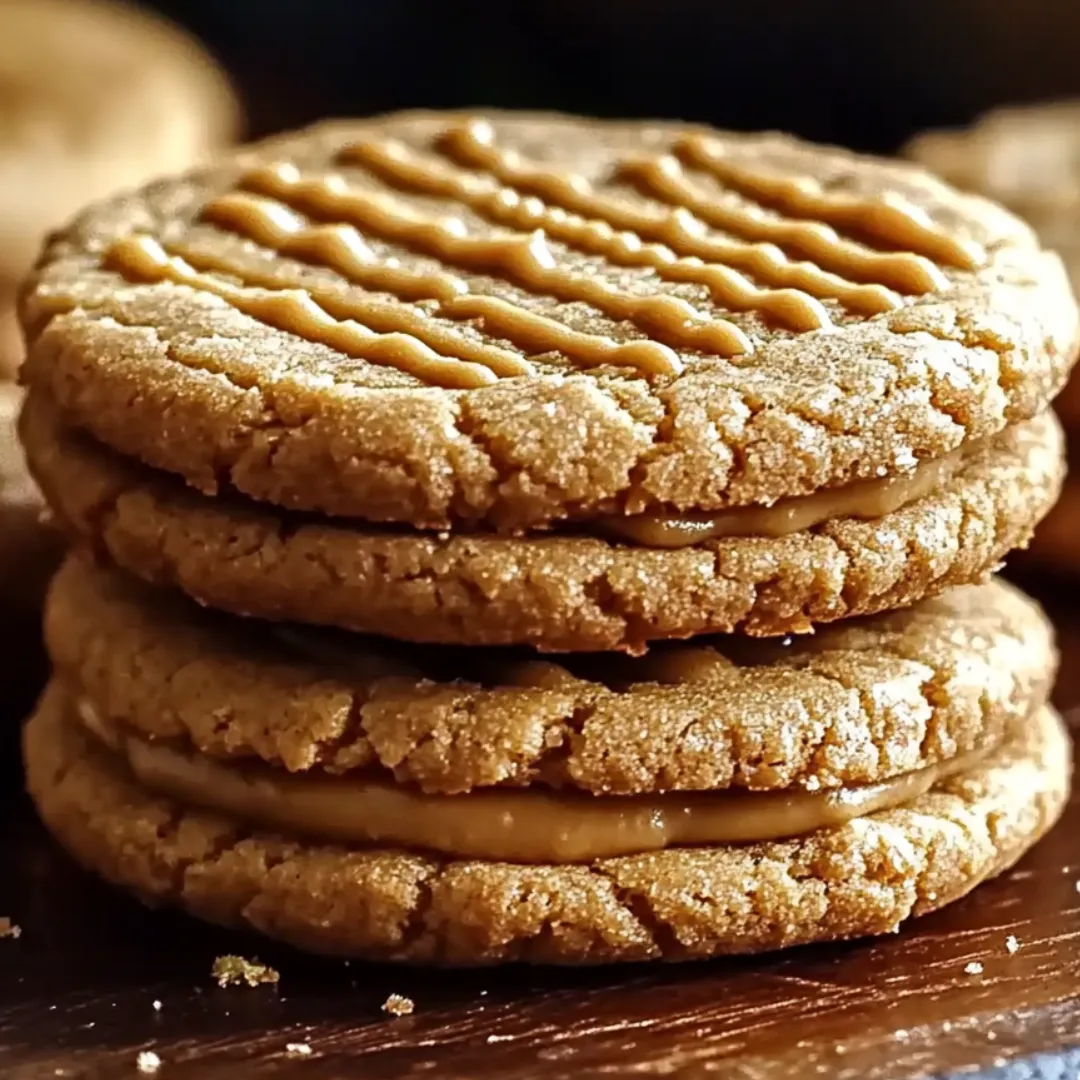
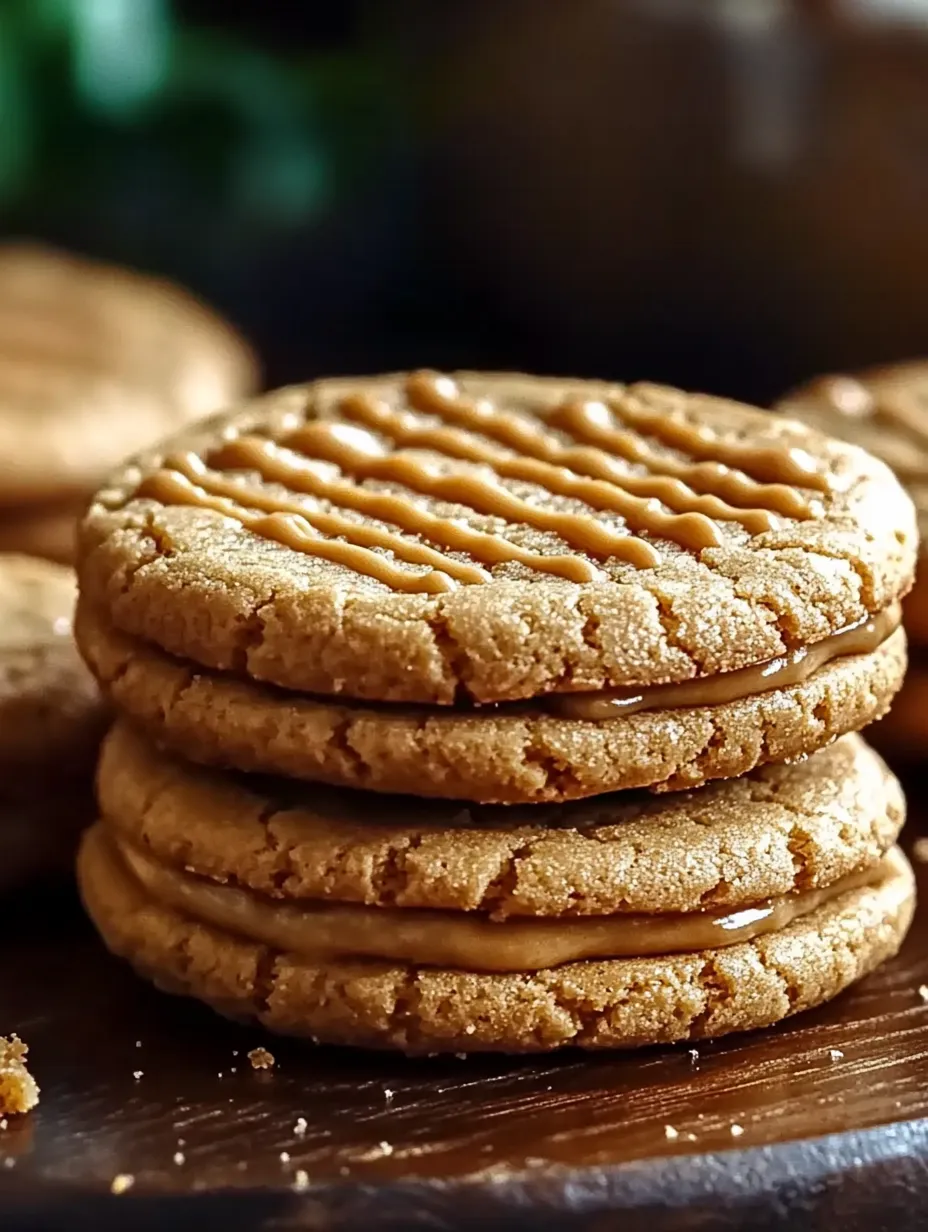
This hearty peanut butter sandwich cookie recipe has been my family's go-to treat for years. The combination of soft peanut butter cookies with a creamy filling creates the perfect indulgent dessert that always disappears within minutes at gatherings.
I first created these cookies during a rainy weekend when my kids were begging for something sweet. What started as a simple baking project has evolved into our signature family treat that even the pickiest eaters request by name.
Ingredients
- All-purpose flour: Ensures the perfect cookie structure with just the right amount of tenderness
- Baking soda: Provides the slight lift that keeps these cookies from being too dense
- Salt: Enhances all the flavors and balances the sweetness perfectly
- Unsalted butter: Gives rich flavor and allows you to control the salt content
- Creamy peanut butter: Forms the backbone of both cookie and filling; choose a good-quality brand for best results
- Granulated sugar: Provides sweetness and helps create the crisp edges
- Brown sugar: Adds moisture and depth with its molasses notes
- Egg: Binds everything together while adding richness
- Vanilla extract: Brings warmth and complexity to both cookie and filling
- Powdered sugar: Creates a smooth, silky filling without any graininess
Step-by-Step Instructions
- Prepare Your Equipment:
- Preheat your oven to 350°F and line baking sheets with parchment paper. This temperature gives the perfect balance of gently browned exteriors while maintaining soft centers. The parchment prevents sticking and makes cleanup effortless.
- Create The Dry Mix:
- Whisk together the flour, baking soda, and salt in a medium bowl until completely combined. This even distribution ensures consistent texture and flavor throughout your cookies.
- Cream The Base:
- Beat the softened butter, peanut butter, and both sugars until the mixture becomes noticeably lighter in color and texture, about 3 minutes. This incorporation of air is crucial for the right cookie texture.
- Add Wet Ingredients:
- Mix in the egg and vanilla until fully incorporated but do not overmix. The mixture should look smooth and cohesive with no streaks of egg visible.
- Combine Everything:
- Gradually add the dry ingredients to your wet mixture, mixing just until combined. Stop once you no longer see flour streaks – a few tiny lumps are perfectly fine as overmixing leads to tough cookies.
- Shape The Cookies:
- Roll tablespoon portions of dough into balls and place them on your prepared baking sheets. Space them about 2 inches apart as they will spread during baking.
- Create The Signature Look:
- Press each cookie with a fork in a crisscross pattern. This not only creates the classic peanut butter cookie look but helps them bake evenly by flattening the dough to a uniform thickness.
- Bake To Perfection:
- Bake for exactly 10 to 12 minutes until the edges turn golden but the centers still look slightly soft. They will continue cooking from residual heat after removal.
- Make The Filling:
- Beat together peanut butter, powdered sugar, vanilla, and butter until completely smooth and creamy. The filling should be thick enough to hold its shape but spreadable.
- Assemble The Sandwiches:
- Once cookies are completely cooled, spread filling on the flat side of one cookie and top with another. Press gently to distribute the filling evenly without squeezing it out the sides.
 Pin it
The creamy peanut butter is truly the star ingredient in this recipe. I discovered that using a national brand rather than natural peanut butter creates the most consistent results. My daughter once called these cookies little pillows of happiness which perfectly describes the soft cookie exterior with the creamy filling surprise inside.
Storage Tips
These sandwich cookies actually improve after a day as the flavors meld together. Store them in an airtight container at room temperature for up to one week. For longer storage, these cookies freeze beautifully. Simply place them in a single layer in a freezer-proof container with parchment between layers and freeze for up to three months. Let them thaw at room temperature for about an hour before serving.
Variations To Try
For chocolate lovers, dip half of each assembled sandwich cookie into melted semisweet chocolate and allow to set. You can also add mini chocolate chips to the cookie dough for a delightful texture contrast. Another popular variation in my household is adding a thin layer of strawberry jam to the filling for a PB&J-inspired cookie that brings nostalgic flavors in an elevated form.
Allergy Adaptations
These cookies can be adapted for various dietary needs. For gluten sensitivities, substitute the all-purpose flour with a 1-to-1 gluten-free baking blend. Those with peanut allergies can use almond butter or sunflower seed butter instead. Just be aware that sunflower seed butter can sometimes turn green when baked due to a reaction with the baking soda but it remains perfectly safe to eat and tastes delicious.
Serving Suggestions
These sandwich cookies pair wonderfully with a cold glass of milk or hot coffee. For an extra special dessert, crumble a cookie over vanilla ice cream and drizzle with warm chocolate sauce. They also make excellent gifts when packaged in a decorative tin or box lined with parchment paper.
 Pin it
Frequently Asked Questions
- → How can I ensure the cookies stay soft?
To keep the cookies soft, avoid overbaking them and store them in an airtight container at room temperature.
- → Can I use natural peanut butter in this recipe?
Yes, but make sure to mix the natural peanut butter well to incorporate any separated oils for consistent texture.
- → What can I substitute for powdered sugar in the filling?
In place of powdered sugar, you can blend granulated sugar into a fine powder as a substitute.
- → Does the dough need to be chilled before baking?
If the dough feels too sticky, refrigerate it for 30 minutes before rolling into balls for easier handling.
- → How can I add a twist to the cookies?
For a fun variation, drizzle melted chocolate or spread a layer of jam inside the sandwich cookies.