
 Pin it
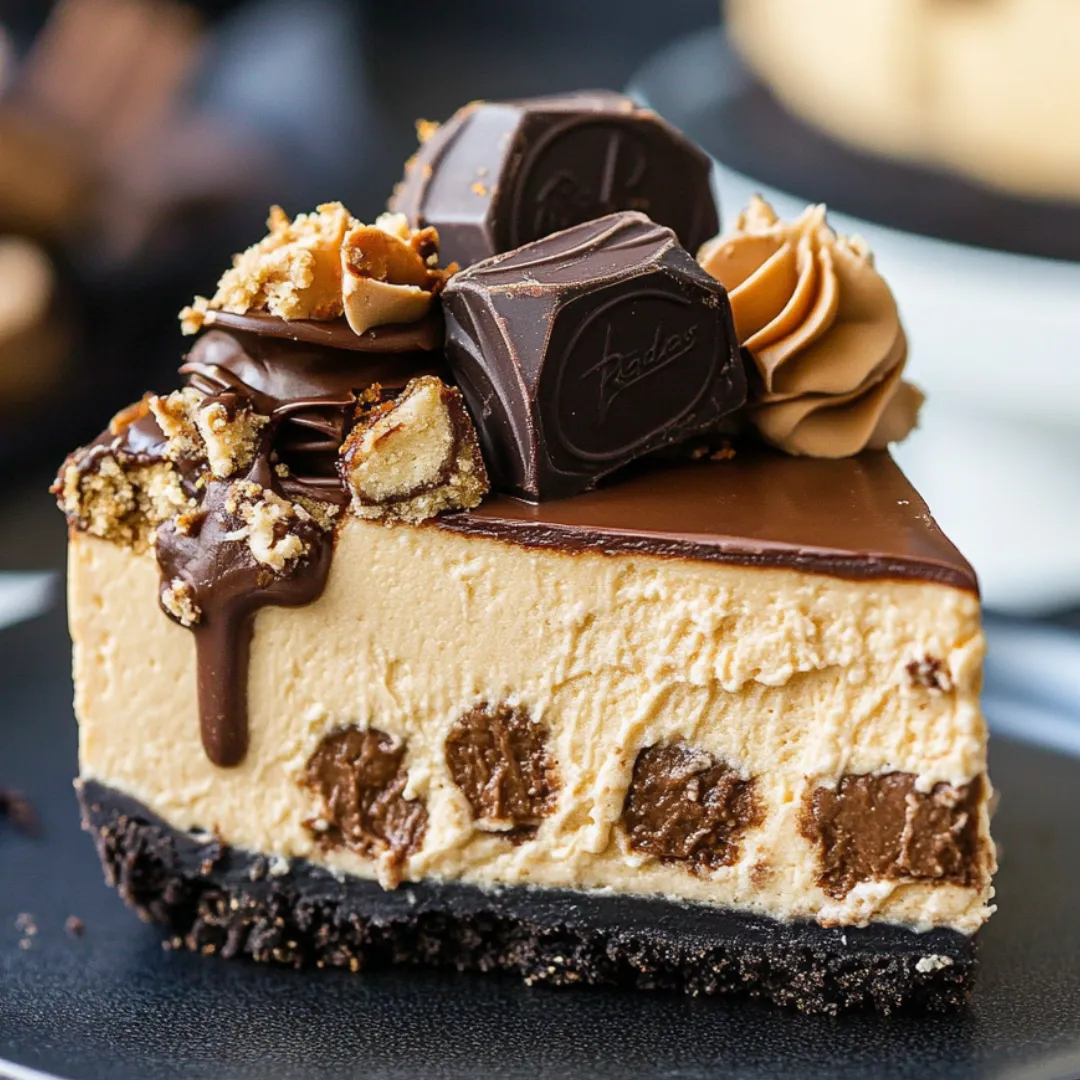
This indulgent Reese's cheesecake transforms America's favorite peanut butter cup into a spectacular dessert experience. A rich, creamy peanut butter filling studded with chopped Reese's cups sits atop a chocolatey Oreo crust, all crowned with silky chocolate ganache and peanut butter whipped cream. Each heavenly bite delivers the perfect balance of chocolate and peanut butter in multiple textures and forms. This showstopping dessert may look like it came from a high-end bakery, but with straightforward instructions and simple decorating techniques, you'll create a professional-looking cheesecake that will have everyone begging for the recipe.
I first made this cheesecake for my husband's birthday, as he's a devoted Reese's cup fan. The expression on his face when he took that first bite was priceless - his eyes widened and he immediately declared it the best dessert I'd ever made! Since then, it's become my most-requested dessert for gatherings. Last Christmas, my notoriously picky brother-in-law had three slices and asked if he could take the leftovers home. Even my mother, who typically avoids rich desserts, couldn't resist a slice. There's something about the nostalgic combination of peanut butter and chocolate that makes everyone feel like a kid again.
Ingredients You'll Need
For the Crust
- 31 Oreo cookies: Creates a chocolatey base that complements the filling; no need to remove the cream filling
- 4 tablespoons unsalted butter, melted: Binds the crust together; use less than typical crusts because of the Oreo filling
For the Filling
- 24 ounces (3 packages) full-fat brick cream cheese, room temperature: The foundation of any good cheesecake; room temperature ensures smooth blending
- 1 cup granulated sugar: Sweetens without overwhelming the peanut butter flavor
- 3 tablespoons all-purpose flour: Helps prevent cracking and creates a creamy texture
- ½ cup sour cream, room temperature: Adds tanginess and breaks up the richness of the cream cheese
- ½ cup creamy peanut butter: Use processed brands like JIF or Skippy, not natural peanut butter which separates
- 2 teaspoons vanilla extract: Enhances the overall flavor profile
- 3 large eggs, room temperature: Provides structure; room temperature ensures proper incorporation
- 1½ cups mini Reese's peanut butter cups, chopped: The star ingredient that adds texture and peanut butter-chocolate flavor pockets
For the Chocolate Ganache
- 1 cup semi-sweet chocolate chips: Creates a smooth, rich topping; quality chocolate makes a difference
- ⅓ cup heavy whipping cream: When heated and combined with chocolate, forms a pourable ganache
For the Peanut Butter Whipped Cream
- 1 cup heavy whipping cream, cold: The base for the fluffy topping; must be cold to whip properly
- ¼ cup powdered sugar: Sweetens and stabilizes the whipped cream
- ¼ cup creamy peanut butter: Infuses the whipped cream with peanut butter flavor
- ½ teaspoon vanilla extract: Adds depth of flavor
- 8-10 regular Reese's cups, cut in half: For the decorative border
 Pin it
Step-by-Step Cooking Instructions
- Prepare Your Equipment:
- Begin by preheating your oven to 325°F (165°C). Line the bottom of a 9-inch springform pan with parchment paper and thoroughly grease the sides. This preparation ensures your cheesecake won't stick to the pan later. Have all your ingredients measured and ready to go before you start mixing.
- Create the Crust:
- In a food processor, pulse the Oreo cookies into fine crumbs. You could also place them in a ziplock bag and crush them with a rolling pin if you don't have a food processor. Transfer the crumbs to a medium bowl and mix in the melted butter until the mixture resembles wet sand. Press this mixture firmly into the bottom and about 1-1½ inches up the sides of your prepared springform pan, using the bottom of a measuring cup to compact it evenly. Bake for 8-10 minutes, then remove from the oven and let cool completely.
- Prepare for Water Bath:
- Once the crust has cooled, wrap the outside of the springform pan with two layers of heavy-duty aluminum foil, ensuring there are no gaps or tears where water could seep in. This step is crucial for preventing a soggy crust when using a water bath. Reduce the oven temperature to 300°F (150°C).
- Make the Filling:
- In the bowl of a stand mixer fitted with a paddle attachment (or using a hand mixer), beat the room temperature cream cheese, sugar, and flour on low speed until completely smooth and free of lumps, about 2-3 minutes. Stop to scrape down the sides and bottom of the bowl several times during mixing. Add the sour cream, peanut butter, and vanilla extract, mixing on low speed until fully incorporated. Add the eggs one at a time, mixing on low speed just until each is incorporated before adding the next. Overbeating after adding eggs can incorporate too much air, leading to cracks later. Finally, gently fold in the chopped Reese's cups by hand using a rubber spatula.
- Assemble the Water Bath:
- Pour the filling into the cooled crust, smoothing the top with a spatula. Place the foil-wrapped springform pan inside a larger roasting pan. For extra protection against water leakage, consider placing the springform pan inside a silicone baking pan or slow cooker liner before setting it in the water bath. Fill the outer pan with hot water until it reaches halfway up the sides of the springform pan. The water bath ensures gentle, even heat for a perfectly smooth cheesecake.
- Bake the Cheesecake:
- Carefully place the water bath setup in the center rack of your preheated oven. Bake for approximately 1 hour and 25 minutes. The cheesecake is done when the edges are set but the center still has a slight jiggle when the pan is gently shaken. The internal temperature should reach about 145-150°F when measured with an instant-read thermometer. Do not overbake, as the cheesecake will continue cooking as it cools.
- Cool Gradually:
- When the baking time is complete, turn off the oven but leave the cheesecake inside with the door closed for 30 minutes. Then, crack the oven door open and let the cheesecake continue cooling in the oven for another 30 minutes. This gradual cooling process helps prevent cracks from forming due to sudden temperature changes. After the oven cooling time, carefully remove the cheesecake from the water bath and peel off the foil. Allow it to cool completely at room temperature on a wire rack.
- Chill the Cheesecake:
- Once the cheesecake has cooled to room temperature, cover it loosely with plastic wrap and refrigerate for at least 5-6 hours, preferably overnight. This chilling time allows the flavors to meld and the texture to set properly. Patience is key for the perfect cheesecake!
- Prepare the Ganache:
- When the cheesecake is fully chilled, carefully remove it from the springform pan and place it on a serving platter. To make the ganache, place the chocolate chips in a heat-resistant bowl. Heat the heavy cream in the microwave or on the stovetop until it just begins to simmer, then pour it over the chocolate chips. Let it sit undisturbed for 2-3 minutes, then whisk until completely smooth and glossy. Let the ganache cool for 5 minutes (but not so long that it thickens too much), then pour it over the center of the cheesecake, using an offset spatula to gently guide it to the edges, allowing some to attractively drip down the sides.
- Create the Peanut Butter Whipped Cream:
- In a small bowl, whisk together the peanut butter, powdered sugar, vanilla extract, and 3 tablespoons of the heavy cream until smooth and well combined. In a separate large bowl, whip the remaining heavy cream on medium-high speed until medium peaks form. Add the peanut butter mixture to the whipped cream and continue beating just until stiff peaks form, being careful not to overwhip. Transfer the peanut butter whipped cream to a piping bag fitted with a large star tip (Ateco #847 works beautifully).
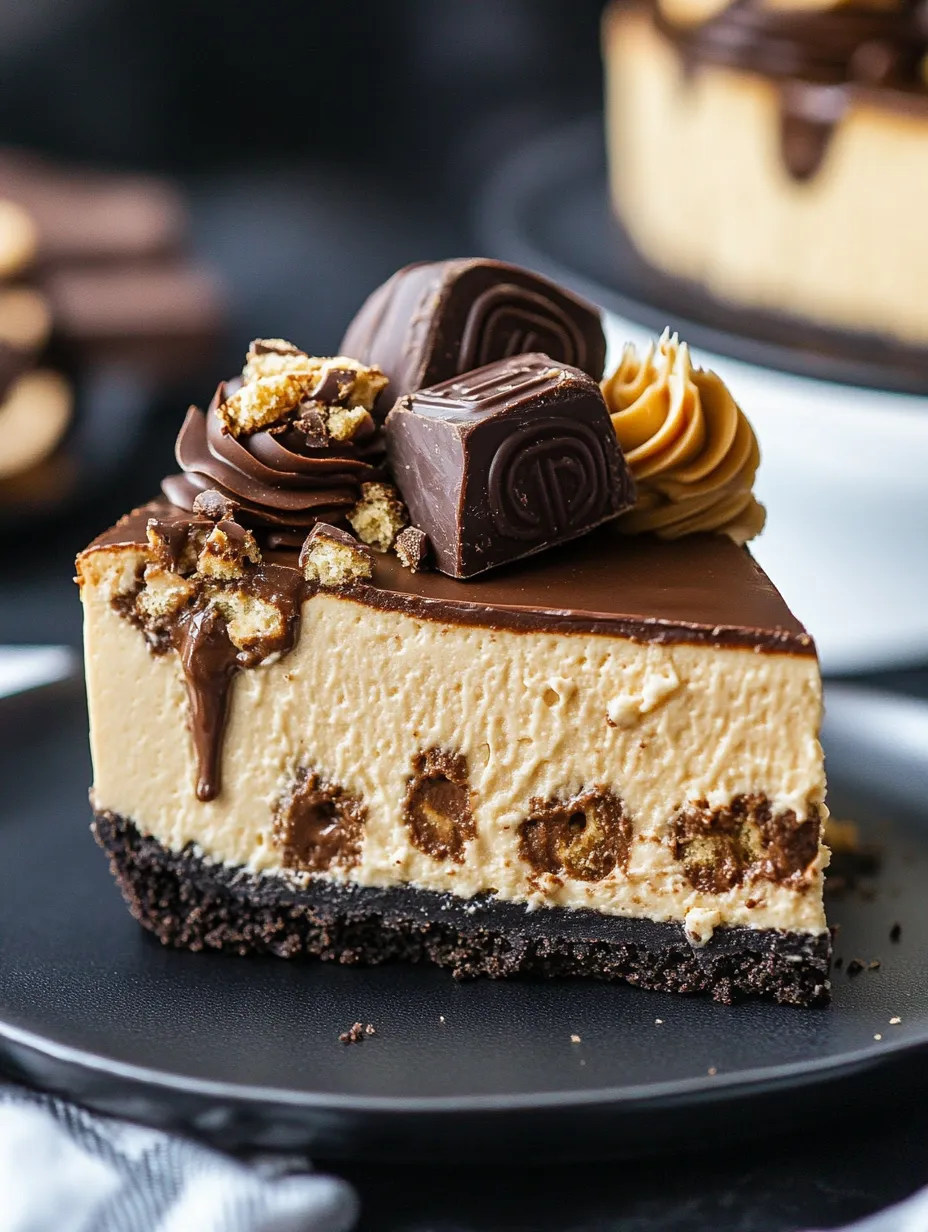
- Decorate the Cheesecake:
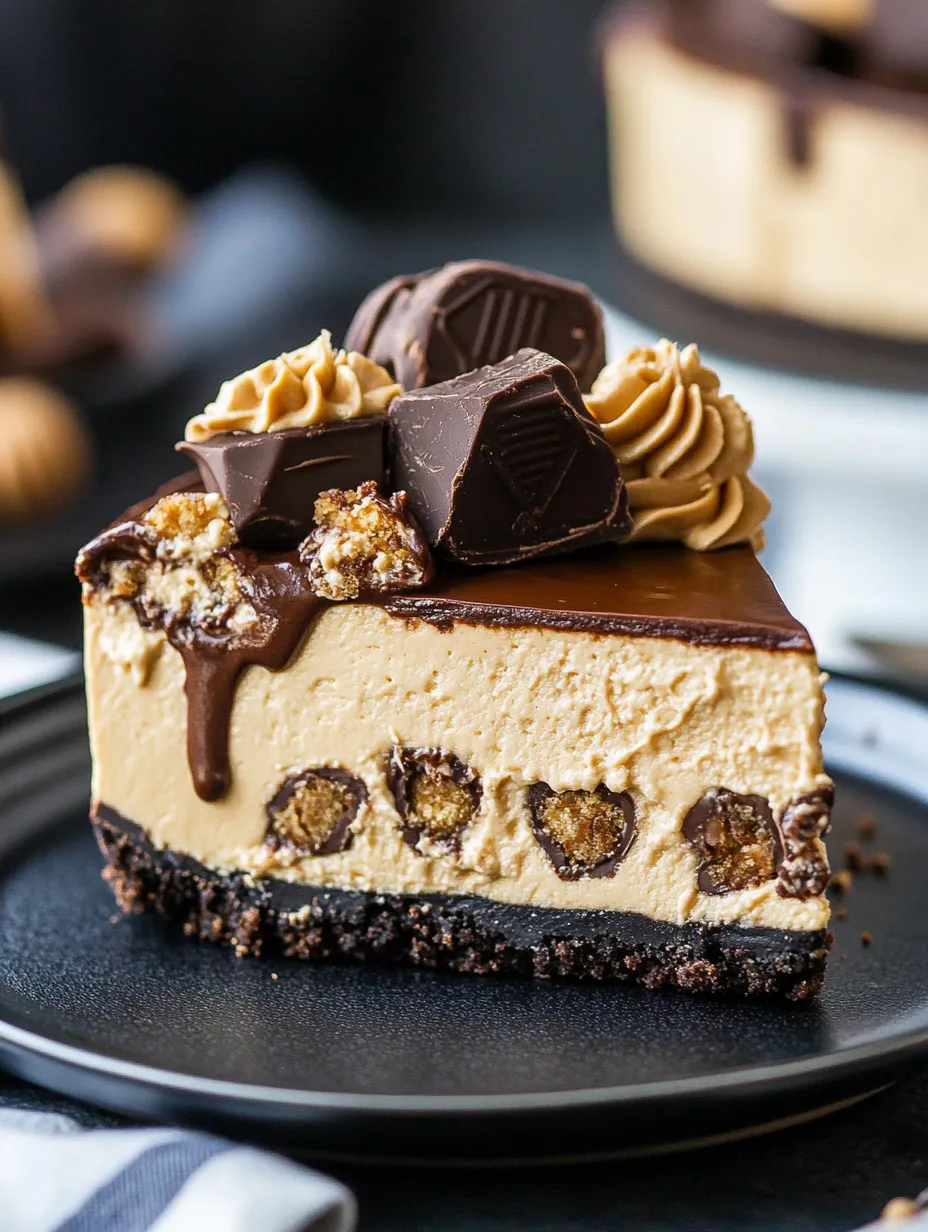
- Pipe decorative swirls of the peanut butter whipped cream around the perimeter of the cheesecake, spacing them evenly. Between each swirl, place half of a Reese's peanut butter cup, pressing it gently into the ganache to secure it. This creates a beautiful and appetizing presentation that hints at the flavors inside.
- Final Chill:
- Return the decorated cheesecake to the refrigerator for at least 30 minutes to allow the ganache to set completely before serving. This final chilling step ensures clean slices and the perfect texture contrast between the creamy cheesecake and the firm ganache.
My first attempt at this cheesecake taught me the importance of patience with the cooling process! I rushed it and ended up with a massive crack down the middle. Now I follow the slow cooling method religiously and get perfect results every time. I've also learned that chopping the Reese's cups while they're cold (straight from the refrigerator) makes them much easier to handle and creates cleaner cuts than working with them at room temperature. For the most vibrant peanut butter flavor, I've found that using a processed brand like JIF or Skippy works far better than natural peanut butter, which can separate and create an oily texture in the filling.
Storage Secrets
This cheesecake keeps beautifully in the refrigerator for 4-5 days when stored in an airtight container or cake carrier. The flavors actually develop and improve after the first day, making this the perfect make-ahead dessert for special occasions. You can also freeze individual slices or the entire cheesecake (preferably before adding the whipped cream decoration) for up to 3 months. To freeze, place the cheesecake in the freezer uncovered until firm, then wrap tightly in a double layer of plastic wrap followed by aluminum foil. Thaw overnight in the refrigerator before serving.
Serving Suggestions
For an extra indulgent presentation, drizzle individual slices with warm chocolate sauce or peanut butter sauce just before serving. A scoop of vanilla ice cream on the side creates a wonderful temperature contrast with the rich cheesecake. For a fun dessert bar idea, serve small slices alongside other miniature desserts like brownie bites or chocolate-dipped strawberries. Coffee or milk makes the perfect beverage pairing to cut through the richness of this decadent dessert.
Common Questions Answered
If your ganache seems too thick to pour smoothly, add an extra tablespoon of warm cream and whisk until it reaches a pourable consistency. Conversely, if it's too thin, allow it to cool at room temperature for a few more minutes until it thickens slightly. For the peanut butter whipped cream, be careful not to overwhip after adding the peanut butter mixture – just a few seconds of mixing is all you need, or the cream can separate and become grainy. If you notice the cream starting to look curdled, gently fold in an additional tablespoon of cold heavy cream by hand to smooth it out.
 Pin it
Variation Ideas
While this classic version is hard to improve upon, you can customize it to suit different occasions or preferences. For a white chocolate variation, substitute white chocolate chips for the semi-sweet in the ganache. During the holidays, try adding a layer of caramel under the ganache for a turtle-inspired version. For a more intense chocolate experience, add 2 tablespoons of cocoa powder to the Oreo crust mixture. If you prefer a less sweet dessert, reduce the sugar in the filling to 3/4 cup and use dark chocolate chips for the ganache.
I'll never forget serving this cheesecake at my sister's engagement party. Her fiancé, who claimed he 'didn't really like cheesecake,' took one bite and immediately asked if I could make it for their wedding! There's something magical about the combination of smooth, creamy cheesecake, crunchy Oreo crust, silky ganache, and that unmistakable peanut butter cup flavor that makes this dessert irresistible. While it does require some time and patience, the results are absolutely worth it – this is the kind of signature dessert that will have people talking long after the last slice disappears.
Frequently Asked Questions
- → Why do I need to use a water bath for this cheesecake?
- A water bath creates a humid environment that helps the cheesecake bake evenly, prevents cracks, and gives it a silky-smooth texture. It's worth the extra step for professional results.
- → Can I make this cheesecake without the peanut butter?
- While you could omit the peanut butter for a plain cheesecake with Reese's, it would significantly change the flavor profile. If you have peanut allergies, consider a different cheesecake recipe that features another flavor.
- → How do I prevent my cheesecake from cracking?
- The slow cooling process in this recipe (leaving in the turned-off oven, then with the door cracked) is designed to prevent cracks. Also, be careful not to overmix the batter, especially after adding the eggs, which can incorporate too much air.
- → Can I make this cheesecake in advance?
- Yes! This cheesecake is perfect for making ahead. You can prepare it 1-2 days before serving and keep it refrigerated. The flavors actually develop and improve with time.
- → How can I tell when my cheesecake is done baking?
- The edges should be set and slightly puffed, but the center should still have a slight jiggle (like Jell-O). If it's completely firm or starting to crack, it's overbaked. The cheesecake will continue to set as it cools.