
 Pin it
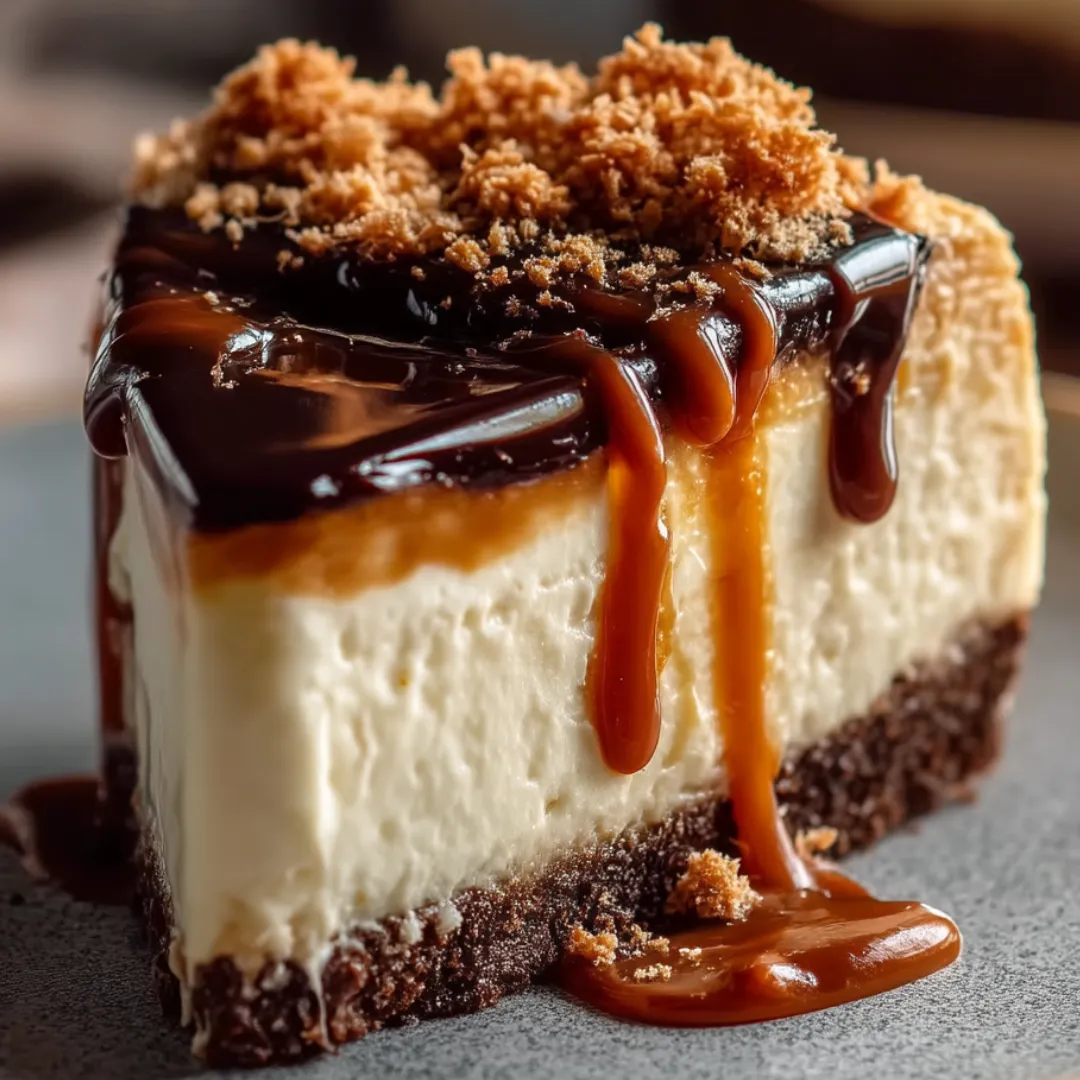
This spectacular Samoa Cheesecake transforms the beloved Girl Scout cookie flavor profile into a luscious dessert that combines multiple textures and tastes in perfect harmony. A buttery graham cracker crust provides the foundation for a velvety-smooth vanilla cheesecake, all crowned with the signature Samoa toppings—toasted coconut, rich caramel, and chocolate drizzle. Each forkful delivers that nostalgic combination of flavors in a new, elevated form that manages to improve upon the original inspiration. Whether you're serving it for a special occasion or simply treating yourself to something extraordinary, this cheesecake creates a memorable dessert experience that will have everyone requesting the recipe.
I first made this cheesecake for a potluck dinner where I wanted to bring something unique rather than the standard chocolate or fruit options. Growing up, Samoa cookies were always the first to disappear from my Girl Scout cookie stash, and I thought transforming those flavors into a decadent cheesecake might be interesting. The moment I set the finished dessert on the table, conversation stopped as everyone turned to stare at it. After the first slice was served, a line quickly formed, and my friend's husband – who claimed he "wasn't really into desserts" – returned for a second piece before finishing his first. What began as an experiment has become my signature dessert, the one friends specifically request for birthdays and special occasions. The greatest compliment came when a former Girl Scout troop leader asked for the recipe, saying it captured the essence of the cookies perfectly while creating something even more indulgent.
Ingredients
- 1½ cups graham cracker crumbs (about 10-12 full sheets): Creates the cookie-like base that complements the cheesecake. Fresh, crisp crackers yield the best texture. Process them to fine, even crumbs without any large pieces for the most cohesive crust.
- ¼ cup granulated sugar: Sweetens the crust and helps it hold together. Fine sugar incorporates most evenly throughout the crumbs. This small amount enhances the graham flavor while providing structure.
- 6 tablespoons unsalted butter, melted: Binds the crust ingredients together and adds rich flavor. Use good quality butter for the best taste. The butter should be completely melted but not hot when mixed with the crumbs.
- 3 packages (8 oz each) cream cheese, softened: Forms the creamy base of the cheesecake. Full-fat cream cheese provides the richest flavor and best texture. The cream cheese must be fully softened to room temperature to prevent lumps in your batter.
- 1 cup granulated sugar: Sweetens the filling perfectly while maintaining the tangy cream cheese flavor. Regular white sugar creates the smoothest texture. This amount provides sweetness without overwhelming the other flavors.
- 3 large eggs, room temperature: Provides structure and richness to the filling. Room temperature eggs incorporate more smoothly than cold ones. Fresh eggs with bright yolks add a subtle richness to the finished cheesecake.
- 1 tablespoon vanilla extract: Enhances the creamy flavor and complements the coconut topping. Pure vanilla extract rather than imitation offers the most complex flavor. The extract should have a rich aroma without any alcohol overtones.
- ¼ cup sour cream: Adds tanginess and creates an incredibly smooth texture. Full-fat sour cream provides the best results. It should have a thick consistency without any separation or wateriness.
- 2 cups sweetened shredded coconut: Creates the signature Samoa texture and flavor. Look for moist, fresh coconut without any dryness or off smells. The sweetened variety balances the overall flavor profile perfectly.
- 1 cup caramel sauce (store-bought or homemade): Provides the classic caramel element of Samoas. Thick caramel sauce that can be drizzled works best. Choose a high-quality brand with real butter and cream for the most authentic flavor.
- 1 cup semi-sweet chocolate chips: Creates the chocolate drizzle that completes the Samoa experience. Good quality chocolate with around 60% cacao provides the perfect balance of sweetness and chocolate flavor. The chips should melt smoothly without seizing.
- 2 tablespoons heavy cream (for chocolate drizzle): Helps create a smooth, pourable chocolate sauce. The cream should have at least 36% milk fat content for the best results. This small amount transforms melted chocolate into a drizzle-able consistency.
 Pin it
Step-by-Step Instructions
- Step 1:
- Prepare your equipment properly - Begin by positioning a rack in the center of your oven and preheating to 325°F (165°C). This moderate temperature is crucial for baking cheesecake evenly without causing it to puff up and crack. While the oven heats, wrap the outside of a 9-inch springform pan with two layers of heavy-duty aluminum foil, ensuring the foil extends up the sides of the pan. This waterproofing step is essential for the water bath that will help your cheesecake bake gently and evenly. The double layer of foil provides insurance against water seepage that could ruin your perfect crust. Lightly grease the inside of the springform pan with butter or cooking spray to ensure easy removal after baking. Additionally, gather all ingredients and allow the cream cheese, eggs, and sour cream to come to room temperature for at least an hour before beginning – properly tempered ingredients are crucial for a smooth, lump-free batter.
- Step 2:
- Create the perfect graham cracker crust - In a medium bowl, combine the graham cracker crumbs, ¼ cup sugar, and melted butter. Stir with a fork until the mixture resembles wet sand and holds together when pressed between your fingers. Transfer this mixture to your prepared springform pan and, using the bottom of a measuring cup or glass, press firmly to create an even layer across the bottom and about 1 inch up the sides of the pan. The pressure applied is important – press firmly enough to create a compact crust that won't crumble when sliced, but not so hard that it becomes impenetrable. Pay special attention to the corners where the bottom meets the sides, ensuring there are no thick spots that could be difficult to cut through. Place the crust in the preheated oven and bake for 10 minutes until it's just set and slightly fragrant, but not browned. Remove from the oven and allow to cool slightly while preparing the filling. This pre-baking step ensures a crisp crust that won't become soggy when the filling is added.
- Step 3:
- Mix the cheesecake filling properly - In the bowl of a stand mixer fitted with the paddle attachment (or a large bowl with a hand mixer), beat the softened cream cheese on medium-low speed until completely smooth and free of lumps, about 2-3 minutes. Scrape down the sides and bottom of the bowl thoroughly during this process – hidden pockets of unmixed cream cheese can ruin the texture of your cheesecake. Add the cup of granulated sugar gradually and continue beating for another 2 minutes until the mixture is light and fluffy. The proper creaming of these ingredients creates the silky texture that makes this cheesecake exceptional. Keep the mixer at medium-low speed throughout this process – beating at high speed incorporates too much air, which can cause cracks during baking. This patient approach yields a cheesecake with the perfect dense-yet-light texture that sets it apart from ordinary versions.
- Step 4:
- Add eggs and flavorings with care - With the mixer running on low speed, add the eggs one at a time, allowing each to incorporate fully before adding the next. Pause to scrape down the bowl after each addition. This methodical approach prevents overbeating while ensuring the eggs are properly distributed throughout the batter. After all eggs are incorporated, add the vanilla extract and sour cream. Mix on low speed just until combined and smooth – about 30-45 seconds. Overmixing at this stage can affect the final texture of your cheesecake, making it too airy or prone to cracking. The finished batter should be completely smooth with a slight sheen, indicating the perfect consistency. It will be thicker than cake batter but should pour easily from the mixer bowl. The sour cream adds a subtle tanginess that balances the sweetness while contributing to the creamy texture.
- Step 5:
- Prepare for water bath baking - Pour the prepared cheesecake filling into the cooled crust, smoothing the top with a spatula. Tap the pan gently against the counter several times to release any trapped air bubbles, which could create holes in your finished cheesecake. Place the foil-wrapped springform pan into a larger roasting pan or baking dish. Carefully pour hot water into the larger pan until it reaches halfway up the sides of the springform pan, creating a water bath. This water bath is crucial for gentle, even baking that prevents cracks and creates that perfectly smooth texture. Take care not to splash any water into the cheesecake batter during this process. The insulation provided by the water helps regulate the temperature around the cheesecake, allowing it to bake at a consistent rate from edges to center.
- Step 6:
- Bake with patience and precision - Carefully transfer the water bath setup to the preheated oven, moving slowly to avoid splashing water. Bake for 60-70 minutes, checking after the 60-minute mark. The cheesecake is done when the edges are set and appear slightly puffed, but the center still has a slight jiggle – about a 3-inch diameter circle in the middle should wobble slightly when the pan is gently shaken. The cheesecake will continue to cook and set after being removed from the oven, so it's better to underbake slightly than overbake. An overbaked cheesecake can become dry and crack, while a properly baked one will be creamy and smooth. Resist the urge to open the oven door during the first 45 minutes of baking, as temperature fluctuations can cause cracking. The slow, steady baking process is what creates the signature velvety texture that makes cheesecake so irresistible.
- Step 7:
- Cool gradually for crack prevention - When the cheesecake has finished baking, turn off the oven but leave the cheesecake inside with the door cracked open about 1 inch. Allow it to cool gradually in the cooling oven for one hour. This slow cooling process prevents the dramatic temperature change that can cause the cheesecake surface to crack and sink. After the hour in the oven, remove the cheesecake from the water bath, carefully peel away the foil, and let it cool completely on a wire rack at room temperature, about another hour. Once completely cooled, cover the cheesecake with plastic wrap (without touching the surface) and refrigerate for at least 4 hours, preferably overnight. This chilling time is non-negotiable – it allows the flavors to meld and the texture to set properly for clean slicing. The patience required during cooling and chilling is rewarded with a perfectly smooth, crack-free surface.
- Step 8:
- Toast coconut for enhanced flavor - While the cheesecake chills, prepare the toasted coconut. Spread the sweetened shredded coconut in an even layer on a baking sheet. Place in a preheated 325°F oven and toast for 5-10 minutes, stirring every 2 minutes to ensure even browning. Watch it carefully, as coconut can go from golden to burnt very quickly. You're looking for a mix of golden brown and lighter pieces, which creates the most interesting texture and flavor. The coconut is done when most pieces are golden and the room fills with a nutty, sweet aroma. Remove from the oven and allow to cool completely before using. Toasting the coconut transforms it from a sweet, chewy ingredient to one with complex flavor and a pleasant crunch that mimics the texture found in Samoa cookies. This simple step elevates the topping from good to exceptional, adding depth that makes this cheesecake truly special.
- Step 9:
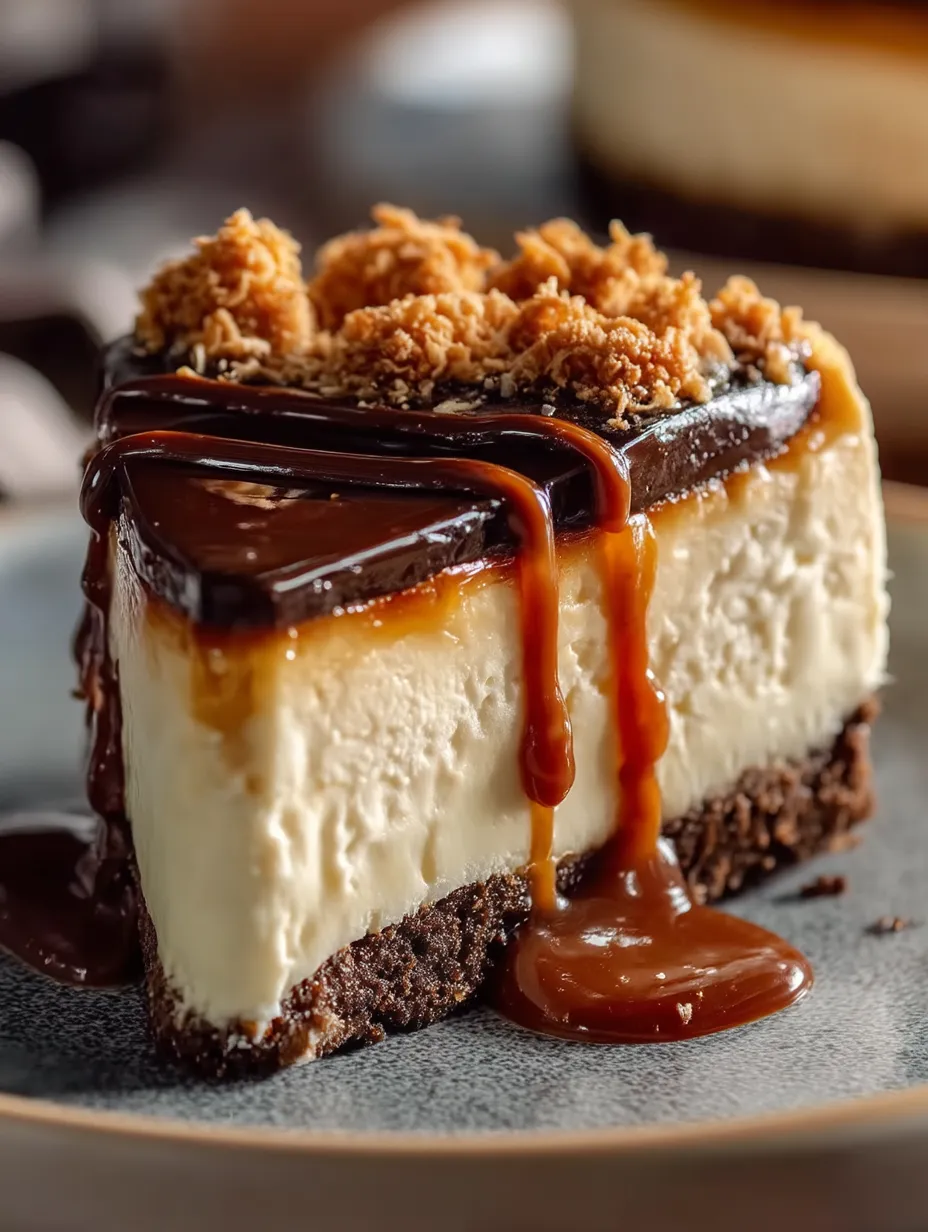
- Create the signature Samoa toppings - When ready to serve, carefully remove the sides of the springform pan by running a thin knife around the edge first, then releasing and lifting away the ring. Transfer the cheesecake to a serving platter if desired. Warm the caramel sauce slightly if it's too thick to drizzle – about 20 seconds in the microwave should suffice. Pour about ¾ cup of the caramel sauce over the surface of the cheesecake, leaving a small border around the edge for a beautiful presentation. Sprinkle the toasted coconut over the caramel layer, gently pressing it in so it adheres. In a microwave-safe bowl, combine the chocolate chips and heavy cream. Microwave in 30-second intervals, stirring between each, until the chocolate is completely melted and smooth. Transfer the melted chocolate to a small zip-top bag, snip off a tiny corner, and drizzle it over the coconut-caramel layer in a zigzag pattern. Reserve the remaining caramel sauce for serving. These layers of flavor and texture recreate the iconic Samoa cookie experience while elevating it to a more sophisticated dessert.
- Step 10:
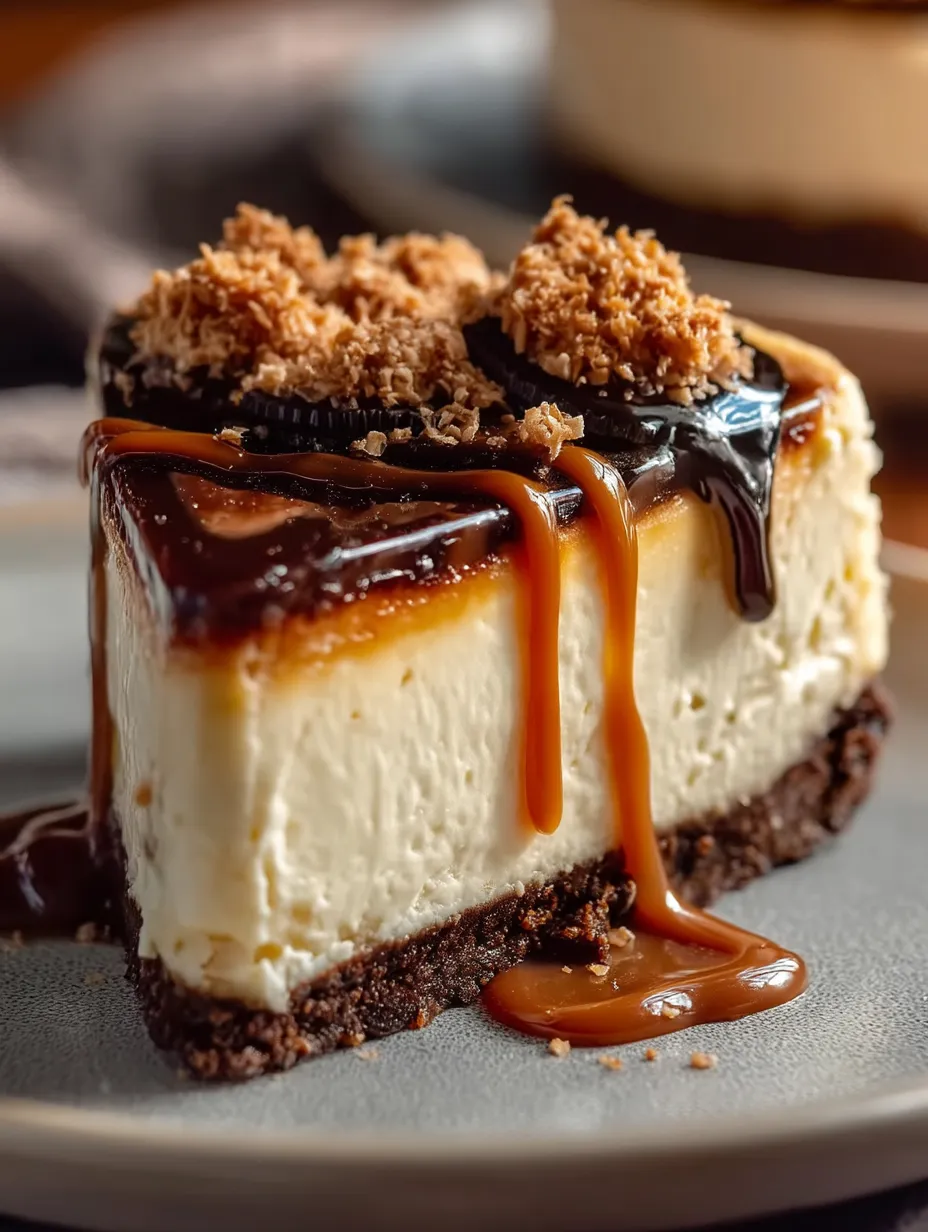
- Serve with thoughtful presentation - For the cleanest slices, dip a sharp knife in hot water and wipe dry between each cut. This heated blade technique helps you achieve picture-perfect slices that showcase all the beautiful layers. Drizzle additional caramel sauce on each serving plate before placing the slice, or serve the extra sauce on the side for guests to add according to their preference. For a truly indulgent experience, serve slices slightly chilled rather than cold from the refrigerator – about 15-20 minutes at room temperature allows the flavors to fully bloom on the palate. The cheesecake can be garnished with additional toasted coconut or a small Samoa cookie for a decorative touch that indicates the flavor inspiration. Each slice should show the distinct layers of graham crust, creamy cheesecake, golden caramel, toasted coconut, and chocolate drizzle – a visual feast that hints at the flavor experience to come.
The finished Samoa Cheesecake should showcase a perfect balance of textures and flavors: the crisp graham cracker crust providing a sturdy base, the creamy vanilla cheesecake offering a neutral canvas, and the trio of toppings – sticky caramel, toasty coconut, and rich chocolate – recreating the beloved cookie flavor in a new, elevated form.
A Year-Round Cookie Fix
One of the aspects I love most about this Samoa Cheesecake is how it lets me enjoy the beloved cookie flavor any time of year, not just during the limited Girl Scout cookie season.
I discovered the true value of this recipe one summer when my daughter, home from college and craving her favorite cookies, lamented that she'd have to wait months before they'd be available again. On a whim, I decided to surprise her with this cheesecake, hoping it might satisfy her craving. As she took her first bite, her eyes widened in surprise. "This is even better than the cookies," she declared, immediately taking a photo to share with her friends. What began as a substitute became something we now prefer to the original.
The translation of these flavors into cheesecake form actually enhances the experience in several ways. The contrast between the silky, cool cheesecake and the textural toppings creates more dimension than the cookies alone. The caramel layer can be adjusted to your preference – thicker and more abundant than what's possible on a small cookie. Most importantly, the ratio of flavors can be customized with each bite, allowing you to experience the perfect balance of coconut, caramel, and chocolate according to your personal taste.
This recipe has also become my secret weapon for bake sales and potlucks, where I've noticed people are willing to pay premium prices or choose it first from a crowded dessert table. There's something about the familiar, beloved flavor profile in an unexpected form that draws people in, creating an immediate emotional connection before they've taken their first bite.
Perfect Occasions for Serving
This Samoa Cheesecake has proven itself versatile enough to shine in numerous settings, from casual gatherings to more formal occasions.
For dinner parties, I often serve smaller slices as the grand finale, accompanied by small cups of espresso or dessert wine. The rich, complex flavors pair beautifully with both coffee and sweet wines, creating a sophisticated ending to a meal. Guests invariably ask for the recipe, surprised that something so impressive stems from a Girl Scout cookie inspiration.
During the holidays, when cookie trays and traditional pies abound, this cheesecake offers a welcome deviation from the expected desserts. One Christmas, my sister-in-law requested it instead of our family's traditional Yule log, starting a new tradition that's continued for several years. The flavors feel celebratory and special without being tied to any specific holiday.
For more casual settings like family dinners or weekend gatherings, I sometimes prepare mini versions using a muffin tin lined with paper cups and a vanilla wafer base. These individual portions are perfect for serving without the formality of slicing a full cheesecake and allow for easier portion control. Children particularly love having their own personal dessert, especially when topped with an extra drizzle of caramel.
When bringing dessert to someone else's home, this cheesecake travels remarkably well. I transport it in the springform pan for protection, then remove the sides and add the final chocolate drizzle just before serving. The dramatic presentation never fails to elicit gasps of appreciation when revealed at the dessert table.
I learned about the importance of proper cooling through an embarrassing kitchen disaster. Preparing this cheesecake for an important dinner party, I was running behind schedule and attempted to speed the process by removing it from the oven immediately after baking. As it cooled on the counter, I watched in horror as a Grand Canyon-sized crack formed across the surface, growing wider by the minute. While the caramel and coconut toppings eventually covered the imperfection, the texture suffered from the rapid temperature change. Now I religiously follow the gradual cooling method, turning off the oven and leaving the door cracked with the cheesecake inside for a full hour. This patience has consistently rewarded me with perfectly smooth, crack-free cheesecakes that taste as good as they look.
 Pin it
Creative Variations to Try
While the classic version of this Samoa Cheesecake is perfect as is, I've developed several variations that offer delightful twists on the original recipe.
For chocolate lovers, I sometimes add 3 tablespoons of cocoa powder to the cheesecake batter, creating a chocolate cheesecake base that intensifies the chocolate component found in the traditional cookie. This variation works particularly well during winter months when rich, deep flavors feel especially appropriate. I adjust the sugar slightly, adding an extra 2 tablespoons to balance the unsweetened cocoa.
When serving at summer gatherings, I've created a coconut cream variation by adding 1/2 cup cream of coconut (not coconut milk) to the cheesecake batter and reducing the regular sugar by 1/4 cup. This tropical twist enhances the coconut flavor throughout the entire dessert rather than just in the topping. Garnished with fresh pineapple chunks alongside the standard toppings, it creates a dessert that feels perfect for warm-weather entertaining.
For a more sophisticated adult version, I occasionally add 2 tablespoons of dark rum to the caramel sauce before drizzling it over the cheesecake. The rum adds complexity and depth to the caramel flavor while cutting some of the sweetness. This variation has been particularly popular at dinner parties where guests appreciate the subtle complexity of flavors.
During holiday seasons, I sometimes incorporate a layer of dark chocolate ganache between the cheesecake and caramel topping. This additional chocolate layer references the chocolate cookie base found in actual Samoa cookies while adding another texture to the dessert. The contrast between the smooth, bitter chocolate and sweet caramel creates an even more complex flavor experience.
For those who prefer a different crust, I've successfully substituted chocolate cookie crumbs for the graham crackers, creating a base that more closely mimics the chocolate-dipped bottom of Samoa cookies. This simple swap significantly changes the overall flavor profile while maintaining the spirit of the original dessert.
After years of making this cheesecake for family gatherings, dinner parties, and special occasions, I've come to appreciate how a dessert can be more than just something sweet – it becomes a connection to memories and experiences. My niece, who sold Girl Scout cookies for years, now requests this cheesecake for her birthday instead of a traditional cake. Each time I make it, conversations inevitably turn to cookie memories – favorite varieties, selling experiences, or the anticipation of cookie season.
What I treasure most about this recipe is how it transforms something familiar into an elevated experience while maintaining the nostalgic connection to the original. Like many of the best recipes, it doesn't merely imitate its inspiration but reimagines it in a way that creates something new and special. The flavors remain recognizable enough to trigger those happy cookie memories while the creamy cheesecake format adds a level of indulgence that makes it appropriate for celebrating life's special moments.
Whether you make this to satisfy a cookie craving, to impress guests, or simply to treat yourself to something extraordinary, this Samoa Cheesecake delivers an experience that honors its inspiration while creating new memories around your table. And isn't that what the best desserts should do?
Frequently Asked Questions
- → Can I make this cheesecake ahead of time?
- Absolutely! It tastes even better after chilling overnight. Can be made up to 2 days in advance.
- → How long will the cheesecake keep?
- Refrigerate for up to 5 days or freeze for up to 2 months.
- → Can I use a different type of cookie for the crust?
- Yes! Graham crackers or shortbread cookies work well as alternatives to OREO cookies.
- → What if I don't have a springform pan?
- A springform pan is recommended, but you can try a deep cake pan lined with parchment paper.
- → Can I make this cheesecake gluten-free?
- Use gluten-free sandwich cookies for the crust and check all other ingredients for gluten.