
 Pin it
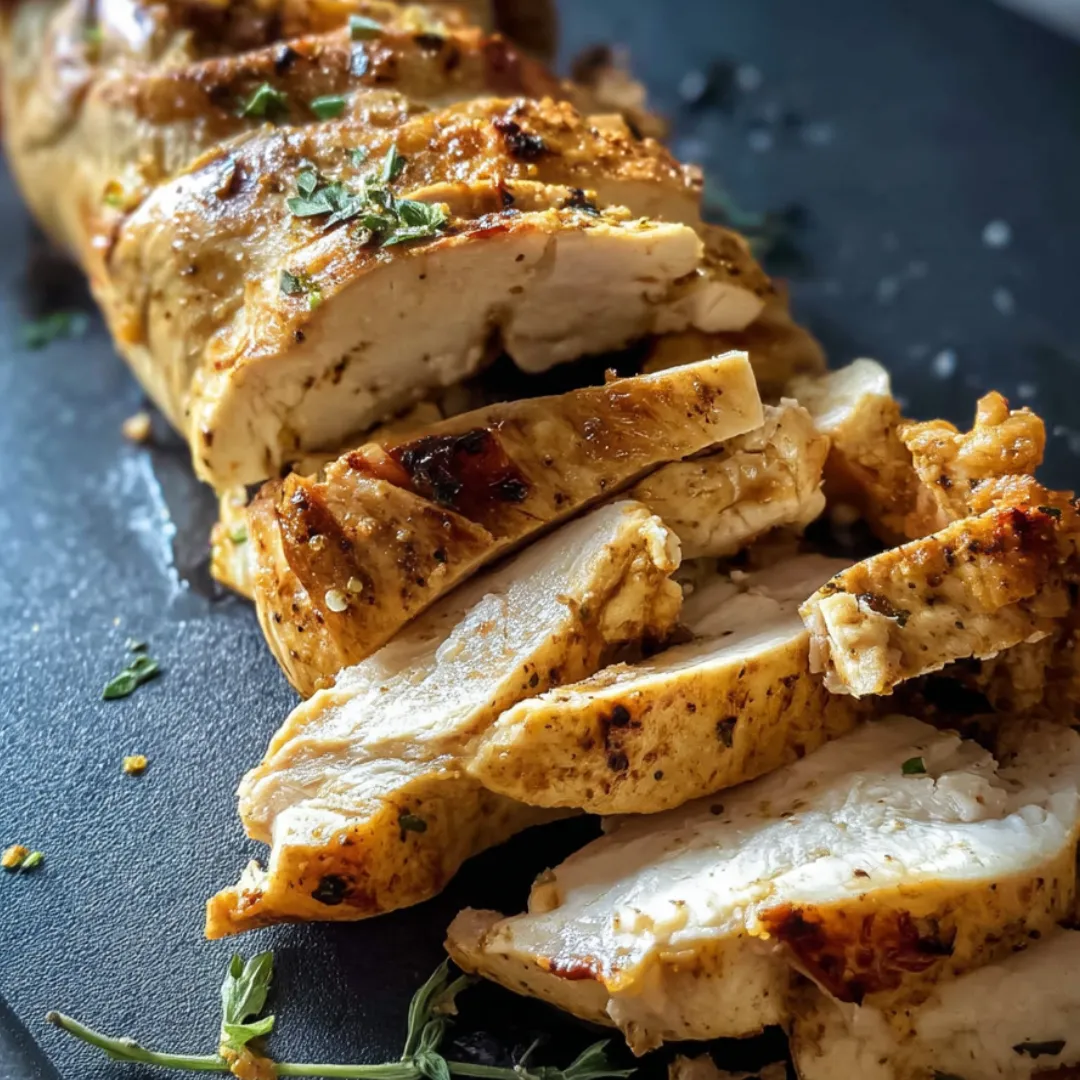
This ingenious Chicken Shawarma reimagines the beloved street food favorite using a simple loaf pan to create those distinctive layers of flavor and texture without specialized equipment. Each slice reveals beautifully stacked chicken infused with aromatic spices like cumin, coriander, and cinnamon, creating that authentic shawarma experience right in your home kitchen. The loaf pan method allows the meat to self-baste as it cooks, resulting in incredibly tender, juicy chicken with perfectly caramelized edges that mimic traditional vertical rotisserie cooking.
I discovered this technique purely by accident during a dinner party crisis. I had promised homemade shawarma to friends but realized my rotisserie attachment was broken. In desperation, I layered the marinated chicken in a loaf pan, hoping for the best. When I pulled it from the oven, the aroma filled the kitchen, and slicing revealed those perfect layers of spiced meat. My guests couldn't believe it wasn't from a specialty restaurant. What began as a kitchen mishap has become my most requested recipe, proving that sometimes the best culinary discoveries happen when we're forced to improvise.
Ingredients
- 2 pounds boneless, skinless chicken breasts: Forms the heart of this dish. Look for plump, even-sized breasts with good color and minimal white striations. Fresh chicken works best here, but if using frozen, ensure it's completely thawed and patted dry before marinating. The meat should feel firm and have a clean smell.
- 4 cloves garlic, minced: Provides essential aromatic depth. Choose firm garlic bulbs with tight, papery skin and no sprouting. Fresh garlic makes a significant difference in this recipe compared to pre-minced varieties, which often lack intensity.
- 3 tablespoons fresh lemon juice: Adds brightness and helps tenderize the chicken. Use freshly squeezed juice rather than bottled for the cleanest flavor. A medium lemon typically yields about 2 tablespoons of juice, so you'll need 1-2 lemons.
- ¼ cup olive oil: Creates a rich marinade that keeps the chicken moist. Extra virgin olive oil provides the best flavor, but any good quality olive oil works well. The oil should have a fresh, fruity aroma without any rancidity.
- 2 teaspoons ground cumin: Contributes earthy, warm notes essential to shawarma's distinctive taste. Fresh, aromatic cumin makes a significant difference – it should have a strong, warm smell when you open the container.
- 2 teaspoons paprika: Adds depth and subtle smokiness. Sweet paprika creates a balanced flavor, while smoked paprika adds an extra dimension if you prefer. The spice should have a vibrant red color without any brown tinge.
- 1 teaspoon turmeric: Provides beautiful color and subtle earthy flavor. Quality turmeric should have a bright yellow-orange color and a fresh, slightly bitter aroma. It stains easily, so handle with care.
- 1 teaspoon ground coriander: Brings citrusy, floral notes that round out the spice profile. The spice should have a light tan color and fresh, lemony aroma when you open the container.
- ½ teaspoon ground cinnamon: Adds distinctive warmth and slight sweetness. Ceylon cinnamon offers a more delicate flavor than cassia cinnamon, but either works in this recipe. The spice should have a sweet, woody aroma.
- ½ teaspoon ground ginger: Contributes subtle warmth and complexity. Fresh, fragrant powder without clumps will distribute most evenly throughout the marinade.
- ¼ teaspoon cayenne pepper (adjustable): Provides gentle heat that enhances other flavors. Adjust according to your heat preference; the recipe as written creates moderate spice. Fresh cayenne should have a vibrant red color and potent aroma.
- 1½ teaspoons salt: Enhances all other flavors and helps tenderize the meat. Kosher or sea salt provides cleaner flavor than table salt and dissolves well in the marinade.
- ½ teaspoon freshly ground black pepper: Adds subtle heat and depth. Freshly ground pepper offers significantly more flavor complexity than pre-ground.
 Pin it
Step-by-Step Instructions
- Step 1:
- Prepare the chicken with precision - Begin by placing your chicken breasts on a clean cutting board. Using a sharp knife, trim away any excess fat or tendon tissue, ensuring clean, evenly-sized pieces. Next, with your knife parallel to the cutting board, carefully slice each breast horizontally into thin, even sheets approximately ¼-inch thick. This uniform thickness is crucial for proper cooking and authentic texture. After slicing, gently pound any thicker sections with a meat mallet until all pieces are consistently thin. This step might seem fussy, but it's essential for creating those traditional shawarma-style meat layers that stack and cook properly. The thinness also allows the marinade to penetrate quickly and thoroughly, infusing every bite with flavor.
- Step 2:
- Craft the perfect marinade - In a large mixing bowl, combine the minced garlic, fresh lemon juice, and olive oil, whisking to create an emulsion. Add all the spices—cumin, paprika, turmeric, coriander, cinnamon, ginger, cayenne, salt, and pepper—and whisk vigorously until you have a smooth, fragrant paste without any dry spice pockets. Take a moment to inhale the aroma; it should be complex and enticing with warm, earthy notes. The marinade's consistency should be thick enough to cling to the chicken but still pourable. This rich paste will tenderize the meat while infusing it with the distinctive shawarma flavor profile that balances earthy, sweet, and tangy notes.
- Step 3:
- Marinate with intention - Add the sliced chicken to the bowl with the spice mixture, using clean hands to thoroughly massage the marinade into each piece. Ensure every surface of the chicken is coated evenly with the aromatic paste. The tactile approach allows you to feel any dry spots and address them directly. Once all pieces are well-coated, cover the bowl tightly with plastic wrap and refrigerate for at least 2 hours, though overnight marination yields the most developed flavor. If you're short on time, even 30 minutes will impart good flavor, but the longer marinade time allows the acids in the lemon juice to tenderize the meat while the spices penetrate deeply. For maximum flavor, turn the chicken pieces halfway through the marinating time.
- Step 4:
- Prepare your loaf pan thoughtfully - When you're ready to cook, preheat your oven to 375°F (190°C), positioning the rack in the middle of the oven for even heat distribution. Take a standard 9x5-inch loaf pan and lightly coat the interior with olive oil or cooking spray to prevent sticking. The loaf pan is the genius element of this recipe—it mimics the stacking effect of traditional shawarma, allowing the meat to self-baste as it cooks. Make sure to grease the corners well, as these areas tend to stick. The pan's size is important; a standard loaf pan creates the perfect density for the chicken pieces to cook properly while remaining juicy.
- Step 5:
- Layer the chicken with care - Remove the marinated chicken from the refrigerator. Beginning with the largest pieces, start layering the chicken in the loaf pan, overlapping each slice slightly like shingles on a roof. The overlapping technique is crucial as it creates those characteristic shawarma layers and prevents any single piece from drying out. Continue stacking until all the chicken is used, pressing down gently between layers to eliminate air pockets. Pour any remaining marinade from the bowl over the top, ensuring it seeps down between the layers. The final layer should come close to the top of the pan but not overflow. This careful stacking recreates the vertical spit arrangement of traditional shawarma.
- Step 6:
- Bake to perfection - Place the filled loaf pan on a larger baking sheet to catch any potential overflow. Transfer to the preheated oven and bake uncovered for approximately 35-40 minutes. You're looking for several visual cues for doneness: the top should be deeply golden with some caramelized edges, and a meat thermometer inserted into the center should read 165°F (74°C). The exposed edges will develop a beautiful crust while the interior remains juicy. About halfway through cooking, you may notice juices accumulating; this is normal and contributes to the self-basting effect. Resist the urge to drain these juices, as they're essential for keeping the meat moist and flavorful.
- Step 7:
- Rest before slicing - Once the chicken reaches the proper temperature and has achieved that appetizing golden color, remove it from the oven and let it rest in the pan for 10-15 minutes. This resting period is non-negotiable as it allows the juices to redistribute throughout the meat instead of running out when cut. During this time, the residual heat will continue cooking the chicken slightly while the texture sets. Place a piece of aluminum foil loosely over the top to keep it warm without trapping too much steam, which could soften the desirable crispy edges. The patience required here pays off in perfectly juicy meat with the ideal texture.
- Step 8:
- Create perfect shawarma slices - After resting, run a knife around the edges of the loaf pan to loosen the chicken. Place a cutting board over the top of the pan and carefully invert it, allowing the shawarma loaf to release onto the board. If it doesn't come out easily, tap the bottom of the pan gently or slide a spatula underneath to help release it. Using a sharp knife, slice the loaf crosswise into thin pieces, approximately ¼-inch thick. The cross-section should reveal beautiful layers of spiced chicken with caramelized edges. These thin slices mimic the traditional shaving of meat from a vertical rotisserie, giving you that authentic shawarma experience.
- Step 9:
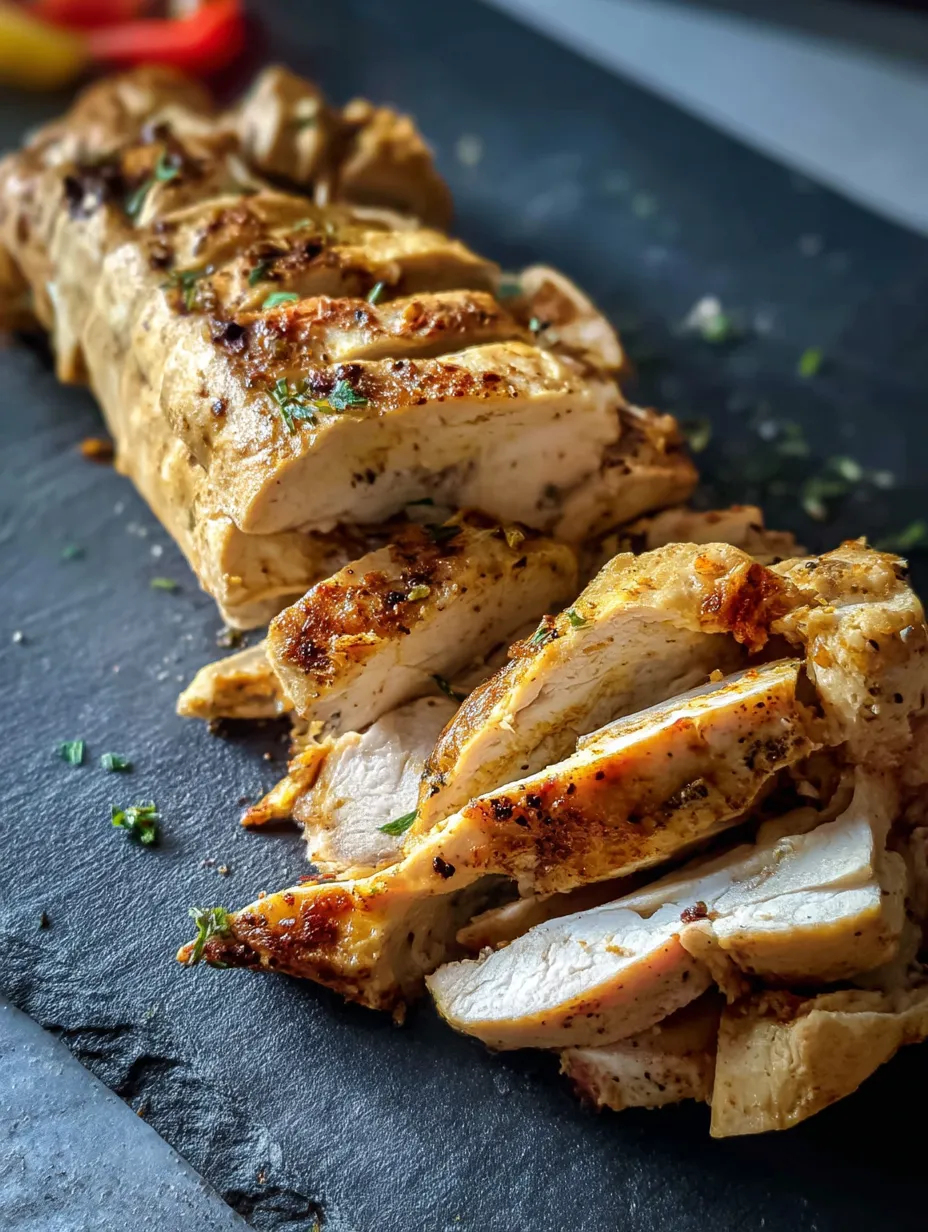
- Crisp the edges for authentic texture (optional but recommended) - For the most authentic shawarma experience, heat a large skillet over medium-high heat until very hot. Working in batches, quickly sear the sliced chicken for 30-60 seconds per side until the edges become slightly crispy. This extra step recreates the caramelized exterior that traditional shawarma gets from extended exposure to heat on a rotating spit. Be careful not to overcook during this step; you're just looking for texture enhancement, not additional cooking. The brief high-heat contact creates those irresistible crispy bits that contrast beautifully with the tender interior, elevating your homemade shawarma to restaurant quality.
- Step 10:
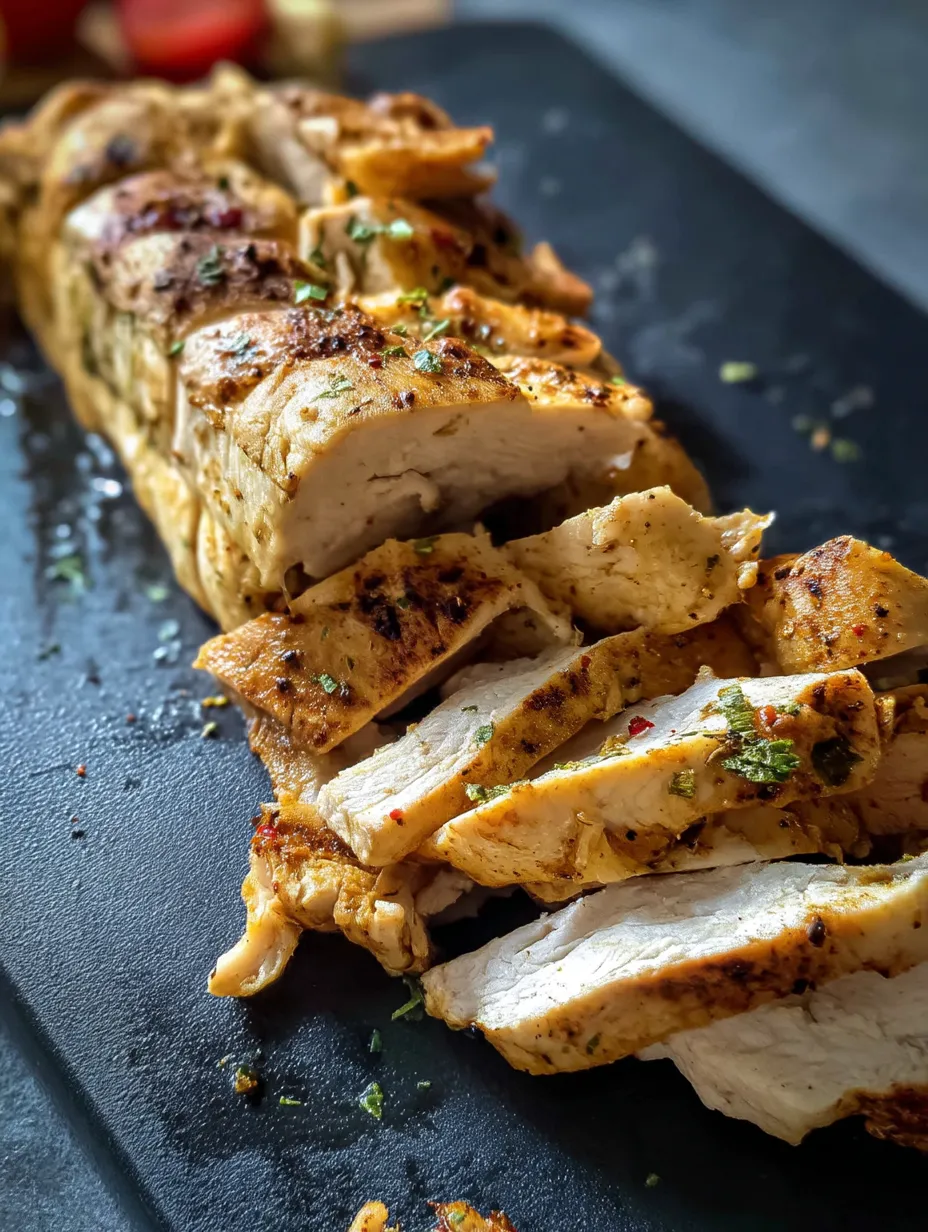
- Serve with complementary accompaniments - Arrange your shawarma slices on a warm serving platter, garnished with fresh herbs like parsley or mint if desired. Traditional serving options include warm pita bread, tangy yogurt sauce, crisp vegetables like tomatoes and cucumbers, and pickled elements for contrast. The chicken can be presented family-style, allowing everyone to build their own shawarma wraps, or pre-assembled for convenience. For a complete meal, offer sides like tabbouleh salad, hummus, or fragrant rice. The versatility of this chicken means it works equally well in wraps, salads, grain bowls, or simply enjoyed on its own with a drizzle of tahini sauce.
The finished Chicken Shawarma should deliver a wonderful contrast of textures – slightly crisp at the edges with tender, juicy meat inside – and a complex flavor profile that balances warm spices with bright acidity and gentle heat. Each slice should showcase those beautiful layers created by the stacking method, mimicking the traditional vertical rotisserie technique.
The Perfect Make-Ahead Meal Solution
One of the most remarkable aspects of this Chicken Shawarma is how well it works for meal preparation. Unlike many dishes that deteriorate with time, the flavors in this shawarma actually develop and improve with a day or two in the refrigerator.
I discovered this happy accident when preparing for a busy week. I made a double batch of the shawarma, planning to use half for Sunday dinner and the rest for quick lunches. To my surprise, the portion we ate on Tuesday had even deeper, more harmonious flavor than the fresh batch. The spices had melded together beautifully, and even after reheating, the chicken remained tender and moist.
For the most effective meal prep, I recommend cooking the shawarma completely, then refrigerating it whole, still in the loaf shape if possible. This preserves the moisture better than slicing it all at once. When ready to serve, slice off only what you need and quickly warm the pieces in a hot skillet to refresh the texture and flavor.
This make-ahead capability transforms the recipe from a weekend project to an everyday luxury. Imagine coming home after a long day and having authentic-tasting shawarma ready in minutes. I often portion it with small containers of yogurt sauce and quick-pickled onions for grab-and-go lunches that make my coworkers envious.
Versatile Serving Ideas
The beauty of this shawarma lies in its versatility. While traditional serving methods involve wrapping the meat in warm pita with various accompaniments, I've discovered countless creative ways to enjoy this flavorful chicken.
For family-style dinner, I often set up a "shawarma bar" with various toppings and let everyone build their own creation. Essential components include warm flatbreads (pita or lavash work beautifully), a cooling yogurt sauce (mix Greek yogurt with cucumber, garlic, and dill), and fresh vegetables like sliced tomatoes, cucumbers, and red onion. Adding pickled elements like turnips or quick-pickled red cabbage provides a bright, acidic contrast that cuts through the rich meat.
For a lighter option, the shawarma makes an incredible salad topping. I arrange warm slices over crisp romaine with cherry tomatoes, cucumber, and feta cheese, then drizzle with a simple lemon-tahini dressing. This Mediterranean-inspired salad delivers all the flavor of traditional shawarma in a fresher, lighter package.
When entertaining, I transform the shawarma into elegant appetizers by serving small pieces on skewers with a side of tzatziki for dipping, or creating mini shawarma cups using phyllo dough pressed into muffin tins, then filled with the sliced meat and topped with a dot of harissa.
For lunch boxes, I often roll the shawarma with vegetables in lavash bread, securing it tightly in parchment paper. The wrap holds well for hours without becoming soggy, making it perfect for school or work lunches.
I learned the importance of proper slicing technique the hard way during my early attempts at this recipe. Rushing through the preparation, I left some chicken pieces thicker than others, resulting in uneven cooking – some parts were perfectly done while others remained undercooked. Now I take my time with the slicing step, occasionally even putting the chicken in the freezer for 15 minutes before cutting to firm it up slightly, making precise slicing easier. The uniformity not only ensures even cooking but creates those beautiful stacked layers that define great shawarma.
 Pin it
Creative Flavor Variations
While the classic shawarma spice blend creates an authentic flavor profile, I've developed several variations that offer delightful twists on the original recipe.
For a Moroccan-inspired version, I add 1 teaspoon of ras el hanout spice blend and 2 tablespoons of finely chopped preserved lemon to the marinade. The complex warmth of the ras el hanout combined with the unique tanginess of preserved lemon creates a North African flavor profile that's exotic yet familiar.
When cooking for those who prefer less heat, I create a milder variation by omitting the cayenne pepper and adding 1 teaspoon of smoked paprika instead of regular paprika. This maintains the depth of flavor while reducing the spice level, making it more accessible for children or heat-sensitive palates.
For a Mediterranean twist, I include 2 tablespoons of finely chopped fresh oregano and 1 tablespoon of za'atar in the marinade. These herbaceous additions brighten the profile while maintaining the dish's Middle Eastern roots. I serve this version with a simple Greek salad and warm pita for a Mediterranean feast.
During summer months, I often add a citrus note by incorporating 1 tablespoon of orange zest alongside the lemon juice. The subtle sweetness works beautifully with the warm spices and adds a seasonal freshness that pairs perfectly with outdoor dining.
For special occasions, I create a luxurious variation by adding 2 tablespoons of pomegranate molasses to the marinade. This provides a complex sweet-tart flavor and helps create a gorgeous caramelized exterior when cooked. Garnished with fresh pomegranate seeds, this version makes a stunning centerpiece for holiday meals.
After making this recipe countless times for family, friends, and even skeptical Middle Eastern food enthusiasts, I've come to appreciate how this simple loaf pan technique opens up authentic international flavors to home cooks without specialized equipment. The first time I served it to my friend Samir, who grew up in Lebanon, he was silent after taking his first bite. When he finally spoke, he said, "This tastes like memories." That moment crystallized for me why I love cooking so much – the ability to transport someone through flavor, to connect them to distant places or cherished memories through something as humble as a piece of spiced chicken.
What continues to delight me about this recipe is its accessibility. The ingredients are readily available in most grocery stores, the technique requires no special skills beyond basic slicing, and yet the results feel like something you'd get from a specialty restaurant. It's proof that with a little creativity and the right combination of spices, extraordinary culinary experiences are within everyone's reach, no vertical rotisserie required.
Frequently Asked Questions
- → Can I use store-bought alfredo sauce instead of making it from scratch?
- Yes, you can substitute with jarred alfredo sauce to save time. You'll need about 3-4 cups (about 2 jars). For the best flavor, consider adding extra minced garlic and parmesan cheese to enhance the store-bought sauce.
- → What type of ravioli works best for this recipe?
- Cheese-filled ravioli (ricotta or four-cheese) works best, but you can also use spinach and cheese ravioli for added flavor. Either fresh or frozen ravioli will work - no need to pre-cook either type before assembling.
- → Can I make this vegetarian?
- Absolutely! Simply omit the Italian sausage or substitute with a plant-based sausage alternative. You can also add sautéed mushrooms, spinach, or roasted red peppers for additional flavor and texture.
- → Can I freeze this dish?
- Yes, this dish freezes well. Assemble the lasagna but don't bake it. Cover tightly with plastic wrap and then foil, and freeze for up to 3 months. When ready to eat, thaw in the refrigerator overnight and then bake as directed, adding about 15 minutes to the cooking time.
- → What can I serve with this rich pasta dish?
- This rich dish pairs perfectly with a light, crisp green salad dressed with a simple vinaigrette or lemon juice. Garlic bread is also a great accompaniment, and a glass of medium-bodied red wine like Chianti or Merlot completes the meal.