
 Pin it
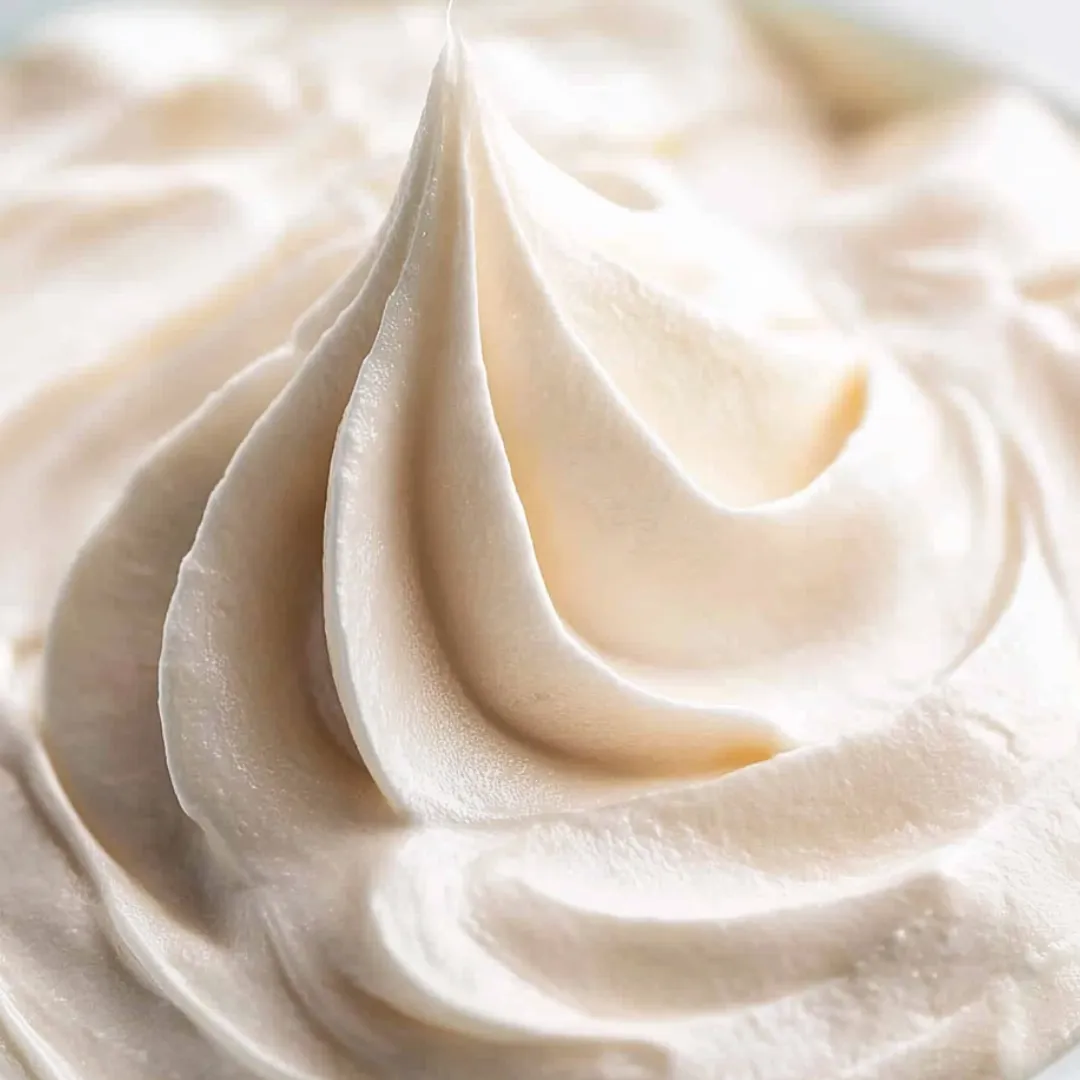
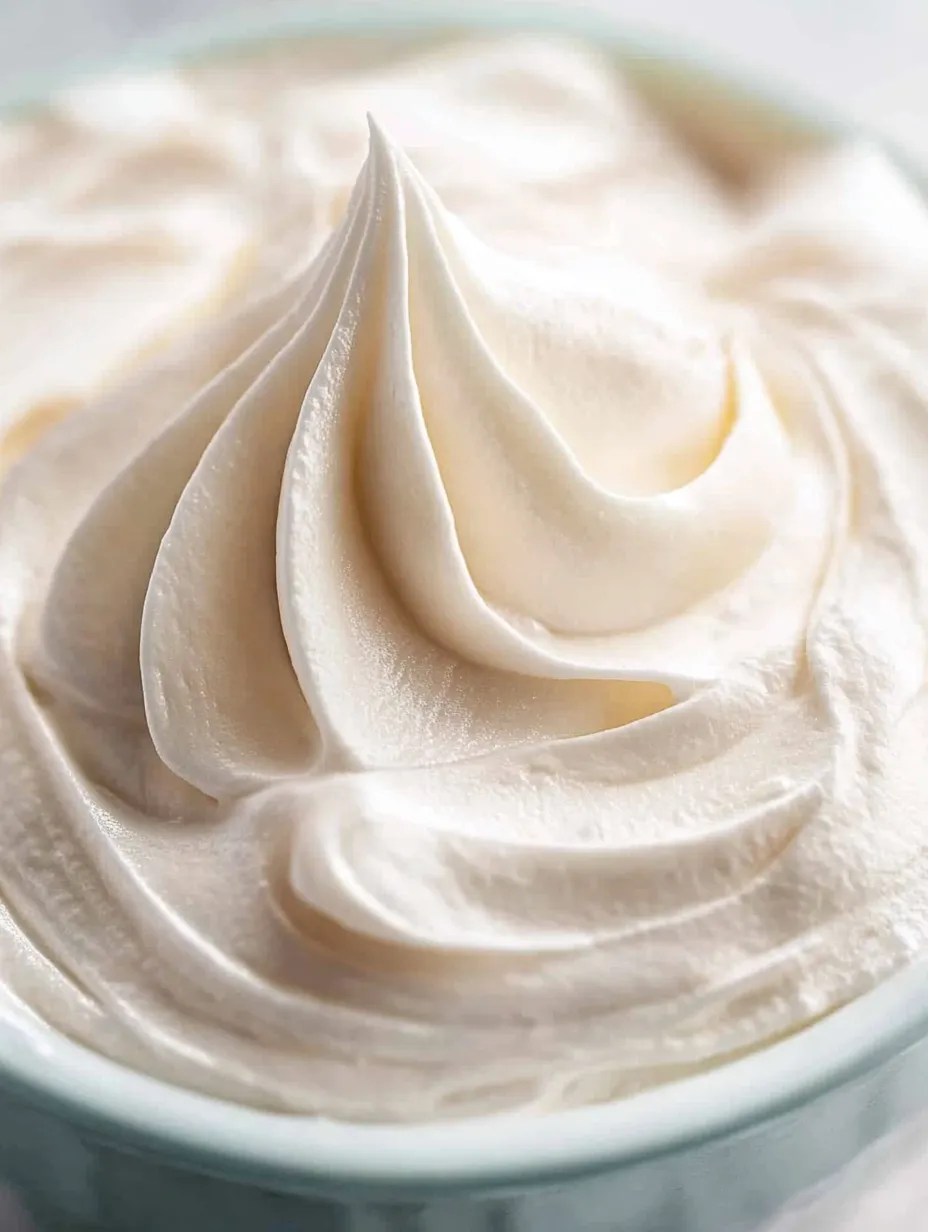
This ethereal seafoam frosting transforms a classic 7-minute frosting into something truly special by using brown sugar instead of white. The result is a cloud-like, billowy meringue frosting with subtle notes of caramel and molasses that perfectly complement a variety of cakes. Light and airy in texture but rich in flavor, this frosting creates beautiful swirls and peaks that hold their shape beautifully. Unlike buttercream, this frosting isn't heavy or overly sweet, making it perfect for those who prefer a less sugary finish to their desserts. The old-fashioned stovetop method may seem intimidating at first, but the effort is well worth the magical results.
I first discovered this frosting in my grandmother's handwritten recipe book, tucked between pages of classic cakes. The first time I made it, I was amazed at how something with so few ingredients could create such a spectacular topping. My family was equally impressed – my husband, who usually scrapes frosting off his cake, actually asked for extra! Last Christmas, I used it on a spice cake for our family gathering, and my aunt (who rarely gives out compliments) declared it the best frosting she'd ever tasted. What I love most is how the brown sugar transforms the texture and flavor into something that feels both nostalgic and special, like biting into a cloud of caramel.
Ingredients You'll Need
- 2 egg whites: Provide the structure and airy texture; fresh eggs work best for maximum volume
- 1 cup light brown sugar, packed: The star ingredient that gives this frosting its signature caramel notes
- ¼ cup cold water: Helps dissolve the sugar during the cooking process
- ¼ teaspoon cream of tartar: Stabilizes the egg whites, helping them hold their shape longer
- 1 teaspoon vanilla extract: Enhances the flavor; can be substituted with other extracts for variety
 Pin it
Step-by-Step Cooking Instructions
- Set Up Your Double Boiler:
- Begin by creating a double boiler setup. Fill a medium saucepan with about an inch of water and bring it to a gentle simmer over medium heat. The water should be hot enough to produce steam but not boiling vigorously. Find a heat-safe glass or metal bowl that fits snugly on top of the saucepan without touching the water. This indirect heating method is crucial for gently cooking the egg whites without scrambling them.
- Combine the Base Ingredients:
- In your heat-safe bowl, combine the egg whites, brown sugar, cold water, and cream of tartar. Using a hand whisk or fork, mix these ingredients together until well incorporated before placing the bowl over the simmering water. The cold water might seem counterintuitive when you're about to heat everything, but it helps dissolve the sugar crystals more effectively for a smoother final texture.
- Begin the Heating Process:
- Place your bowl over the simmering water, creating your double boiler. Immediately begin beating the mixture with an electric hand mixer on medium speed. It's important to start beating right away to prevent the egg whites from cooking too quickly on the bottom of the bowl. The steam from the water will gradually heat the mixture, beginning the cooking process.
- Beat Until Peaks Form:
- Continue beating the mixture constantly over the simmering water. During the first few minutes, you'll notice the mixture becoming thinner and more liquid as the sugar begins to dissolve. Don't be alarmed – this is normal. As you continue beating, the mixture will gradually change from transparent to opaque and begin to increase in volume. Keep beating until the frosting forms stiff peaks when you lift the beaters, which typically takes between 7-10 minutes of continuous beating. The frosting should be glossy, thick, and hold its shape.
- Test for Readiness:
- To ensure your frosting is ready, perform a simple test: lift the beaters from the mixture and observe the peaks that form. They should stand tall without collapsing at the tips. Another test is to rub a small amount of frosting between your fingers – it should feel smooth with no sugar graininess. If you have a candy thermometer, the mixture should reach about 160°F (71°C) to ensure the egg whites are safely cooked.
- Remove from Heat and Flavor:
- Once the frosting holds stiff peaks, remove the bowl from the heat. Immediately add the vanilla extract and continue to beat for another minute to incorporate it thoroughly and to help the frosting begin cooling. The vanilla not only adds flavor but also helps to stabilize the frosting. If you'd like to experiment with other flavors, almond extract or maple extract can be wonderful alternatives.
- Finish Beating:
- Continue to beat the frosting off the heat for an additional 1-2 minutes. This further stabilizes the structure and helps the frosting cool down slightly, making it easier to spread. The frosting should now be thick, glossy, and hold its shape beautifully when spread or piped. If the frosting seems too thin, continue beating – the air incorporated during beating is what gives the frosting its structure.
- Use Immediately:
- Seafoam frosting is at its best when used right away, while it's still warm and most pliable. It spreads easily and creates beautiful swoops and peaks on cakes. Use an offset spatula or the back of a spoon to create decorative swirls and ridges that will hold their shape as the frosting sets. Work quickly, as the frosting will begin to set and become more difficult to manipulate as it cools.
My first attempt at this frosting was nearly a disaster! I was too impatient and removed it from the heat before it formed proper peaks, resulting in a runny mess that slid right off my cake. Now I make sure to beat it until I can practically turn the bowl upside down without the frosting moving. I've also learned that adding the vanilla at the end, rather than cooking it with the other ingredients, keeps the flavor brighter and more pronounced. One of my favorite tricks is to add just a tiny pinch of salt to the mixture – it enhances the caramel notes of the brown sugar without making the frosting taste salty.
Perfect Pairings
This versatile frosting pairs beautifully with a variety of cakes. Its light texture and caramel notes make it the perfect complement to denser cakes like chocolate or spice cake, where it provides a delightful textural contrast. The subtle molasses flavor from the brown sugar makes it an exceptional partner for autumn-inspired desserts like apple cake, pumpkin cake, or anything with warm spices. For a stunning presentation, try it on a simple white cake where its unique color and texture can truly shine.
Troubleshooting Tips
If your frosting isn't thickening properly after several minutes of beating, there might be a tiny bit of yolk or fat in your egg whites. Even a speck can prevent proper whipping. Another common issue is not beating long enough – this frosting requires patience. If your frosting seems grainy, the sugar hasn't fully dissolved; continue heating and beating until smooth. If the frosting begins to deflate or weep after being spread on a cake, it might be due to high humidity. In very humid conditions, add an extra 1/8 teaspoon of cream of tartar to help stabilize the frosting.
Creative Variations
While the classic vanilla version is delicious, this frosting can be customized in several ways. For a maple seafoam, substitute maple extract for the vanilla. For a subtle citrus version, add 1/2 teaspoon of lemon or orange zest to the finished frosting. If you'd like a touch of color, add 1-2 drops of food coloring when you add the vanilla extract, being careful not to overmix. For a more festive look, sprinkle the freshly frosted cake with toasted coconut or chopped nuts that will adhere to the sticky surface before it sets.
 Pin it
Make-Ahead Notes
This frosting is best made just before you plan to use it. However, if you need to prepare in advance, you can make the frosting and frost your cake, then keep it at room temperature for one day. After that, refrigeration is necessary, though it will cause the texture to change slightly. Unfrosted cakes can be prepared ahead and wrapped well, then frosted the day of serving for the best results. This frosting does not freeze well, as the texture becomes compromised upon thawing.
I love the heritage aspect of this frosting – it's a recipe that has stood the test of time for good reason. There's something magical about transforming such simple ingredients into something so spectacular. The way it billows up in the bowl reminds me of watching waves crash against the shore, which is perhaps why it's called 'seafoam.' Every time I make it, I think of my grandmother and how recipes like this connect us across generations. The looks of delight when people take their first bite of cake topped with this uniquely textured frosting make the arm workout of all that beating absolutely worth it!
Frequently Asked Questions
- → Why is it called seafoam frosting?
- It's called seafoam frosting because of its light, airy texture and pale tan color that resembles seafoam. The brown sugar gives it this distinctive appearance.
- → How long does seafoam frosting last?
- This frosting is best used the same day it's made. It will start to break down and lose its fluffy texture after about 24 hours.
- → Can I make this frosting without a double boiler?
- You can create a makeshift double boiler by placing a heat-proof bowl over a pot of simmering water. Just make sure the bottom of the bowl doesn't touch the water.
- → What cakes pair well with seafoam frosting?
- This frosting pairs beautifully with spice cakes, chocolate cakes, vanilla cakes, and carrot cakes. The caramel notes from the brown sugar complement these flavors nicely.
- → Is this the same as 7-minute frosting?
- It's a variation of classic 7-minute frosting, but uses brown sugar instead of white sugar, giving it a richer flavor and caramel color.