
 Pin it
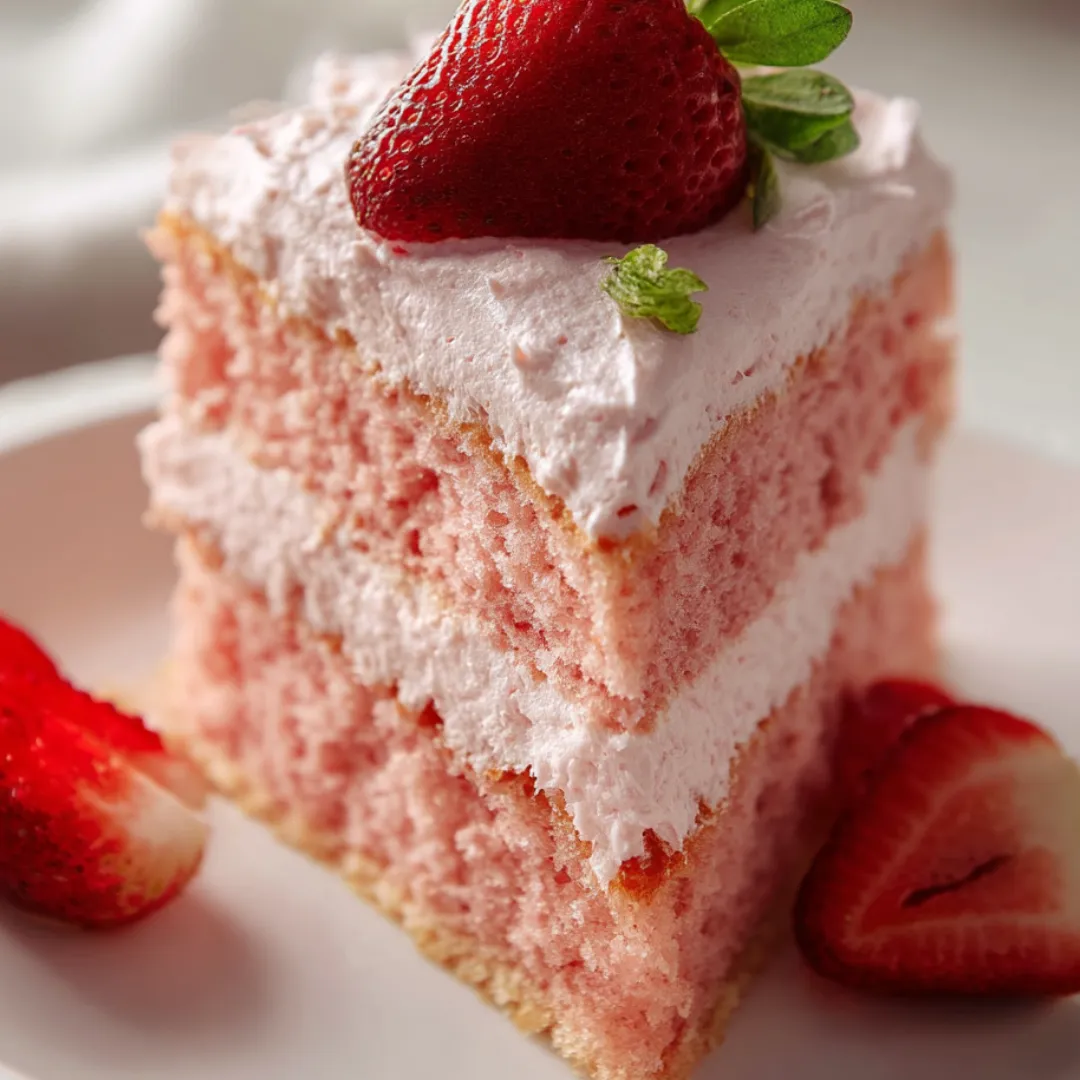
This ethereal Strawberry Angel Cake transforms simple ingredients into a dessert that tastes like a cloud infused with sweet strawberry essence. The pillowy angel food cake provides the perfect delicate base to absorb the naturally sweet juices from fresh strawberries, while a crown of billowy whipped cream adds richness without heaviness. Unlike dense cakes that weigh you down, this lighter-than-air creation satisfies your sweet tooth while still feeling refreshing and bright. Perfect for warm weather gatherings, special occasions, or anytime you crave something sweet yet surprisingly light, this dessert showcases the natural beauty of fresh strawberries in their finest form.
I first discovered the magic of pairing angel food cake with strawberries at my grandmother's summer garden parties. While everyone else served traditional strawberry shortcake with biscuits, she always opted for angel food cake, claiming it was "how the angels would eat their strawberries." As a child, I was mesmerized by how the bright red berry juices would stain the snow-white cake, creating a beautiful marbled effect as it soaked in. Years later, when planning a spring bridal shower for my sister, I remembered Grandma's ethereal dessert and decided to recreate it. The moment I set the cake on the table, conversations paused as everyone admired its simple beauty. My sister later confessed it was her favorite part of the entire event, and she now makes it every year for her anniversary. What I love most about this dessert is how it transforms even the most ordinary strawberries into something special, and how its lightness leaves everyone satisfied without feeling weighed down after indulging.
Ingredients
- 1 angel food cake (store-bought or homemade): Provides the cloud-like, airy base. If purchasing, look for one that feels light for its size and has an even, golden-brown exterior. Homemade versions offer the freshest flavor and often have a more tender texture.
- 2 pounds fresh strawberries: Creates the sweet, juicy filling. Select bright red berries with a strong fragrance and minimal white shoulders near the stems. Local, in-season strawberries offer the most intense flavor but grocery store berries work well when macerated with sugar.
- 1/3 cup granulated sugar: Draws out the natural juices from the strawberries. Fine sugar dissolves more quickly than coarser varieties. This amount can be adjusted depending on the natural sweetness of your berries.
- 1 tablespoon fresh lemon juice: Brightens the strawberry flavor and balances the sweetness. Fresh lemon juice provides cleaner flavor than bottled versions. The slight acidity enhances the natural strawberry taste while adding depth.
- 2 cups heavy whipping cream: Creates the billowy topping that complements the light cake. Look for cream with at least 36% milk fat for the best whipping results and stable texture. The cream should be very cold for the best volume when whipped.
- 1/4 cup powdered sugar: Sweetens the whipped cream while keeping it silky-smooth. Sift if you notice any lumps for the most uniform texture. The cornstarch in powdered sugar helps stabilize the whipped cream, helping it hold its shape longer.
- 1 teaspoon vanilla extract: Adds aromatic depth to the whipped cream. Pure vanilla extract offers the most complex flavor. The vanilla complements both the strawberries and the subtle sweetness of the angel food cake.
- Mint leaves for garnish (optional): Adds a fresh, colorful accent. Look for bright green leaves without any browning or wilting. Fresh mint provides a beautiful color contrast and subtle aromatic element that enhances the strawberry fragrance.
 Pin it
Step-by-Step Instructions
- Step 1:
- Prepare the strawberries with care - Begin by washing the strawberries under cool, gentle running water, being careful not to soak them as they can absorb water and become soggy. Pat them completely dry with paper towels before hulling and slicing. For the most attractive presentation, slice the berries evenly – about 1/4-inch thick – using a sharp knife to prevent crushing them. Place the sliced strawberries in a large bowl and sprinkle with the granulated sugar and lemon juice, gently tossing to ensure even coating. The sugar will begin drawing out the natural juices through osmosis, while the lemon juice brightens the flavor and helps maintain the vibrant red color. Allow this mixture to sit at room temperature for at least 20 minutes, occasionally stirring gently to distribute the developing syrup. This maceration process is crucial for developing that sweet strawberry syrup that will later soak beautifully into the angel food cake. The berries will soften slightly and release their juices, creating a glistening, ruby-red mixture that forms the heart of this dessert.
- Step 2:
- Prepare the angel food cake properly - If using a homemade angel food cake, ensure it has completely cooled before proceeding. If using a store-bought cake, remove it from any packaging and allow it to breathe for a few minutes. Using a long serrated knife, carefully slice the cake horizontally into three even layers. A gentle sawing motion works best to prevent crushing the delicate, airy structure. If you find the cake difficult to cut, try freezing it for 15-20 minutes first – the slight firmness makes slicing easier without affecting the final texture. Alternatively, instead of creating layers, you can cut the entire cake into 1-inch cubes for a more casual, trifle-style presentation. Either approach works beautifully; the layered version creates a more formal presentation while the cubed version allows the strawberry juices to penetrate more thoroughly throughout the dessert. Set the prepared cake pieces aside on a clean cutting board or plate while you prepare the remaining components.
- Step 3:
- Whip the cream to perfect peaks - For the best volume and stability, begin with very cold heavy cream, a chilled mixing bowl, and chilled beaters. Place the cream in the cold bowl and beat at medium speed until it begins to thicken slightly, about 1 minute. Add the powdered sugar and vanilla extract, then increase to medium-high speed and continue beating until soft peaks form – when you lift the beaters, the cream should form gentle peaks that softly curl over at the tips. Be careful not to overbeat, which can cause the cream to become grainy or even turn to butter. The perfect whipped cream should be billowy and smooth, holding its shape while still remaining soft enough to spread easily. The powdered sugar not only sweetens the cream but also helps stabilize it, allowing it to maintain its texture longer at room temperature. If preparing in advance, slightly underwhip the cream initially, as it will continue to firm up in the refrigerator, and you can give it a quick additional whip just before assembling.
- Step 4:
- Begin assembly with the first layer - Place the bottom layer of angel food cake on your serving platter or cake stand. If using cubed cake, arrange about one-third of the cubes in an even layer at the bottom of a clear trifle dish or serving bowl. Using a slotted spoon, lift about one-third of the macerated strawberries from their juices and arrange them evenly over the cake layer, leaving some of the juices behind for now. The slotted spoon helps control the amount of liquid, preventing the cake from becoming too soggy too quickly. Allow the arranged strawberries to sit on the cake for about 5 minutes, giving the cake time to begin absorbing some of the berry juice naturally. This patience results in better flavor integration throughout the final dessert. The bottom layer receives slightly fewer strawberries than subsequent layers, as it will also absorb juices that filter down from above.
- Step 5:
- Add whipped cream strategically - Gently spread or pipe approximately one-third of the whipped cream over the strawberry layer, creating an even layer about 1/2-inch thick. If piping, a large round tip creates beautiful, cloud-like dollops, while spreading with an offset spatula creates a more rustic, homestyle appearance. Either approach works beautifully – the key is achieving an even layer that completely covers the strawberries. For the most attractive presentation, leave a small margin around the edge (about 1/4-inch) where the strawberries remain visible. This creates a beautiful visual effect when the cake is sliced. The cream layer acts as both a delicious component and a barrier that slows the absorption of strawberry juices between cake layers, preventing the dessert from becoming overly soggy.
- Step 6:
- Continue building layers thoughtfully - Place the second cake layer on top of the whipped cream, gently pressing down just enough to secure it without compressing the cream layer below. If using cake cubes, add another third of the cubes, arranging them evenly over the cream. Add another third of the macerated strawberries on top of this cake layer, this time spooning a bit more of the accumulated strawberry juices over them. The middle layer receives more of the juices than the bottom layer did, as these juices will have less distance to travel and won't make the dessert soggy. Follow with another third of the whipped cream, spreading it evenly as before. The building of these distinct layers creates the beautiful striped effect when the cake is sliced, revealing the contrasting colors and textures that make this dessert so visually appealing.
- Step 7:
- Complete the final layer with extra attention - Place the final cake layer on top and arrange the remaining strawberries over it, this time including most of the remaining accumulated juices. These juices will slowly seep into the top layer, infusing it with intense strawberry flavor and creating a beautiful glossy appearance. For the top layer of whipped cream, you can either spread it evenly across the entire surface or pipe decorative rosettes around the perimeter, leaving the center strawberries visible for a more dramatic presentation. The top layer deserves a bit of extra attention to detail, as it creates the first impression of your dessert. If piping decorative elements, a star tip creates traditional rosettes, while a petal tip can create more elegant, flower-like decorations.
- Step 8:
- Add the finishing touches - Reserve a few perfect strawberry slices and fresh mint leaves for the final garnish. Arrange these decoratively on top of the whipped cream, placing them strategically to create visual appeal from all angles. For an extra-special presentation, you can create a simple strawberry fan garnish by making thin slices in a large berry, keeping the stem intact, and gently spreading the slices to create a fan. Place this in the center of the cake for a professional touch. A light dusting of powdered sugar adds sparkle and visual interest, especially when contrasted against the red strawberries. These final garnishes transform a simple dessert into something that looks as though it came from a professional bakery.
- Step 9:
- Chill to perfect the texture - Cover the assembled cake very loosely with plastic wrap, being careful not to let it touch the whipped cream topping. Refrigerate for at least 30 minutes, but no more than 4 hours before serving. This chilling period is essential for allowing the flavors to meld and the cake to absorb some of the strawberry juices without becoming soggy. During refrigeration, the dessert undergoes a beautiful transformation as the distinct components begin to harmonize – the cake softens slightly as it absorbs the strawberry essence, the berries continue to release their juices, and the cream firms up to the perfect consistency. The ideal serving temperature is cool but not cold – about 15 minutes out of the refrigerator – when the flavors are most pronounced and the textures at their best.
- Step 10:
- Slice and serve with precision - For the cleanest slices, use a sharp knife dipped in hot water and wiped clean between cuts. If you've created a layered cake, cut straight down through all layers in one smooth motion rather than sawing, which can crush the delicate components. For a trifle-style presentation with cubed cake, use a large spoon to scoop servings, making sure each portion includes all the layers. Serve on chilled plates for the most elegant presentation, adding an additional small dollop of whipped cream and a perfect strawberry or mint leaf to each serving plate if desired. This attention to serving details elevates the eating experience, making even a simple family dessert feel special and thoughtfully prepared.
Perfect for Warm Weather Entertaining
What makes this Strawberry Angel Cake particularly special is how well it suits spring and summer gatherings when heavier desserts feel too substantial after seasonal meals.
I discovered the true value of this dessert when hosting a Mother's Day brunch on an unexpectedly warm May afternoon. After a meal of quiche, salad, and mimosas on the patio, the thought of serving the chocolate layer cake I'd originally planned felt wrong for the bright, sunny day. Remembering this lighter option, I quickly assembled a Strawberry Angel Cake using store-bought components. The result was perfect – substantial enough to feel special for the celebration but airy enough to enjoy in the warm weather. My mother declared it the ideal spring dessert, light yet satisfying, and requested it again for her birthday in June.
What I particularly appreciate about this dessert for entertaining is its visual impact relative to the effort required. Many show-stopping desserts demand complex techniques or precise timing, but this cake creates a beautiful presentation with simple assembly. The striking color contrast between the ruby-red strawberries, snow-white cake, and creamy topping makes it look far more complicated than it actually is.
For outdoor gatherings, this cake has another advantage – it holds up better in warm temperatures than many alternatives. While chocolate can melt and buttercream can soften unappealingly, the whipped cream stabilized with powdered sugar maintains its texture reasonably well, especially if kept in the shade. The refreshing nature of the dessert actually seems enhanced by enjoying it outdoors among spring flowers or summer breezes.
Versatile Serving Options
One of the aspects I love most about this Strawberry Angel Cake is its flexibility in presentation, allowing it to adapt to different occasions and serving needs.
For elegant dinner parties, I often create individual servings in clear glass trifle cups or wine glasses. Layering small cubes of cake with the macerated strawberries and topping with a perfect rosette of whipped cream creates sophisticated individual desserts that can be prepared hours ahead. These single servings are particularly appreciated when guests are too full for a large dessert but still want something sweet to complete the meal.
When serving larger groups like family reunions or potlucks, I transform this into a spectacular trifle using a large glass bowl that showcases the beautiful layers. This family-style presentation encourages second helpings and creates a centerpiece for the dessert table. For these occasions, I sometimes double the recipe and create extra layers, making an even more impressive display.
For more casual weeknight desserts, I often skip the formal layering altogether and simply serve slices of angel food cake topped with the macerated strawberries and a dollop of whipped cream. This deconstructed approach delivers all the same flavors with minimal effort and works beautifully when you're craving something sweet but don't want to spend time on presentation.
During peak strawberry season, I've even served this as a "make your own" dessert bar, setting out slices of angel food cake, the macerated strawberries, and freshly whipped cream, allowing everyone to build their own creation according to their preferences. Children particularly enjoy this interactive approach, and it's a wonderful way to showcase exceptionally fresh, local strawberries.
I learned about proper timing through a memorable kitchen disaster. Eager to get ahead on preparations for a dinner party, I assembled this cake the morning of an evening gathering, thinking longer chill time would improve the flavors. When we cut into it eight hours later, the once-fluffy angel food cake had collapsed into a soggy, albeit tasty, pudding-like consistency. While still delicious, it had lost the textural contrast that makes this dessert special. Now I never assemble more than 4 hours before serving, finding that 2-3 hours creates the optimal balance where the cake absorbs some strawberry essence while still maintaining its distinctive texture. If I need to prepare further ahead, I keep all components ready but separate until closer to serving time.
 Pin it
Seasonal Adaptations to Try
While the classic version of this recipe with fresh strawberries is perfect for spring and summer, I've developed several variations that allow me to enjoy similar flavors year-round.
During late summer when peaches are at their peak, I create a peach version using ripe, juicy peaches macerated with a bit of brown sugar and a tiny splash of almond extract instead of lemon juice. The golden peaches create a beautiful color contrast against the white cake and cream, while the flavor partnership of peach and almond feels sophisticated and unexpected. This variation has become a traditional August birthday dessert in our family.
For autumn gatherings, I've had great success with a spiced apple adaptation. Thinly sliced apples macerated with cinnamon, nutmeg, and brown sugar, then briefly cooked to soften, create a warm, comforting filling between the cake layers. A touch of caramel drizzled over the top completes the fall-inspired version. While different from the fresh lightness of the strawberry original, this adaptation captures the essence of the dessert while embracing seasonal flavors.
During winter months when quality fresh fruit is harder to find, I sometimes use frozen strawberries, thawed and drained, with excellent results. The freezing process actually helps break down the cell walls of the berries, allowing them to release their juices more readily during maceration. Adding a bit of orange zest brightens the flavor of frozen berries and adds a welcome winter citrus note.
For holiday gatherings, a festive adaptation using cranberries and oranges creates a beautiful red and white dessert perfect for the season. The tart cranberries require extra sugar during maceration, and benefit from being slightly crushed to release their juices, but their vibrant color and bright flavor create a memorable holiday dessert that stands out from traditional offerings.
After years of making this Strawberry Angel Cake for family gatherings, holidays, and casual dinners, I've come to appreciate how something so simple can create such joy. There's something magical about the transformation that happens when the strawberry juices begin to soak into the angel food cake, creating that beautiful pink-tinged interior that signals the perfect melding of flavors.
What I love most about sharing this recipe is watching people's reactions when they take their first bite. There's usually a moment of surprise at how light yet satisfying it is, followed by an appreciation for the perfect balance of flavors. Even those who typically gravitate toward richer, more decadent desserts find themselves enchanted by its subtle sweetness and ethereal texture.
This dessert also connects generations in my family. My grandmother's preference for angel food cake with her strawberries rather than traditional shortcake might have simply been a matter of personal taste, but it created a distinctive family tradition that continues today. When my daughter recently made this for her college roommates, sending me a proud photo of her creation, I felt that wonderful continuity of family food memories being created and shared. Some recipes are valuable not just for their flavor but for the stories and connections they create across time—this Strawberry Angel Cake is definitely one of those special recipes.
Frequently Asked Questions
- → Can I use frozen strawberries for this recipe?
- Yes, you can use frozen strawberries, but thaw them completely first and drain excess liquid. Fresh strawberries will give the best texture and flavor, but frozen work in a pinch. You may need less sugar as frozen strawberries often release more liquid.
- → How far in advance can I make this dessert?
- You can prepare this dessert up to 24 hours in advance. The cake will soften as it absorbs the strawberry juices, creating an even more luscious texture. Any longer than 24 hours and the cake may become too soggy.
- → Can I make my own angel food cake instead of using store-bought?
- Absolutely! Homemade angel food cake will make this dessert even more special. Just be sure it's completely cooled before slicing and assembling with the strawberries and cream.
- → What other fruits work well with this recipe?
- This versatile dessert works beautifully with many fruits. Try peaches, mixed berries, mangoes, or even a combination. Each fruit may require slight adjustments to the sugar amount depending on its natural sweetness.
- → Can I use something other than heavy cream for the topping?
- Yes, you have several options. Store-bought whipped topping (like Cool Whip) works well for a quick alternative. You can also use coconut cream (chilled and whipped) for a dairy-free version, or fold some mascarpone cheese into the whipped cream for an extra rich topping.