
 Pin it
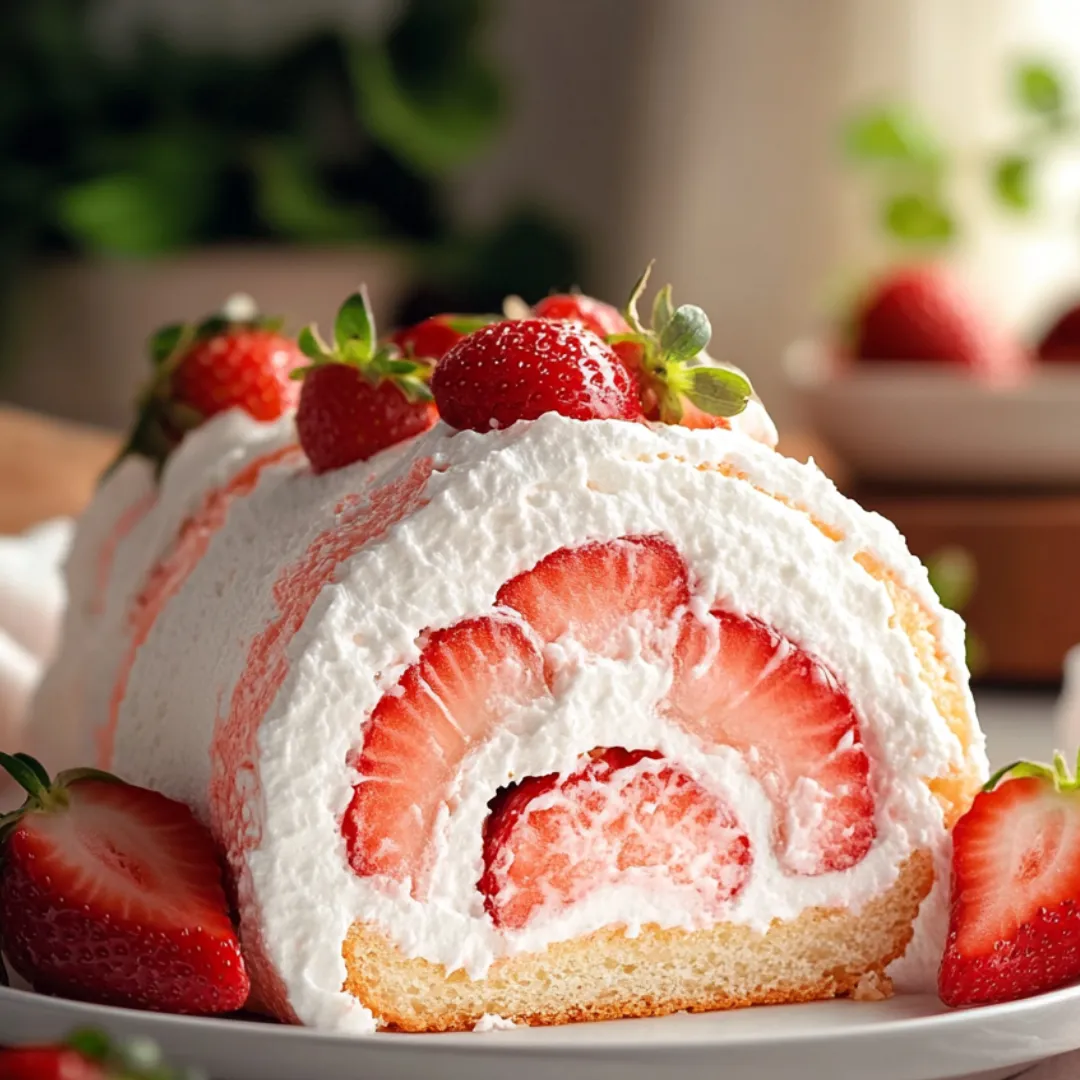
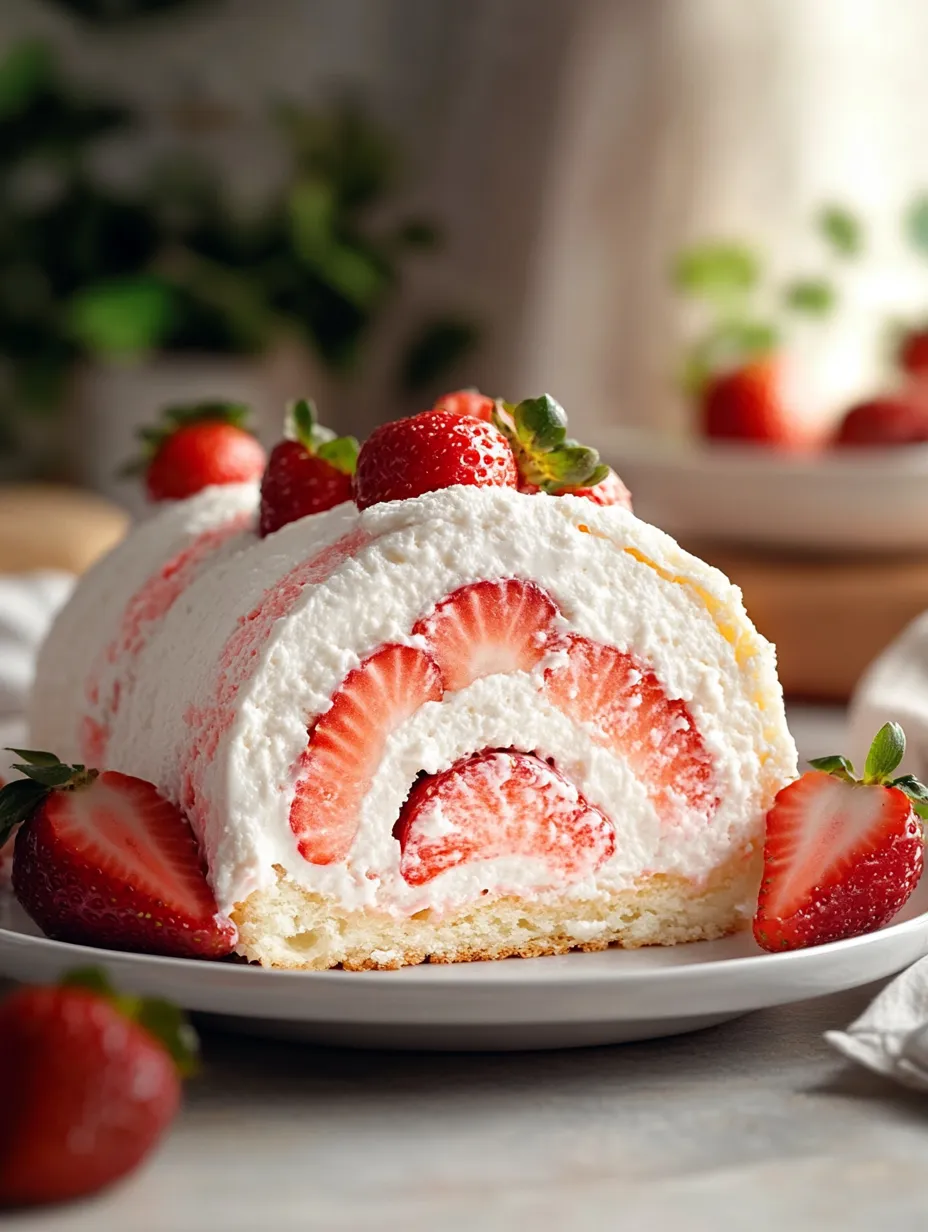
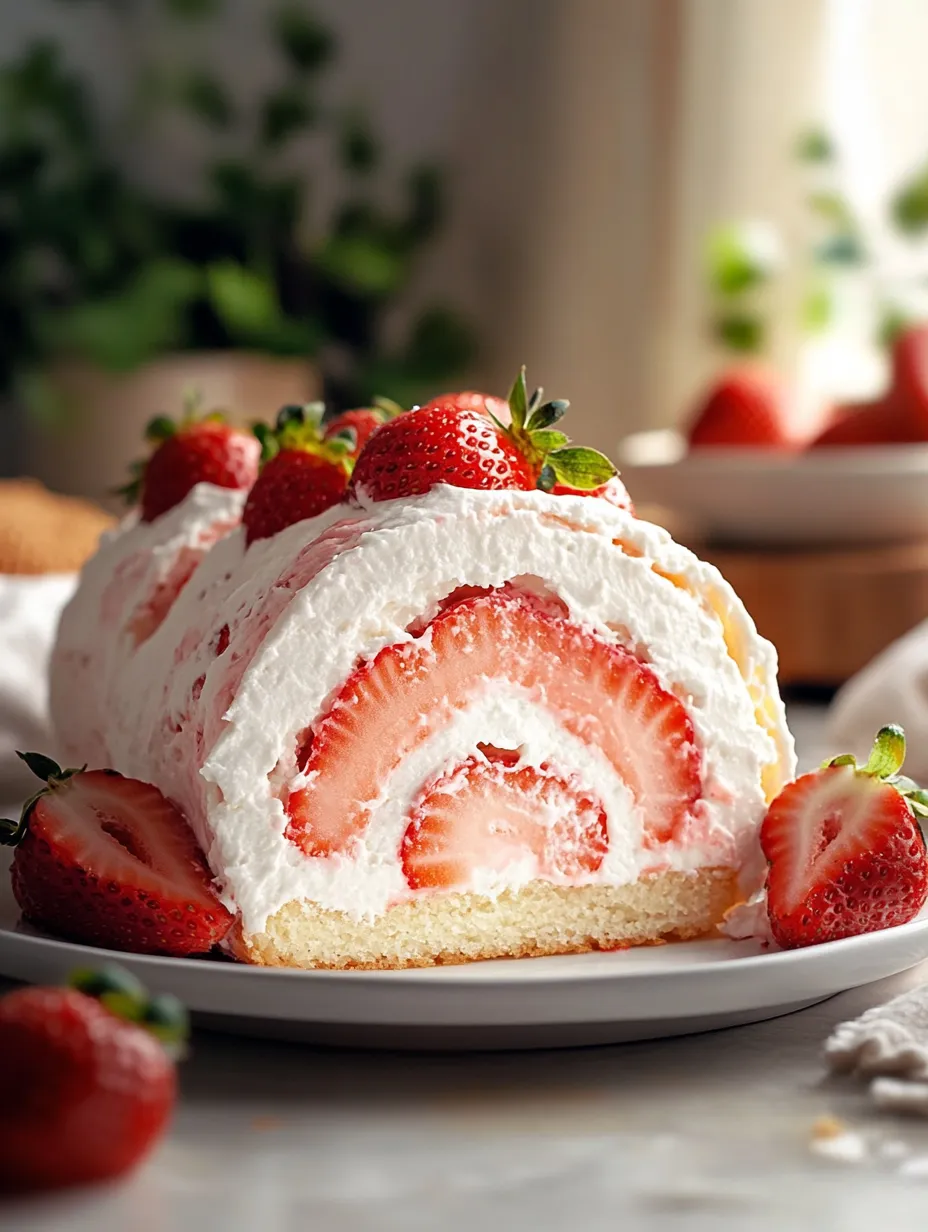
This strawberry swiss roll transforms simple ingredients into a bakery-worthy dessert that's as beautiful as it is delicious. The delicate pink chiffon cake wraps around clouds of freshly whipped cream studded with juicy strawberry pieces, creating a stunning spiral design when sliced. Unlike heavier cakes, this airy creation offers the perfect balance of lightness and satisfaction – each bite delivers the perfect ratio of pillowy cake to creamy filling and sweet-tart berries. The subtle sweetness lets the natural flavors shine through, making it an ideal showcase for seasonal strawberries.
I first attempted this recipe when planning a Mother's Day brunch and wanted something elegant but not too heavy. Despite my initial nervousness about rolling the cake, it turned out perfectly on the first try! The look on my mom's face when I brought out this pretty pink creation was priceless. She couldn't believe I'd made it myself, and now it's become our special tradition for celebrations and afternoon tea gatherings. There's something magical about transforming simple ingredients into something that looks like it came from a high-end patisserie.
Ingredients You'll Need
- 5 Large Eggs, separated: The backbone of the chiffon cake, providing structure and airiness. Room temperature eggs separate more easily and whip to greater volume.
- ¼ teaspoon Cream of Tartar: This acidic powder stabilizes egg whites, helping them maintain their volume during baking. Don't skip this ingredient.
- 150g Granulated Sugar, divided: Sweetens both the meringue and the cake batter. Using it in two stages creates the perfect texture.
- 80ml Milk: Adds moisture to the cake. Any type works, from whole to plant-based alternatives.
- 60ml Light Oil: Creates tenderness in the cake. Choose a neutral option like canola, vegetable, or grapeseed.
- 1 teaspoon Vanilla Extract: Enhances the strawberry flavor with its warm, aromatic notes.
- Pink Gel Food Coloring: Creates the signature pink color. Only use gel coloring as liquid versions can deflate your meringue.
- 150g Cake Flour: Lower in protein than all-purpose flour, creating a more delicate crumb structure.
- 1 teaspoon Baking Powder: Provides additional leavening for the perfect rise.
- 300ml Heavy Whipping Cream: The foundation of the filling. Choose the highest fat content available for best whipping results.
- 30g Powdered Sugar: Sweetens the whipped cream while dissolving completely without grittiness.
- 250g Fresh Strawberries: The star ingredient. Select ripe, fragrant berries for the best flavor.
 Pin it
Step-by-Step Cooking Instructions
- Prepare Your Workspace:
- Preheat your oven to 350°F (175°C) and position a rack in the center. Line a 12x17-inch baking tray with parchment paper, making sure it covers the bottom completely but leaving the sides unlined. Having the sides unlined helps the cake cling to the edges as it rises, creating more height. Separate your eggs while they're still cold from the refrigerator (they separate more cleanly this way), placing whites in one large, spotlessly clean bowl and yolks in another. Allow both to come to room temperature for about 30 minutes before continuing – room temperature egg whites whip to much greater volume than cold ones.
- Create a Stable Meringue:
- Add cream of tartar to your room temperature egg whites and begin beating with an electric mixer on medium speed until the mixture becomes frothy and resembles cappuccino foam. This creates the foundation for a stable meringue. Gradually add 100g of sugar, one tablespoon at a time, waiting about 10 seconds between additions. This slow incorporation allows each bit of sugar to dissolve properly, preventing a grainy meringue. After all sugar is added, drop in 1-2 drops of pink gel food coloring and increase mixer speed to medium-high. Continue beating until stiff peaks form – when you lift the beater, the meringue should stand up with tips that bend just slightly, and the bowl can be inverted without anything falling out. Be careful not to overbeat, which would make the meringue dry and difficult to fold.
- Develop the Cake Base:
- In your bowl of egg yolks, add the remaining 50g of sugar and beat with your electric mixer until the mixture becomes pale yellow and slightly thickened, about 2 minutes. This process is called "ribboning" and incorporates air into the yolks. Add milk, oil, and vanilla extract, then mix again until completely combined and smooth. The mixture should look cohesive, with no streaks of oil visible. Sift cake flour and baking powder directly into this mixture using a fine-mesh sieve to prevent any lumps, which would create tough spots in your finished cake. Mix on low speed just until combined and smooth, being careful not to overmix, which would develop too much gluten and toughen the cake.
- Master the Folding Technique:
- Using a large silicone spatula, transfer about one-third of the pink meringue into the egg yolk mixture. Gently fold them together using a sweeping motion – cut through the center of the batter with the edge of your spatula, scoop under one side, and fold it over the top. Rotate the bowl a quarter turn and repeat. This initial folding lightens the yolk mixture, making it easier to incorporate the remaining meringue without deflating it. Once this first portion is incorporated, add the remaining meringue and continue folding gently until no streaks remain. Be especially mindful to scrape the bottom of the bowl where denser batter tends to settle. The finished batter should be light, airy, and uniform in color.
- Bake with Precision:
- Pour the batter onto your prepared baking tray. Using an offset spatula, gently spread the batter into the corners of the pan and smooth it into an even layer. Take your time with this step to ensure even thickness throughout. Tap the tray gently on the counter once or twice to release any large air bubbles, but don't overdo it or you'll deflate the batter. Place in the preheated oven and bake for 12-13 minutes, until the edges are just turning golden brown and the center springs back when lightly touched. Don't open the oven during the first 10 minutes as sudden temperature changes can cause the cake to collapse.
- Perfect the Cake Release:
- When the cake is done, remove it from the oven and immediately run an offset spatula around the edges to release it from the sides of the pan. Working quickly while the cake is still warm and flexible, place a clean sheet of parchment paper on top of the cake. Position a cooling rack on top of the parchment, then swiftly flip everything over. The cake should release onto the rack with the original parchment paper now on top. Gently peel off this original parchment paper. Place a new sheet of parchment on the exposed side of the cake and flip again so the side that was originally on top is once again facing up.
- Train Your Cake to Roll:
- While the cake is still warm and pliable, use a sharp knife to trim off any browned edges from the short ends of the rectangle. Starting at one of the short ends of the cake, carefully roll it up with the parchment paper inside the roll. The parchment prevents the cake from sticking to itself. Allow the cake to cool completely in this rolled shape, about 1-2 hours at room temperature. This crucial "training" step helps the cake maintain its shape when filled later and prevents cracking. While the cake cools, wash and dice most of your strawberries into small, uniform pieces, saving a few whole berries for decoration.
- Whip the Perfect Cream:
- Once the cake has cooled completely, prepare your filling. In a large, chilled mixing bowl (placing it in the freezer for 5 minutes helps cream whip better), combine heavy whipping cream, powdered sugar, and a splash of vanilla extract. Using clean beaters, whip on medium-high speed until firm peaks form – when you lift the beaters, the cream should stand up with tips that hold their shape but still look smooth, not grainy or curdled. This usually takes 3-4 minutes, but watch carefully as overwhipped cream can quickly turn into butter. Reserve about ¼ cup of the whipped cream in a separate container and refrigerate it if you plan to decorate the top of your roll.
- Assemble with Care:
- Gently unroll your cooled cake. It may still have a slight curve, which is perfect. If it cracks slightly, don't worry – the filling will hide minor imperfections. Using your offset spatula, spread an even layer of whipped cream across the surface, leaving a 2-inch strip bare at the far end (this prevents overflow when rolling). The cream should be about ½-inch thick. Evenly distribute the diced strawberries over the cream, gently pressing them in slightly so they adhere. Starting from the same short end you began with before, carefully roll the cake back up, this time without the parchment paper. The bare strip at the end should now form a neat seam on the bottom of your roll.
- Chill for Perfect Slices:
- Wrap your completed roll tightly in plastic wrap, gently reshaping if needed to maintain an even cylindrical form. Refrigerate for at least 6 hours or, ideally, overnight. This resting period allows the filling to set and the flavors to meld beautifully. When ready to serve, unwrap the roll and place it on a serving platter. For the cleanest slices, dip a sharp knife in hot water, wipe it dry, then slice about ½-inch off each end to reveal the beautiful spiral pattern. For an elegant presentation, pipe the reserved whipped cream along the top of the roll in decorative patterns and garnish with fresh whole or halved strawberries before slicing the roll into portions.
I learned the importance of proper meringue the hard way when I first attempted a swiss roll years ago. I was impatient and didn't beat the egg whites long enough, resulting in a dense, flat cake that cracked badly when I tried to roll it. Now I always make sure my meringue passes the "upside-down bowl test" before moving forward. The extra few minutes of beating make all the difference between disappointment and a picture-perfect dessert that makes everyone think you're a professional baker.
Make-Ahead Magic
One of the best features of this strawberry swiss roll is that it actually improves with a little time. You can make it a day or two before serving, and the flavors will meld beautifully while the texture remains perfect. If making it more than a day ahead, I recommend waiting to add the decorative whipped cream and fresh strawberry garnish until shortly before serving for the freshest presentation. Leftover slices can be individually wrapped in plastic and frozen for up to a month – just thaw them in the refrigerator overnight for an impromptu sweet treat.
Seasonal Variations
While fresh strawberries create the classic version of this cake, the basic recipe is wonderfully adaptable to other fruits and flavors. In summer, try substituting fresh raspberries or blueberries. For a tropical twist, diced mango and a hint of lime zest in the whipped cream create an unexpected but delightful variation. In fall, consider adding a teaspoon of cinnamon to the cake batter and filling with thinly sliced poached pears. Winter holidays call for a festive touch – try adding peppermint extract to the cream and garnishing with crushed candy canes.
Troubleshooting Tips
Even experienced bakers occasionally encounter issues with swiss rolls. If your cake cracks despite pre-rolling, don't despair – strategically placing whipped cream and strawberries can disguise most flaws. If your cake seems too moist and sticky, it may be slightly underbaked; next time, give it an extra minute in the oven. Conversely, if it's dry and cracks severely, it may be overbaked; reduce baking time by a minute or two in your next attempt. Remember that room temperature and humidity can affect baking times, so always judge doneness by appearance rather than strictly by the clock.
 Pin it
Serving Suggestions
This strawberry swiss roll stands beautifully on its own, but for special occasions, consider elevating your presentation. A light dusting of powdered sugar creates a simple, elegant finish. For a more indulgent dessert, serve each slice with a pool of strawberry coulis and a small scoop of vanilla ice cream. At brunch, pair slices with glasses of prosecco or mimosas for a celebratory touch. For afternoon tea, small slices alongside Earl Grey or jasmine tea create a refined experience that guests will remember.
The first time I served this cake at a family gathering, my normally stoic father-in-law asked for a second slice – something he'd never done with any other dessert I'd made. That moment of quiet appreciation meant more to me than any elaborate compliment. There's something about the delicate balance of textures and flavors in this swiss roll that appeals to everyone, from sophisticated foodies to picky eaters. It's become my signature dessert, the one friends and family request for special occasions. The joy of watching someone take their first bite of this cloud-like creation never gets old – it's why I love baking in the first place.
Frequently Asked Questions
- → Why did my cake crack when rolling?
- Roll the cake while it's still warm and pliable. If it cools completely before rolling, it's more likely to crack.
- → Can I make this ahead of time?
- Yes, it's best made a day ahead and chilled overnight, which allows the flavors to meld and the filling to set properly.
- → Can I use other fruits instead of strawberries?
- Absolutely! Try raspberries, blueberries, or sliced peaches. Just make sure to dice them small and pat dry to prevent excess moisture.
- → What's the difference between a Swiss roll and a jelly roll?
- They're essentially the same type of dessert - a thin cake rolled with filling. Jelly rolls traditionally use jam or jelly as filling, while Swiss rolls often use cream.
- → Why is my cake dense instead of fluffy?
- Be gentle when folding the meringue into the batter to maintain air bubbles. Overmixing or using the wrong flour can result in a denser cake.