
 Pin it
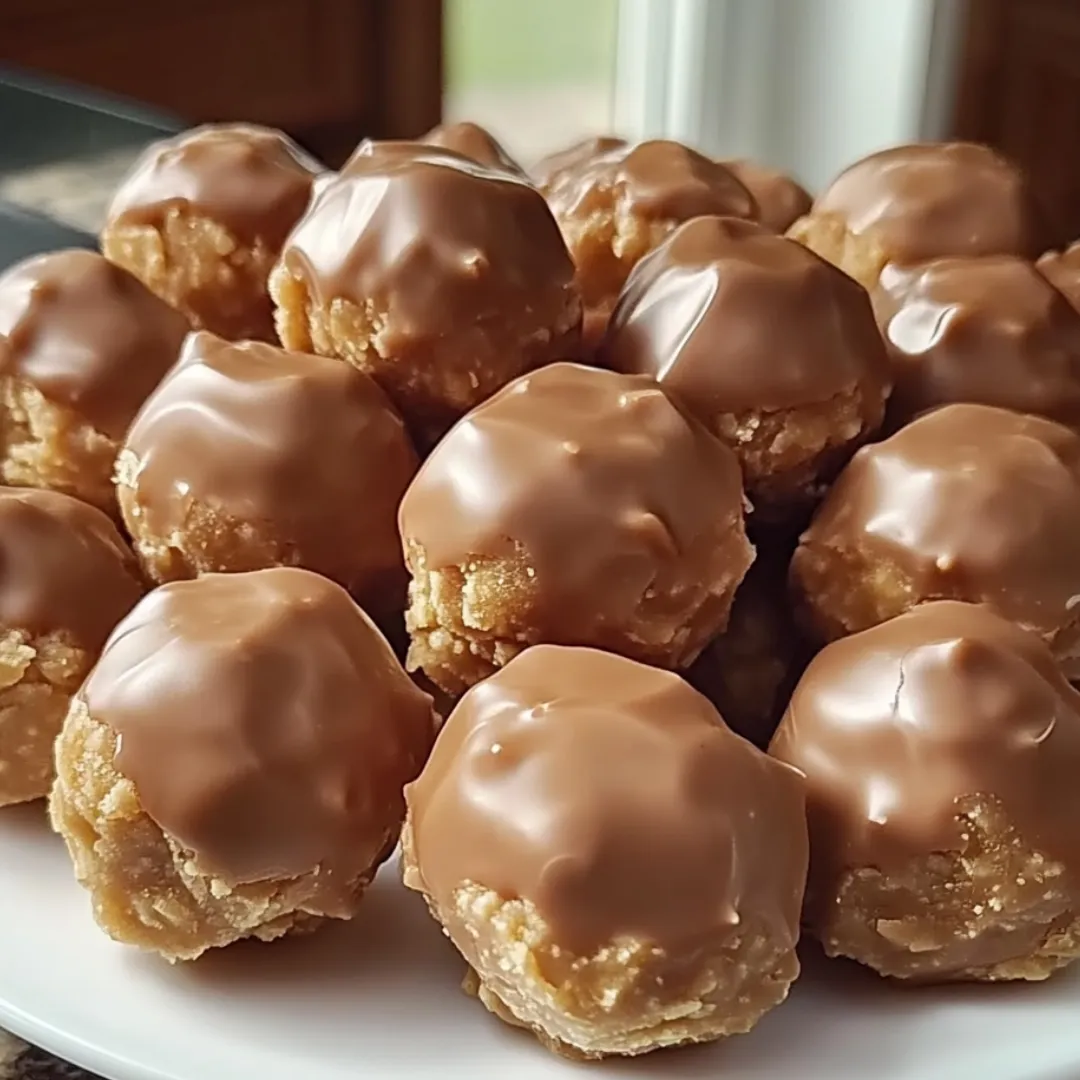
These irresistible Butterfinger Balls transform the iconic candy bar into bite-sized treats that deliver perfect texture and flavor in every bite. The creamy peanut butter base, studded with crunchy Butterfinger pieces and graham cracker crumbs, creates the ideal canvas for a smooth chocolate coating. Unlike typical truffles, these no-bake treats combine multiple textures—creamy, crunchy, and crisp—in a single bite-sized morsel. Whether you're creating holiday gifts, preparing for a party, or simply satisfying a sweet tooth craving, these portable confections deliver big flavor with minimal effort. The best part? They can be made well in advance and stored until you're ready to serve or gift them.
I first created these treats for a holiday cookie exchange where I wanted something different from the typical offerings. The response was immediate and enthusiastic—they were the first treats to disappear from the table! My neighbor, who typically avoids sweets, asked for the recipe on the spot. What surprised me most was how they appealed to multiple generations; my grandmother appreciated their nostalgic candy bar flavor, while my young nieces were delighted by the fun, bite-sized format. Since then, they've become my signature contribution to potlucks and gatherings. Last Christmas, I packaged them in small gift boxes for neighbors and received so many compliments that I now keep the ingredients on hand year-round for impromptu gifts or last-minute entertaining.
Essential Ingredients
- Peanut butter: Creates the creamy, rich base for these treats. Choose regular creamy peanut butter rather than natural varieties, which can separate and create an oily texture. The stabilizers in commercial peanut butter help maintain the proper consistency.
- Butterfinger bars: Provide the distinctive crunchy texture and unique flavor that makes these treats special. Finely crushed bars incorporate throughout the mixture while larger pieces create pockets of crunch and visual appeal.
- Graham cracker crumbs: Add structure and a subtle honey-graham flavor that complements the peanut butter. They also absorb excess moisture, helping the balls hold their shape when formed and dipped.
- Powdered sugar: Sweetens the mixture while contributing to the smooth texture. The fine consistency integrates seamlessly with the peanut butter without adding graininess.
- Butter: Enhances richness and helps bind the ingredients together. Use unsalted butter to control the overall salt level in the finished treats.
- Vanilla extract: Adds depth and warmth to the flavor profile. Pure vanilla extract provides the best flavor, though artificial works in a pinch.
- Chocolate coating: Creates the protective shell that holds everything together. Chocolate bark or melting wafers produce the smoothest results, though good-quality chocolate chips also work well.
 Pin it
Step-By-Step Preparation
- Step 1:
- Create the perfect peanut butter base - In a medium mixing bowl, combine 1 cup of creamy peanut butter with 4 tablespoons of softened (not melted) butter. Using an electric mixer on medium speed, beat until completely smooth and well integrated, about 2 minutes. The mixture should be uniform in color and texture with no visible streaks of butter. This creates the creamy foundation that will carry all the other flavors and textures.
- Step 2:
- Add flavor and sweetness - Add 1 teaspoon of vanilla extract to the peanut butter mixture and beat until incorporated. With the mixer on low speed, gradually add 1 cup of powdered sugar, about ¼ cup at a time, allowing each addition to incorporate before adding more. This prevents the powdered sugar from flying out of the bowl and ensures even distribution. Scrape down the sides of the bowl as needed to ensure everything is thoroughly mixed. The mixture will become noticeably thicker and slightly lighter in color.
- Step 3:
- Incorporate the crunchy elements - Switch to a sturdy wooden spoon or rubber spatula for this step. Gently fold in ¾ cup of graham cracker crumbs and ½ cup of finely crushed Butterfinger pieces until evenly distributed throughout the peanut butter mixture. The folding motion preserves the texture of the crushed candy and prevents the mixture from becoming too compacted. The dough should be firm enough to hold its shape when rolled but still slightly pliable—similar to a soft cookie dough consistency.
- Step 4:
- Shape with consistency - Line a large baking sheet with parchment paper or a silicone mat. Using a 1-tablespoon cookie scoop or measuring spoon, portion the mixture into equal amounts. Roll each portion between your palms to form neat, round balls. For the smoothest results, wash your hands occasionally as they become sticky. Place the shaped balls on the prepared baking sheet, spacing them about an inch apart to prevent sticking together. This recipe typically yields about 24-30 balls, depending on the exact size.
- Step 5:
- Chill for structure - Place the entire baking sheet in the freezer for 30 minutes, or until the balls are firm to the touch. This critical step ensures the balls maintain their shape during the dipping process and prevents them from falling apart or melting when they come in contact with the warm chocolate. If you're short on freezer space, refrigerate for at least 2 hours instead.
- Step 6:
- Master the chocolate coating - About 10 minutes before removing the chilled balls from the freezer, begin preparing the chocolate coating. Place 8 ounces of chocolate bark, melting wafers, or chocolate chips in a microwave-safe bowl. Heat on 50% power for 30 seconds, then stir thoroughly. Continue heating in 30-second intervals at 50% power, stirring between each interval, until the chocolate is almost completely melted with just a few small lumps remaining. Stir until completely smooth, allowing the residual heat to melt the remaining pieces. This prevents overheating, which can cause the chocolate to seize or become grainy.
- Step 7:
- Dipping technique for perfect results - Remove the chilled balls from the freezer, working with about 5-6 at a time while keeping the rest cold. Drop one ball into the melted chocolate and use two forks to roll it gently, ensuring complete coverage. Lift the coated ball with one fork, allowing excess chocolate to drip back into the bowl. Gently tap the fork handle on the edge of the bowl to encourage extra chocolate to fall away, creating a thinner, more even coating. Transfer to a parchment-lined baking sheet, using the second fork to slide the ball off the first fork if needed.
- Step 8:
- Finishing touches - While the chocolate is still wet, sprinkle the tops with additional crushed Butterfinger pieces, festive sprinkles, or a tiny pinch of coarse sea salt, if desired. Work quickly to add these garnishes before the chocolate begins to set. Allow the coated balls to set completely at room temperature, approximately 1-2 hours, or speed up the process by refrigerating for about 30 minutes until the chocolate is firm and no longer tacky to the touch.
The Art of Chocolate Selection and Handling
The chocolate coating is much more than just a sweet covering—it's an integral part of the taste experience and presentation. Understanding the nuances of different chocolate options can dramatically affect your final results.
Chocolate bark or melting wafers (sometimes called candy coating or almond bark) contain vegetable fats rather than cocoa butter, which makes them easier to work with. They melt smoothly, set firmly at room temperature, and don't require tempering. This makes them ideal for beginners or when you need reliable results without specialized techniques.
If using real chocolate (dark, milk, or white), proper melting technique becomes crucial. Real chocolate contains cocoa butter, which has a crystalline structure that can become unstable when heated. This is why chocolate sometimes develops a dull appearance or white streaks (bloom) after setting. For the shiniest finish, consider tempering your chocolate—a process that ensures the cocoa butter crystals reform in a stable pattern.
For a quick pseudo-tempering method, melt about ¾ of your chocolate, then remove from heat and add the remaining ¼, stirring until smooth. This introduces stable crystals from the unmelted chocolate into the melted portion, creating a more reliable set.
The temperature of both the chocolate and the peanut butter balls affects dipping success. Too-warm chocolate will create a thinner coating and may partially melt the balls. Too-cold balls can cause the chocolate to seize or set too quickly upon contact. Aim for thoroughly chilled but not frozen balls and melted chocolate that feels warm but not hot when tested on your inner wrist.
I've made these treats countless times now, and I've learned that attention to detail makes all the difference. During my first attempt, I used natural peanut butter because I thought it would be healthier. Big mistake! The balls were oily and wouldn't hold their shape, no matter how much I increased the graham crackers. Another breakthrough came when I discovered the freezing technique. Initially, I had just refrigerated the balls briefly, but they would start to soften and fall apart in the warm chocolate. Once I started freezing them solid first, the dipping process became so much easier and the final appearance much more professional. My most recent improvement was using a combination of finely crushed and slightly larger Butterfinger pieces—the variety creates more interesting texture and visual appeal when you bite into each treat.
 Pin it
Creative Variations
While the classic Butterfinger Balls are irresistible, this adaptable recipe welcomes creative variations to suit different tastes and occasions:
For chocolate lovers, try replacing the graham cracker crumbs with chocolate cookie crumbs and using dark chocolate for coating. The deeper chocolate notes complement the Butterfinger pieces beautifully while creating a more sophisticated flavor profile.
Create a holiday version by using white chocolate for the coating and adding festive sprinkles in seasonal colors. For Christmas, red and green sprinkles create a festive appearance, while pastels work wonderfully for Easter or spring gatherings.
For a salty-sweet variation, mix in a quarter cup of finely crushed pretzel pieces along with the graham cracker crumbs and Butterfinger pieces. The added salt dimension enhances the sweetness and creates more textural interest.
Consider a s'mores-inspired twist by using honey graham crackers for the crumbs, adding mini marshmallow bits to the filling, and using milk chocolate for coating. This combination evokes campfire treats in a convenient, bite-sized form.
For those who enjoy different candy bars, this basic method works wonderfully with substitutions. Try using crushed Heath bars, Snickers, or Reese's cups in place of the Butterfinger pieces for entirely different but equally delicious variations.
My final thought on these Butterfinger Balls is that they perfectly represent what makes homemade treats special—they're relatively simple to prepare but deliver a unique experience that can't be found in store-bought confections. There's something genuinely delightful about the combination of creamy, crunchy, and smooth textures all in one bite-sized package. When I give these as gifts, I always include the recipe because I inevitably get requests for it. But what makes me happiest is seeing someone's expression when they take that first bite—the moment of surprise and pleasure that comes from discovering something unexpectedly delicious. Whether you're making these for yourself or to share, they're sure to create sweet memories and happy moments.
Frequently Asked Questions
- → Can I freeze these Butterfinger balls?
- Yes! They freeze well for up to 3 months in an airtight container. Just thaw in the refrigerator for a few hours before serving.
- → What can I substitute for Butterfinger bars?
- You can use other crunchy candy bars like Heath bars, Skor bars, or even Reese's Pieces for a different but equally delicious flavor.
- → How do I prevent the chocolate from cracking?
- Adding a small amount of shortening or coconut oil to your melted chocolate (about 1 teaspoon per cup) helps create a smoother coating that's less likely to crack.
- → Can I make these without graham crackers?
- Yes, you can substitute graham crackers with vanilla wafers, digestive biscuits, or even crushed pretzels for a sweet-salty combination.
- → Why shouldn't I use natural peanut butter?
- Natural peanut butter separates and is often too oily, making the mixture difficult to form into balls. Commercial brands like Jif or Skippy have stabilizers that create a better consistency.