
 Pin it
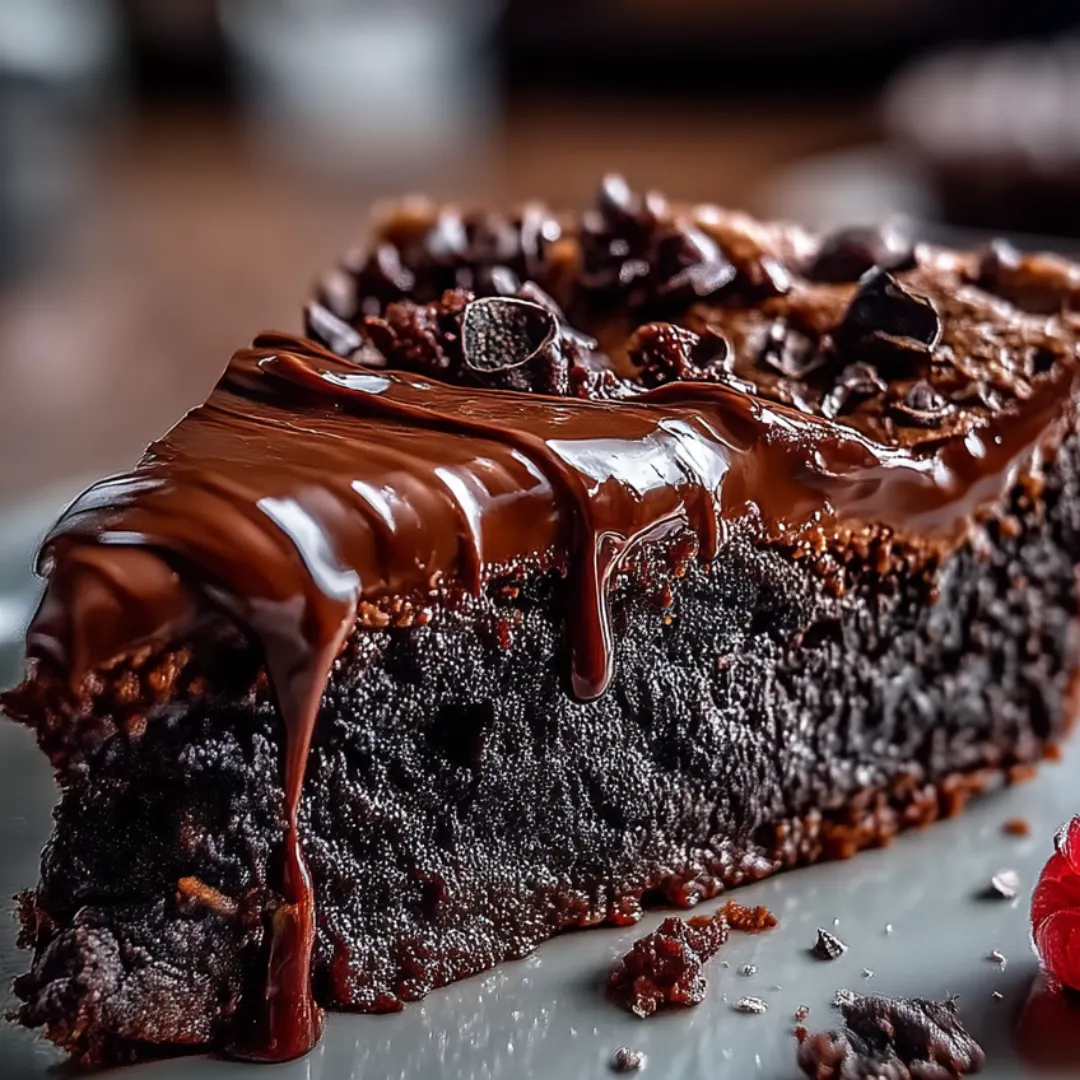
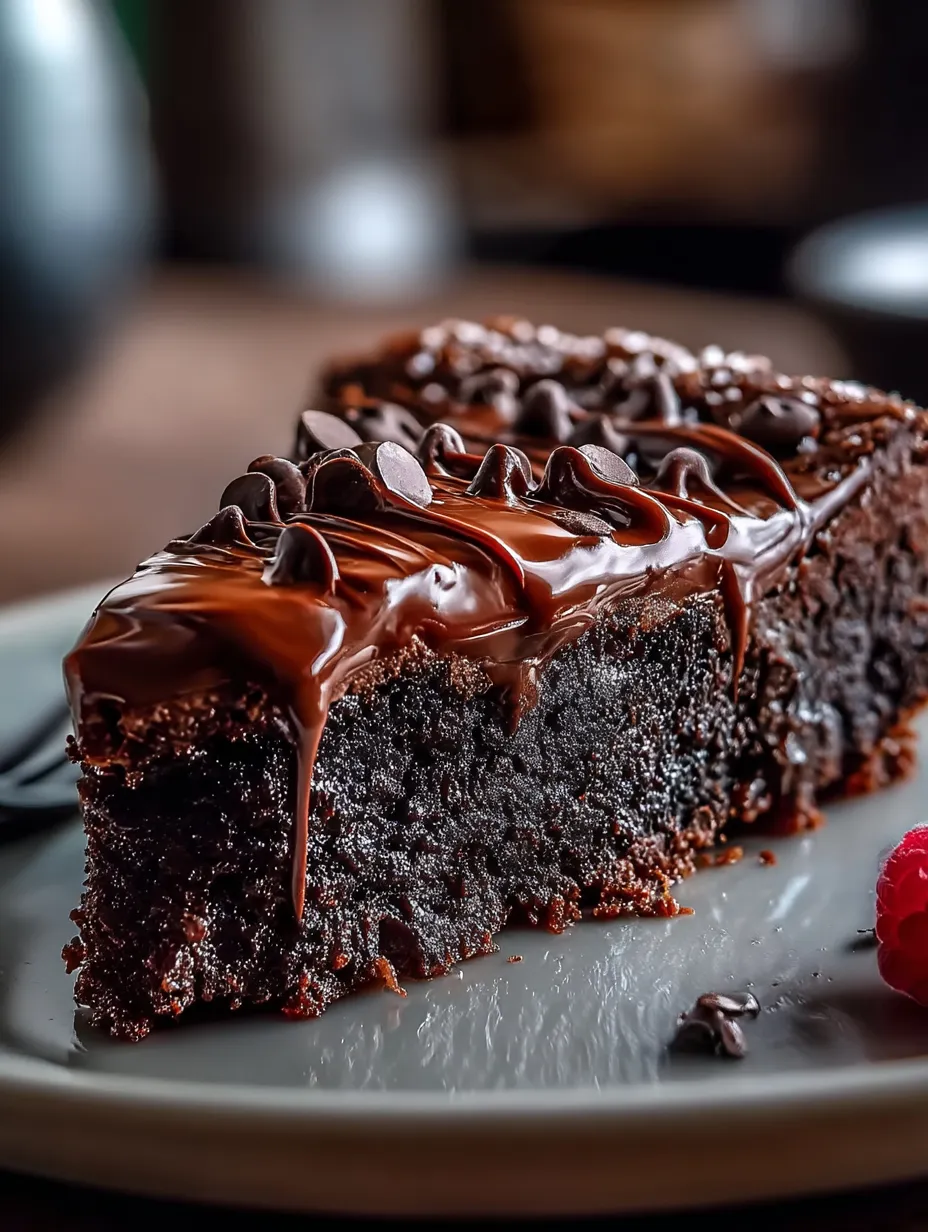
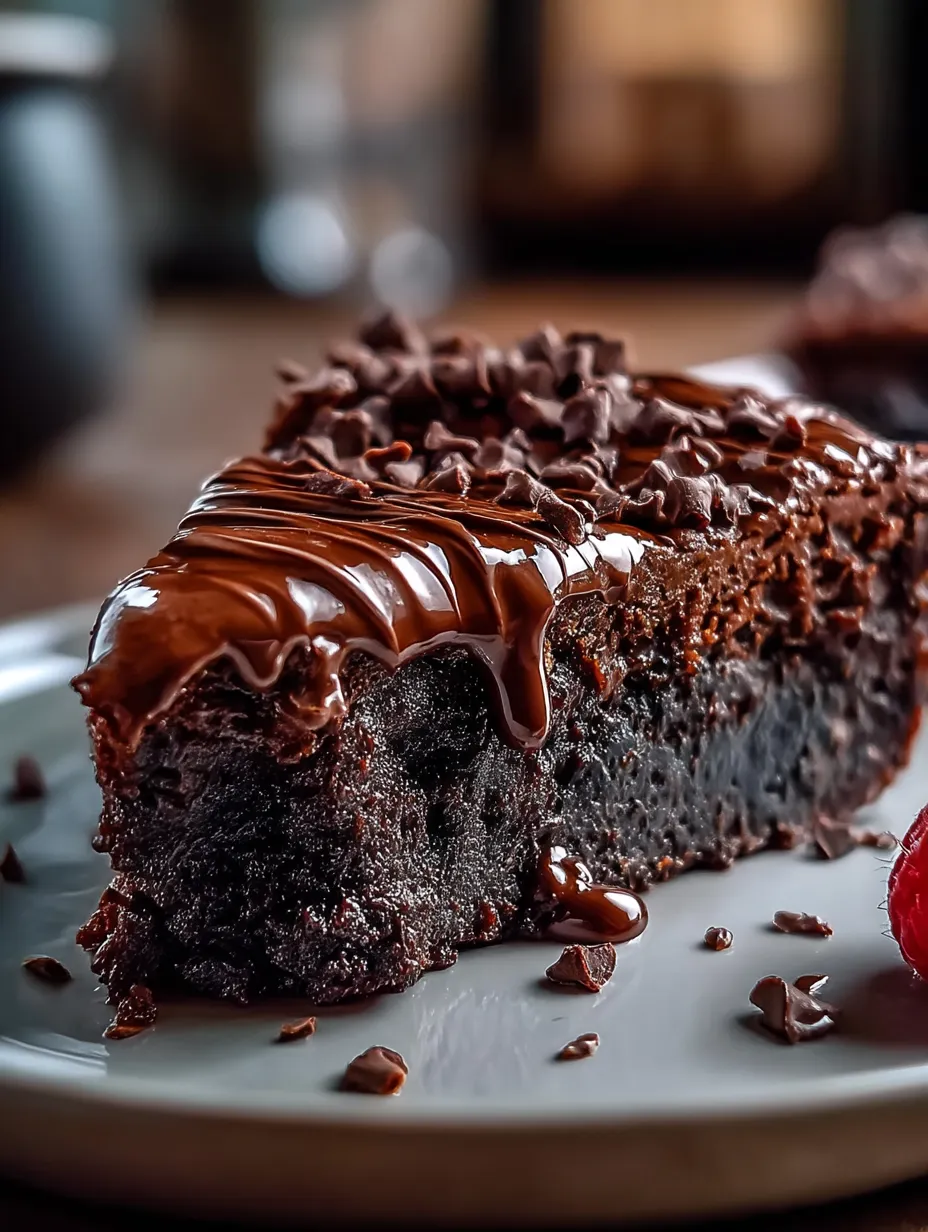
This irresistible Chocolate Ooey Gooey Cake lives up to its name with a perfectly crisp top that gives way to a decadently fudgy, molten chocolate center. The magical contrast between the slightly caramelized exterior and the silky-smooth interior creates a dessert experience that feels both comforting and luxurious. Despite its impressive results, this crowd-pleasing treat comes together with minimal effort and basic pantry ingredients, making it the perfect solution for last-minute entertaining or satisfying intense chocolate cravings without requiring advanced baking skills.
The first time I made this cake was for a potluck dinner where I was assigned dessert at the last minute. With no time for a grocery run, I frantically searched for something I could make with what I already had. This recipe saved the evening! Despite my rushed preparation, the cake emerged from the oven with that magical gooey center that made everyone swoon. As guests took their first bites, conversation temporarily halted, replaced by appreciative murmurs and requests for the recipe. My friend's husband, who claimed he wasn't "a dessert person," returned for a second slice and then asked if I would make it for his birthday. What began as a desperate solution has become my go-to impressive dessert for everything from casual family gatherings to dinner parties where I want to appear far more skilled in the kitchen than I actually am.
Ingredients
- 1 box chocolate cake mix: Provides the perfect foundation for texture and flavor. Any brand works well, though darker chocolate varieties like devil's food create more depth. The mix should be fresh without any hardened lumps for the best texture.
- 3 large eggs: Creates structure while contributing to the cake's richness. Room temperature eggs incorporate more easily than cold ones. Farm-fresh eggs with bright yolks add extra richness and color to the final result.
- 8 tablespoons (1 stick) unsalted butter, melted: Adds luxurious richness and helps create the gooey texture. European-style butter with higher fat content produces an even more indulgent result. Be sure to cool the melted butter slightly before mixing with other ingredients.
- 1 teaspoon vanilla extract: Enhances the chocolate flavor with its aromatic notes. Pure vanilla extract rather than imitation offers the most complex flavor. A high-quality extract with visible vanilla bean specks elevates the overall taste.
- 1 cup semi-sweet chocolate chips: Creates pockets of melted chocolate throughout the cake. Choose good quality chips that melt well without becoming waxy. Chips with at least 45-60% cacao content offer the best chocolate flavor without excessive sweetness.
- 2 cups powdered sugar: Creates the signature gooey texture when combined with the other ingredients. Fresh, lump-free powdered sugar incorporates most smoothly. Sift if it appears at all lumpy to ensure a silky-smooth finish.
- 1/4 cup cocoa powder: Intensifies the chocolate flavor and adds richness. Dutch-processed cocoa provides a deeper, smoother chocolate flavor, though regular unsweetened cocoa works well too. The powder should be fresh with a rich aroma.
- 1/4 teaspoon salt: Balances the sweetness and enhances the chocolate flavor. Fine sea salt or kosher salt distributes more evenly than coarse varieties.
 Pin it
Step-by-Step Instructions
- Step 1:
- Prepare your baking environment properly - Begin by positioning a rack in the middle of your oven and preheating to 350°F (175°C). This temperature creates the perfect balance between a set exterior and gooey interior. While the oven heats, generously grease a 9×13-inch baking dish with butter or cooking spray, paying special attention to the corners where sticking is most likely to occur. Some bakers prefer lining the dish with parchment paper with overhanging edges for easy removal, but this is optional. The proper pan preparation prevents frustration later when serving this delicate cake. A metal pan creates more browning on the edges than glass, which many prefer for the textural contrast.
- Step 2:
- Create the cake base with care - In a large mixing bowl, combine the dry chocolate cake mix, melted butter (cooled slightly so it doesn't cook the eggs), and eggs. Mix using an electric mixer on medium speed or a wooden spoon with considerable effort until the ingredients form a thick, smooth batter. This will require about 2-3 minutes of mixing, during which the batter will transform from a loose mixture to a thick, frosting-like consistency. The density is perfect – it should be substantially thicker than a normal cake batter, almost like a soft cookie dough. This thickness is crucial for achieving the distinctive texture that makes this cake special. If the batter seems too stiff, you can add a tablespoon of milk to loosen it slightly.
- Step 3:
- Incorporate the chocolate chips thoughtfully - Add the semi-sweet chocolate chips to the thick batter and fold them in using a rubber spatula or wooden spoon. Use gentle, sweeping motions to distribute the chips evenly throughout the mixture without overmixing, which could make the final texture tough. The goal is to have chocolate chips scattered throughout every bite of the finished cake. For an even more decadent result, you can use a combination of semi-sweet and milk chocolate chips, or substitute chocolate chunks for a more rustic appearance. The chocolate pieces create melty pockets within the gooey interior that intensify the chocolate experience.
- Step 4:
- Transfer to the baking dish with precision - Spoon the thick batter into your prepared baking dish, using a rubber spatula to spread it into an even layer that reaches all corners. This takes some effort as the batter is quite thick and sticky. Take your time with this step – an uneven distribution will result in inconsistent baking. The batter should fill the dish to about half its depth, allowing room for it to rise slightly during baking. The surface doesn't need to be perfectly smooth, as any small lumps or bumps will be covered in the next step and contribute to the rustic charm of the finished dessert.
- Step 5:
- Create the magical gooey layer - In a separate bowl, whisk together the powdered sugar and cocoa powder until well combined with no visible streaks of either ingredient. This creates the mixture that will transform into the signature gooey layer during baking. Sift these ingredients together if either has lumps to ensure the smoothest possible texture. The combination of powdered sugar and cocoa powder melts during baking to create that distinctive molten center while adding an extra layer of chocolate intensity. Sprinkle this mixture evenly over the entire surface of the batter in the baking dish, creating a generous, even layer that completely covers the batter. Resist the urge to mix it in – it will incorporate naturally during baking.
- Step 6:
- Bake with attention to timing - Place the baking dish on the center rack of your preheated oven and bake for 28-32 minutes. This timing is crucial for achieving the perfect texture – too short and the cake will be too loose and raw-tasting; too long and you'll lose the signature gooeyness. You're looking for specific visual cues: the edges should be set and slightly pulled away from the sides of the pan, while the center remains soft and slightly jiggly. A light touch on the surface should leave a slight impression but not sink in completely. The top will develop a thin, crackly crust similar to a brownie. Start checking at the 25-minute mark if your oven runs hot, as overbaking is the most common mistake with this recipe.
- Step 7:
- Cool strategically for the perfect texture - Remove the cake from the oven and place it on a wire cooling rack. Allow it to cool for exactly 15-20 minutes before serving – this timing creates the ideal serving temperature and texture. During this brief cooling period, the cake will continue to set slightly while remaining warm and gooey in the center. The contrast between the crisp top, set edges, and molten center becomes more pronounced as it cools. If you cut into it too soon, it will be too loose to serve neatly; wait too long, and while still delicious, it will lose some of its signature molten quality. This cooling window is your sweet spot for the ultimate gooey experience.
- Step 8:
- Cut and serve with intention - Use a sharp knife to cut the cake into squares, wiping the blade clean between cuts for the neatest presentation. This cake is inherently messy by design, so embrace its rustic charm rather than expecting perfectly clean slices. Serving sizes can vary depending on the richness you prefer – smaller 2-inch squares are perfect for rich dessert buffets, while larger portions satisfy serious chocolate cravings. The interior should have a pudding-like consistency that slowly oozes onto the plate. For the most indulgent presentation, serve each portion in a shallow bowl rather than a flat plate to contain the gooey center.
- Step 9:
- Enhance with complementary toppings - While this cake is certainly delicious on its own, it reaches its full potential when topped with a scoop of vanilla ice cream or a dollop of lightly sweetened whipped cream. The cold, creamy contrast against the warm, gooey cake creates a sensory experience that elevates the dessert to restaurant-quality status. The vanilla flavor in either topping enhances the chocolate intensity while providing temperature contrast. For special occasions, consider additional garnishes like fresh berries, mint leaves, or a light dusting of extra cocoa powder or powdered sugar for visual appeal.
- Step 10:
- Store leftovers properly - On the rare occasion that you have leftovers, allow the cake to cool completely before covering the baking dish with plastic wrap or transferring portions to an airtight container. The cake will keep at room temperature for up to 3 days, though the texture will gradually become more fudge-like and less gooey over time. To revive the molten center when serving leftovers, warm individual portions in the microwave for 15-20 seconds. The gooey quality will return, though the top will lose some of its crispness. For longer storage, the cake can be frozen for up to 3 months – thaw overnight in the refrigerator before reheating.
The finished cake should have a slightly crackly top giving way to a gloriously fudgy center that slowly oozes when cut into. The edges provide a more cake-like texture, while the interior delivers that signature gooey chocolate experience that makes this dessert truly special.
The Magic Behind the Gooeyness
What fascinates me most about this cake is the simple science that creates its extraordinary texture. The magic lies in the unique proportion of ingredients and the special layering technique with powdered sugar.
Unlike traditional cakes that aim for a uniform, fluffy crumb throughout, this recipe intentionally creates different zones of texture. The thick, almost dough-like batter forms a stable structure around the edges while the center remains beautifully underbaked. The powdered sugar layer on top doesn't just add sweetness—it creates a thin, crackly crust similar to a brownie top while helping to insulate the center, preventing it from cooking through completely.
I discovered the importance of this powdered sugar layer during an experimental batch where I mixed the sugar directly into the batter instead of sprinkling it on top. The resulting cake was uniformly sweet but entirely lacked that distinctive molten center that makes this dessert so special. The separation of ingredients is crucial to the chemistry that creates the varied textures.
The butter content also plays a vital role in developing the gooey interior. While many cake recipes use oil for moisture, the solid fat content in butter melts during baking but never fully incorporates with the other ingredients, creating small pockets of richness throughout the cake. These butter pockets, combined with the melting chocolate chips, contribute to that luscious, pudding-like center that gives the cake its name.
Perfect Occasions for Serving
This Chocolate Ooey Gooey Cake has become my secret weapon for numerous occasions, as it possesses that rare quality of being both impressively decadent and surprisingly easy to prepare.
For last-minute dinner guests, it's an absolute lifesaver. I can have it in the oven within 10 minutes of their unexpected call, and by the time we finish the main course, a showstopping dessert awaits. The rich chocolate aroma filling the house creates anticipation that the cake always fulfills.
During the holiday season, when elaborate multi-course meals can become overwhelming, this cake provides a welcome simplicity. I often prepare it in advance and pop it into the oven just as we sit down to dinner, allowing it to reach perfect serving temperature by the time we're ready for dessert. Its rustic presentation fits beautifully alongside more elaborate holiday fare, offering a homey contrast to fussier seasonal treats.
For casual family movie nights, I prepare a batch in the afternoon and reheat individual portions throughout the evening. There's something magical about pausing a film for a warm, gooey slice of chocolate heaven that elevates an ordinary night at home into something special.
This cake has even saved birthday celebrations. When my daughter requested a "chocolate lava cake" for her birthday but I lacked individual ramekins, this large-format version saved the day. Topped with candles and served with ice cream, it created the molten chocolate experience she wanted without requiring special equipment or individual timing for each serving.
I learned about the critical importance of baking time through a memorable kitchen disaster. Preparing this cake for a dinner party, I became distracted by conversation and left it in the oven for an extra 10 minutes. When I finally served it, the cake was fully set throughout – still delicious, but missing its signature molten center. Now I set two timers when baking it: one on my phone and one on the oven, ensuring I never miss that perfect window of doneness. I've found that starting to check at the 25-minute mark and looking for those visual cues – set edges with a slightly jiggly center – is far more reliable than adhering strictly to a prescribed time, as individual ovens can vary significantly.
 Pin it
Creative Variations to Try
While the classic version of this cake is absolutely perfect as is, I've developed several variations over the years that offer delightful twists on the original recipe.
For a mocha version that coffee lovers adore, I dissolve 1 tablespoon of espresso powder in the melted butter before adding it to the batter. This doesn't make the cake taste like coffee but rather intensifies the chocolate flavor in the same way that coffee enhances chocolate in many professional bakery recipes. For an extra touch, I sometimes sprinkle chocolate-covered espresso beans on top after baking.
During holiday seasons, I create a peppermint variation by adding 1/2 teaspoon of peppermint extract to the batter and substituting mint chocolate chips for half of the regular chocolate chips. Garnished with crushed candy canes after baking, this version offers festive flavor perfect for winter gatherings.
For those who enjoy textural contrast, my "turtle" version incorporates 1/2 cup of chopped pecans into the batter and replaces 1/4 cup of the chocolate chips with caramel baking bits. The nuts provide a pleasant crunch against the gooey center, while the caramel creates pockets of sweet, buttery goodness throughout.
When serving to guests who prefer less intense chocolate flavors, I've created a marble version by separating the cake mix batter and adding cocoa powder to only half. Swirling the two batters together in the pan creates a beautiful visual effect and offers bites with varying levels of chocolate intensity.
For special occasions requiring a more sophisticated presentation, I've baked individual portions in ramekins, reducing the baking time to about 18-20 minutes. These personal-sized treats, served warm with a small scoop of vanilla bean ice cream on top, elevate the dessert to restaurant-quality status while maintaining its comforting character.
After making this cake countless times for family gatherings, potlucks, and impromptu dessert cravings, I've come to appreciate the simple joy it brings to both baker and eater. There's something deeply satisfying about creating something so seemingly indulgent with such minimal effort – it feels almost like cheating at dessert.
What I love most about sharing this recipe is watching the expressions on people's faces when they take their first bite. There's usually a moment of silence, followed by closed eyes and an appreciative murmur. In our busy world of complicated recipes and intimidating techniques, there's something wonderfully reassuring about a dessert that consistently delivers on its promises without requiring professional skills or specialized equipment.
This cake has become more than just a recipe in my collection – it's a reminder that sometimes the most memorable food experiences come from embracing imperfection. The slightly messy serving, the way it doesn't quite hold its shape on the plate, the need to eat it warm rather than at a picture-perfect temperature – these "flaws" are exactly what make it special. In a world that often prioritizes appearance over substance, this delightfully gooey, gloriously messy cake reminds us that sometimes the most delicious things in life are the ones that don't try too hard to be perfect.
Frequently Asked Questions
- → What size pan should I use for this cake?
- This recipe works best in a 9x13-inch baking pan. You can also use a 9-inch square pan for a thicker cake, but you may need to increase the baking time by 5-10 minutes.
- → Can I use a different flavor of cake mix?
- Absolutely! While chocolate cake mix creates a classic chocolate gooey cake, you can experiment with other flavors like yellow cake mix, red velvet, or even spice cake for different variations.
- → How do I know when the cake is done baking?
- The edges should be set and slightly golden, while the center will still be soft and jiggly. If you insert a toothpick about 2 inches from the edge, it should come out mostly clean. Don't test the center as it's supposed to remain gooey!
- → How should I store leftovers?
- Cover the cake tightly with plastic wrap or transfer to an airtight container and store at room temperature for up to 2 days or in the refrigerator for up to 5 days. Reheat individual slices in the microwave for 15-20 seconds before serving.
- → Can I freeze this cake?
- Yes! Cut the cooled cake into portions, wrap each piece in plastic wrap and then aluminum foil, and freeze for up to 3 months. Thaw overnight in the refrigerator and warm slightly before serving for the best gooey texture.