
 Pin it
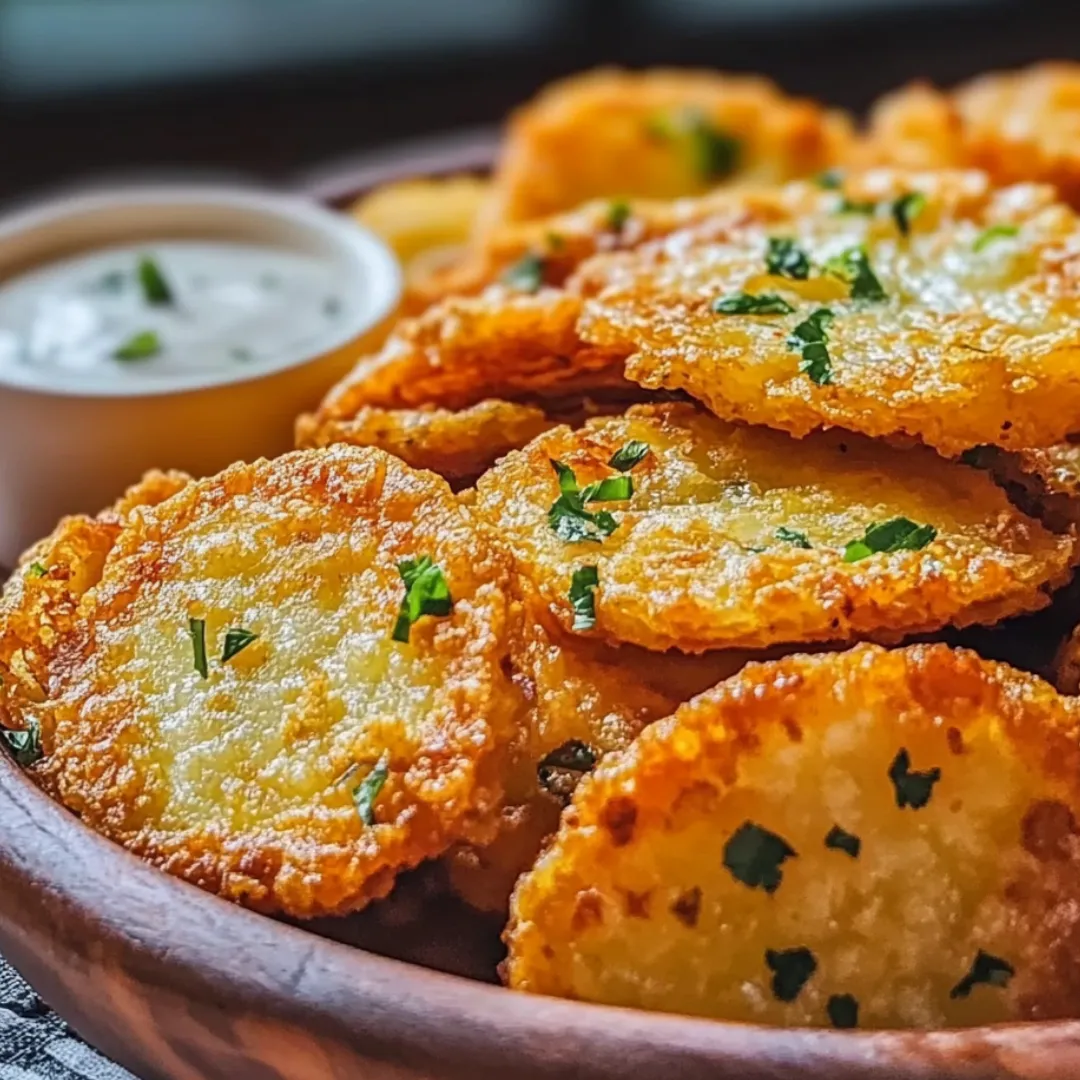
These Crispy Crunchy Fried Pickles transform tangy dill pickles into an irresistible appetizer that perfectly balances juicy, briny interiors with golden, seasoned exteriors. The contrasting textures create a sensory experience that keeps you reaching for just one more, while the carefully selected spices enhance the natural pickle flavor without overwhelming it. Whether served at game day gatherings, summer cookouts, or as a surprising starter for dinner guests, these addictive bites disappear quickly and leave everyone asking for your secret recipe.
I discovered the magic of homemade fried pickles during a summer when my sister and her family stayed with us for two weeks. With four extra people in the house, including two teenagers with bottomless appetites, I needed affordable appetizers that would disappear quickly. The first batch of these pickles vanished so fast that my nephew actually stood beside me at the stove while I made the second round, grabbing them almost before they could cool. Now whenever he visits, he walks through the door asking if we're having "those pickle things" before he even sets down his bag. That's how I knew this recipe was truly special—it created not just a delicious snack, but a food memory that's become part of our family story.
Ingredients
- 1 jar (32 oz) dill pickle slices: The foundation of this recipe, providing that distinctive tangy flavor. Look for pickles that are firm and crisp with a bright green color. Hamburger dill slices work perfectly as they have consistent thickness and diameter. The pickles should be thoroughly drained and patted dry before breading, as excess moisture prevents proper crisping. Refrigerated pickles tend to be crisper than shelf-stable varieties, though both work well. The thickness of the slices affects cooking time—thinner slices cook faster but can become too crisp, while thicker slices maintain more juiciness.
- 1 cup buttermilk: Creates the perfect adhesive base for the breading while adding subtle tanginess. True buttermilk (not milk with lemon juice) yields the best results with its thicker consistency and cultured flavor. The slight acidity complements the pickles' brine while helping tenderize them during the brief soaking period. Cold buttermilk adheres better to the pickles than room temperature. If you don't have buttermilk, combine 1 cup of whole milk with 1 tablespoon white vinegar and let stand for 10 minutes before using.
- 1 cup all-purpose flour: Provides structure to the coating and helps create a crisp exterior. Unbleached all-purpose flour works best for this recipe, with its moderate protein content creating the ideal crispness. The flour should be fresh and free-flowing without lumps. Measuring by spooning the flour into measuring cups rather than scooping directly ensures you don't use too much, which could create a heavy coating. While specialty flours like cake flour or bread flour can be substituted in a pinch, they will produce slightly different textures.
- ½ cup yellow cornmeal: The secret to that exceptional crunch factor that makes these pickles irresistible. Medium-grind cornmeal provides the perfect balance of texture without being too gritty. Stone-ground varieties offer more corn flavor than degerminated types. The cornmeal should smell fresh and sweet with no musty aroma, which would indicate staleness. This ingredient creates those delightful crispy bits that cling to the pickles and maintain their crunch even as they cool.
- 1 tablespoon garlic powder: Adds depth and savory notes that complement the pickles' tanginess. Look for garlic powder without added salt for better flavor control. Fresh garlic powder should have a potent aroma when opened—if it smells faint, it's time to replace it. This ingredient helps create a more complex flavor profile that elevates these pickles beyond basic fried food. The fine powder distributes evenly throughout the breading mixture for consistent flavor in every bite.
- 1 teaspoon onion powder: Contributes subtle sweetness and aromatic qualities to the breading. Like garlic powder, it should have a strong scent when opened, indicating freshness. The mild onion flavor works harmoniously with the garlic and pickle brine without overpowering. This ingredient adds another layer of flavor complexity that makes these pickles distinctive. The fine powder ensures even distribution throughout the coating mixture.
- ½ teaspoon cayenne pepper: Provides a gentle heat that balances the tanginess of the pickles. Adjust according to your spice preference—½ teaspoon gives noticeable warmth without overwhelming heat. Fresh cayenne should have a vibrant red color and potent aroma. The heat builds subtly with each pickle consumed, making them increasingly addictive. If serving to spice-sensitive guests, you can reduce to ¼ teaspoon or substitute with paprika for color without heat.
- 1 teaspoon paprika: Adds beautiful color and mild flavor to the breading. Sweet Hungarian paprika works best for its bright color and subtle sweetness. The paprika should have a vibrant red hue, as dull or brownish color indicates loss of flavor. This ingredient contributes to the golden-reddish appearance that makes the pickles visually appealing. Beyond color, it adds a gentle earthiness that rounds out the flavor profile.
- 1 teaspoon salt: Enhances all the other flavors in the breading. Kosher salt is preferred for its clean taste and easy distribution. This amount balances the breading without making it too salty, as the pickles themselves contribute significant saltiness. If using table salt instead of kosher, reduce the amount by half due to its finer grain and more concentrated salinity. Proper seasoning is crucial to highlighting the contrast between the tangy pickle and savory coating.
- ½ teaspoon black pepper: Adds subtle heat and aromatic qualities to the breading. Freshly ground pepper provides significantly better flavor than pre-ground, with its essential oils still intact. The slight spiciness complements the cayenne and enhances the overall flavor profile. Coarse-ground pepper adds visible specks to the breading for visual interest. This ingredient contributes to the complex flavor that makes these pickles so addictive.
- Vegetable oil for frying: The cooking medium that creates the perfect crispy exterior. Use a neutral oil with a high smoke point such as canola, peanut, or vegetable oil blend. The oil should be fresh, not previously used for frying, to ensure clean flavor. You'll need enough to fill your cooking vessel to a depth of approximately 2 inches, typically 4-6 cups depending on your pot size. The oil temperature (365°F) is crucial for achieving the perfect crisp texture without greasiness.
 Pin it
Step-by-Step Instructions
- Step 1: Prepare the pickles properly
- Begin by draining the pickle slices thoroughly. Open the jar and pour the entire contents into a colander set in the sink, allowing the brine to drain completely. Gently shake the colander to remove excess liquid, then spread the pickle slices in a single layer on paper towels or clean kitchen towels. Place additional towels on top and press gently to absorb as much moisture as possible without crushing the pickles. This crucial step removes excess moisture that would otherwise create steam during frying, preventing the coating from achieving optimal crispness. Let the pickles sit uncovered for about 15 minutes while you prepare the other components. Properly dried pickles will look slightly less glossy than when first removed from the jar.
- Step 2: Create the perfect breading mixture
- In a medium mixing bowl, combine the all-purpose flour, yellow cornmeal, garlic powder, onion powder, cayenne pepper, paprika, salt, and black pepper. Whisk these dry ingredients together thoroughly to ensure even distribution of the spices throughout the mixture. Pay special attention to breaking up any clumps, particularly in the flour, which can create uneven coating. The properly mixed breading should have a uniform color with visible specks of spices distributed evenly. The combination of flour and cornmeal creates the ideal texture—the flour provides structure while the cornmeal delivers that signature crunch. This mixture can be prepared up to a day in advance and stored in an airtight container at room temperature.
- Step 3: Set up an efficient breading station
- Organization is key to successful frying. Place the buttermilk in a shallow bowl wide enough to easily dip the pickle slices. Position your bowl of breading mixture adjacent to it. Next to these, place a baking sheet lined with parchment paper where you'll put the breaded pickles before frying. Arrange these components in a line, progressing from left to right if you're right-handed (or right to left if left-handed) to create a smooth workflow. Keep a dry hand for handling the uncoated pickles and breading, and a wet hand for dipping in buttermilk to prevent creating a sticky mess on your fingers. Having everything arranged before you begin breading ensures a cleaner process and more consistent results.
- Step 4: Master the breading technique
- Working with about 5-6 pickle slices at a time, dip them first into the buttermilk, ensuring they're completely coated. Allow excess buttermilk to drip back into the bowl for a few seconds. Then transfer the pickle slices to the breading mixture. Use your dry hand to gently press the breading onto both sides of each slice, ensuring complete coverage. The pressure should be firm enough to help the coating adhere but gentle enough not to damage the pickles. Shake off any excess breading and place the coated pickles on your prepared baking sheet, arranging them in a single layer without touching. Continue this process until all pickle slices are breaded. For extra crispiness, you can double-coat the pickles by dipping them back into the buttermilk after the first coating and then into the breading mixture again.
- Step 5: Heat oil to the perfect temperature
- Pour vegetable oil into a heavy-bottomed pot or Dutch oven to a depth of about 2 inches. Attach a deep-fry or candy thermometer to the side of the pot, ensuring the sensor is submerged in oil but not touching the bottom of the pot. Heat the oil over medium-high heat until it reaches exactly 365°F (185°C). This specific temperature is crucial—too low and the pickles will absorb excess oil and become soggy; too high and the coating will burn before the interior warms through. While the oil heats, prepare your draining station by lining a baking sheet with several layers of paper towels. Also place a heat-resistant slotted spoon or spider strainer nearby for removing the fried pickles. Monitor the oil temperature constantly throughout the frying process, adjusting the heat as necessary to maintain the optimal temperature.
- Step 6: Fry in small batches for maximum crispness
- Once the oil has reached 365°F, carefully lower 6-8 breaded pickle slices into the hot oil using your slotted spoon or spider strainer. Avoid overcrowding the pot, as this would lower the oil temperature significantly and result in soggy pickles. The pickles should sizzle immediately upon entering the oil—this is a good sign that your oil is at the correct temperature. Allow them to fry for 2-3 minutes, gently turning them halfway through with your slotted spoon to ensure even browning. The pickles are done when they've developed a golden-brown color with hints of reddish-gold from the paprika. During frying, the oil temperature will naturally drop slightly; adjust your heat source as needed to maintain as close to 365°F as possible.
- Step 7: Perfect the draining process
- Using your slotted spoon or spider strainer, carefully remove the fried pickles from the oil, allowing excess oil to drain back into the pot for a few seconds. Transfer the pickles to your prepared paper towel-lined baking sheet, arranging them in a single layer to prevent steaming. Immediately sprinkle with a tiny pinch of salt while still hot, if desired, for enhanced flavor. Allow them to drain for about 30 seconds, then transfer to a wire cooling rack placed over another baking sheet. This two-step draining process—first on paper towels to absorb the initial oil, then on a rack—prevents the pickles from becoming soggy on the bottom while retaining maximum crispness. Continue frying the remaining pickles in small batches, allowing the oil to return to 365°F between each batch.
- Step 8: Serve at the optimal moment
- Fried pickles are at their absolute best when served within minutes of frying, while the contrast between the hot, crispy exterior and the tangy, juicy interior is most pronounced. Transfer them to a serving platter lined with parchment paper or a cloth napkin to absorb any remaining oil. Serve immediately alongside small bowls of complementary dipping sauces such as ranch dressing, spicy remoulade, or honey mustard. For an elegant presentation, garnish the platter with fresh dill sprigs or a light dusting of paprika. If you must hold the pickles before serving, keep them on a wire rack in a 200°F oven for up to 15 minutes, though they're truly exceptional when enjoyed fresh from the fryer.
The Perfect Party Starter
These Crispy Crunchy Fried Pickles have saved countless gatherings when I needed an impressive appetizer without spending hours in the kitchen. Whether I'm hosting a casual game night or an impromptu weekend get-together, they consistently draw people to the kitchen with their irresistible aroma and keep everyone hovering near the serving platter until the last crispy morsel disappears.
What makes these fried pickles particularly perfect for entertaining is their ability to break the ice. I've noticed that even at parties where guests don't know each other well, these little flavor bombs create instant conversation. There's something about the surprising combination of crispy coating and tangy pickle that gets people talking, sharing their pickle preferences, and reaching for another one together. Food that creates connection is always the most satisfying to serve.
Beyond their social benefits, these pickles possess that magical quality of seeming far more labor-intensive than they actually are. Guests inevitably ask if I've been cooking all day when in reality, the entire process takes less than 30 minutes. This perception of effort without the actual time investment makes them my secret weapon for entertaining, especially when I want to impress without exhausting myself before guests arrive.
Dipping Sauce Pairings
While these Crispy Crunchy Fried Pickles shine brilliantly on their own, pairing them with the right dipping sauce elevates them to an entirely new level of flavor experience. The ideal sauce complements the pickles' tanginess while adding another dimension to each bite, creating a perfect balance of flavors and textures.
My family's absolute favorite pairing is a smoky sriracha ranch that comes together in seconds. I simply mix ¾ cup of good-quality ranch dressing with 1-2 tablespoons of sriracha (depending on your heat preference) and ½ teaspoon of smoked paprika. The cooling creaminess of the ranch mellows the pickle's intense tanginess, while the sriracha and smoked paprika add heat and depth that make each bite more complex and satisfying.
For gatherings with varied taste preferences, I often prepare a trio of dipping options. Alongside the sriracha ranch, I'll offer a honey mustard sauce (equal parts Dijon mustard and honey with a splash of apple cider vinegar) and a zesty remoulade (mayonnaise, chopped capers, minced pickles, Dijon, lemon juice, and Cajun seasoning). The variety allows guests to experiment with different flavor combinations throughout the evening, keeping the experience fresh and engaging even as they reach for their tenth pickle.
 Pin it
Southern Cooking Heritage
These fried pickles connect me to a culinary tradition much larger than my own kitchen. While researching regional appetizers for a family reunion in Tennessee years ago, I discovered that fried pickles reportedly originated in the Southern United States in the early 1960s. The story goes that they were first commercially served at the Duchess Drive-In in Atkins, Arkansas, before spreading throughout the region and eventually nationwide.
What fascinates me about this particular recipe is how it reflects the brilliant Southern cooking principle of transforming humble ingredients into something extraordinary. Pickles—essentially cucumbers preserved in vinegar brine—are elevated through the alchemy of a seasoned cornmeal coating and hot oil into something craveable and special. This transformation mirrors so many other Southern classics, from grits to greens, where technique and seasoning turn simple foods into defining cultural dishes.
I'm not Southern by birth, but preparing these pickles connects me to a food history rich with ingenuity and flavor. Each time I make them, I feel part of a long tradition of cooks who understood that good food doesn't necessarily require expensive ingredients—just care, attention to detail, and respect for the techniques that bring out the best in what you have. That's a cooking philosophy worth preserving and sharing, regardless of where you call home.
I learned the importance of pickle preparation through a memorable kitchen disaster during a dinner party. Rushing to get appetizers out, I skipped the proper drying step and tossed still-wet pickle slices directly into my breading mixture. When they hit the hot oil, they created an alarming amount of popping and splattering that sent several guests retreating from the kitchen. Worse, the resulting pickles had a soggy, almost pasty coating that slid right off when bitten into. My friend Elaine, who grew up in Georgia making these with her grandmother, gently suggested I try again while demonstrating the proper technique. Her version—with thoroughly dried pickles—produced that perfect crispy coating that adhered beautifully to each slice. The contrast was dramatic enough that I've never skipped the drying step since, regardless of how pressed for time I might be.
After making these Crispy Crunchy Fried Pickles countless times over the years, I'm still amazed by the joy they bring to a gathering. There's something oddly satisfying about transforming a humble jar of pickles into something that disappears within minutes of hitting the table. In our world of complex cuisine and exotic ingredients, there's a special place for simple foods done exceptionally well. These pickles remind us that cooking doesn't always have to be complicated to be memorable—sometimes the most straightforward preparations, executed with care and attention to detail, create the dishes that become part of our permanent recipe collection. The next time you're looking for an appetizer that delivers maximum impact with minimal fuss, give these fried pickles a try. I suspect they'll earn a permanent place in your entertaining repertoire, just as they have in mine.
Frequently Asked Questions
- → Can I use an air fryer instead of deep frying?
- Yes! Preheat your air fryer to 400°F, spray the breaded pickles with cooking oil, and cook for 7-9 minutes, flipping halfway through. They won't be quite as crispy but still delicious.
- → What kind of pickles work best for this recipe?
- Both dill pickle chips and spears work great. For chips, choose thicker-cut ones that won't fall apart. For spears, make sure they're not too thick or they won't cook through evenly.
- → Can I make these ahead of time?
- Fried pickles are best served immediately after cooking. However, you can bread them ahead of time and refrigerate for up to 2 hours before frying.
- → What can I substitute for buttermilk?
- If you don't have buttermilk, mix 1 cup of regular milk with 1 tablespoon of lemon juice or white vinegar and let it sit for 5 minutes before using.
- → How do I keep leftover fried pickles crispy?
- Reheat leftovers in a 375°F oven for 10-15 minutes or in an air fryer at 350°F for 3-5 minutes. Avoid using the microwave as it will make them soggy.