 Pin it
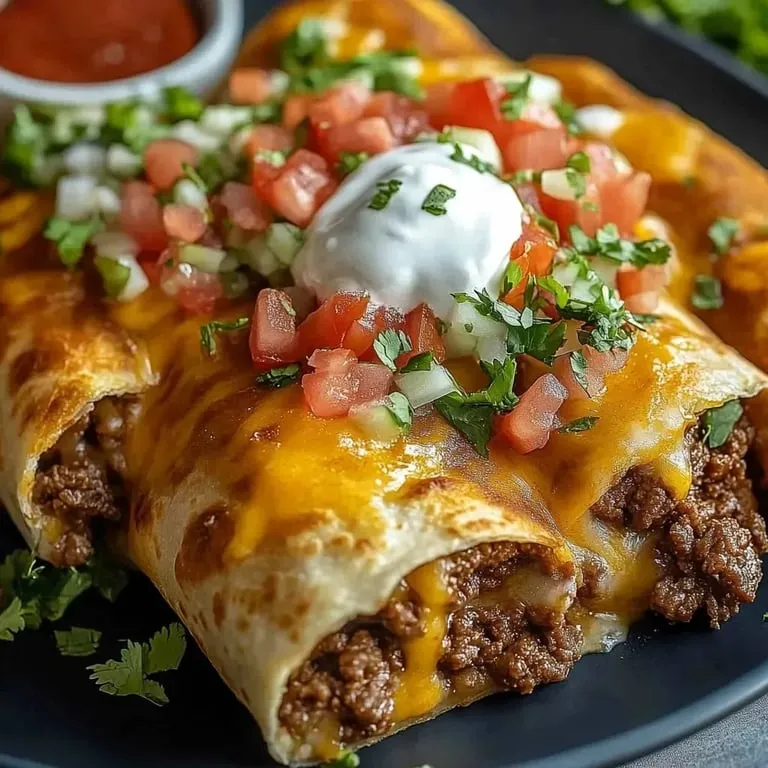
These crunchy beef cheese wraps combine seasoned ground beef with melted cheese inside a buttery, golden tortilla that’s baked to crispy perfection. They make a perfect easy weeknight dinner or a fun party snack that everyone loves. The filling is flavorful and gooey, while the outside delivers a satisfyingly crisp bite.
Ingredients
- One pound ground beef gives the dish hearty, meaty substance—choose fresh or lean for best flavor
- Half a cup of diced yellow onion brings a sweet, savory base note—select firm onions without soft spots
- Two cloves garlic minced provide aromatic depth—fresh garlic is key for punchy flavor
- A packet of taco seasoning adds bold southwestern spices without extra effort—look for no MSG options if preferred
- Half a cup water helps the seasoning soak into the meat and creates a saucy mixture
- Sharp cheddar cheese grated for a tangy, rich contrast—go for aged cheddar for more complexity
- Monterey Jack cheese grated adds creaminess and meltiness—freshly grated melts better than pre shredded
- Six large flour tortillas form the wrap’s tender shell—choose soft, flexible ones that won’t crack when rolled
- Quarter cup melted butter or cooking oil for brushing creates a golden crispy crust in the oven
- Sour cream for dipping offers a cool, creamy counterpoint
- Salsa for topping adds fresh acidity and brightness—homemade or store bought
- Fresh cilantro chopped for garnish brings herbaceous freshness and color
Step by Step Instructions
- Sear the meat:
- Brown the ground beef with diced onion and minced garlic in a large skillet over medium heat. Cook until the meat loses all pink and onions soften, about 7 to 8 minutes. Drain excess fat so the filling is not greasy.
- Simmer with seasoning:
- Add the taco seasoning packet and half a cup of water to the skillet. Stir everything together and let the mixture simmer for two to three minutes until thickened. Remove from heat and allow it to cool slightly, so the cheese doesn’t melt too fast in the next step.
- Mix in cheeses:
- Stir in sharp cheddar and Monterey Jack cheeses thoroughly so they begin melting into the warm meat. This creates a stringy, creamy filling that holds well when wrapped.
- Prep the tortillas:
- Warm tortillas in the microwave for 30 seconds or in a dry pan for a few seconds on each side to make them pliable. This prevents tearing when rolling.
- Assemble the wraps:
- Scoop about half a cup of the cheesy beef mixture into the center of each tortilla. Fold the sides inward, then roll tightly like a burrito to seal in all the filling.
- Brush with butter:
- Place the wraps seam side down on a parchment lined baking sheet. Brush each wrap generously with melted butter or oil. This step is crucial for crispy, golden exteriors.
- Bake to perfection:
- Bake in a preheated 400 degree oven for 20 to 25 minutes. Flip the wraps halfway through baking to crisp evenly on all sides. They should be beautifully browned and crunchy.
- Serve immediately:
- Remove wraps from the oven and serve hot. Top with sour cream, salsa, and chopped cilantro for layers of flavor and freshness. The contrast of creamy fillings and a crunchy outside is irresistible.

Storage tips
Store any leftover wraps in an airtight container in the refrigerator for up to three days. Reheat them in the oven or toaster oven at 350 degrees for about 10 minutes to regain the crunch. Avoid microwaving as it will make the tortillas soggy.
Ingredient substitutions
Ground turkey or chicken can replace beef for a lighter option but may need extra seasoning for punch. You can swap out taco seasoning with homemade spice blends if you prefer a custom flavor profile. Use any melting cheese like mozzarella or a pepper jack if you want a little heat.
Serving suggestions
Serve these wraps with a fresh green salad or simple Mexican style rice to round out the meal. Adding guacamole or pickled jalapenos on the side adds brightness and an extra layer of flavor. They also work great with a side of black beans or corn salsa.
Cultural context
The idea of wrapping seasoned meat and cheese in a tortilla is a nod to classic Tex Mex flavors, blending traditional Mexican ingredients with American tastes. Baking instead of frying is a home cook’s shortcut to get a crispy texture without the extra oil and mess.

Frequently Asked Questions
- How do I get the wraps crispy?
Brushing the wrapped tortillas with melted butter before baking helps create a golden, crunchy exterior. Baking at 400°F and flipping halfway ensures even crisping.
- Can I prepare the beef filling ahead of time?
Yes, cooking the beef mixture in advance and refrigerating it allows the flavors to meld. Reheat gently before assembling the wraps.
- What cheeses work best for melting inside the wraps?
Sharp cheddar and Monterey Jack cheeses melt smoothly, adding creamy, rich flavor and texture inside the wraps.
- Is there a way to make the tortillas more pliable for rolling?
Warming the tortillas briefly in the microwave or on a dry skillet makes them softer and easier to roll without cracking.
- What are recommended toppings to serve with these wraps?
Fresh salsa, sour cream, and chopped cilantro add brightness and a cool contrast to the warm, crunchy wraps.