
 Pin it
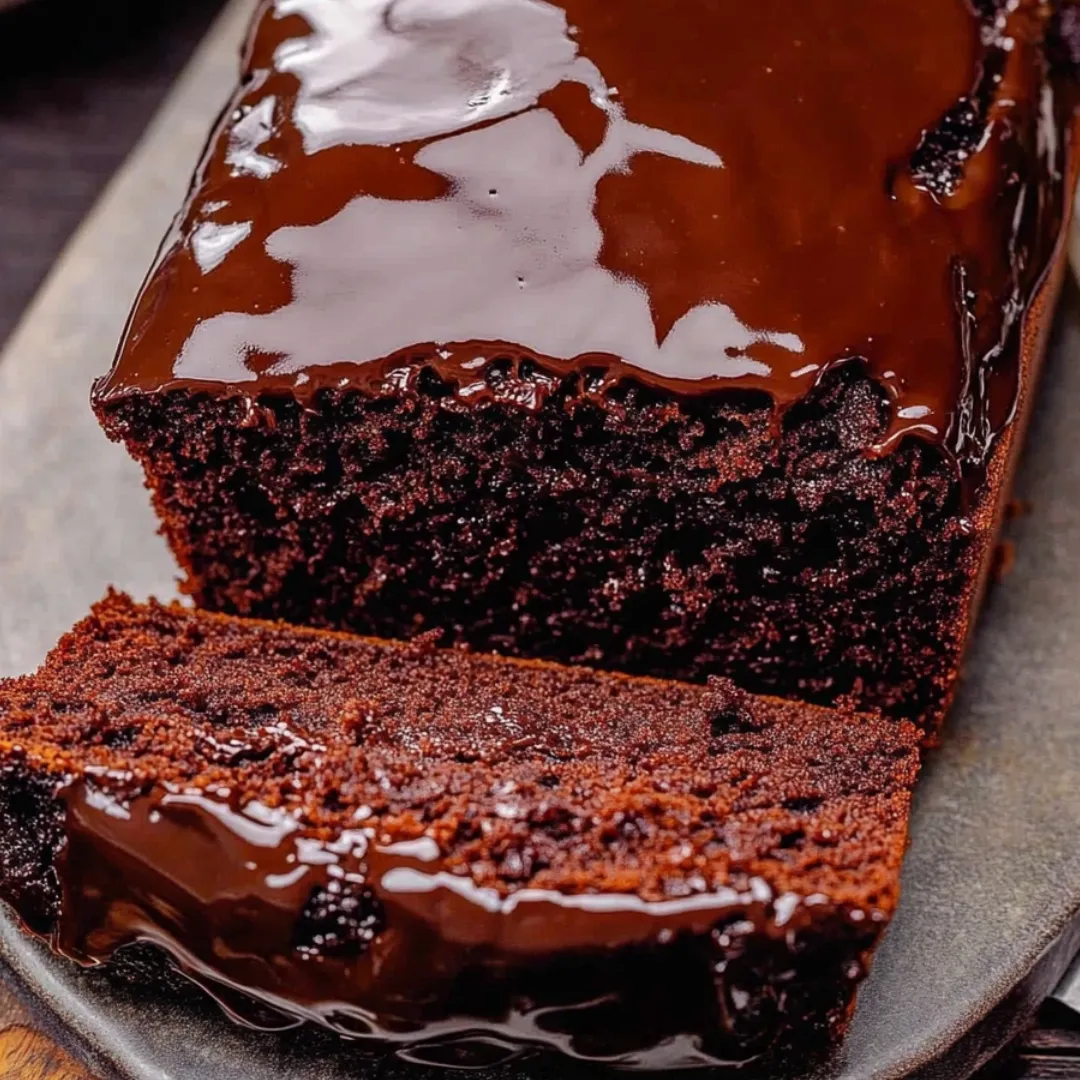
This hot fudge brownie bread brings together the best elements of two beloved treats – the dense, fudgy texture of a perfect brownie with the convenient sliceability of a quick bread. Unlike traditional brownies that require careful portioning, this loaf slices beautifully into even pieces that showcase the rich chocolate crumb studded with pockets of melted chocolate chips. The exterior develops a slight crust while baking, providing textural contrast to the incredibly moist, tender interior. Each bite delivers intense chocolate flavor with that distinctive chewiness that brownie lovers crave, making this hybrid creation a standout dessert that works equally well for casual snacking or dressed up with toppings for an impressive finale to a special meal.
I created this recipe during a baking experiment gone wonderfully right. Looking to combine my family's love for both chocolate quick bread and fudgy brownies, I adjusted proportions and techniques until this perfect hybrid emerged from my oven. The first time I served it, my chocolate-obsessed teenager declared it 'dangerously good' and proceeded to eat three slices before I could even get it properly photographed. My neighbor, who claims to be 'just not a dessert person,' requested the recipe after trying it at a block party. What makes me most proud, though, is that my grandmother – who taught me to bake and is my toughest critic – asked for a second slice when I brought it to Sunday dinner.
Ingredients You'll Need
- 1½ cups All-Purpose Flour: Provides structure while still allowing for a tender crumb. Measuring by weight rather than volume ensures consistent results.
- ½ cup Unsweetened Cocoa Powder: The foundation of rich chocolate flavor. Dutch-processed cocoa creates a deeper color and smoother taste.
- ½ teaspoon Baking Powder: Provides just enough lift without making the bread too cakey like a traditional quick bread.
- ½ teaspoon Salt: Enhances the chocolate flavor and balances the sweetness. Fine sea salt distributes most evenly.
- 1 cup Granulated Sugar: Sweetens while helping create that classic brownie crinkle top. Can be reduced to ¾ cup for a less sweet version.
- ½ cup Light Brown Sugar, packed: Adds moisture and depth with its molasses notes that complement the chocolate.
- 2 Large Eggs, room temperature: Provides structure and richness. Room temperature eggs incorporate more evenly into the batter.
- ⅔ cup Unsalted Butter, melted and slightly cooled: Creates richness and that distinctive brownie texture. European-style butter has less water content for best results.
- 2 teaspoons Vanilla Extract: Enhances the chocolate flavor with aromatic complexity. Pure extract rather than imitation makes a noticeable difference.
- 1 cup Semi-Sweet Chocolate Chips: Creates pockets of melted chocolate throughout the bread. High-quality chips melt better than bargain brands.
- Optional: ½ cup Chopped Walnuts or Pecans: Adds textural contrast and nutty flavor if desired.
 Pin it
Step-by-Step Cooking Instructions
- Prepare Your Baking Environment:
- Begin by preheating your oven to 350°F (175°C). This moderate temperature allows the bread to bake evenly without burning the exterior before the center is done. Position an oven rack in the middle position for optimal heat distribution. Lightly grease a 9x5-inch loaf pan, then line it with parchment paper, allowing the paper to hang over the long sides to create handles for easy removal after baking. This preparation step is crucial for clean slices and easy serving later. The parchment prevents the dense, moist bread from sticking to the pan, which would be disastrous for presentation.
- Combine the Dry Ingredients:
- In a medium bowl, whisk together the flour, cocoa powder, baking powder, and salt until thoroughly combined. Whisking rather than sifting aerates the ingredients while ensuring even distribution of the leavening and salt. Pay special attention to break up any cocoa powder lumps, which can create dry pockets in the finished bread. Using a whisk rather than a spoon for this step incorporates air into the dry ingredients, contributing to a lighter texture in this otherwise dense bread. Set this mixture aside while you prepare the wet ingredients.
- Mix the Wet Ingredients:
- In a large bowl, whisk together the granulated sugar, brown sugar, and eggs until well combined and slightly lightened in color, about 2 minutes by hand or 1 minute with an electric mixer on medium speed. This step incorporates air into the batter and begins dissolving the sugar crystals for a smoother texture. Next, stream in the melted butter while whisking constantly. The butter should be warm but not hot to prevent cooking the eggs. Add the vanilla extract and continue whisking until the mixture is smooth and uniform in consistency. This wet mixture forms the foundation of your bread's rich, fudgy texture.
- Combine Wet and Dry Mixtures:
- Gradually add the dry ingredients to the wet ingredients, folding gently with a rubber spatula until just combined. Stop mixing as soon as no dry streaks remain – overmixing will develop gluten in the flour, resulting in a tougher, less brownie-like texture. The batter will be thick and somewhat similar to a traditional brownie batter at this stage. This minimal mixing approach is key to maintaining that perfect fudgy quality that distinguishes this bread from ordinary chocolate quick bread recipes.
- Add the Chocolate Chips:
- Fold in ¾ cup of the chocolate chips, distributing them evenly throughout the batter. Reserve the remaining ¼ cup for topping. If using nuts, fold them in at this time as well. The folding motion gently incorporates these add-ins without deflating the air you've incorporated or overworking the batter. These chocolate chips will create pockets of melted chocolate in the finished bread, contributing to its decadent, dessert-like quality rather than reading as a standard quick bread.
- Transfer and Top the Batter:
- Pour the batter into your prepared loaf pan, using the spatula to spread it evenly into the corners. The batter will be thick, so take your time to ensure it's level for even baking. Sprinkle the reserved ¼ cup of chocolate chips on top, pressing them lightly into the surface. These surface chips create an appealing visual presentation while adding additional chocolate flavor to the crust. A light dusting of granulated sugar over the top at this stage can also create a subtle, sweet crackle on the finished bread.
- Bake to Fudgy Perfection:
- Place the pan in the preheated oven and bake for 55-65 minutes. The key to achieving the perfect brownie-like texture is to slightly underbake the bread by traditional quick bread standards. The bread is done when a toothpick inserted in the center comes out with a few moist crumbs attached, but not wet batter. The surface will be set and slightly cracked, similar to brownies. The internal temperature should reach about 190°F (88°C), lower than most quick breads which typically reach 200°F. This slight underbaking ensures you maintain that fudgy brownie quality rather than ending up with chocolate cake in loaf form.
I learned about the importance of proper baking time through an early kitchen disaster with this recipe. Eager to serve the bread while still warm, I removed it from the oven when a toothpick came out completely clean – a sign that I'd actually overbaked it. The result was a dry, cakey loaf that lacked the fudgy charm that makes this recipe special. Now I always err on the side of underbaking slightly, pulling the bread out when the toothpick still shows some moist crumbs. This single adjustment transformed the recipe from ordinary chocolate bread to the brownie-like delicacy it was meant to be.
Serving Suggestions
While delicious on its own, this brownie bread reaches new heights when served with complementary accompaniments. For an elegant dessert, warm a slice slightly and top with a scoop of vanilla bean ice cream and a drizzle of warm hot fudge sauce. The temperature contrast between the warm bread and cold ice cream creates a sensory delight. For brunch, serve thin slices alongside fresh berries and whipped cream. Coffee enthusiasts will appreciate pairing it with an espresso or cappuccino, as the bitter coffee notes enhance the chocolate flavor while cutting through the richness.
Storage Solutions
This bread actually improves after a day, as the flavors deepen and the texture becomes even more fudgy. Store it tightly wrapped in plastic wrap or in an airtight container at room temperature for up to 3 days. For longer storage, wrap individual slices in plastic wrap and place in a freezer bag for up to 3 months. Thaw frozen slices at room temperature for about an hour, or microwave for 20-30 seconds for that fresh-baked quality. To revive day-old bread, warm slices in the microwave for 10-15 seconds or in a 300°F oven for 5 minutes for that just-baked experience.
Creative Variations
Once you've mastered the basic recipe, experiment with delicious variations. For a mint chocolate version, add ¼ teaspoon peppermint extract and use mint chocolate chips. Create a mocha experience by dissolving 1 tablespoon of espresso powder in the melted butter before adding it to the batter. For texture contrast, swirl in ¼ cup of peanut butter before baking, or fold in ¼ cup of toffee bits along with the chocolate chips. During the holidays, add ¼ teaspoon of cinnamon and a pinch of cayenne for a Mexican chocolate twist that adds complexity and subtle warmth.
 Pin it
Perfect Pairings
The intense chocolate flavor of this bread pairs beautifully with both complementary and contrasting flavors. Serve with raspberry coulis for a classic chocolate-raspberry combination that balances the richness with fruit acidity. A dollop of orange-infused whipped cream brings out subtle citrus notes in the chocolate. For an adult treat, serve with a glass of port or a rich cabernet sauvignon, both of which complement the chocolate without overwhelming it. Even a cold glass of milk becomes special alongside this dessert, providing cool creaminess against the dense chocolate creation.
The first time I brought this bread to a potluck, I was surprised to see people bypassing fancier desserts to try it. Its humble loaf appearance belied the rich, chocolate experience inside. One friend took a bite and immediately asked if I'd be offended if she took some home. When I explained how simple it was to make, she seemed almost disappointed – as if part of the magic was believing it took special skill or effort to create something so delicious. That's the beauty of this recipe: it delivers gourmet results with basic techniques, making you look like a baking genius with minimal effort. Now it's my signature contribution to gatherings, sliced and arranged on a platter where it disappears faster than anything else on the dessert table.
Frequently Asked Questions
- → Can I use homemade hot fudge sauce?
- Absolutely! Homemade hot fudge sauce works wonderfully in this recipe and may even enhance the flavor. Just make sure it's thick and not too runny when adding it to the batter.
- → What can I substitute for buttermilk?
- If you don't have buttermilk, you can make a quick substitute by adding 1 tablespoon of white vinegar or lemon juice to 1 cup of milk. Let it sit for 5 minutes before using in the recipe.
- → Can I freeze this bread?
- Yes, this bread freezes very well. Wrap it tightly in plastic wrap, then aluminum foil, and freeze for up to 3 months. Thaw overnight in the refrigerator before serving. You can warm individual slices in the microwave for 15-20 seconds.
- → Why is my bread sinking in the middle?
- This can happen if the bread is underbaked or if the oven door was opened during baking. Make sure to test with a toothpick before removing from the oven, and avoid opening the oven door during the first 30 minutes of baking.
- → Can I make this into muffins instead of a loaf?
- Yes! This batter works great for muffins. Fill greased or lined muffin cups about 2/3 full and bake at the same temperature for about 18-22 minutes. This will yield approximately 12-14 muffins.