
 Pin it
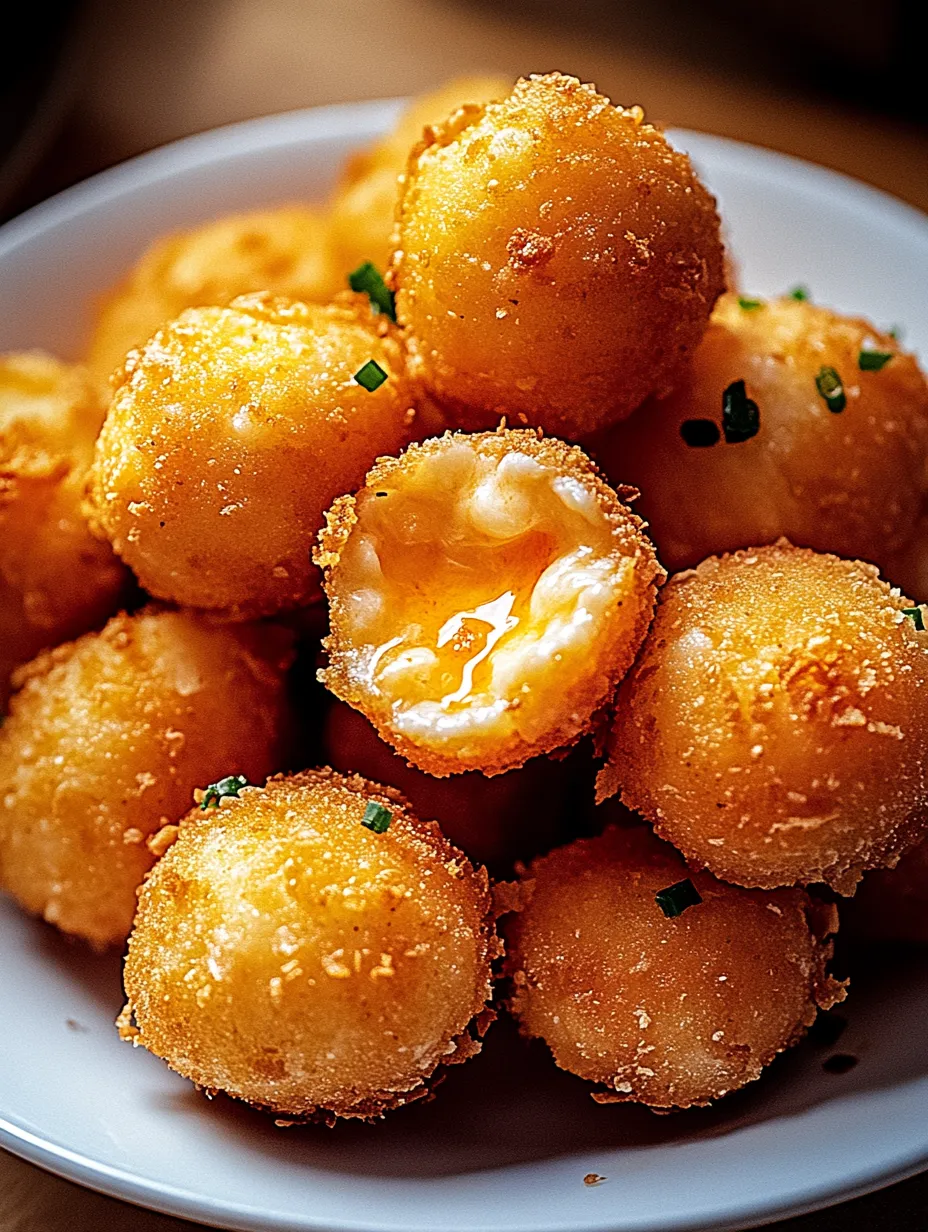
These Fried Buffalo Cheese Balls deliver the perfect harmony of textures and flavors in every bite—a golden, crispy panko exterior gives way to a molten center of gooey cheese infused with tangy buffalo heat. Each ball packs the beloved flavor combination of classic buffalo wings and blue cheese dip into one irresistible, poppable morsel. Whether served as a game day crowd-pleaser, happy hour appetizer, or indulgent snack, these cheese balls strike the ideal balance between crunchy and creamy, spicy and savory. The addition of blue cheese crumbles within the mixture provides delightful pockets of tanginess that complement the buffalo sauce's signature kick, creating an addictive appetizer that disappears the moment it hits the table.
I first created these cheese balls when looking for the perfect appetizer for a Super Bowl party several years ago. Wanting something that captured the essence of game day food but in a more unique presentation, I combined everyone's favorite flavors into these poppable bites. What surprised me most was how quickly they disappeared—faster than the wings, faster than the dips, faster than anything else on the table! My husband, normally restrained with party food, kept returning to the platter until they were gone, then asked when I'd be making them again. What I appreciate most about this recipe is its versatility—I've adjusted the heat level for different crowds, experimented with cheese combinations, and even found they work perfectly when prepared ahead and fried just before guests arrive. They've become my signature appetizer, requested for everything from casual gatherings to holiday cocktail parties.
Ingredients You'll Need
- 2 cups Shredded Mozzarella Cheese: Provides that iconic cheese-pull stretch when the balls are broken open. Low-moisture mozzarella works best
- ½ cup Crumbled Blue Cheese: Contributes distinctive tangy flavor that perfectly complements the buffalo sauce. Choose a medium-strength variety
- ½ cup Cream Cheese, softened: Acts as the binding agent that holds everything together while adding creaminess. Full-fat creates the best texture
- ¼ cup Buffalo Sauce: Delivers the signature spicy, vinegary kick. Frank's RedHot Buffalo is traditional, but any favorite brand works
- ½ teaspoon Garlic Powder: Adds depth and savory notes that enhance the overall flavor profile
- ½ teaspoon Onion Powder: Contributes subtle sweetness and complexity to balance the heat
- ¼ teaspoon Salt: Enhances all the other flavors. Adjust based on the saltiness of your cheese and buffalo sauce
- ½ teaspoon Smoked Paprika: Provides a gentle smoky undertone that elevates the flavor profile
- 1 cup All-Purpose Flour: Creates the initial coating that helps the egg and breadcrumbs adhere properly
- 2 large Eggs, beaten: Acts as the 'glue' that binds the breadcrumb coating to the cheese balls
- 1½ cups Panko Breadcrumbs: Delivers superior crunch compared to regular breadcrumbs. The larger, airier texture creates the perfect crispy exterior
- ½ teaspoon Cayenne Pepper (optional): Adds extra heat for spice lovers. Can be adjusted or omitted based on preference
- Vegetable Oil for frying: Neutral-flavored oil with a high smoke point is ideal for achieving the perfect golden crust
- Ranch or Blue Cheese Dressing: For dipping and complementing the buffalo flavor
 Pin it
Step-by-Step Cooking Instructions
- Create the Flavorful Cheese Mixture:
- In a large mixing bowl, combine the shredded mozzarella, crumbled blue cheese, and softened cream cheese. The cream cheese should be at room temperature to blend smoothly. Add the buffalo sauce, garlic powder, onion powder, salt, and smoked paprika. Using a sturdy wooden spoon or clean hands, mix thoroughly until all ingredients are well incorporated and evenly distributed. The mixture will be sticky and somewhat soft at this point, which is exactly what you want. Make sure no pockets of cream cheese remain unmixed, as this could affect how the cheese balls hold together during frying.
- Form and Chill the Cheese Balls:
- Line a baking sheet with parchment paper. Using a tablespoon measure or a small cookie scoop for consistency, portion the cheese mixture into approximately 24 equal-sized scoops. With slightly dampened hands to prevent sticking, gently roll each portion between your palms to form smooth balls about 1-inch in diameter. Place the formed balls on the prepared baking sheet, spacing them about an inch apart to prevent sticking together. Transfer the baking sheet to the freezer and chill for a minimum of 30 minutes, or until the balls are firm to the touch. This freezing step is crucial—it ensures the cheese balls maintain their shape during the coating and frying process.
- Prepare the Breading Station:
- While the cheese balls are firming up in the freezer, set up your breading station. Arrange three shallow bowls in a row: In the first bowl, place the all-purpose flour. In the second bowl, beat the eggs until smooth. In the third bowl, combine the panko breadcrumbs with cayenne pepper (if using), mixing well to distribute the heat evenly. Having this assembly line ready will streamline the coating process and help maintain the cheese balls' frozen state as you work. Position the bowls in order of use with your chilled cheese balls on one end and a clean baking sheet lined with parchment paper on the other end.
- Coat the Cheese Balls:
- Remove the cheese balls from the freezer—they should be firm but not completely frozen. Working quickly with one cheese ball at a time, roll it first in the flour, ensuring it's completely coated with a thin, even layer. Shake off any excess flour, then dip it into the beaten eggs, turning to coat all sides. Allow any excess egg to drip off, then place it in the panko mixture. Gently roll and press to adhere the breadcrumbs to all surfaces, creating a substantial coating. For an extra-crispy result, you can perform a double coating by dipping the breaded ball back into the egg mixture and then once more in the panko. Place the coated cheese ball on the clean baking sheet and repeat with the remaining balls.
- Rest Before Frying:
- Once all cheese balls are coated, return them to the refrigerator for at least 15 minutes. This resting period allows the coating to set and adhere properly to the cheese mixture, which is essential for preventing the coating from separating during frying. While the cheese balls chill, begin heating your oil for frying. Pour vegetable oil into a heavy-bottomed, deep pot to a depth of at least 2 inches. Attach a candy thermometer to the side of the pot and heat the oil over medium heat until it reaches 350°F (175°C). Maintaining this temperature is crucial for perfect frying—too hot and the coating will burn before the cheese melts; too cool and the balls will absorb excess oil and become greasy.
- Fry to Golden Perfection:
- Once the oil reaches the proper temperature and the cheese balls have rested, you're ready to fry. Working in small batches of 4-5 balls at a time to prevent overcrowding and oil temperature drops, carefully lower the cheese balls into the hot oil using a slotted spoon or spider. Fry for 2-3 minutes, gently turning occasionally with the spoon, until the coating is evenly golden brown and crispy. Keep a close eye on them, as they can go from perfect to overdone quickly. The ideal cheese ball has a deep golden-brown exterior while the interior is just melted but not completely liquefied.
- Drain and Season:
- Using a slotted spoon or spider, carefully remove the fried cheese balls from the oil, allowing excess oil to drip back into the pot. Transfer them to a paper towel-lined plate or a wire cooling rack positioned over a baking sheet to drain. While still hot, you can enhance the flavor by lightly sprinkling with a pinch of additional salt or even a dash of buffalo seasoning if desired. The hot exterior will absorb these final touches beautifully. Allow the oil to return to 350°F before frying the next batch, adjusting the heat as necessary to maintain a consistent temperature.
- Serve While Hot:
- These cheese balls are at their absolute best when served immediately while the exterior is still crispy and the interior is molten and gooey. Arrange them on a serving platter with small bowls of ranch and blue cheese dressing for dipping. For an extra touch of flavor and presentation, drizzle a small amount of additional buffalo sauce over the top of the cheese balls or serve the sauce on the side for dipping. Garnish with chopped fresh chives or green onions for a pop of color and freshness that complements the rich, spicy flavors.
Serving Suggestions
These buffalo cheese balls pair beautifully with cooling dips that complement their spicy kick. A classic blue cheese dressing offers traditional buffalo wing flavor harmony, while ranch provides a creamy, herb-infused alternative. For a more elaborate presentation, create a 'buffalo flight' by serving the cheese balls alongside buffalo chicken wings, buffalo cauliflower bites, and celery and carrot sticks. This creates a fun, themed spread perfect for game days or casual gatherings. For a lighter accompaniment, a simple green salad with a vinaigrette dressing provides a refreshing contrast to the rich, spicy cheese balls.
Creative Variations
This versatile recipe welcomes numerous flavor adaptations. For a Tex-Mex twist, substitute pepper jack for the mozzarella and add finely chopped jalapeños and a pinch of cumin to the cheese mixture. BBQ lovers can replace the buffalo sauce with their favorite barbecue sauce and add finely chopped bacon for smoky, sweet cheese balls. For a Mediterranean-inspired version, use feta instead of blue cheese, add chopped sun-dried tomatoes, and mix oregano into the breadcrumbs. Vegetable additions like finely diced bell peppers or spinach not only add color and nutrients but also create interesting texture variations within the cheese mixture.
Make-Ahead Options
These cheese balls are perfect for entertaining because much of the preparation can be done in advance. The cheese mixture can be made and formed into balls up to two days ahead, stored covered in the refrigerator. The breaded, uncooked cheese balls can be frozen for up to a month - simply arrange them in a single layer on a baking sheet until solid, then transfer to a freezer bag. When ready to serve, fry them directly from frozen, adding about 30 seconds to the cooking time. For parties, you can fry all the cheese balls about 30 minutes before guests arrive and keep them warm in a 200°F oven until serving time.
 Pin it
Storage Solutions
While these cheese balls are best enjoyed immediately after frying, leftovers can be stored in an airtight container in the refrigerator for up to three days. To reheat, place them on a baking sheet in a preheated 375°F oven for 5-7 minutes until hot and crispy again. Avoid microwave reheating, which will make the coating soggy. For the best texture when reheating, place the cheese balls on a wire rack over a baking sheet so heat can circulate on all sides, restoring some of the original crispiness.
Troubleshooting Tips
If your cheese balls seem too sticky after mixing, resist the urge to add too much additional flour, which can make the cheese balls dense. Instead, lightly oil your hands for easier handling. For cheese balls that didn't brown properly, ensure your oil is fully preheated and consider placing the baking sheet on a higher rack. If your cheese balls deflate after boiling, you may have left them in the water bath too long—stick to exactly 30 seconds for perfect results. Should your heart shapes lose definition during baking, try refrigerating the shaped cheese balls for 10 minutes before the baking soda bath to help them hold their form.
My first attempt at these cheese balls taught me an important lesson about patience with the freezing step. Eager to try them, I rushed the process and put insufficiently chilled balls into the hot oil, resulting in a delicious but formless mass of fried cheese rather than distinct balls. Now I know that taking the time to properly chill the cheese mixture makes all the difference between a good appetizer and a great one. Another game-changer was discovering the double-coating technique, which creates an extra-crispy shell that maintains its integrity even as the cheese inside becomes perfectly molten. My favorite memory with this recipe was at a neighborhood potluck where a friend's picky-eater child, who normally avoided new foods, couldn't stop eating these cheese balls. His mother later asked for the recipe, explaining they were the first new food he'd voluntarily tried in months!
These Fried Buffalo Cheese Balls have become my go-to appetizer whenever I need a guaranteed crowd-pleaser. What began as an experimental recipe has evolved into something friends and family specifically request when they visit. I love watching people's faces light up when they bite into one for the first time—that moment of surprise when the crispy exterior gives way to the gooey, spicy center never gets old. There's something universally appealing about the combination of crispy coating, melty cheese, and buffalo spice that transcends age and preference. Whether you're hosting a casual movie night or an elaborate cocktail party, these versatile bites adapt to any occasion while maintaining their irresistible appeal and flavor.
Frequently Asked Questions
- → Can I bake these instead of frying them?
- Yes! Preheat your oven to 425°F (220°C), place the breaded cheese balls on a parchment-lined baking sheet, spray or brush them lightly with oil, and bake for 10-12 minutes until golden brown. They won't be quite as crispy as fried, but still delicious.
- → Can I make these ahead of time?
- You can prepare the cheese balls up to the coating stage and freeze them for up to a month. Freeze them first on the baking sheet, then transfer to a freezer bag. When ready to serve, fry them directly from frozen, adding about 1-2 minutes to the cooking time.
- → Why did my cheese balls burst while frying?
- This typically happens when the oil is too hot or the balls weren't frozen enough. Make sure to freeze them thoroughly (at least 30 minutes), maintain the oil at 350°F, and don't overcrowd the pan which can lower the temperature too quickly.
- → What can I substitute for blue cheese?
- If you're not a fan of blue cheese, you can substitute with feta, goat cheese, or simply use more mozzarella and a bit of sharp cheddar for flavor. The texture will be different but still delicious.
- → How spicy are these cheese balls?
- The spice level depends largely on the buffalo sauce you use. Most commercial brands range from mild to hot. For a milder version, use less buffalo sauce or choose a mild variety. For extra heat, add more cayenne pepper to the panko mixture.