
 Pin it
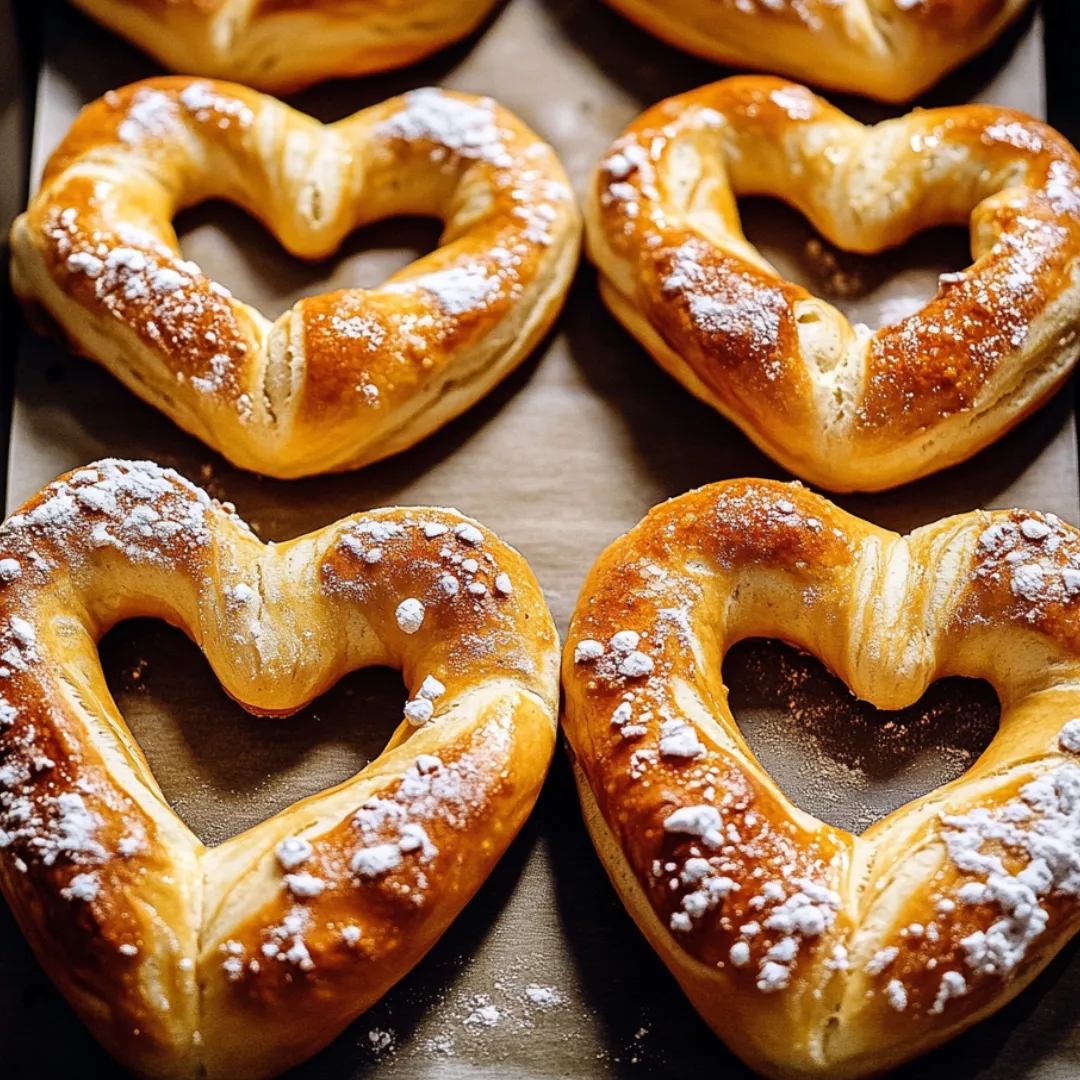
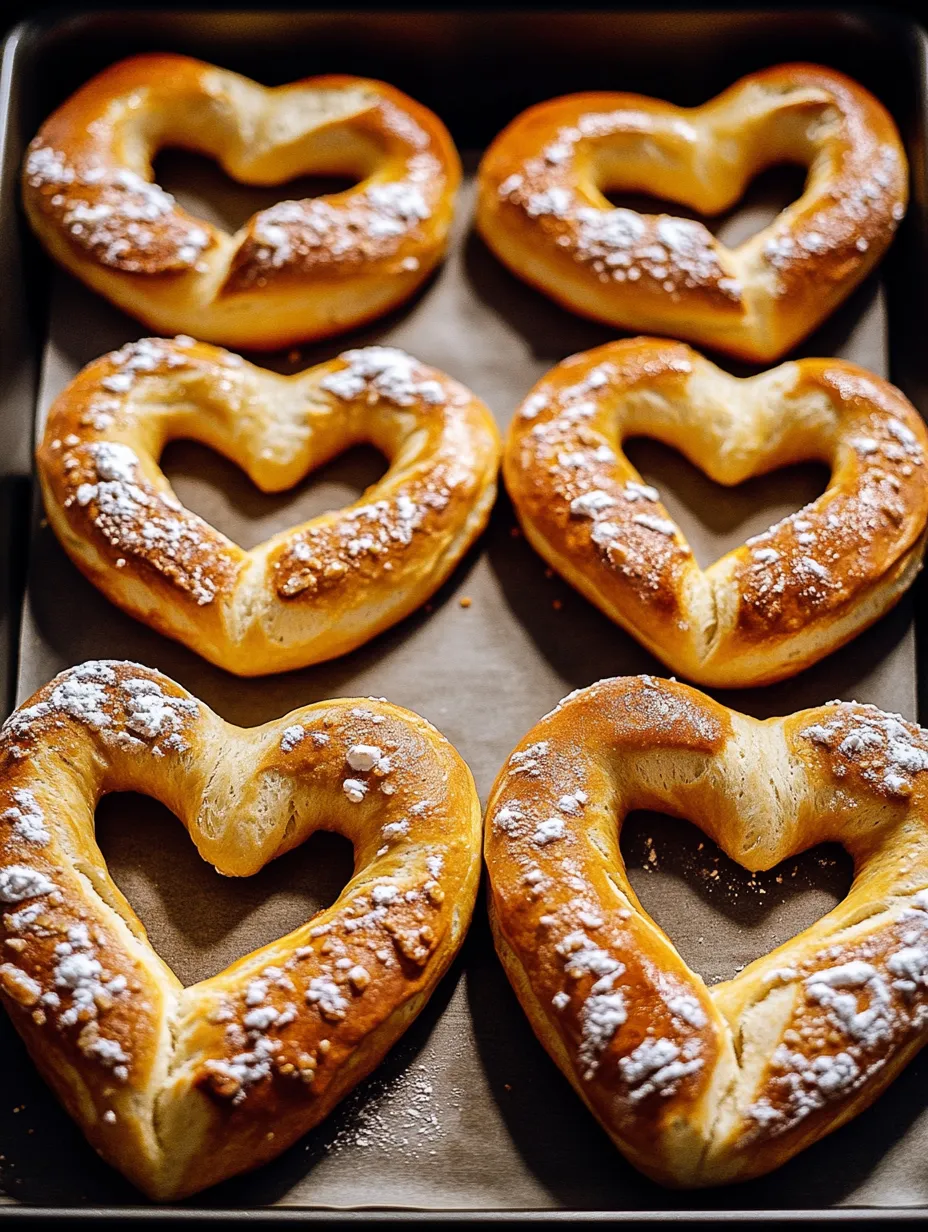
These Heart-Shaped Homemade Pretzels transform the classic bakery favorite into an expression of affection that's as delightful to make as it is to eat. Each golden-brown pretzel features the perfect balance of a chewy interior and slightly crisp exterior, with that distinctive pretzel flavor enhanced by a light sprinkle of coarse salt. The special heart shape adds a touch of whimsy and warmth to the traditional twisted form, making these treats perfect for celebrations of love or simply to bring a smile to someone's face. Whether enjoyed fresh from the oven with your favorite dipping sauce or presented as a handmade gift, these pretzels combine simple ingredients with a little creativity to create something truly special.
I first created these heart-shaped pretzels for a stay-at-home anniversary celebration when our dinner plans were unexpectedly canceled. The process of shaping and baking them together turned what could have been a disappointing evening into one of our most cherished memories. What surprised me most was how the simple act of twisting dough into heart shapes filled our kitchen with more love than any restaurant could have offered. My husband, who typically leaves the baking to me, got so involved in the pretzel-making process that it's now become our annual tradition. What I appreciate most about this recipe is how it transforms basic pantry ingredients into something that feels celebratory and special without requiring advanced baking skills or hard-to-find components.
Ingredients You'll Need
- 1½ cups Warm Water (110°F/45°C): The precise temperature activates the yeast without killing it. Use a kitchen thermometer for accuracy
- 1 packet (2¼ teaspoons) Active Dry Yeast: Provides the rise and distinctive chew in the finished pretzels. Fresh yeast ensures the best results
- 1 tablespoon Granulated Sugar: Feeds the yeast and adds a subtle sweetness that balances the salt. Regular white sugar works perfectly
- 1 teaspoon Salt: Enhances the dough's flavor. Table salt works in the dough; save the coarse salt for topping
- 3¾ cups All-Purpose Flour: Creates the structure of the pretzels. Measure accurately by spooning and leveling for best results
- 2 tablespoons Unsalted Butter, melted: Adds richness and tenderness to the dough. Unsalted allows better control of the overall saltiness
- ½ cup Baking Soda: The essential ingredient for the water bath that gives pretzels their distinctive flavor and golden crust
- 4 cups Water (for boiling): Combined with baking soda to create the alkaline bath that's key to true pretzel flavor
- 1 Egg Yolk + 1 tablespoon Water (for egg wash): Creates a beautiful golden-brown shine on the baked pretzels
- Coarse Salt (for topping): Provides that classic pretzel flavor and appealing visual texture. Pretzel salt is ideal, but coarse sea salt works well
 Pin it
Step-by-Step Cooking Instructions
- Activate the Yeast:
- Begin by ensuring your water temperature is exactly 110°F (45°C) – too hot will kill the yeast, too cool won't activate it properly. Pour the warm water into a large mixing bowl, then sprinkle the sugar and yeast over the surface. Gently stir to combine, then let the mixture sit undisturbed for 5-7 minutes. During this time, the yeast will begin to feed on the sugar, creating a foamy layer on top of the water. This frothy appearance is your visual confirmation that the yeast is alive and active, setting the foundation for perfect pretzels.
- Create a Smooth, Elastic Dough:
- Once your yeast mixture is foamy, add the salt and melted butter (make sure it's not too hot), stirring to combine. Begin adding the flour gradually, about one cup at a time, mixing thoroughly after each addition. After about 3 cups, the mixture will form a shaggy dough. Turn it out onto a lightly floured surface and begin kneading, gradually incorporating the remaining flour as needed. Knead for 8-10 minutes, until the dough becomes smooth, elastic, and slightly tacky but not sticky. This kneading process develops the gluten, which will give your pretzels their characteristic chewy texture.
- Allow the First Rise:
- Shape your kneaded dough into a neat ball and place it in a large bowl that has been lightly greased with oil. Turn the dough once to coat its surface, which prevents it from drying out during rising. Cover the bowl with a clean kitchen towel or plastic wrap and place it in a warm, draft-free area of your kitchen. Allow the dough to rise for approximately 60 minutes, or until it has doubled in size. This rising time is crucial for developing the flavor and texture of your pretzels – the yeast is creating air pockets and beginning the fermentation process that gives pretzels their distinctive taste.
- Prepare for Shaping and Cooking:
- While your dough is nearing the end of its rise, begin preparing your workstation. Preheat your oven to 425°F (220°C) and line two baking sheets with parchment paper or silicone baking mats. In a large, wide pot (at least 8 inches in diameter), bring the 4 cups of water and ½ cup baking soda to a gentle boil. The baking soda creates an alkaline environment that gelatinizes the proteins on the pretzel's surface, allowing for the development of that classic brown crust. In a small bowl, whisk together the egg yolk and 1 tablespoon of water to create your egg wash.
- Shape the Heart Pretzels:
- Once your dough has doubled in size, gently punch it down to release excess air bubbles, then transfer it to a clean, lightly floured surface. Divide the dough into 12 equal portions – a kitchen scale helps achieve uniformity. Working with one piece at a time (keep the others covered to prevent drying), roll it into a rope approximately 20-24 inches long and about ½-inch in diameter. To form the heart shape, first bend the rope into a U-shape. Then cross the ends over each other about 2 inches from the tips. Finally, fold the crossed section down and gently press the tips onto the bottom of the U, forming a heart. Place the shaped pretzel on a lightly floured surface while you work on the others.
- Boil in Baking Soda Bath:
- Working one at a time, carefully lift each shaped pretzel and lower it into the gently boiling baking soda solution. Allow it to boil for exactly 30 seconds – any longer risks making the pretzels too alkaline. Using a slotted spoon or spider, carefully remove the pretzel, allowing excess water to drip off, and place it on the prepared baking sheet. This baking soda bath is what gives pretzels their distinctive flavor and beautiful color – it's a step that cannot be skipped if you want authentic pretzel taste and texture.
- Apply Egg Wash and Salt:
- Once all pretzels have been boiled and arranged on the baking sheets (with at least 1.5 inches between them), use a pastry brush to gently apply the egg wash to the top surface of each pretzel. The egg wash will help the salt adhere and create a beautiful golden-brown shine during baking. Immediately sprinkle each pretzel with coarse salt according to your preference. Work quickly as the egg wash will begin to dry, making it harder for the salt to stick. If you prefer sweet pretzels, you'll skip the salt now and apply butter and cinnamon sugar after baking.
- Bake to Golden Perfection:
- Place the baking sheets in the preheated oven and bake for 10-12 minutes, or until the pretzels have achieved a deep golden-brown color. Rotate the pans halfway through baking if your oven has hot spots. Watch carefully during the final minutes as the difference between perfectly golden and over-browned can happen quickly. The beautiful color development is thanks to the Maillard reaction between the proteins on the surface (treated with baking soda) and the sugars in the dough. Once baked, transfer the pretzels to a cooling rack to prevent the bottoms from becoming soggy.
Dipping Sauce Suggestions
These heart-shaped pretzels pair beautifully with a variety of dipping options. For a classic approach, serve with whole grain mustard or a smooth cheese sauce made from sharp cheddar. Sweet cream cheese dip provides a delightful contrast to the savory pretzel, especially when flavored with a touch of vanilla and honey. For dessert-style pretzels (coated with cinnamon sugar instead of salt), consider a chocolate ganache or caramel sauce for dipping. When serving for parties, offer an assortment of dips and let guests mix and match according to their preferences.
Creative Variations
This versatile dough welcomes numerous flavor adaptations. For a savory twist, knead in 2 tablespoons of fresh chopped herbs such as rosemary or thyme before shaping. Cheese lovers can incorporate ½ cup of shredded sharp cheddar or parmesan into the dough for extra flavor. For a sweet variation, skip the salt topping and instead brush freshly baked pretzels with melted butter and dip in a mixture of cinnamon and sugar while still warm. During holiday seasons, add colored sugar sprinkles to the tops of the egg-washed pretzels before baking for a festive appearance.
Make-Ahead Options
These pretzels are most magical when freshly baked, but you can prepare the dough up to 24 hours in advance. After kneading, place the dough in an airtight container and refrigerate. The cold environment slows yeast activity while developing deeper flavor. When ready to bake, allow the dough to come to room temperature for 30-45 minutes before shaping. Alternatively, you can freeze the shaped, unbaked pretzels on a baking sheet, then transfer to a freezer bag for storage up to one month. When ready to bake, thaw in the refrigerator overnight, then proceed with the baking soda bath and baking instructions.
Storage Solutions
Freshly baked pretzels are best enjoyed within hours of baking, but proper storage can extend their enjoyment. For next-day consumption, store cooled pretzels in an airtight container at room temperature. To refresh their texture, warm in a 300°F oven for 3-5 minutes before serving. For longer storage, freeze completely cooled pretzels in a single layer, then transfer to freezer bags where they'll keep for up to three months. Thaw at room temperature and reheat in a 300°F oven for 5-7 minutes to restore their texture.
 Pin it
Troubleshooting Tips
If your pretzel dough seems too sticky after mixing, resist the urge to add too much additional flour, which can make the pretzels dense. Instead, lightly oil your hands for easier handling. For pretzels that didn't brown properly, ensure your oven is fully preheated and consider placing the baking sheet on a higher rack. If your pretzels deflate after boiling, you may have left them in the water bath too long—stick to exactly 30 seconds for perfect results. Should your heart shapes lose definition during baking, try refrigerating the shaped pretzels for 10 minutes before the baking soda bath to help them hold their form.
My earliest attempt at making these pretzels taught me a valuable lesson about patience and dough texture. I rushed the kneading process, resulting in pretzels that lacked that characteristic chew. Now I know that taking the full 8-10 minutes to develop the gluten through proper kneading is absolutely essential. Another discovery came when I tried different salts for topping—while regular table salt dissolved and disappeared into the pretzels, coarse sea salt maintained its structure and provided those perfect bursts of saltiness in each bite. My favorite memory with this recipe was teaching my niece to shape her first heart pretzel. Her face lit up with such pride when she saw her somewhat lopsided heart transform into a beautifully golden, professional-looking pretzel after baking. These moments of shared joy in the kitchen are what make baking so rewarding.
What began as a spontaneous baking project has become one of my signature recipes, requested by friends and family for gatherings throughout the year, not just on Valentine's Day. I've found that the process of making these pretzels—the rhythmic kneading of the dough, the careful shaping of each heart, the transformation that happens in the oven—provides a meditative quality that's as rewarding as the final product. There's something deeply satisfying about creating these heart-shaped symbols of affection with your own hands, infusing them with care and attention that no store-bought treat can match. Whether you're making these as a gift of love, a fun activity with children, or simply because you're craving a homemade pretzel, this recipe delivers both joy in the process and deliciousness in every bite.
Frequently Asked Questions
- → Why do I need to use a baking soda bath for pretzels?
- The baking soda bath creates that distinctive pretzel taste and texture. It gelatinizes the outside of the dough, creating the chewy interior and characteristic brown, glossy crust. Without this step, you'd essentially have bread shaped like a pretzel rather than a true pretzel.
- → Can I make these pretzels ahead of time?
- Yes! You can prepare the dough and refrigerate it overnight (after the first rise, punch it down, then refrigerate). You can also freeze the shaped, unbaked pretzels after boiling them in the baking soda bath. When ready to bake, thaw at room temperature, brush with egg wash, add toppings, and bake as directed.
- → What if my dough isn't rising?
- If your dough isn't rising, the yeast might not be active. Ensure your water is warm (110°F/45°C) but not hot, as high temperatures can kill yeast. Also check that your yeast isn't expired. Place the dough in a warm, draft-free place - near a preheating oven or on top of the refrigerator works well.
- → How do I store these pretzels?
- Soft pretzels are best enjoyed fresh, but you can store them in an airtight container at room temperature for 1-2 days. Reheat them in a 350°F oven for 5 minutes to refresh. For longer storage, freeze baked pretzels and reheat from frozen in a 350°F oven for 10-12 minutes.
- → Can I make sweet versions of these pretzels?
- Absolutely! Skip the salt topping and instead brush the baked pretzels with melted butter and dip in cinnamon sugar. You can also drizzle them with chocolate, caramel, or a simple glaze made from powdered sugar and milk. For the dough itself, you can add a bit more sugar (up to 3 tablespoons total) for a sweeter base.