
 Pin it
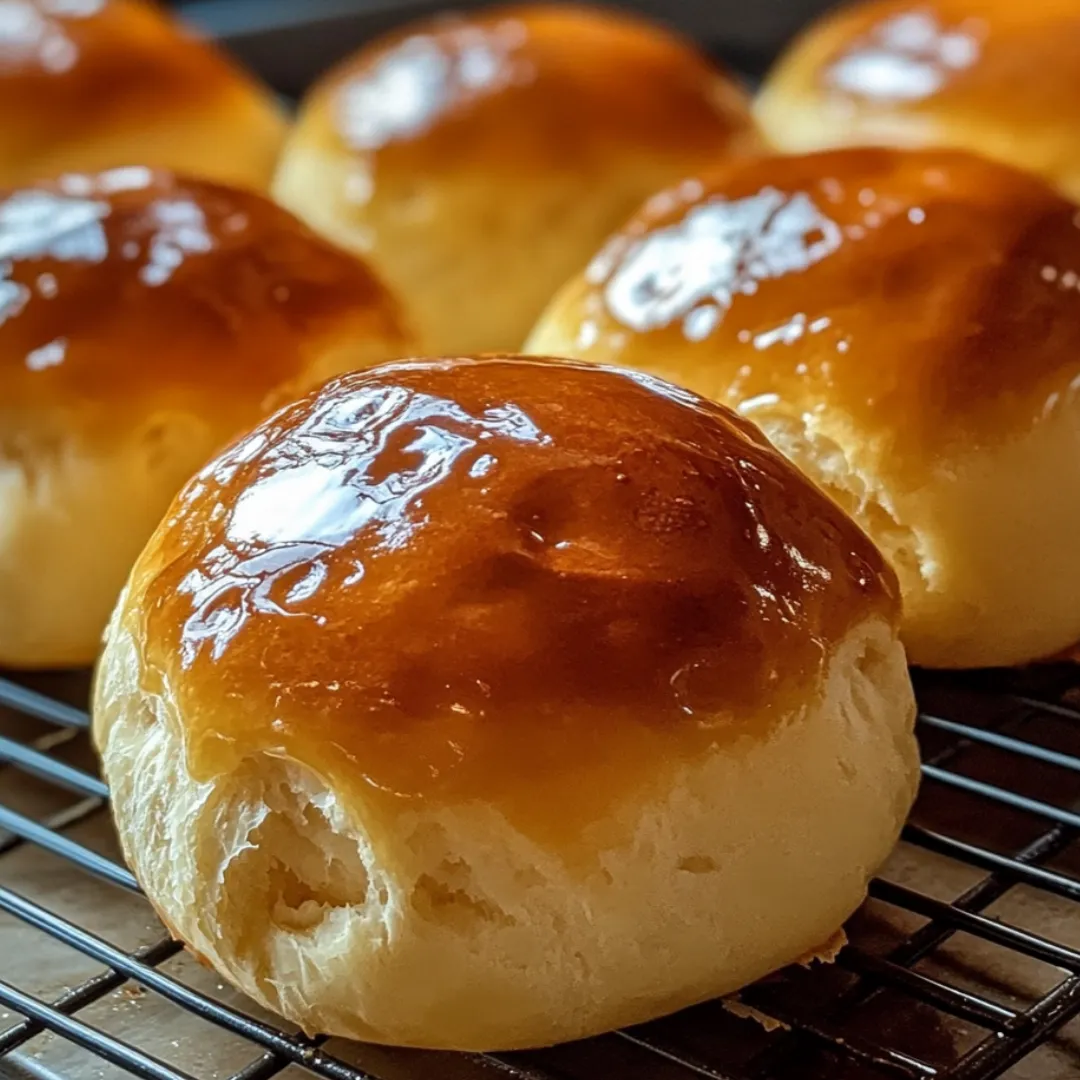
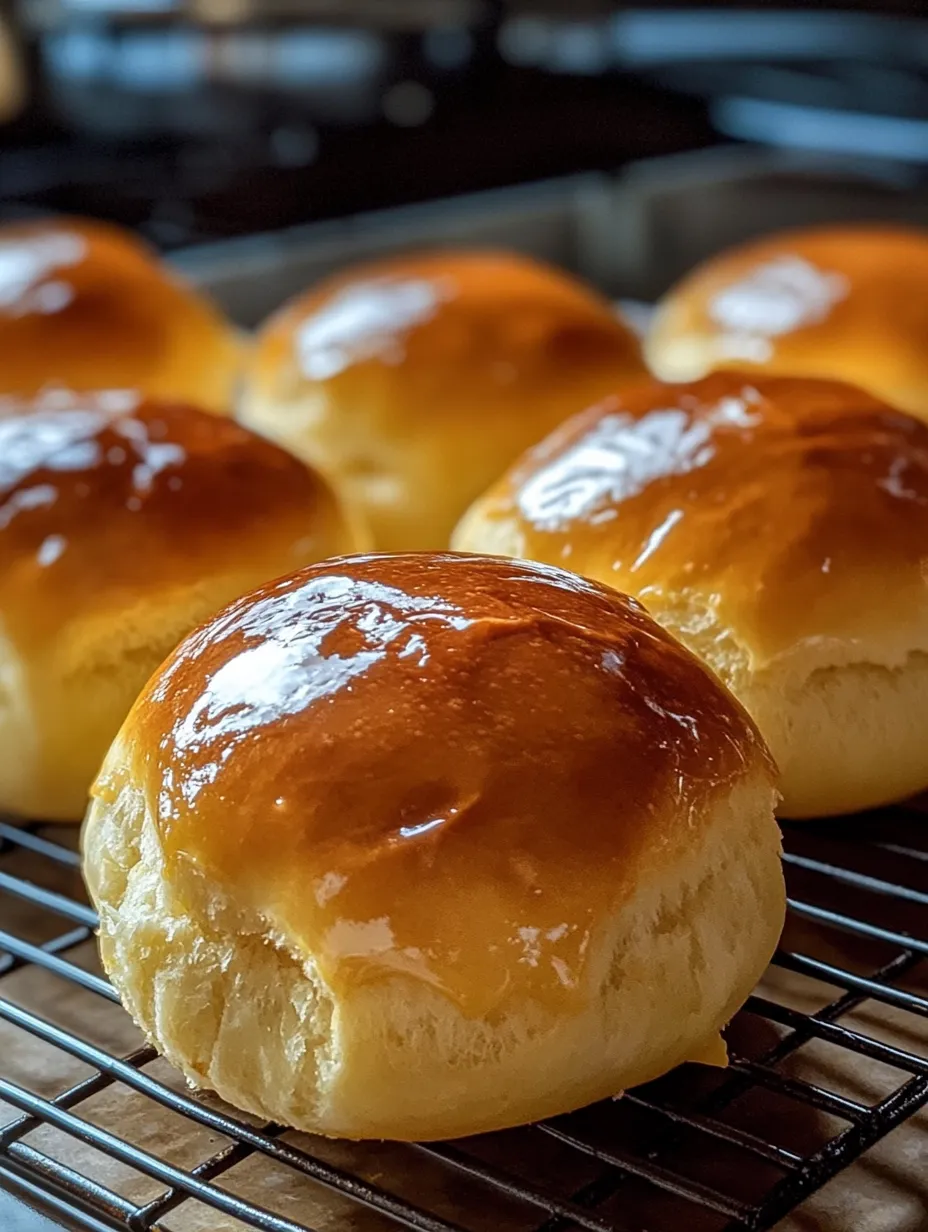
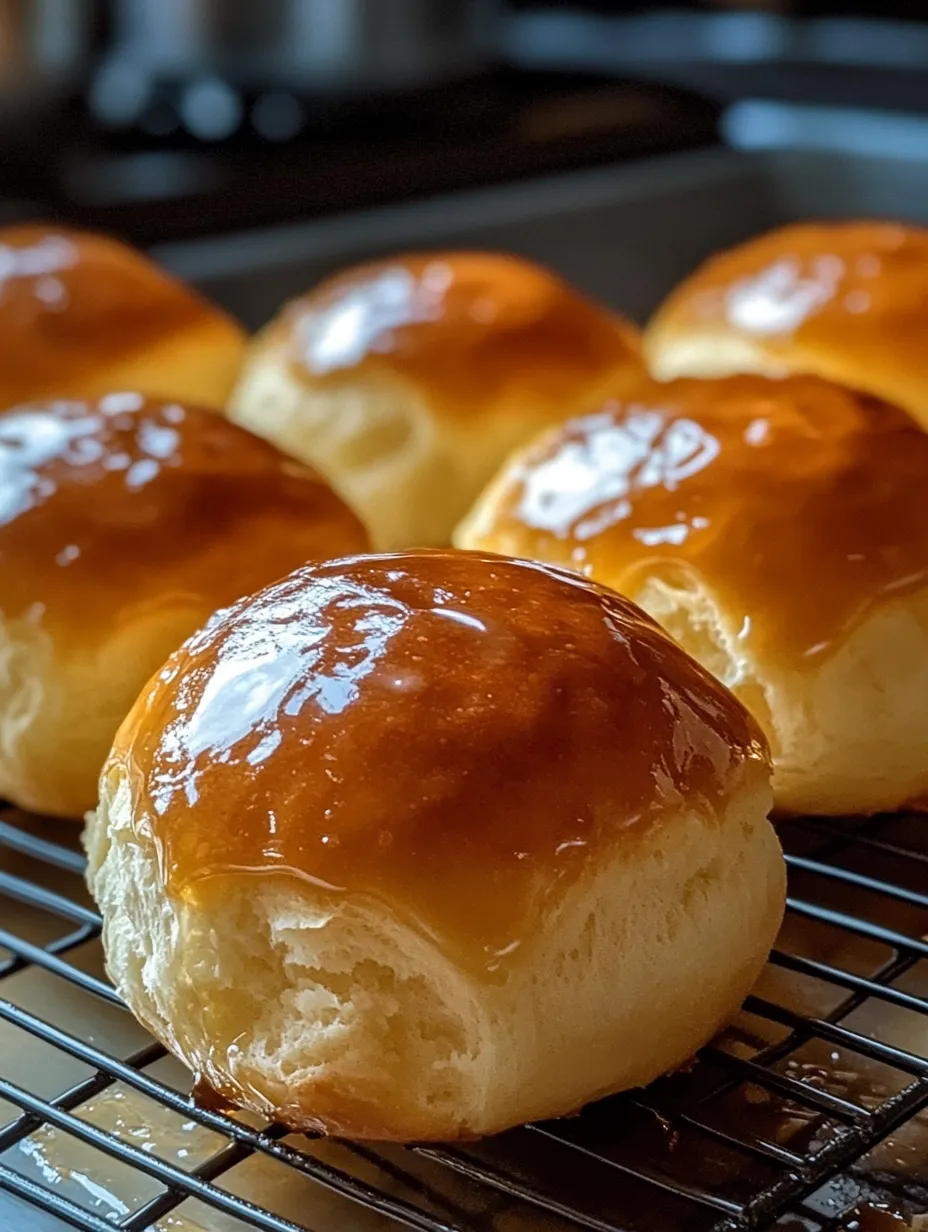
These homemade honey buns deliver pillowy soft dough swirled with warm cinnamon and bathed in a rich honey glaze that creates an irresistible sticky-sweet finish. Each bite offers the perfect balance of tender, fluffy bread and sweet, aromatic spice, creating a pastry that's equally suitable for breakfast, dessert, or an indulgent snack. The golden exterior gives way to a soft, spiraled interior that pulls apart in delicate layers, while the honey glaze adds a glossy shine and natural sweetness that commercial versions simply can't match. Whether enjoyed warm from the oven or at room temperature, these honey buns bring bakery-quality goodness to your kitchen with surprisingly simple ingredients.
I first attempted making honey buns after my daughter kept asking for the packaged ones at the grocery store. The first batch I made completely transformed our weekend breakfast routine! What surprised me most was how much more flavorful homemade honey buns are compared to store-bought – the combination of real honey, fresh cinnamon, and buttery dough created something truly special. My family now requests these regularly, and the house fills with an incredible aroma that makes everyone gather in the kitchen asking when they'll be ready. The best part is watching guests' faces light up when they realize these aren't from a bakery but made right in our home.
Ingredients You'll Need
- For the Dough:
- 3 cups All-Purpose Flour - Creates the structure for soft, tender buns. Use unbleached for best flavor.
- 2¼ teaspoons Active Dry Yeast (1 packet) - Provides the rise that makes these buns light and fluffy.
- ¼ cup Granulated Sugar - Feeds the yeast and adds sweetness to balance the dough.
- 1 teaspoon Salt - Enhances flavors and controls yeast activity for proper rising.
- 1 cup Milk, lukewarm - Activates the yeast and creates a tender crumb. Whole milk provides the richest results.
- ¼ cup Unsalted Butter, melted - Adds richness and flavor to the dough.
- 2 large Eggs, room temperature - Provides structure, richness, and helps the dough rise beautifully.
- For the Filling:
- ½ cup Unsalted Butter, softened - Creates a spreadable base for the cinnamon-sugar mixture.
- ¾ cup Brown Sugar, packed - Offers deep, caramel-like sweetness and moisture.
- 2 tablespoons Ground Cinnamon - Provides the classic warm, spicy flavor essential to honey buns.
- ½ teaspoon Ground Nutmeg - Adds subtle warmth and complexity that complements the cinnamon.
- For the Honey Glaze:
- ½ cup Honey - The star ingredient that gives these buns their signature flavor.
- ¼ cup Unsalted Butter - Creates richness and helps the glaze achieve the perfect consistency.
- 1 teaspoon Vanilla Extract - Enhances the flavor with aromatic depth.
- ¼ cup Powdered Sugar (optional) - Helps thicken the glaze if you prefer a less runny consistency.
 Pin it
Step-by-Step Cooking Instructions
- Prepare the Dough:
- Begin by warming the milk until it's just lukewarm (about 110°F/45°C) – it should feel warm but not hot to the touch. Pour the warm milk into a large mixing bowl and sprinkle the yeast and 1 teaspoon of the sugar over the surface. Let this mixture sit for about 5-10 minutes until it becomes foamy, which indicates the yeast is active and ready to work. Once foamy, add the remaining sugar, melted butter, eggs, and salt to the bowl. Whisk these wet ingredients together until well combined.
- Form the Dough:
- Gradually add the flour to the wet ingredients, about ½ cup at a time, stirring with a wooden spoon until a shaggy dough forms. Once it becomes too difficult to stir, transfer the dough to a floured surface and knead by hand for 8-10 minutes. The dough should become smooth, elastic, and slightly tacky but not sticky. If it's too sticky, add a little more flour, a tablespoon at a time. If it's too dry, wet your hands slightly and continue kneading. The properly kneaded dough should spring back when poked with a finger.
- First Rise:
- Place the dough in a large, lightly greased bowl, turning once to coat both sides with oil. Cover the bowl with a clean kitchen towel or plastic wrap and set it in a warm, draft-free place to rise. Let the dough rise until it doubles in size, which typically takes about 1 to 1.5 hours depending on the temperature of your kitchen. You can tell the dough is ready when you gently press it with your finger and the indentation remains.
- Prepare the Filling:
- While the dough rises, make the filling by combining the brown sugar, cinnamon, and nutmeg in a small bowl. Mix until well blended and set aside. Having the filling ready before the dough finishes rising ensures a smooth assembly process. Make sure your butter for the filling has softened to room temperature so it will spread easily without tearing the dough.
- Shape the Buns:
- Once the dough has doubled in size, gently punch it down to release the air bubbles. Turn it out onto a lightly floured surface and roll it into a rectangle approximately 18×12 inches. The dough should be about ¼ inch thick. Spread the softened butter evenly over the entire surface of the dough, leaving about a ½-inch border along one of the long edges. Sprinkle the cinnamon-sugar mixture evenly over the buttered surface, pressing it lightly into the butter to help it adhere.
- Roll and Cut:
- Starting from the long edge that has filling all the way to the edge (not the one with the border), tightly roll the dough into a log, pinching the seam to seal it shut. Position the log seam-side down. Using a sharp knife or unflavored dental floss, cut the log into 12-15 equal pieces, each about 1½ inches thick. Place the cut buns in a greased 9×13-inch baking dish or on a large baking sheet lined with parchment paper, leaving some space between each bun to allow for rising.
- Second Rise:
- Cover the shaped buns with a kitchen towel and let them rise again in a warm place for about 30-45 minutes, or until they've noticeably puffed up and expanded to touch each other in the pan. About 20 minutes into this second rise, preheat your oven to 350°F (175°C) to ensure it's properly heated when the buns are ready to bake.
- Bake to Golden Perfection:
- Place the risen buns in the preheated oven and bake for 25-30 minutes, or until they're golden brown on top and a thermometer inserted into the center of a bun reads 190°F (88°C). If the buns are browning too quickly but aren't yet done in the center, loosely cover them with aluminum foil for the remaining baking time to prevent over-browning.
- Create the Honey Glaze:
- While the buns are baking, prepare the honey glaze. In a small saucepan over medium-low heat, combine the honey and butter. Stir occasionally until the butter is completely melted and the mixture is smooth and well combined. Remove from heat and stir in the vanilla extract and powdered sugar (if using), whisking until smooth. The glaze should be thin enough to pour but thick enough to coat the back of a spoon.
- Glaze and Serve:
- As soon as the buns come out of the oven, pour about half of the warm honey glaze evenly over the top, allowing it to seep into all the crevices. Let the buns cool for 5-10 minutes, then pour the remaining glaze over them for an extra sticky, sweet finish. Allow the buns to cool for another 15-20 minutes before serving to let the glaze set slightly. These honey buns are best enjoyed warm but remain delicious at room temperature or gently reheated the next day.
I learned the importance of proper milk temperature after my first attempt resulted in dense, flat buns because I'd inadvertently killed the yeast with too-hot milk. Now I always use a thermometer or test with my wrist – the milk should feel warm but not hot, similar to baby bath water. Another game-changing discovery was using dental floss to cut the rolls instead of a knife. The floss creates a clean cut without compressing the delicate dough, which helps the buns maintain their perfect spiral shape. These small adjustments transformed my honey buns from good to bakery-quality.
Perfect Pairings
These sweet treats pair beautifully with several beverages and sides. A hot cup of coffee provides the perfect bitter contrast to the sweet honey glaze. For tea lovers, a robust black tea or Earl Grey complements the cinnamon notes wonderfully. If serving as dessert, a scoop of vanilla ice cream alongside a warm honey bun creates an indulgent treat. For breakfast, fresh fruit like strawberries or sliced bananas adds a refreshing element that balances the richness of the buns.
Make-Ahead Options
One of the best features of this recipe is its flexibility for preparing ahead of time. After shaping the rolls and placing them in the baking dish, cover them tightly with plastic wrap and refrigerate overnight (up to 12 hours). In the morning, remove them from the refrigerator and let them sit at room temperature for about 30-45 minutes before baking as directed. Alternatively, you can freeze the unbaked rolls for up to one month. Thaw overnight in the refrigerator, then allow them to come to room temperature and rise before baking.
 Pin it
Storage Solutions
These honey buns stay fresh at room temperature in an airtight container for 2-3 days. For longer storage, wrap them individually in plastic wrap and place in a freezer-safe bag for up to 3 months. To reheat from frozen, thaw overnight in the refrigerator then warm in a 300°F oven for 10-15 minutes or microwave individual buns for 20-30 seconds. The honey glaze helps these buns retain moisture better than other sweet rolls, making them excellent candidates for freezing and reheating.
I've made these honey buns countless times over the years, and the most important lesson I've learned is that patience truly makes a difference. Allowing enough time for both the first and second rise creates an incredibly light, fluffy texture that can't be rushed. My family particularly loves when I add orange zest to the filling – the citrus notes complement the honey and cinnamon beautifully. Another favorite variation is adding chopped pecans to the filling for a delightful textural contrast. Don't be afraid to experiment once you've mastered the basic recipe – the possibilities for customization are endless!
Frequently Asked Questions
- → Can I bake these instead of frying?
- While frying gives the authentic honey bun texture and flavor, you can bake them at 350°F for 15-18 minutes. The texture will be more like cinnamon rolls but still delicious.
- → Why did my dough not rise properly?
- This usually happens if the yeast is old or the water was too hot (above 110°F) or too cold. Make sure your yeast is fresh and the water temperature is between 105°-110°F.
- → Can I make the dough ahead of time?
- Yes, you can refrigerate the dough after the first rise for up to 24 hours. Let it come to room temperature for about 30 minutes before rolling, filling, and proceeding with the recipe.
- → My glaze is too thick/thin. How do I fix it?
- For thinner glaze, add more warm water, a teaspoon at a time. For thicker glaze, add more powdered sugar, a tablespoon at a time, until you reach your desired consistency.
- → How do I know when the oil is the right temperature?
- Use a cooking thermometer for accuracy (365°F is ideal). If you don't have one, drop a small piece of dough in the oil - it should bubble around the edges and rise to the surface within seconds, but not brown immediately.