
 Pin it
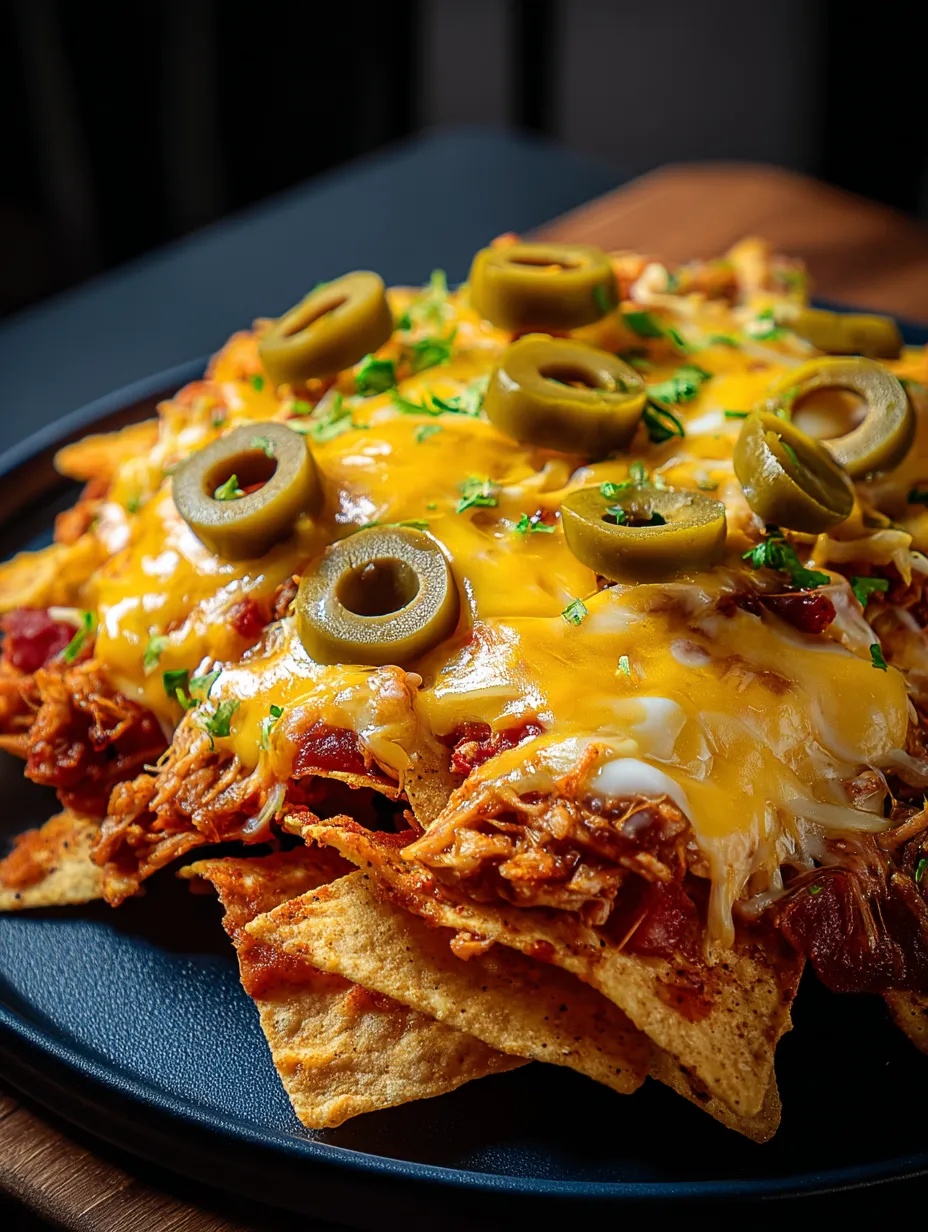
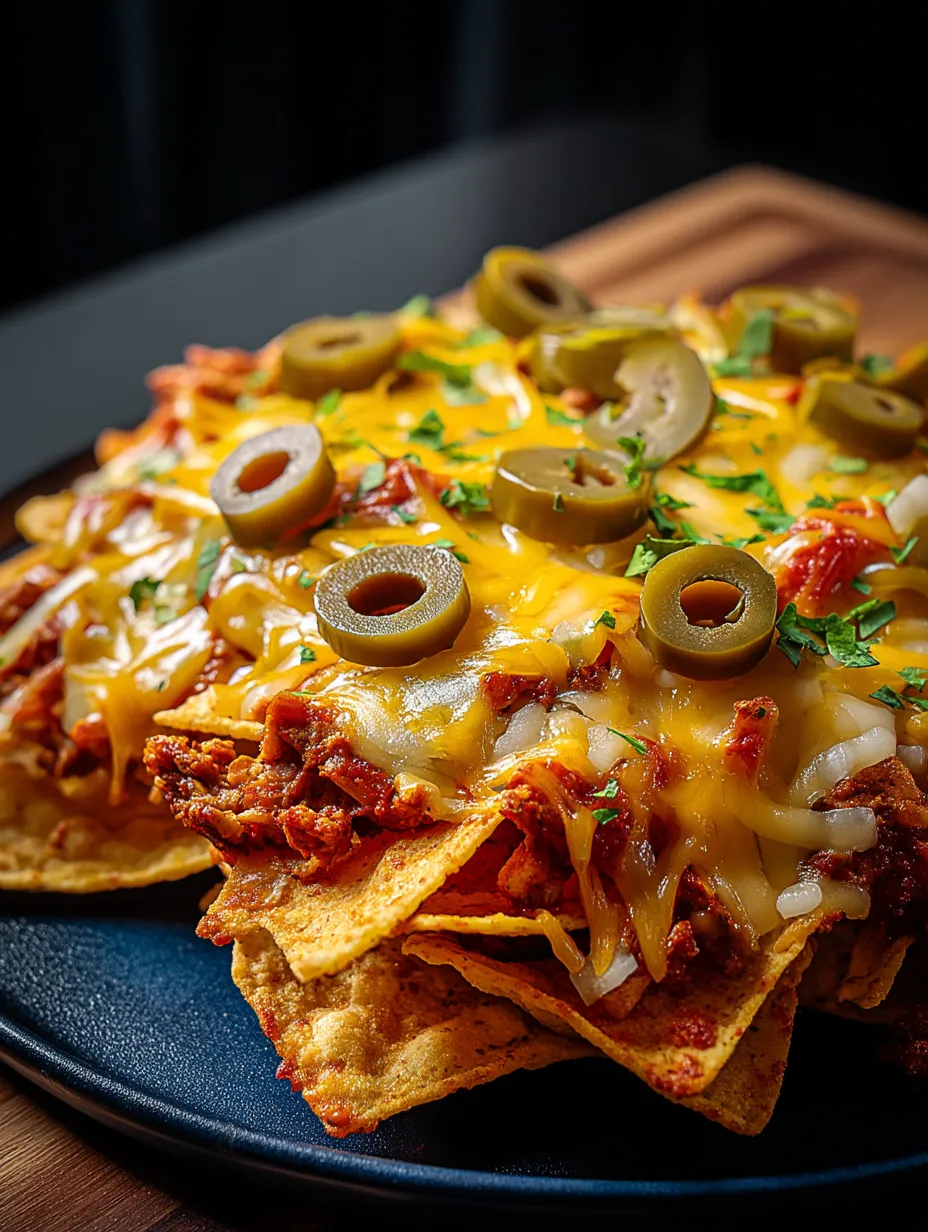
Picture a mountain of crispy tortilla chips blanketed in molten cheese that stretches into perfect strings with every bite. These loaded nachos deliver that irresistible combination of textures and flavors – the crunch of the chips, the gooey blanket of melted cheese, and the fresh burst from colorful toppings. This isn't just a snack; it's a celebration on a platter. Perfect for casual gatherings or when you need serious comfort food, these nachos transform simple ingredients into something truly crave-worthy that brings people together around the table.
I brought these nachos to my sister's housewarming party last month, and they disappeared faster than anything else on the buffet table. My brother-in-law, who claims to be a nacho connoisseur after years of sports bar visits, said they were the best he'd ever tasted. The secret, I think, is in taking the time to layer properly – no sad, naked chips hiding at the bottom of the pile.
Essential Ingredients
- Tortilla chips: Look for thick, sturdy triangles that can support the weight of toppings without breaking; restaurant-style chips with a bit of salt work perfectly and won't turn soggy quickly. 12-16 ounces needed.
- Cheese blend: A mix of cheeses creates the perfect melt; sharp cheddar provides flavor while monterey jack or mozzarella contributes that picture-perfect stretch when pulled apart. 3 cups shredded (2 cups cheddar, 1 cup monterey jack or mozzarella).
- Ground beef: Season generously with cumin, chili powder, and garlic for authentic Mexican-inspired flavor; the meat should be juicy but not dripping with fat that would make the chips soggy. 1 pound needed.
- Fresh toppings: Crisp red onion, ripe tomatoes, and bright cilantro provide essential freshness that cuts through the richness of the cheese and meat. ½ cup diced red onion, 1 cup diced tomatoes, ¼ cup chopped cilantro.
- Finishing touches: Cold sour cream, chunky guacamole, and vibrant salsa served alongside (not baked on) provide temperature contrast and allow everyone to customize their portion. ½ cup each sour cream, guacamole, and salsa.
 Pin it
Step-by-Step Cooking Instructions
- Step 1:
- Prepare your foundation – Preheat your oven to 400°F (200°C) and line a large, rimmed baking sheet with parchment paper for easy cleanup. This high temperature ensures quick melting without giving the chips time to become soggy. The rimmed edges prevent any cheese from dripping off during baking, saving you from oven messes.
- Step 2:
- Season and cook the meat perfectly – In a large skillet over medium-high heat, brown 1 pound of ground beef, breaking it into small, even crumbles with a wooden spoon. Once no pink remains, drain excess fat but leave a little for flavor. Return to heat and add 1 tablespoon chili powder, 1 teaspoon cumin, 1 teaspoon garlic powder, ½ teaspoon salt, and ¼ teaspoon black pepper. Pour in ¼ cup water, stirring to create a light sauce that coats the meat. Simmer for 2-3 minutes until the liquid is mostly absorbed but the meat remains moist.
- Step 3:
- Create strategic layers – Spread half of a 12-16 ounce bag of tortilla chips in an even layer on the prepared baking sheet, making sure they overlap slightly. Sprinkle with one-third of 3 cups shredded cheese blend (2 cups cheddar, 1 cup monterey jack or mozzarella), then half of the seasoned meat, and half of your chopped vegetables (¼ cup diced red onion, ½ cup diced tomatoes, ¼ cup sliced black olives). Add another layer of chips, followed by another third of cheese, the remaining meat, and most of the remaining vegetables, reserving some for the final garnish.
- Step 4:
- Apply the cheese cap – Sprinkle the remaining cheese over the top layer, making sure to cover as many chips as possible. This final layer of cheese acts as a protective "cap" that helps hold the nachos together and prevents toppings from falling off when served. Pay special attention to the edges of the nacho mountain, where chips can easily dry out during baking.
- Step 5:
- Bake with attention – Place the loaded nachos in the preheated oven and bake for 7-10 minutes, watching carefully. The perfect nachos are done when the cheese is completely melted and just beginning to bubble, with a few spots starting to brown. Don't overbake, as the chips can quickly go from perfectly crisp to burnt. If your cheese isn't melting evenly, rotate the pan halfway through.
- Step 6:
- Finish with flair – Remove the nachos from the oven and immediately sprinkle with the reserved fresh toppings – ½ cup diced tomatoes, ¼ cup chopped cilantro, and ¼ cup jalapeño slices if using. This contrast of hot, melted ingredients with cool, fresh garnishes creates flavor magic. For presentation impact, place small bowls of ½ cup sour cream, ½ cup guacamole, and ½ cup salsa at different spots around the nacho platter for easy dipping access.
- Step 7:
- Serve without delay – Loaded nachos wait for no one! Serve immediately while the cheese is still hot and stretchy. For casual gatherings, place the entire baking sheet (on a heat-safe surface) in the center of the table and let everyone dig in. For more formal occasions, use a wide spatula to transfer portions to individual plates, making sure each serving has a good balance of chips, cheese, and toppings.
- Step 8:
- Offer finishing options – Place additional toppings in small bowls around the nacho platter – extra jalapeños for heat lovers, ¼ cup chopped green onions for freshness, and various hot sauces for people who want to customize their heat level. This interactive element makes the nacho experience even more fun for guests.
I discovered my love for loaded nachos during college when my roommate from San Antonio showed me how her family made them for game days. Their secret was layering everything carefully and using a blend of cheeses rather than just cheddar. Years later, when I was going through a difficult breakup, I found myself craving this comfort food and made a giant batch that somehow healed my soul a little. Now these nachos are my go-to contribution for casual gatherings – I've never brought home leftovers.
The Art of Strategic Layering
The hallmark of truly great nachos is ensuring every chip has its fair share of toppings. Rather than the disappointing experience of reaching the bottom half of the pile and finding naked chips, proper layering guarantees a consistent nacho experience from first bite to last.
Consider creating a "nacho table" for larger gatherings by covering your entire table with foil, then building massive nacho layers across the entire surface. This interactive dining experience creates instant memories and conversation as guests gather around to share in the communal feast.
Beyond Traditional Toppings
While classic nacho toppings never disappoint, don't be afraid to experiment with unexpected flavors that can elevate your nacho game. Try drizzling 1 tablespoon honey over your finished nachos for a sweet-and-savory combination that's surprisingly addictive. The slight sweetness contrasts beautifully with the spicy jalapeños and salty chips.
For a fusion twist, consider Korean-inspired nachos with bulgogi beef, ½ cup kimchi, and a gochujang-spiked sour cream. The fermented flavors of kimchi provide a unique tanginess that works remarkably well with melted cheese. Similarly, Mediterranean nachos featuring ground lamb, ½ cup feta cheese, ¼ cup olives, and a cucumber-yogurt sauce offer a refreshing variation on the theme.
 Pin it
The Perfect Cheese Pull
The signature moment of any great nacho experience is that first perfect cheese pull – when you lift a chip and the cheese stretches into tantalizing strings. To achieve this Instagram-worthy effect, incorporate some whole-milk mozzarella into your cheese blend. Its high moisture content and protein structure create those picture-perfect stretchy strands.
For even more dramatic cheese pulls, let the nachos rest for exactly one minute after removing from the oven before serving. This brief resting period allows the cheese to set just enough to create maximum stretch without becoming too firm.
I've made these loaded nachos for everything from game days to movie nights to impromptu dinner parties when I realized I had nothing planned. There's something magical about the way a simple platter of nachos can transform any gathering into a celebration. What I love most is how they bring people together – everyone reaching in, creating their perfect bite, and sharing in this communal food experience. In our increasingly formal world, there's something wonderfully primal and connecting about gathering around a platter of nachos, using your hands, and enjoying each other's company over stretchy cheese and crunchy chips. When life gets complicated, sometimes all you need is the simple pleasure of perfect loaded nachos.
Frequently Asked Questions
- → How do I keep my nachos from getting soggy?
- Use sturdy, thick tortilla chips and avoid adding wet ingredients before baking. Add fresh ingredients like tomatoes and guacamole after baking, or serve them on the side.
- → Can I make these nachos vegetarian?
- Absolutely! Skip the meat and add black beans, pinto beans, or refried beans for protein. You can also add extra vegetables like corn, bell peppers, or avocado.
- → What's the best cheese for nachos?
- A combination of cheeses works best - sharp cheddar for flavor and a melty cheese like mozzarella or Monterey Jack for stretch. For authentic Mexican flavor, try Oaxaca or queso asadero.
- → Can I prepare these nachos ahead of time?
- You can prep all ingredients ahead of time, but assemble and bake just before serving. Nachos are best enjoyed fresh from the oven while the cheese is hot and melty.
- → How do I layer nachos for the best results?
- Use a shallow layer of chips, add some cheese, then toppings, then more cheese on top. This ensures cheese in every bite and helps toppings stick to the chips rather than falling off.