
 Pin it
Rich, fudgy chocolate goodness emerges from your microwave in mere minutes with this clever single-serving brownie that harbors a surprising secret – cottage cheese. The humble curds transform into a silky-smooth texture that adds incredible moisture and a protein boost while remaining completely undetectable in the final product. Each spoonful delivers that deep chocolate satisfaction you crave with a lighter profile than traditional brownies. This quick treat occupies that perfect middle ground between wholesome snack and indulgent dessert, making it ideal for afternoon energy slumps or evening sweet tooth emergencies.
I discovered this recipe during a particularly stressful week of deadlines when I desperately needed a chocolate fix but couldn't justify a full batch of brownies. The first time I stirred cottage cheese into my brownie mix, I was skeptical—I'm not normally a cottage cheese fan and worried the texture would be off-putting. When I took that first warm bite, I was genuinely shocked. Not only was there no trace of the cottage cheese texture, but the brownie had a richness that seemed impossible for something made so quickly. My teenager wandered into the kitchen, drawn by the chocolate aroma, and demanded to know what I was baking. When I shared my creation (and its secret ingredient), she wrinkled her nose initially but was completely won over after one bite. Now it's our shared end-of-day ritual when we both need a little chocolate therapy.
Ingredients You'll Need
- Cottage Cheese: The unexpected hero that creates a creamy, moist texture while adding protein. Use 2% or 4% milkfat for the best results; fat-free versions can make the brownie slightly drier. Small or medium curd works equally well, as it all blends smoothly in the final mixture. If you're typically not a cottage cheese fan, don't worry—the flavor completely disappears in the finished brownie, leaving only its moisture and protein benefits behind. Look for cottage cheese without additives or excess salt for the cleanest flavor profile.
- Unsweetened Cocoa Powder: Provides the deep chocolate flavor without adding extra sugar or fat. Natural cocoa powder gives a more traditional brownie flavor, while Dutch-processed cocoa creates a smoother, less acidic taste. The quality matters significantly here since cocoa is the primary flavoring—brands like Ghirardelli, Valrhona, or even regular Hershey's work well. For an extra-dark, more intense brownie, try special dark cocoa powder, though you may want to increase the sweetener slightly to balance the increased bitterness.
- Sweetener of Choice: Balances the bitterness of the cocoa and creates that classic brownie sweetness. Regular granulated sugar works perfectly, but you can substitute brown sugar for a deeper, caramel-like flavor or honey for a more complex sweetness. If using liquid sweeteners like maple syrup or honey, reduce the amount slightly (by about 25%) to account for their higher moisture content. For a lower-sugar version, stevia, monk fruit, or erythritol can be used according to their package conversion guidelines.
- Egg: Provides structure, richness, and helps bind everything together. For the fluffiest texture, use a room temperature egg rather than one straight from the refrigerator. The egg protein sets during cooking, helping the brownie maintain its shape rather than becoming pudding-like. In a pinch, you can substitute with 1 tablespoon ground flaxseed mixed with 3 tablespoons water (let sit for 5 minutes before using) for a vegan version, though the texture will be slightly different.
- All-Purpose Flour: Creates structure and helps the brownie hold together. You need just enough to provide form without making the brownie tough or dry. Measure flour by spooning it into the measuring spoon and leveling off rather than scooping directly, which can compact it. For a gluten-free version, substitute with a 1:1 gluten-free flour blend that contains xanthan gum. For a lower-carb option, almond flour can be used, though you may need to add an additional teaspoon to compensate for its different absorbency.
- Baking Powder: Provides just enough lift to keep the texture from becoming too dense or fudge-like. Even in a microwave recipe, this small amount of leavening makes a noticeable difference in the final texture. Make sure your baking powder is fresh—test by placing a small amount in hot water; it should fizz immediately. If it doesn't, it's time for a new container. The minimal amount used here ensures the brownie doesn't rise too much and become cakey rather than fudgy.
 Pin it
Step-by-Step Instructions
- Step 1:
- Prepare your cooking vessel properly – Select a microwave-safe mug or ramekin that holds at least 8 ounces (1 cup) of liquid. The container needs to be large enough to allow the brownie to rise slightly without overflowing. Ceramic or glass works best for even heating. Lightly grease the inside with a small amount of butter, coconut oil, or cooking spray, paying special attention to the bottom and lower sides where sticking is most likely to occur. This step ensures your brownie will release easily after cooking and prevents the disappointment of leaving half your dessert stuck to the container. For easier cleanup and a more elegant presentation, you can alternatively line the mug with a small piece of parchment paper, leaving some excess to act as a handle for removing the brownie later.
- Step 2:
- Blend the cottage cheese for optimal texture – Place 2 tablespoons of cottage cheese in your prepared mug or a small bowl. Using a fork, mash the cottage cheese vigorously against the sides of the container until the curds are broken down and the texture becomes relatively smooth. This step is crucial for eliminating the telltale texture of cottage cheese in your final brownie. Don't worry if it's not perfectly smooth—the cooking process will further integrate the cheese into the batter. If you have a small immersion blender or mini food processor, you can use that for an even smoother result, though it's not necessary. The goal is simply to break down the larger curds so they incorporate seamlessly into the brownie batter.
- Step 3:
- Create a well-balanced batter – To the mashed cottage cheese, add 1 tablespoon unsweetened cocoa powder, 1 tablespoon granulated sugar (or sweetener of choice), ¼ teaspoon vanilla extract, and a tiny pinch of salt (about 1/16 teaspoon). The vanilla enhances the chocolate flavor while the salt balances the sweetness. Mix these ingredients together until they form a thick paste. Crack in 1 small egg or ½ of a large egg and whisk vigorously until completely incorporated. The mixture will become smoother and glossier. Now add 1 tablespoon all-purpose flour and ⅛ teaspoon baking powder, stirring until just combined and no dry flour remains visible. Be careful not to overmix at this stage, which can develop the gluten in the flour and make your brownie tough rather than tender. Finally, stir in ½ tablespoon melted butter or oil, which adds richness and improves the mouthfeel of the finished brownie.
- Step 4:
- Enhance with mix-ins for personal flavor preferences – This basic batter serves as a perfect canvas for customization. If desired, now is the time to fold in 1-2 teaspoons of chocolate chips, chopped nuts, or dried fruit. For a flavor twist, consider adding ¼ teaspoon of espresso powder to enhance the chocolate notes, a pinch of cinnamon for warmth, or ¼ teaspoon of orange zest for a bright, complementary flavor. For a more decadent version, create a "stuffed" brownie by adding half the batter to your mug, placing a small piece of chocolate or a teaspoon of peanut butter in the center, and covering with the remaining batter. These additions allow you to make the recipe your own while still maintaining the quick, easy nature of the dessert.
- Step 5:
- Microwave with precision for the perfect texture – Smooth the top of your batter with the back of a spoon to ensure even cooking. Place the mug in the microwave and cook on high power (100%) for 45 seconds initially. This first cooking interval sets the outside while leaving the center slightly underdone. Check the brownie—it should be partially set around the edges but still quite soft in the center. Continue cooking in 10-15 second intervals, checking after each interval. Depending on your microwave's wattage, the total cooking time will be approximately 60-90 seconds. The brownie is done when the top appears mostly set but still looks slightly moist in the very center. It will continue cooking from residual heat after removal from the microwave. It's better to slightly undercook than overcook, as the brownie will continue to firm up as it cools and an overcooked microwave brownie can become tough and rubbery.
- Step 6:
- Rest briefly for optimal texture development – Once removed from the microwave, allow the brownie to stand undisturbed for 1-2 minutes. This resting period is crucial as it allows the residual heat to finish cooking the center gently while the structure sets. The temperature also begins to equalize throughout the brownie, preventing a too-hot first bite. During this time, the texture continues to develop, transforming from a light and airy just-cooked state to a more dense, fudgy consistency that makes this microwave treat so satisfying. Use this brief waiting period to gather any toppings you might want to add, but resist the urge to dig in immediately—those couple of minutes make a significant difference in the final texture.
- Step 7:
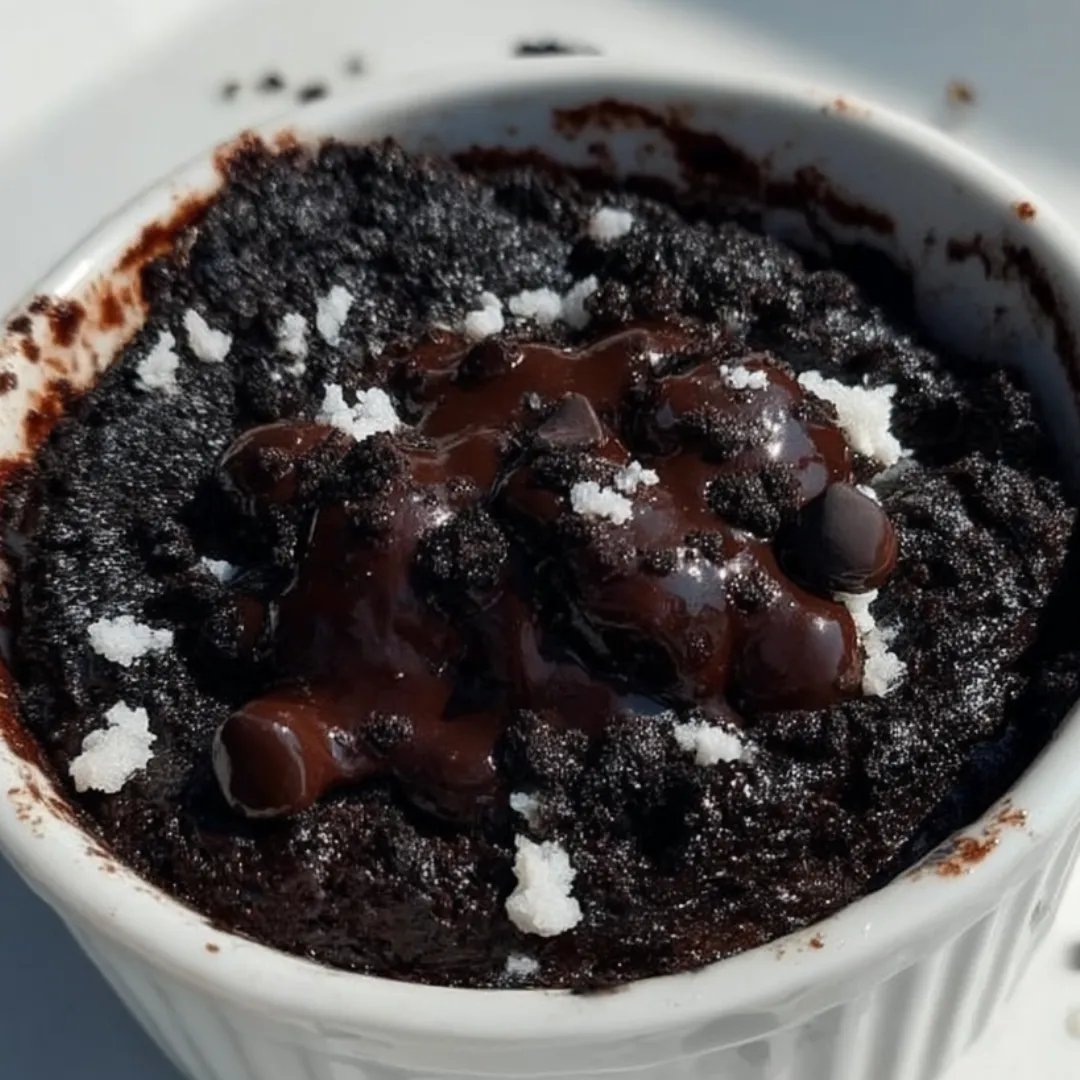
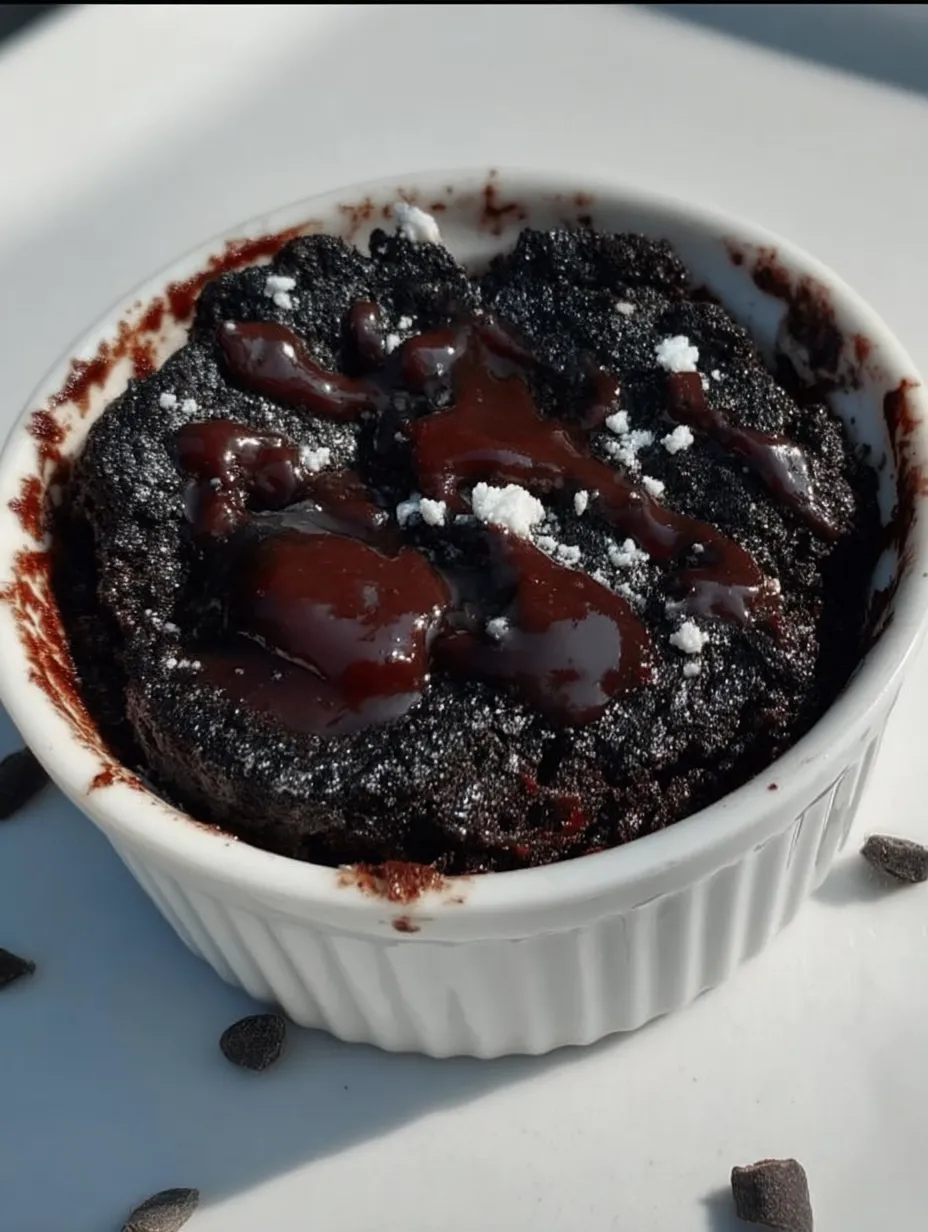
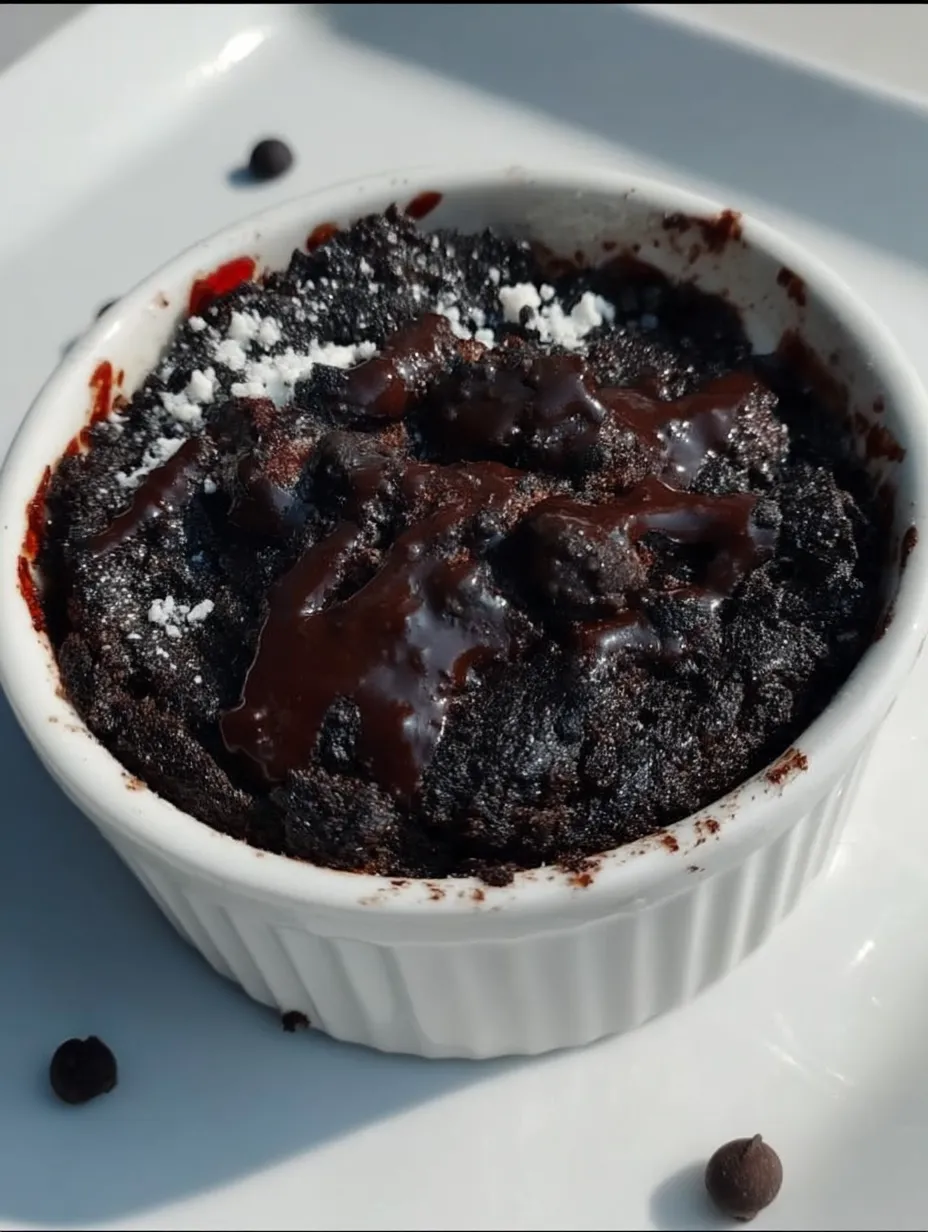
- Top thoughtfully for enhanced enjoyment – After the brief rest, your brownie is ready for optional toppings that can elevate it from simple snack to proper dessert. A small dollop of whipped cream adds lightness and visual appeal. A sprinkle of flaky sea salt creates a sophisticated flavor contrast that enhances the chocolate notes. For added protein and creaminess, a spoonful of Greek yogurt works beautifully. If you're enjoying this as dessert rather than a snack, a small scoop of vanilla ice cream creates that classic warm brownie à la mode experience as it melts into the warm chocolate. Fresh berries like raspberries or sliced strawberries add color, freshness, and a nutritional boost. Whatever topping you choose, add it just before serving to maintain the temperature and texture contrast.
- Step 8:
- Serve immediately for the best experience – This brownie is at its peak when enjoyed promptly after the resting period. The contrast between the warm interior and slightly firmer exterior creates the perfect textural experience. Eat it directly from the cooking vessel for casual enjoyment, or carefully turn it out onto a small plate for a more presented dessert. If turning out, run a knife around the edge first to loosen any stuck portions. The brownie should be moist and fudgy with a tender crumb—not wet or soupy, nor dry and cakey. Take a moment to appreciate the rich chocolate aroma before diving in. The beauty of this single-serving treat is that it's meant to be enjoyed immediately, eliminating the temptation of leftovers and creating a mindful, satisfying dessert experience.
I learned the importance of proper microwave timing after serving my husband what he kindly referred to as a "chocolate hockey puck" during my early experiments with this recipe. Now I set a specific timer rather than guessing, and we joke about the "brownie watch" that happens when we hover near the microwave counting down the seconds. My daughter has become the official taste-tester for new variations, with her current favorite being a mint chocolate version made with a drop of peppermint extract and dark chocolate chips. Even my mother, who was deeply skeptical about "microwave desserts" and "hidden cottage cheese," requested the recipe after trying it during a visit.
Perfect Pairings
This brownie's rich chocolate flavor pairs beautifully with a variety of beverages. A cold glass of milk creates that classic combination that helps temper the intensity of the chocolate. For a more adult pairing, a small espresso or cup of black coffee provides a bitter counterpoint that enhances the brownie's sweetness through contrast.
If enjoying this as a more substantial dessert, consider serving it with mixed berries on the side. The bright acidity of raspberries or strawberries cuts through the richness of the brownie and adds a fresh element to the experience. A small dollop of Greek yogurt atop the berries adds creaminess while continuing the protein theme.
For a more indulgent presentation, serve the brownie with a small scoop of vanilla ice cream or a spoonful of lightly sweetened whipped cream. The temperature contrast between the warm brownie and cold topping creates a delightful sensory experience.
Flavor Variations to Try
This basic recipe serves as an excellent canvas for creating different flavor profiles to match your mood or cravings. For a mocha version, add ¼ teaspoon of instant espresso powder to the batter, intensifying the chocolate flavor while adding subtle coffee notes.
Mint chocolate lovers can add 1-2 drops of peppermint extract and a few dark chocolate chips for a refreshing variation. Be cautious with peppermint extract as it's potent—even a small amount creates significant flavor.
For a Mexican chocolate-inspired version, add a pinch each of cinnamon and cayenne pepper to the batter. The warm spices complement the chocolate beautifully while the cayenne provides a gentle heat that builds subtly with each bite.
Orange and chocolate fans should try adding ¼ teaspoon of orange zest to the batter. The bright citrus notes cut through the richness of the chocolate and add an aromatic quality to the brownie.
 Pin it
Troubleshooting Tips
If your brownie turns out too dry, you likely microwaved it too long. Next time, reduce the cooking time by 15-20 seconds. Remember that different microwave wattages can significantly affect cooking times.
For a brownie that's too wet or undercooked, return it to the microwave for additional 10-second intervals until it reaches your desired consistency. The center should be moist but not liquid.
If you find the cottage cheese texture noticeable in your finished brownie, take more time mashing it before adding the other ingredients, or consider blending it smooth with an immersion blender first.
I created this recipe during a particularly challenging month when I was trying to eat more mindfully but still craving my usual comfort foods. There's something uniquely satisfying about creating a warm, chocolatey dessert in minutes that actually contains some nutritional value. It's become my go-to solution for those evenings when I'm curled up with a good book and want something sweet without the fuss of real baking or the temptation of a full batch of treats. The single-serving nature of this recipe means I can indulge my chocolate cravings without having leftovers calling my name from the kitchen. Whether you're cooking for yourself or sharing the technique with a friend who needs a little chocolate therapy, this quick microwave miracle proves that satisfying desserts don't need to be complicated or time-consuming.
Frequently Asked Questions
- → Can I use different sweeteners?
- Yes! You can substitute the sugar with honey, maple syrup, stevia, or any preferred sweetener to taste.
- → What if I don't have a blender for the cottage cheese?
- You can use a fork to thoroughly mash the cottage cheese until smooth, or substitute with 2 tablespoons of Greek yogurt for a similar protein boost.
- → Can I make this gluten-free?
- Absolutely! Just swap the all-purpose flour with the same amount of almond flour, oat flour, or a gluten-free flour blend.
- → How do I know when it's cooked properly?
- The brownie should look set around the edges but still slightly soft in the center. If you insert a toothpick, it should come out with a few moist crumbs.
- → Can I make multiple servings at once?
- Yes, simply multiply the ingredients and use a larger microwave-safe dish. You'll need to increase the cooking time by 30-second intervals until done.