
 Pin it
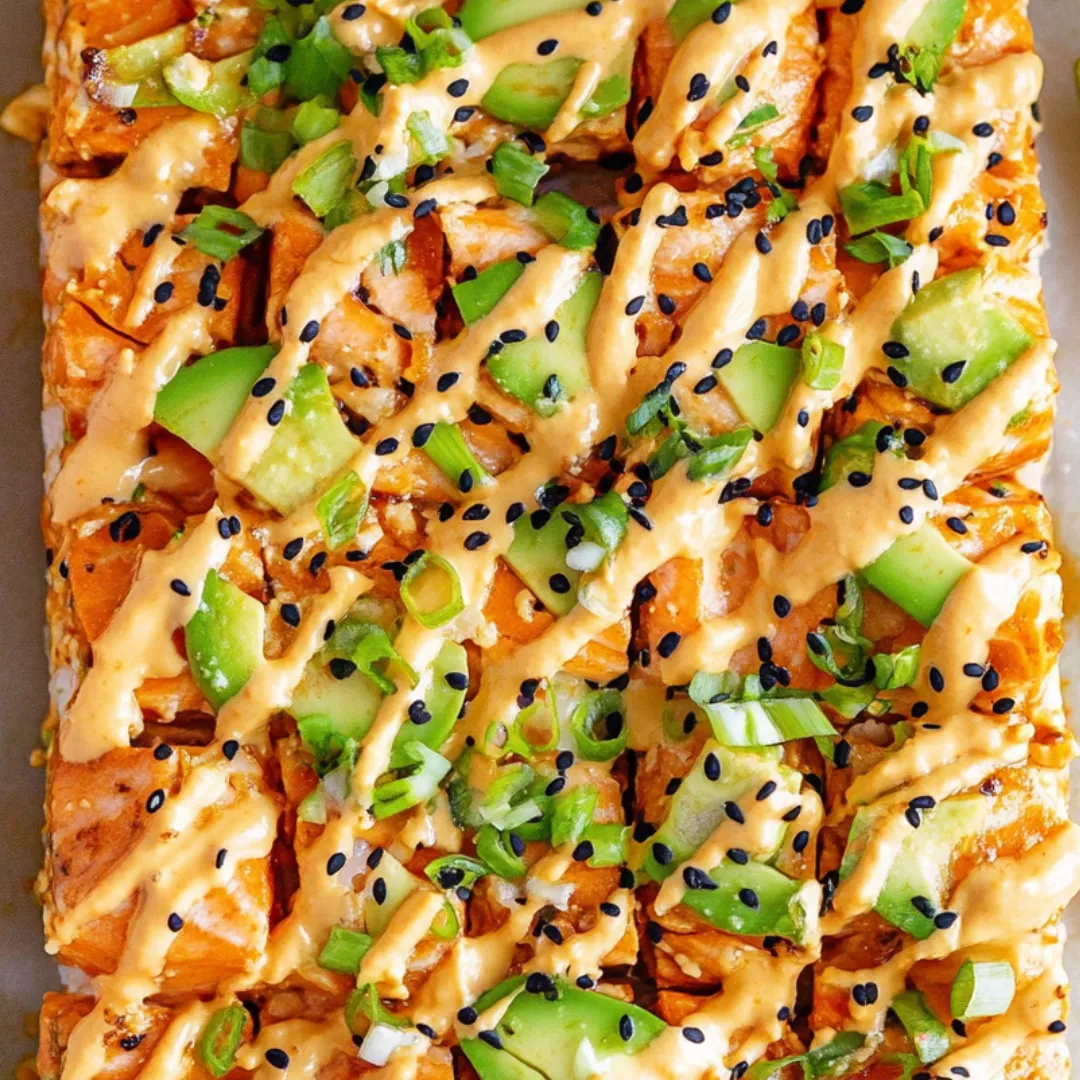
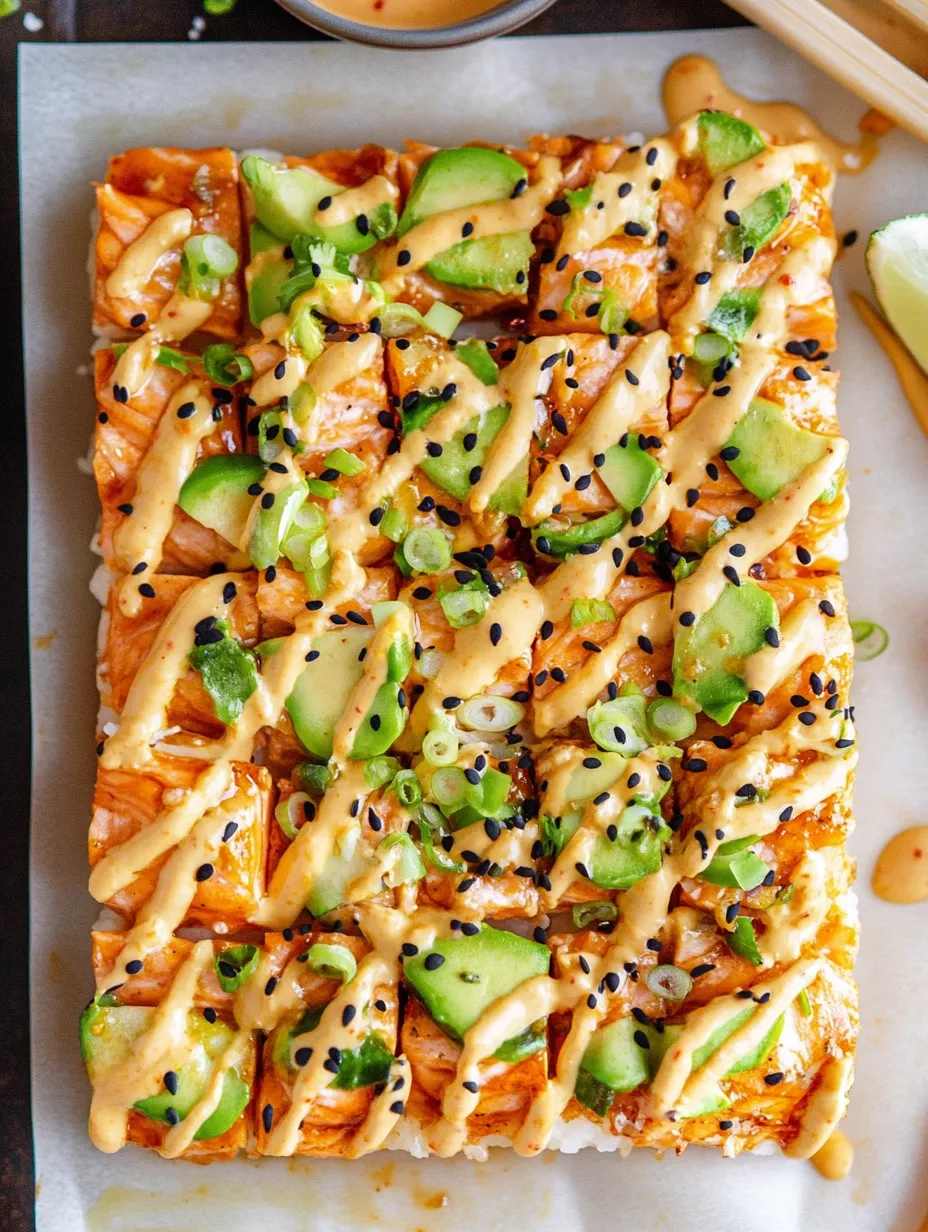
This Spicy Salmon Sushi Bake delivers all the vibrant flavors of your favorite sushi rolls in a fuss-free, shareable format that's perfect for feeding a crowd. Layers of seasoned sushi rice, aromatic furikake, and spicy salmon mixture are baked until bubbling, then topped with fresh garnishes for a delicious blend of textures and temperatures. This deconstructed sushi experience provides the perfect balance of creamy, spicy, and umami flavors without the meticulous rolling required for traditional maki—simply scoop the warm filling onto crisp nori sheets and enjoy this trendy dish that's as impressive as it is easy to prepare.
I discovered sushi bakes during the height of the social media cooking trend phase and was initially skeptical that a baked version could capture the essence of fresh sushi. After my first attempt, I was completely converted! The contrast between the warm, creamy salmon mixture and the cool, crisp toppings creates an experience that's somehow both comforting and refreshing. What truly won me over was how easily it satisfied my family's diverse preferences—my spice-loving husband added extra sriracha, my daughter piled on avocado, and I enjoyed mine with extra cucumber for crunch. It's now our go-to solution when we're craving sushi but don't want the expense or effort of making individual rolls.
Ingredients You'll Need
- 2 cups Sushi Rice (short-grain Japanese rice): The foundation of any good sushi dish, providing the perfect sticky texture for holding everything together. Koshihikari or Calrose varieties work best for authenticity
- ¼ cup Rice Vinegar: Adds the signature tangy flavor that distinguishes sushi rice from plain rice. You can use regular or seasoned varieties
- 1 tablespoon Sugar: Balances the acidity of the vinegar in the rice seasoning. Omit if using seasoned rice vinegar
- 1 teaspoon Salt: Enhances the flavor of the rice mixture. Adjust based on your preference for seasonings
- 3 tablespoons Furikake Seasoning, divided: This Japanese seaweed and sesame seed mixture adds essential umami flavor and visual appeal
- 1 pound Boneless, Skinless Salmon Fillets: Provides the protein base with its rich, distinctive flavor. Fresh salmon yields the best results
- 1 tablespoon Soy Sauce: Used to season the salmon before cooking, adding depth and saltiness
- 4 ounces Cream Cheese, softened: Creates creaminess and richness in the salmon mixture. Full-fat provides the best texture
- ½ cup Kewpie Mayonnaise: The Japanese-style mayo that adds silky texture and tangy flavor to the salmon mixture
- 2 tablespoons Sriracha or Sambal Oelek: Provides the signature heat that makes this 'spicy' salmon. Adjust amount based on your heat preference
- 4-6 Nori Sheets, cut into quarters: These seaweed sheets serve as the 'vessels' for enjoying the baked sushi
- Toppings: Sliced green onions, diced avocado, cucumber, extra spicy mayo, sesame seeds - Fresh garnishes that add color, texture, and flavor contrast
 Pin it
Step-by-Step Cooking Instructions
- Prepare the Perfect Sushi Rice:
- Begin by thoroughly rinsing 2 cups of sushi rice in a fine-mesh strainer under cold water until the water runs clear. This crucial step removes excess starch that would make your rice gummy rather than properly sticky. Transfer the rinsed rice to your rice cooker or a medium saucepan with 2½ cups of water. If using a rice cooker, simply follow the manufacturer's instructions. If cooking on the stovetop, bring to a boil, then reduce heat to low, cover, and simmer for 20 minutes until the water is absorbed and the rice is tender.
- Season Your Sushi Rice:
- While the rice cooks, prepare the seasoning mixture by combining ¼ cup rice vinegar, 1 tablespoon sugar, and 1 teaspoon salt in a small saucepan. Warm over low heat just until the sugar and salt dissolve, then remove from heat. When the rice is done cooking, transfer it to a large, wide bowl (traditionally, a wooden hangiri would be used, but any non-metallic bowl works). Drizzle the vinegar mixture evenly over the hot rice and use a rice paddle or wooden spoon to gently fold it in with a cutting motion, being careful not to mash the grains. Fan the rice as you mix to help it cool and achieve a glossy finish.
- Prepare Your Baking Dish:
- Preheat your oven to 425°F (220°C). Line a 9x9-inch baking dish with parchment paper, allowing some overhang for easy removal, or simply coat with cooking spray. The square shape creates the perfect thickness for the sushi bake, resembling the proportions of a traditional roll. Having your dish ready before assembling ensures a smooth process.
- Cook the Salmon:
- While the rice is cooking, prepare your salmon. Rub the fillets with 1 tablespoon of soy sauce, ensuring even coverage. You can cook the salmon using your preferred method: for an air fryer, cook at 400°F for 10 minutes; for conventional oven baking, place on a lined baking sheet and bake at 400°F for 15-20 minutes depending on thickness. The salmon should flake easily with a fork when done but remain moist. Allow to cool slightly before handling.
- Create the Spicy Salmon Mixture:
- In a medium bowl, use a fork to break the cooked salmon into small flakes – you want varied texture, not a completely smooth paste. Add the softened cream cheese, ½ cup Kewpie mayonnaise, and sriracha or sambal oelek. Gently fold these ingredients together until well combined but still maintaining some texture in the salmon. This mixture should be creamy but not runny, with a distinct salmon-pink color streaked with the spicy sauce.
- Assemble Your Sushi Bake Layers:
- Spread the prepared sushi rice evenly across the bottom of your baking dish, pressing it down gently with moistened hands or a rice paddle to create a firm, even layer about ½-inch thick. Sprinkle 2 tablespoons of furikake seasoning evenly over the rice layer, ensuring good coverage. This middle layer provides essential umami flavor and visual appeal. Finally, carefully spread the spicy salmon mixture over the furikake layer, creating an even top layer that reaches all the way to the edges of the dish.
- Bake Until Bubbling:
- Place the assembled dish in your preheated oven and bake for 15 minutes, or until the edges begin to bubble slightly and the top develops a light golden hue in spots. The goal is to heat everything through and allow the flavors to meld, not to cook the already-prepared ingredients further. The rice will become slightly crispy around the edges – a delightful textural contrast to the creamy salmon mixture.
- Apply the Fresh Finishes:
- Remove the sushi bake from the oven and immediately sprinkle with the remaining tablespoon of furikake, adding both flavor and visual appeal. Drizzle with additional spicy mayo (mix 2 tablespoons Kewpie mayonnaise with 1 teaspoon sriracha for a quick version). Scatter sliced green onions across the top, and arrange diced avocado and cucumber around the edges or in a pattern across the top. The contrast between the warm bake and these cool, fresh toppings creates a wonderful temperature and texture contrast.
The first time I made this dish, I accidentally used long-grain rice that I had on hand, and while the flavors were good, it didn't have that essential sticky quality that makes sushi rice so special. My Japanese neighbor later shared her grandmother's technique for properly seasoning sushi rice—gently folding with a cutting motion rather than stirring, which prevents the grains from breaking and becoming mushy. This simple technique transformed my next attempt, creating that perfect sticky-but-distinct grain texture that's the hallmark of good sushi rice. My family now requests this dish for birthday celebrations instead of going out for sushi, which I consider the highest compliment a home cook can receive!
Serving Suggestions
This Spicy Salmon Sushi Bake is traditionally enjoyed by scooping portions onto squares of nori and eating it like a taco. For a complete meal, consider serving with miso soup, a simple cucumber salad dressed with rice vinegar, or edamame sprinkled with sea salt. If you're hosting a gathering, create a DIY sushi bake bar where guests can customize their nori 'tacos' with additional toppings like pickled ginger, various types of tobiko (flying fish roe), or thinly sliced jalapeños for extra heat.
Creative Variations
The basic formula for this sushi bake welcomes countless variations to suit different tastes or dietary needs. For a California roll-inspired version, substitute imitation crab meat (or real crab if you're feeling luxurious) for the salmon. Vegetarians can replace the salmon with a mixture of diced avocado, cucumber, and carrots seasoned with the same creamy, spicy sauce. For a fusion twist, try teriyaki salmon with a drizzle of unagi sauce on top of the finished bake. You can also experiment with different types of rice – brown sushi rice works well for a heartier, more nutritious version.
Make-Ahead Options
This dish works beautifully for meal prep or entertaining because several components can be prepared in advance. The sushi rice can be cooked and seasoned up to a day ahead and stored, covered, in the refrigerator. Simply bring to room temperature before assembling. The salmon can also be cooked a day ahead and refrigerated. For the freshest result, assemble and bake just before serving, adding the toppings at the last minute. If you do have leftovers, they'll keep in an airtight container in the refrigerator for up to two days – just be sure to store any unused nori separately to maintain its crispness.
 Pin it
Storage Tips
If you find yourself with leftovers, store the sushi bake in an airtight container in the refrigerator for up to two days. The rice will firm up when cold, so when reheating, sprinkle a few drops of water over the top before microwaving to help restore moisture. Always store unused nori sheets in a separate airtight container with a desiccant packet if possible, as exposure to humidity will make them chewy rather than crisp. Fresh toppings like avocado and cucumber are best added just before serving rather than stored with the bake.
I've made countless versions of this Spicy Salmon Sushi Bake over the years, tweaking and perfecting the recipe each time. What began as a social media-inspired experiment has become one of my signature dishes that friends and family regularly request. There's something deeply satisfying about transforming these simple ingredients into something that captures the essence of restaurant sushi while adding my own creative touch. The most rewarding part is watching guests experience that moment of surprise when they take their first bite—the way the warm, creamy filling contrasts with the cool toppings and crisp nori creates an entirely new sushi experience that's both familiar and novel. This dish proves that sometimes the most delicious innovations come from reimagining traditions rather than adhering strictly to them.
Frequently Asked Questions
- → Can I use canned salmon instead of fresh?
- Yes, drained canned salmon works as a convenient substitute. You can skip the cooking step and simply mix it with the cream cheese, mayo, and sriracha. While the flavor won't be identical to fresh cooked salmon, it still creates a delicious dish.
- → Where can I find furikake seasoning?
- Furikake is available at Asian grocery stores, in the international section of many supermarkets, or online. If you can't find it, make your own by mixing toasted sesame seeds, crushed nori (seaweed), a pinch of sugar, and salt.
- → Can I make this dish ahead of time?
- Yes! You can prepare the rice and salmon mixture a day ahead and store separately in the refrigerator. Assemble and bake when ready to serve. The fresh toppings should always be added just before serving.
- → What can I substitute for Kewpie mayonnaise?
- Regular mayonnaise works fine, but to get closer to Kewpie's flavor, add a pinch of MSG (or dashi powder) and a few drops of rice vinegar to regular mayonnaise. You can also use sriracha mayo for extra spice.
- → Is this dish gluten-free?
- It can be! Use tamari or gluten-free soy sauce, and check that your furikake and sriracha don't contain gluten ingredients. All other components are naturally gluten-free.