
 Pin it
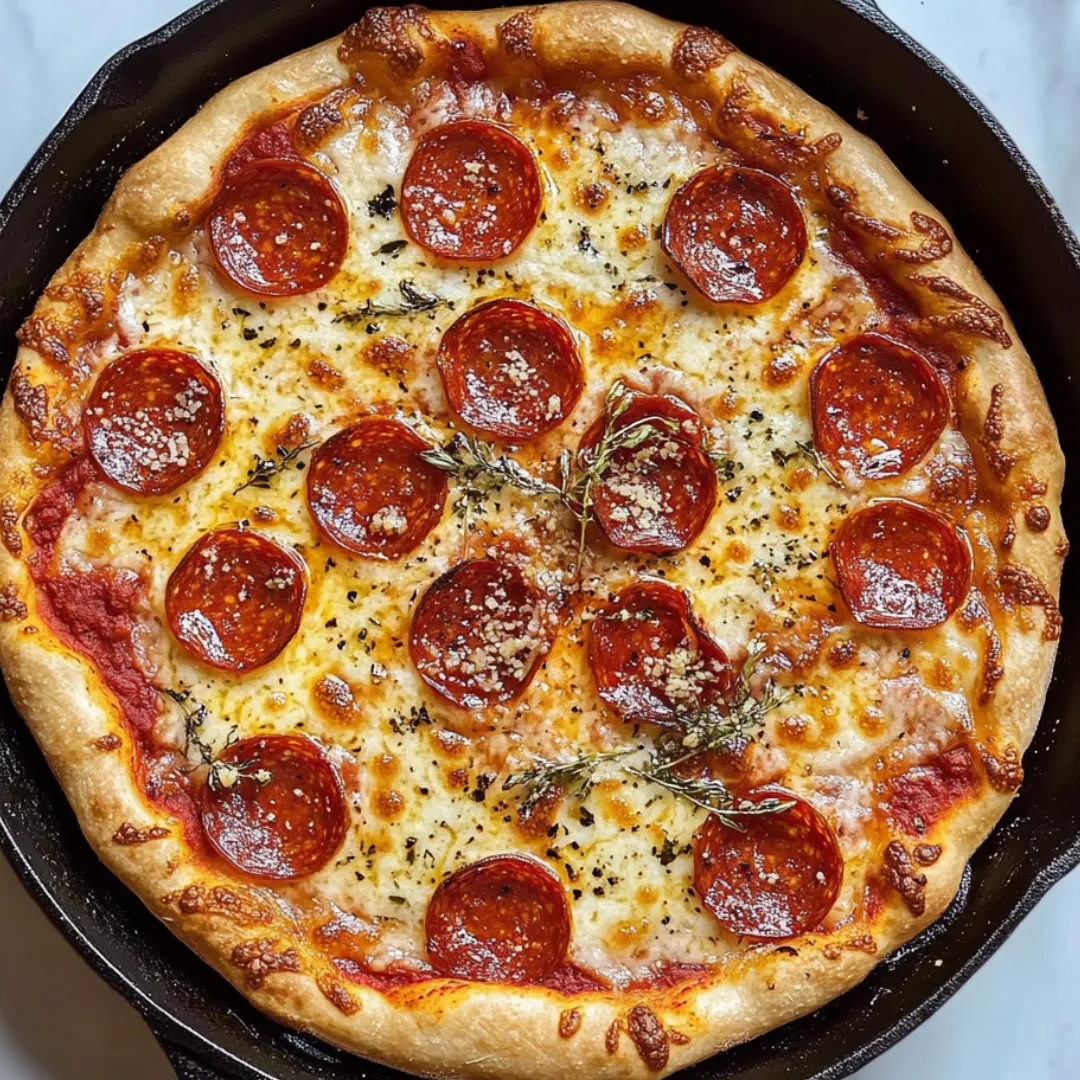
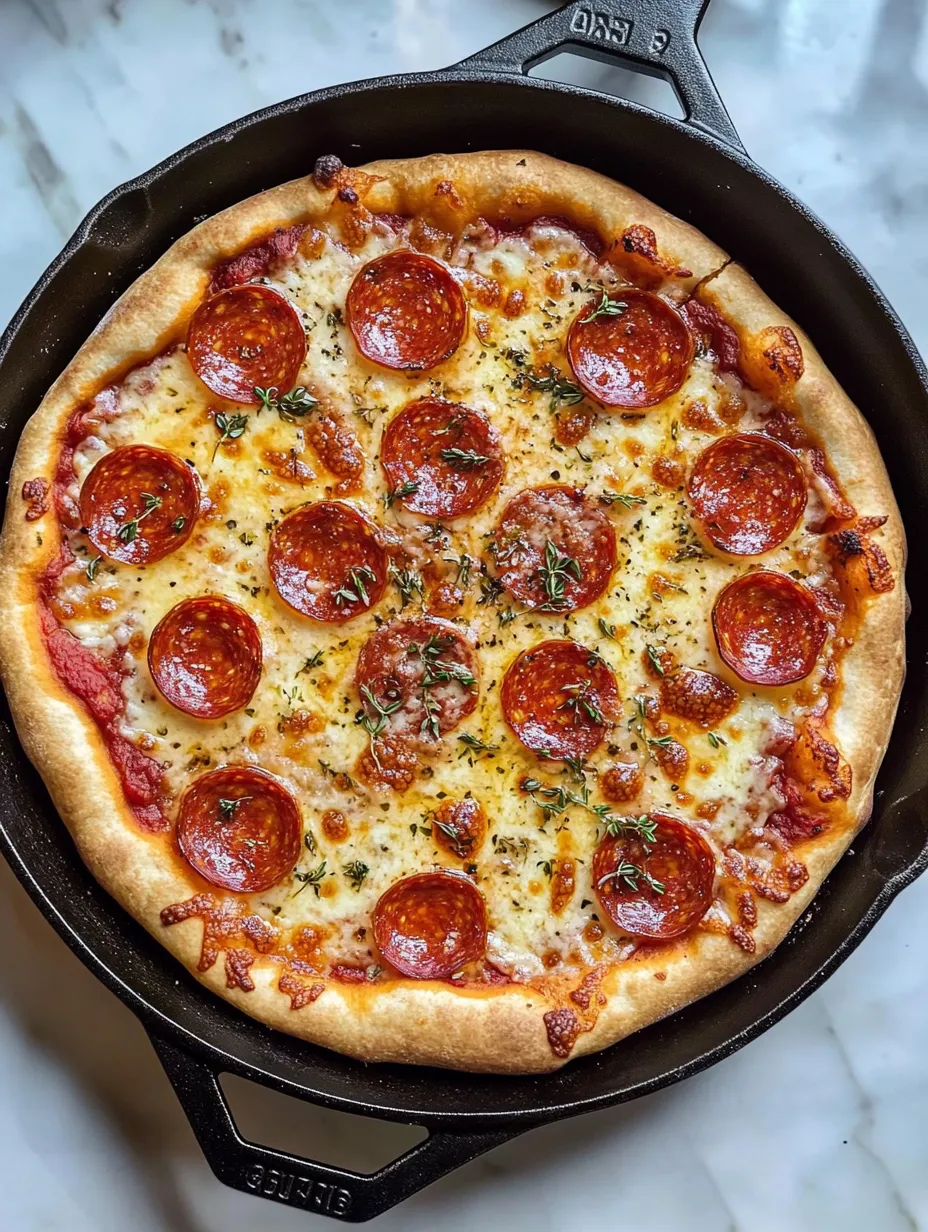
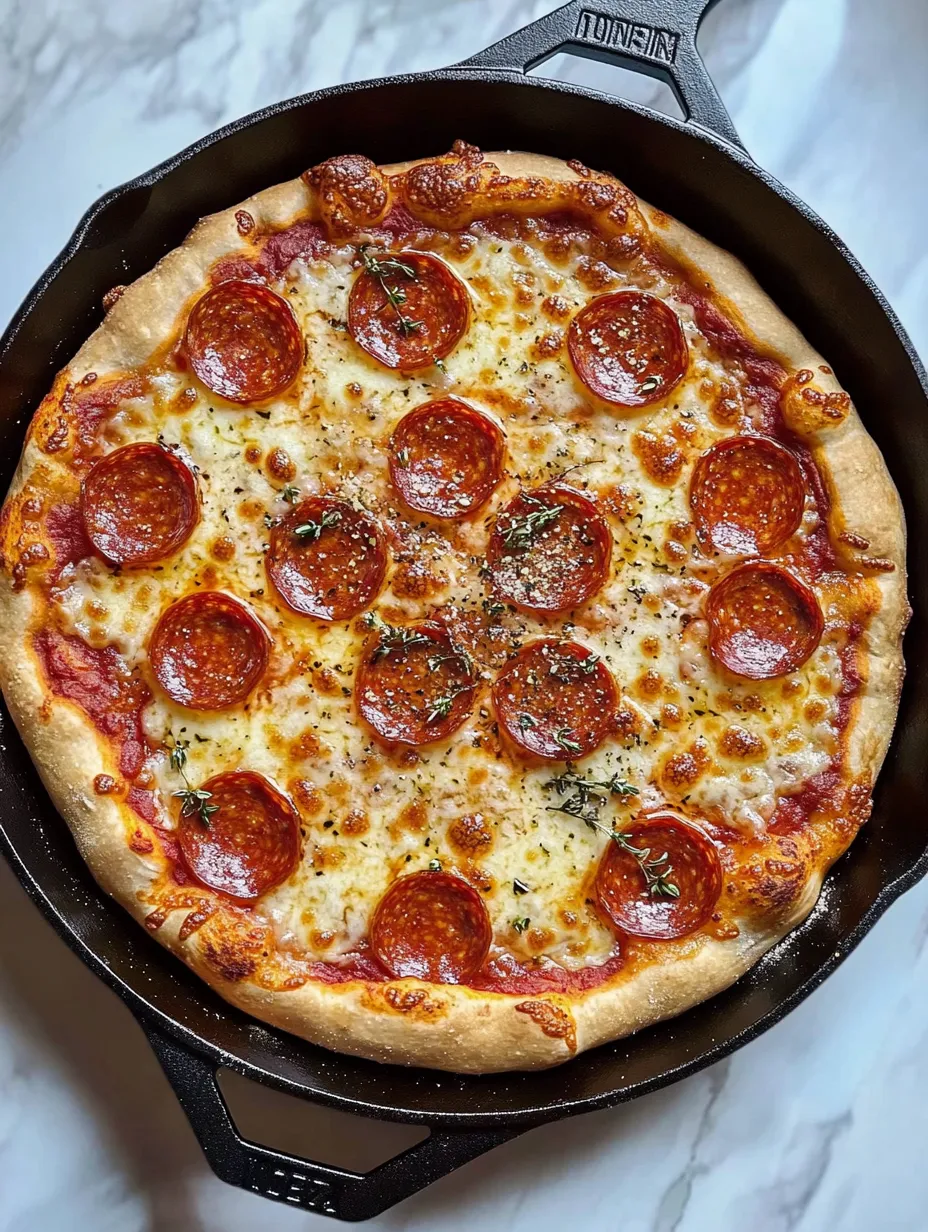
This satisfying homemade pizza delivers the perfect balance of crispy and chewy crust with far less effort than you might expect. The cast iron skillet's excellent heat retention creates a beautifully golden bottom crust while the edges rise tall, puffy, and deliciously browned. Unlike finicky pizza stones that require special techniques and tools, this foolproof method works with either store-bought or homemade dough, making restaurant-quality pizza achievable on any weeknight. The deep sides of the skillet create space for generous toppings without overflow, resulting in a hearty meal that satisfies even the most serious pizza cravings.
I discovered this method during a snowstorm when delivery wasn't an option but our pizza craving was strong. My first attempt using our well-seasoned cast iron skillet was a revelation – the crust developed a crackling exterior with airy pockets throughout, better than our usual takeout. Now Friday is officially pizza night at our house, with everyone taking turns choosing toppings for our skillet masterpiece. Even my mother-in-law, who rarely gives culinary compliments, asked for the recipe after her first bite.
Ingredients You'll Need
- 1 pound Pizza Dough: Either homemade or store-bought works perfectly. Allow it to come to room temperature for easier stretching
- 2 tablespoons Olive Oil: Creates that crispy, golden crust and adds rich flavor. Use a good quality oil for best results
- ½ cup Marinara Sauce: The foundation of your pizza's flavor. Homemade offers superior taste, but a good jarred sauce is perfectly acceptable
- 1½ cups Mozzarella Cheese, shredded: Provides that classic stretchy, gooey cheese pull. Fresh mozzarella or pre-shredded both work well
- Your Favorite Toppings: Pepperoni, Italian sausage, vegetables, or whatever combinations you love. Keep quantities reasonable to prevent a soggy center
- 1 teaspoon Italian Seasoning: Adds aromatic herb flavors throughout the pizza. A blend with oregano, basil, and thyme works best
- ¼ teaspoon Red Pepper Flakes (optional): Adds a pleasant heat that enhances all other flavors
- Fresh Basil Leaves: For garnishing after baking. The heat releases their aromatic oils for an incredible finishing touch
- Cornmeal or Additional Flour: Helps prevent sticking and adds a slight texture to the bottom crust
 Pin it
Step-by-Step Cooking Instructions
- Prepare Your Kitchen for Success:
- Begin by positioning your oven rack in the bottom third of the oven, then preheat to 450°F (230°C). This high temperature is crucial for achieving that perfectly crispy crust. While the oven heats, take your dough out of the refrigerator if you haven't already. Room temperature dough stretches more easily without springing back, saving you frustration and ensuring an even crust. Gather all your toppings and have them ready beside your work area for efficient assembly once the dough is prepared.
- Season Your Skillet:
- Place your cast iron skillet over medium heat on the stovetop for about 1-2 minutes to warm it slightly. This pre-warming step helps prevent sticking and starts the cooking process from below. Remove the skillet from heat and drizzle 1 tablespoon of olive oil into it, using a paper towel or brush to coat the bottom and sides evenly. This oil serves double duty – it prevents sticking while also creating that wonderful crispy exterior on your crust. The heated skillet will help bloom the oil's flavor, enhancing your pizza's taste.
- Shape Your Perfect Crust:
- Gently stretch your room temperature dough into a disk slightly smaller than your skillet. Place it into the oiled skillet and use your fingertips to press and stretch it until it reaches the edges, climbing slightly up the sides. If the dough resists stretching, let it rest for 5 minutes to allow the gluten to relax, then continue. Create a slightly thicker border around the edge for that classic pizza rim. Use your fingertips to make small dimples across the surface of the dough – these will catch little pools of sauce and oil, adding flavor throughout.
- Build Your Flavor Foundation:
- Brush the remaining tablespoon of olive oil across the surface of the dough, paying special attention to the edges which will become beautifully golden during baking. Sprinkle half of your shredded mozzarella directly onto the dough – this base layer of cheese acts as a barrier, protecting the crust from moisture in the sauce and preventing sogginess. Next, spoon your marinara sauce over the cheese in an even layer, spreading it to about half an inch from the edge. This arrangement (cheese first, then sauce) may seem unconventional, but it's the secret to a perfectly crispy yet chewy crust.
- Add Personalized Toppings:
- Sprinkle the remaining mozzarella over the sauce, then add your chosen toppings in an even layer. Be careful not to overload – too many toppings can release excess moisture and prevent proper cooking. If using raw meat toppings like Italian sausage, pre-cook them before adding to ensure food safety and to prevent grease from making the pizza soggy. Dust the entire pizza with Italian seasoning and red pepper flakes if desired, which will bloom in the hot oven and infuse the entire pizza with their flavors.
- Master the Two-Stage Cooking Process:
- Place the skillet on the stovetop over medium-high heat and cook for 2-3 minutes. This head start crisps the bottom crust before the pizza goes into the oven. You'll know it's ready for the oven when the edges of the dough begin to look set and tiny bubbles start to form in the dough. Transfer the hot skillet to your preheated oven and bake for 15-18 minutes, until the cheese is bubbly and the crust is deeply golden brown. The edges should rise dramatically and take on a beautiful color.
- Finish with Flair:
- Once your pizza is perfectly baked, carefully remove the hot skillet from the oven using thick oven mitts. Let it rest in the skillet for 2 minutes – this brief resting period allows the cheese to set slightly, making the pizza easier to slice and serve. Transfer the pizza to a cutting board and garnish with fresh torn basil leaves and a light drizzle of olive oil if desired. Cut into slices with a sharp knife or pizza wheel and serve immediately while the cheese is still stretchy and the crust maintains its perfect texture.
I learned the importance of the stovetop-to-oven method through trial and error. My first attempt went straight into the oven, resulting in a perfectly cooked top but slightly underdone bottom. The game-changer was adding that brief stovetop pre-cook, which ensures the bottom crust gets a head start. Now I never skip this step – it's the difference between good pizza and great pizza. My family can immediately tell when I've rushed this part, as the texture and flavor development are noticeably diminished.
Topping Combinations That Shine
While pepperoni is always a crowd-pleaser, the cast iron method really shines with more creative combinations. Try a white pizza with ricotta base, topped with sautéed mushrooms, caramelized onions, and fresh thyme. For a seasonal summer special, nothing beats fresh corn, cherry tomatoes, and basil with a light sprinkle of feta. In fall, try roasted butternut squash with sage, brown butter, and crispy pancetta. The sturdy skillet can handle heartier toppings that might collapse a thin-crust pizza, opening up endless possibilities for experimentation.
Troubleshooting Common Issues
If your dough is too elastic and keeps shrinking back as you try to stretch it, let it rest covered at room temperature for 15-20 minutes before trying again. For a pizza that's browning too quickly on top but still doughy in the center, tent it loosely with foil for the remaining cooking time. If your crust ends up too soft on the bottom despite following the stovetop step, your skillet may not have been hot enough initially. Next time, let the empty skillet heat for 3-4 minutes before adding the dough.
Make-Ahead Options
Prepare components in advance for even easier pizza nights. Make and refrigerate dough up to 3 days ahead (or freeze for longer storage), just bring to room temperature before using. Pre-cook and refrigerate meat toppings, and pre-shred cheese to streamline assembly. You can even pre-bake the crust alone for 5 minutes, cool completely, then top and finish baking later – perfect for busy weeknights when every minute counts.
Creating a Pizza Bar Experience
Transform your next gathering with a cast iron pizza bar. Prepare several dough balls and set out an array of sauces and toppings. Guests can build personal pizzas that cook one after another, creating an interactive dining experience. Keep the first skillets going while others are being prepared, rotating through your collection if you have multiple cast iron pans. This approach turns dinner into an event while ensuring everyone gets exactly the pizza they crave.
 Pin it
Secrets to the Crispiest Crust
For an even crispier bottom crust, sprinkle a thin layer of grated parmesan directly into the oiled skillet before adding your dough. The cheese will create a flavorful, crispy layer on the bottom of your pizza. Another professional trick is to finish very wet toppings (like fresh mozzarella) under the broiler for the last minute of cooking to quickly evaporate excess moisture without overcooking the crust.
I discovered my favorite technique by happy accident when I ran out of space in my refrigerator and had to leave my dough out longer than planned. The extra-long room temperature rest made the dough incredibly easy to work with and created the most wonderful texture. Now I deliberately give my dough at least an hour at room temperature before stretching. These kinds of serendipitous discoveries are what make home cooking so rewarding – sometimes what seems like a mistake leads to your new signature technique!
Frequently Asked Questions
- → Why put cheese under the sauce?
- Putting cheese under the sauce helps prevent the crust from getting soggy. The cheese creates a barrier between the dough and the moisture from the sauce.
- → Can I use homemade pizza dough instead?
- Absolutely! Homemade pizza dough works great. Just make sure it's at room temperature before stretching it into the pan.
- → What size cast iron skillet works best?
- A 10-12 inch cast iron skillet is ideal for this recipe. If using a different size, you may need to adjust the amount of dough and cooking time.
- → Why is my pizza sticking to the pan?
- Make sure to oil the pan generously before adding the dough. If it still sticks, try preheating the oiled pan for a few minutes before adding the dough.
- → What are the best toppings for skillet pizza?
- Classic toppings like pepperoni, sausage, bell peppers, and onions work great. Just avoid very wet ingredients which can make the pizza soggy.