
 Pin it
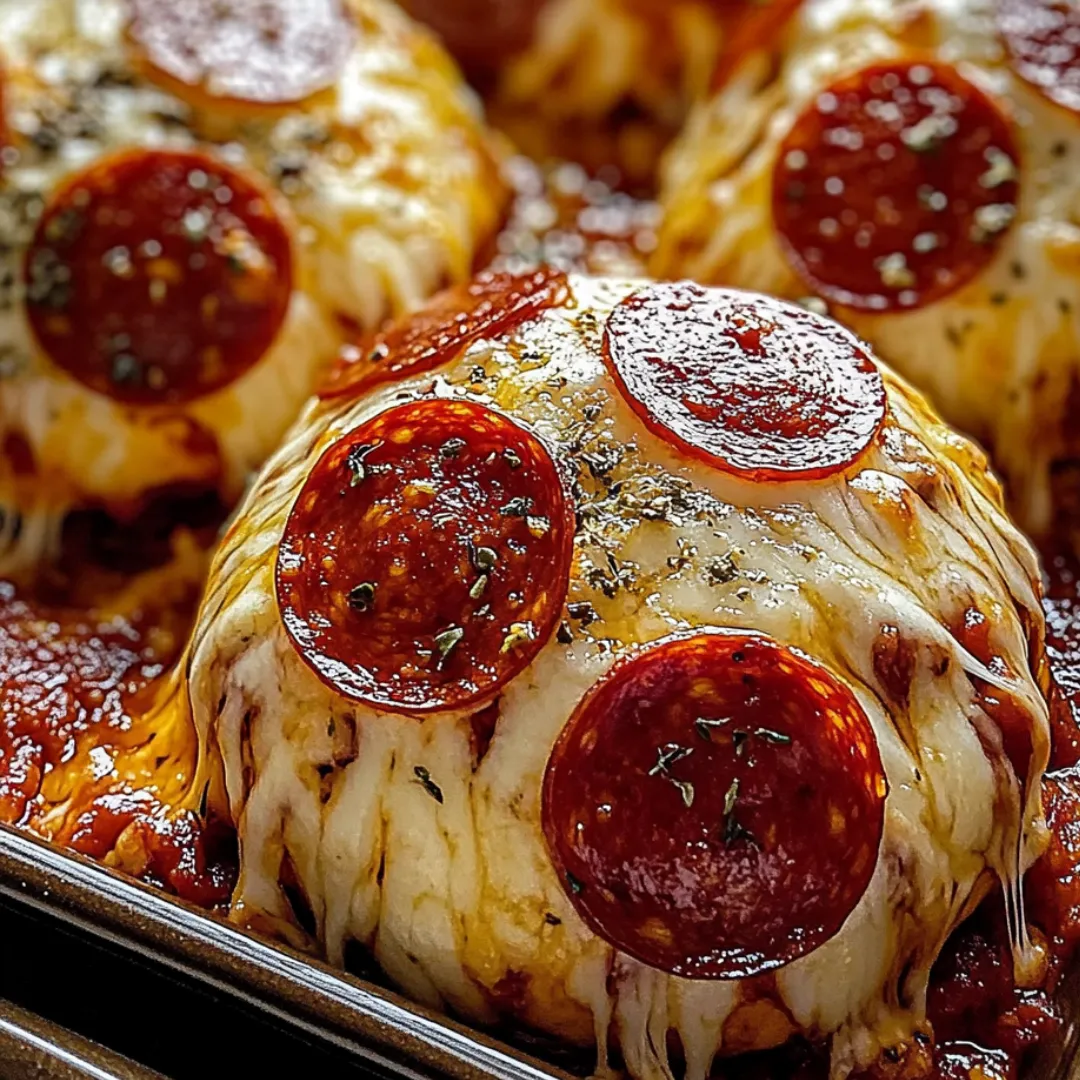
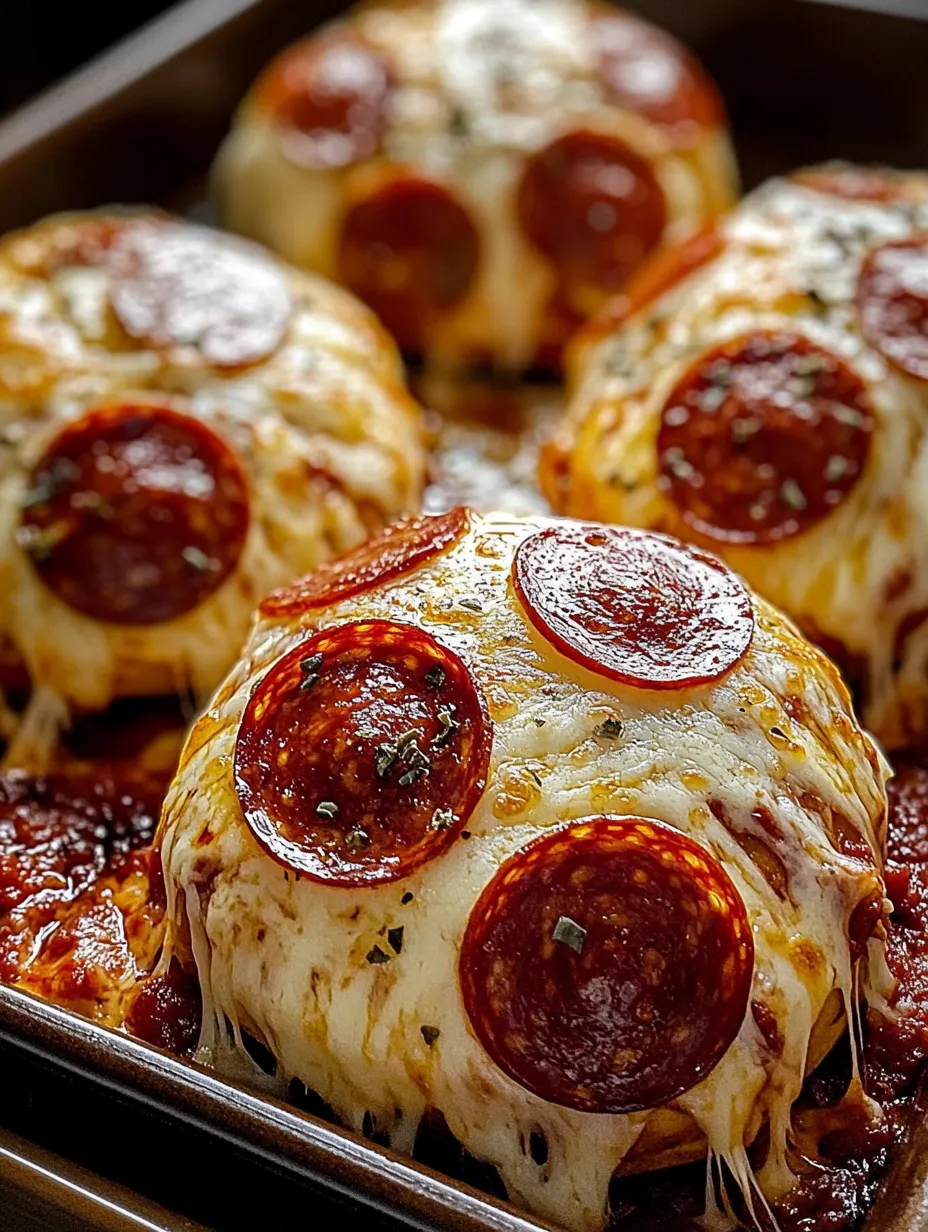
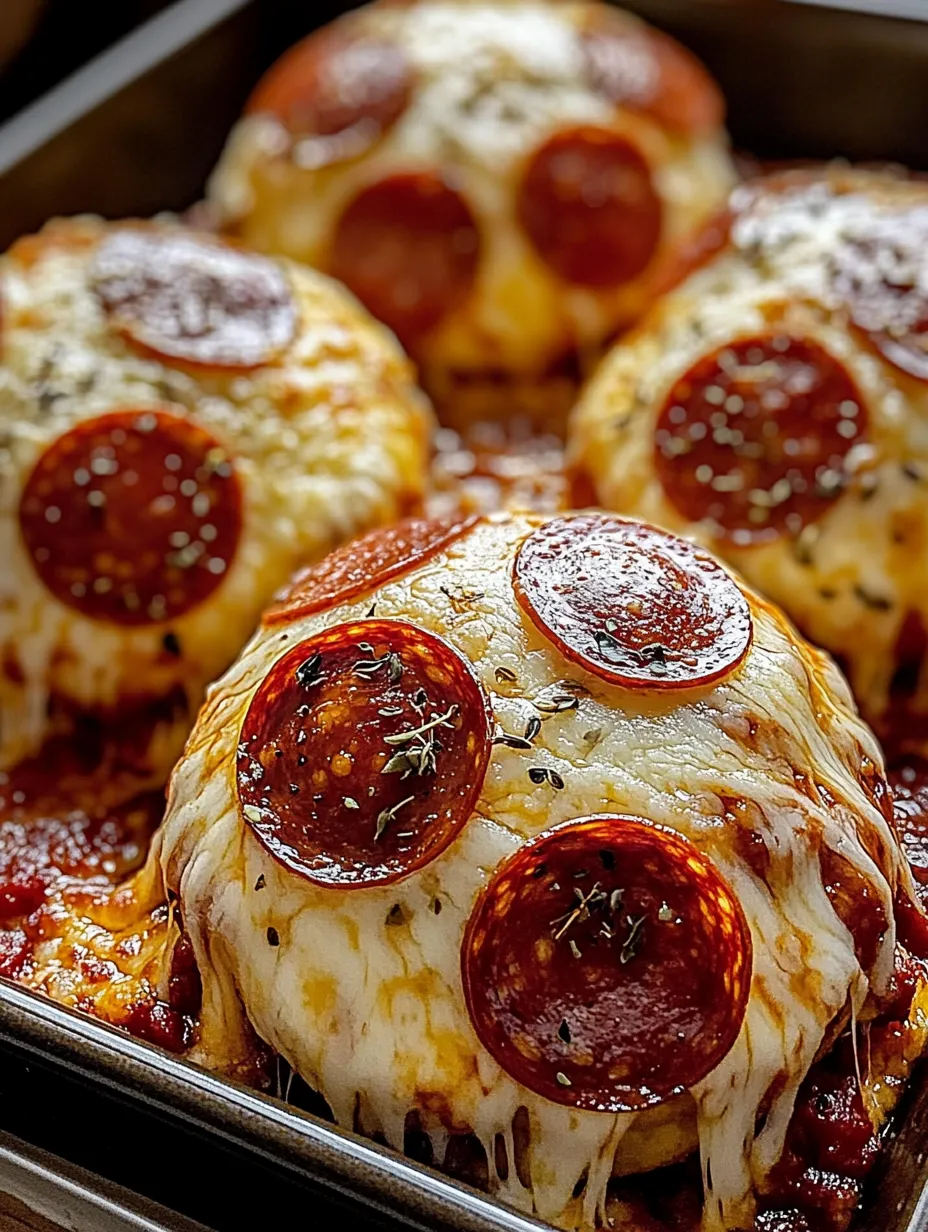
These cheesy pepperoni pizza bombs deliver all the flavors of your favorite pizza in a fun, poppable form that's perfect for snacking, entertaining, or an easy weeknight dinner. The magic happens when you bite into one – the golden, buttery exterior gives way to a molten center of gooey cheese and savory pepperoni wrapped in pillowy dough. Unlike traditional pizza, these handheld delights contain the perfect ratio of crust to filling in every bite, with no droopy slices or toppings sliding off. They're incredibly versatile, too – customize them with your favorite pizza toppings for a personalized twist that everyone will love.
I first created these pizza bombs when hosting a game night where I needed something delicious that wouldn't distract from the competition. The moment I brought out the first batch, the room fell silent except for the sounds of appreciative munching. My friend Mark, who claims to be a pizza purist, reluctantly tried one – then immediately asked for the recipe. What started as a practical solution has become my most-requested contribution to gatherings. Even my picky nephew, who normally picks apart his food, devours these without hesitation.
Ingredients You'll Need
- 1 package Pizza Dough (store-bought or homemade): Forms the pillowy exterior that holds all the goodness inside. Refrigerated pizza dough works beautifully, but crescent roll or biscuit dough can substitute in a pinch.
- 2 cups Mozzarella Cheese, shredded: Creates that perfect stretchy, gooey center. Freshly shredded melts more smoothly than pre-shredded varieties.
- 1 cup Pepperoni Slices, chopped: Provides savory, spicy flavor in every bite. Mini pepperoni can be used whole for convenience.
- 1 cup Pizza Sauce (plus extra for dipping): Adds moisture and classic pizza flavor. Choose a thicker sauce to prevent leakage.
- 2 tablespoons Butter, melted: Creates a golden, flavorful exterior when brushed on top before baking.
- 1 teaspoon Italian Seasoning: Infuses the bombs with authentic Italian herbs. A blend containing oregano, basil, and thyme works best.
- 1/2 teaspoon Garlic Powder: Adds depth and savory notes that complement the cheese and pepperoni.
- 2 tablespoons Parmesan Cheese, grated: Sprinkled on top for an extra layer of flavor and beautiful golden-brown finish.
 Pin it
Step-by-Step Cooking Instructions
- Prepare Your Workspace:
- Preheat your oven to 375°F (190°C) and line a baking sheet with parchment paper for easy cleanup. Dust your counter or cutting board lightly with flour to prevent sticking when working with the dough. Set up a small station with your filling ingredients within reach so you can work efficiently. Having everything prepared and accessible will make the assembly process much smoother and prevent the dough from warming up too much while you work.
- Prepare the Dough:
- On your floured surface, roll out the pizza dough to about 1/4 inch thickness. Using a sharp knife or pizza cutter, divide the dough into approximately 16 equal squares, roughly 2x2 inches each. Don't worry if they're not perfectly uniform - rustic edges add character! If using refrigerated dough that comes in sheets, simply unroll and cut as directed. For biscuit dough, flatten each biscuit with your palm or a rolling pin until it's about 3 inches in diameter.
- Create the Perfect Filling:
- In the center of each dough square, place a small spoonful (about 1 teaspoon) of pizza sauce - be careful not to use too much or it will seep out during baking. Top the sauce with a generous pinch of shredded mozzarella (about 1 tablespoon) and a few pieces of chopped pepperoni (about 2-3 pieces). The key is finding the right balance - you want enough filling to make each bite satisfying but not so much that you can't properly seal the dough.
- Master the Sealing Technique:
- Working with one dough square at a time, carefully bring all four corners up to meet in the center above the filling. Pinch these corners together firmly, then work your way around the edges, pinching and sealing until you have a completely enclosed ball with no openings where cheese could escape. Roll the sealed ball gently between your palms to create a smooth, even shape and reinforce the seal. Place each completed pizza bomb seam-side down on your prepared baking sheet, spacing them about 2 inches apart to allow room for expansion.
- Add the Finishing Touches:
- In a small bowl, combine the melted butter with garlic powder and a pinch of the Italian seasoning. Using a pastry brush, generously coat the top of each pizza bomb with this seasoned butter mixture. The butter will help the outside achieve a beautiful golden color while adding flavor. Sprinkle the tops with the grated Parmesan cheese and remaining Italian seasoning, which will create a delicious crust as they bake and add visual appeal to the finished bombs.
- Bake to Golden Perfection:
- Place the baking sheet in your preheated oven and bake for 12-15 minutes, or until the pizza bombs are puffed up and golden brown on top. The exact timing will depend on your oven and the thickness of your dough, so start checking at the 10-minute mark. You'll know they're done when the exterior is firm and golden, with perhaps a few spots where cheese might have bubbled through - these 'cheese explosions' are actually delicious crispy bits that add texture contrast.
- Serve While Hot:
- Remove the baking sheet from the oven and allow the pizza bombs to cool for just 2-3 minutes - they're best enjoyed while the centers are still molten, but you want to avoid burning mouths with too-hot cheese. Transfer them to a serving platter and provide small bowls of warm pizza sauce for dipping. The contrast between the crisp, buttery exterior and the gooey, savory interior is at its peak when served fresh from the oven. If serving as a meal, pair with a simple green salad for balance.
You Must Know
- Dough Temperature Matters - Cold dough is easier to work with and seals better than room temperature dough.
- Strategic Filling - Place fillings in the center of each square, away from edges, for easier sealing.
- Watch for Steam Escape - Poke a tiny hole in the top of each bomb with a toothpick to prevent explosion during baking.
I learned about the importance of properly sealing these pizza bombs through a memorable kitchen disaster. During one of my first attempts, I rushed the sealing process and thought a quick pinch would suffice. Halfway through baking, I heard a series of popping sounds and opened the oven to find cheese volcanoes erupting all over my baking sheet! Now I take extra time to ensure each bomb is completely sealed and place them seam-side down, which has eliminated any cheese eruptions and made cleanup much easier.
Beyond Basic Pizza Bombs
While the classic pepperoni version is always a hit, these versatile little packages can be adapted to suit any taste preference. Try a vegetarian version with sautéed mushrooms, bell peppers, and onions (just make sure to pre-cook and cool these vegetables to remove excess moisture). For meat lovers, substitute the pepperoni with cooked Italian sausage, bacon bits, or diced ham. Buffalo chicken pizza bombs are another popular variation – simply toss shredded rotisserie chicken with buffalo sauce before adding it to the filling. For a breakfast twist, fill them with scrambled eggs, cheese, and breakfast sausage.
Make-Ahead and Storage Options
These pizza bombs are perfect for preparing in advance. You can assemble them up to 24 hours before baking and store them covered in the refrigerator – just brush with the butter mixture right before they go in the oven. For longer storage, freeze the assembled but unbaked bombs on a baking sheet until solid, then transfer to a freezer bag for up to three months. When ready to enjoy, bake directly from frozen, adding about 5-7 minutes to the baking time. Leftover baked pizza bombs can be refrigerated for up to three days and reheated in a 350°F oven for 5-10 minutes or until heated through.
Perfect Pairings
While these pizza bombs are substantial enough to serve as a meal on their own, they also pair beautifully with complementary sides. A crisp Caesar or Italian salad provides fresh contrast to the rich, cheesy bombs. For a heartier meal, serve alongside a cup of tomato soup for a pizza-and-soup combo that rivals the classic grilled cheese pairing. If serving as party food, arrange them on a platter with other finger foods like mozzarella sticks, garlic knots, or chicken wings for an irresistible game day spread.
 Pin it
Troubleshooting Tips
If you find your pizza bombs leaking during baking, the culprit is usually overfilling or inadequate sealing. Next time, use slightly less filling and take extra care to pinch all seams completely closed. If your bombs are browning too quickly on top but still doughy inside, cover them loosely with aluminum foil for the remainder of the baking time. For bombs that are cooked through but lack color, brush with additional butter and broil for 1-2 minutes (watching carefully to prevent burning).
The first time I brought these to my neighborhood block party, I was stunned by how quickly they disappeared. Three neighbors asked for the recipe on the spot, and one confessed to sneaking four of them before dinner was even served! There's something about the combination of familiar pizza flavors in this fun, handheld format that makes them irresistible to people of all ages. I've since gained a reputation as the 'pizza bomb lady' at community gatherings – a title I wear with pride as I watch people's faces light up when they spot my signature platter coming their way.
Frequently Asked Questions
- → Can I make these pizza bombs ahead of time?
- Yes! You can assemble them ahead of time and refrigerate until ready to bake. You may need to add 2-3 minutes to the baking time if cooking from cold. You can also fully bake them and reheat at 350°F for 5-7 minutes.
- → What can I use instead of refrigerated biscuit dough?
- You can use pizza dough, crescent roll dough, or even homemade bread dough. The texture will vary slightly, but they'll still be delicious. Just adjust cooking time as needed.
- → How do I prevent the cheese from leaking out?
- Make sure to completely seal the dough by pinching all seams tightly. Place the bombs seam-side down on the baking sheet. Also, don't overstuff them with cheese and sauce.
- → Can I freeze these pizza bombs?
- Yes! Bake them completely, let cool, then freeze in a single layer. Once frozen, transfer to a freezer bag. Reheat from frozen in a 350°F oven for 10-15 minutes until heated through.
- → What other fillings can I use?
- Get creative with fillings like cooked sausage, ham, bacon, mushrooms, olives, or bell peppers. Just make sure any meat is pre-cooked and vegetables are finely diced to ensure everything cooks properly.