
 Pin it
This Thai-inspired peanut chicken transforms the crockpot from a simple kitchen appliance into a magic pot of aromatic wonders. The tender chicken bathes in a creamy peanut sauce that balances sweet, savory, and spicy notes in perfect harmony. I discovered this recipe during a particularly busy month and it quickly became my weeknight salvation – the kind of meal that cooks itself while filling the house with an irresistible fragrance that makes waiting for dinner the hardest part.
I first made this for my sister when she visited with her picky eaters, and even they cleaned their plates. Something about the creamy peanut sauce won them over completely. I've never seen them so excited about trying something new!
Key Ingredients
- Boneless chicken thighs or breasts: Thighs deliver more moisture and richness, while breasts offer a leaner option that still becomes wonderfully tender.
- Natural peanut butter: The foundation of our sauce, providing creaminess and that distinctive nutty depth that makes this dish special.
- Full-fat coconut milk: Creates the silky texture we're after; light coconut milk simply won't deliver the same luxurious mouthfeel.
- Fresh lime juice: Brightens everything with essential acidity that balances the richness of the peanut butter and coconut milk.
- Fresh ginger and garlic: These aromatic powerhouses infuse the sauce with warm, complex notes that can't be replicated with powdered versions.
- Brown sugar: Just enough to enhance the natural sweetness of the coconut milk and balance the savory elements.
- Soy sauce or tamari: Provides that crucial umami foundation that makes this dish impossible to resist.
 Pin it
Step-by-Step Cooking Instructions
- Prepare your flavor base:
- In a medium bowl, whisk together 1/2 cup natural peanut butter, 1 can (13.5 oz) full-fat coconut milk, 3 tablespoons soy sauce, juice from 1 fresh lime, 4 minced garlic cloves, 1 tablespoon freshly grated ginger, 2 tablespoons brown sugar, and 1-2tablespoons sriracha (depending on your heat preference) until completely smooth and velvety. Take your time with this step – a well-emulsified sauce will coat the chicken more evenly.
- Prepare your protein:
- Place 2 pounds of boneless chicken pieces in the crockpot. Some people prefer larger chunks while others like smaller pieces – either works perfectly as long as they're roughly uniform in size for even cooking. I sometimes sprinkle with a bit of salt and pepper, though the sauce provides plenty of seasoning.
- Combine and cook:
- Pour your fragrant peanut mixture over the chicken, ensuring every piece gets thoroughly coated. This initial coating is crucial for flavor development throughout the long cooking process. Cover with the lid and set your crockpot to low for 6-8 hours or high for 3-4 hours. The longer, slower cook tends to yield more tender results.
- Check for doneness:
- About halfway through cooking, gently stir if possible to redistribute the sauce. The chicken is ready when it's tender enough to shred easily with two forks and registers 165°F on a meat thermometer.
- Shred and serve:
- Using two forks, gently pull the chicken apart into bite-sized pieces right in the crockpot. This allows the shredded meat to absorb even more of that delicious sauce. Let it sit in the sauce for another 10-15 minutes after shredding for maximum flavor absorption.
Creating a Complete Meal Experience
The beauty of this dish lies in its versatility. Serve it over fragrant jasmine rice to soak up the savory sauce, creating an indulgent meal experience. For a lighter option, pair it with steamed vegetables like broccoli or bok choy, which complement the rich peanut sauce beautifully.
When entertaining guests, I create a Thai-inspired buffet with this chicken as the centerpiece. Small bowls of toppings like crushed peanuts, sliced green onions, fresh cilantro, and extra sriracha allow everyone to customize their plates. The interactive nature of the meal always sparks conversation.
Making It Your Own
This recipe welcomes adaptations based on what you have available. No lime? Lemon works in a pinch. Out of fresh ginger? Use 1 teaspoon ground ginger instead, though the flavor won't be quite as vibrant. For a more robust version, add a tablespoon of fish sauce to the peanut mixture – it adds incredible depth.
For a more substantial one-pot meal, consider adding vegetables during the last 30-60 minutes of cooking. Bell peppers, snap peas, and thinly sliced carrots hold their texture while absorbing the flavors of the sauce. When I'm feeding a crowd, this trick helps stretch the dish while adding color and nutritional value.
My grandmother always cooked with ginger, claiming it was nature's medicine. When I was growing up, she would make a simple chicken and ginger soup whenever someone felt under the weather. This Thai peanut chicken reminds me of her wisdom – combining flavor with wellness in every bite. While she never made this exact dish, I think she would have appreciated the way it incorporates her favorite healing ingredient.
 Pin it
Storage and Meal Prep
This dish actually improves with time as the flavors continue to meld and develop overnight. Store leftovers in airtight containers in the refrigerator for up to four days, or freeze portions for up to three months. The sauce might thicken when chilled – simply add a splash of water or coconut milk when reheating.
I often double the recipe specifically to have planned leftovers. The second day, I might serve it over zucchini noodles for a lower-carb option. By the third day, any remaining chicken gets stuffed into whole wheat pitas with crisp vegetables for a fusion-inspired sandwich that's perfect for lunch.
The technique that completely transformed this recipe for me was learning to use a two-stage cooking method when serving a crowd. I now sear the chicken on both sides until just golden, then transfer them to a 350°F oven to finish cooking through. This allows me to cook all the chicken in advance and keep them warm without overcooking, so everyone can enjoy hot, crispy chicken at the same time. It's made entertaining with this signature dish so much less stressful and more enjoyable for both me and my guests.
Frequently Asked Questions
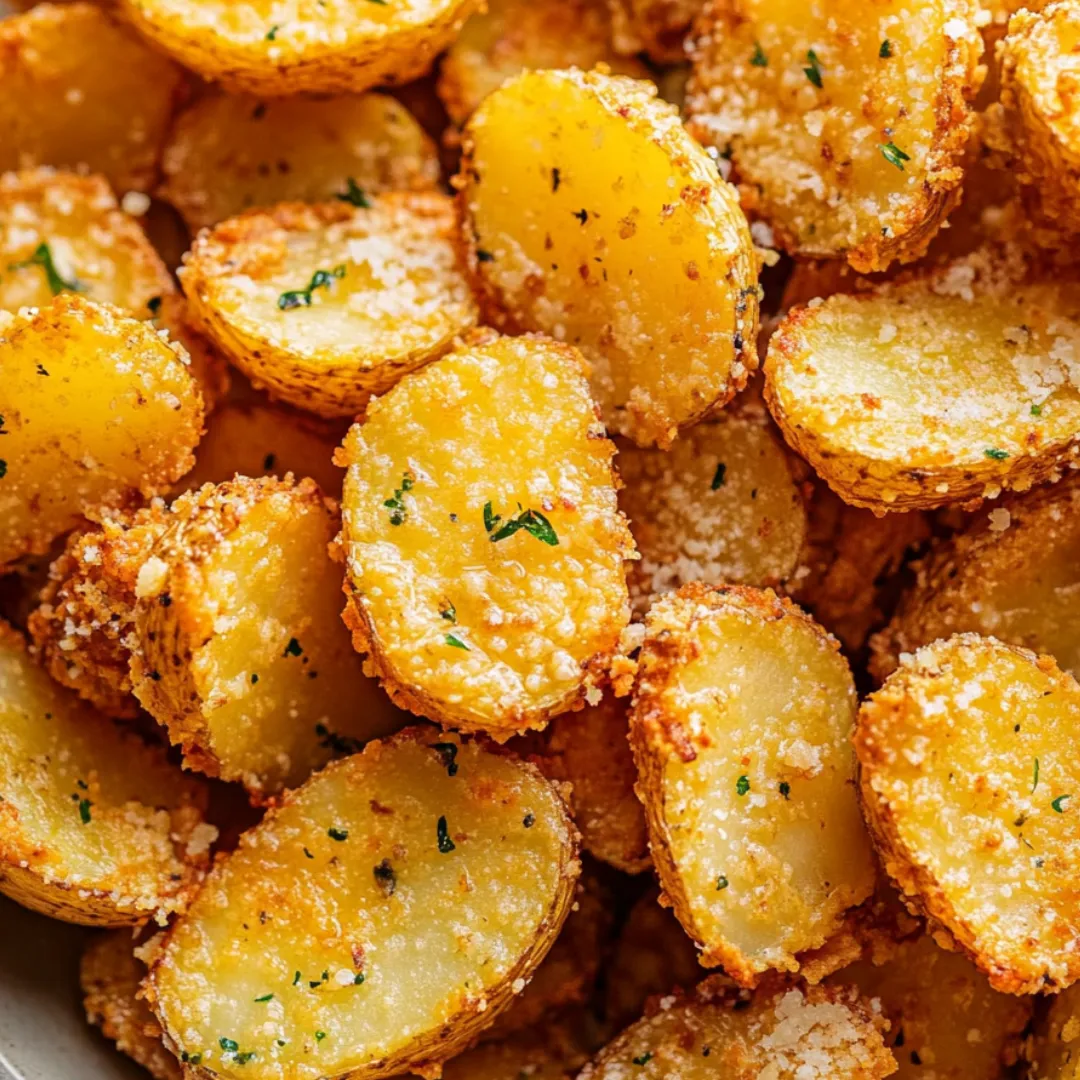
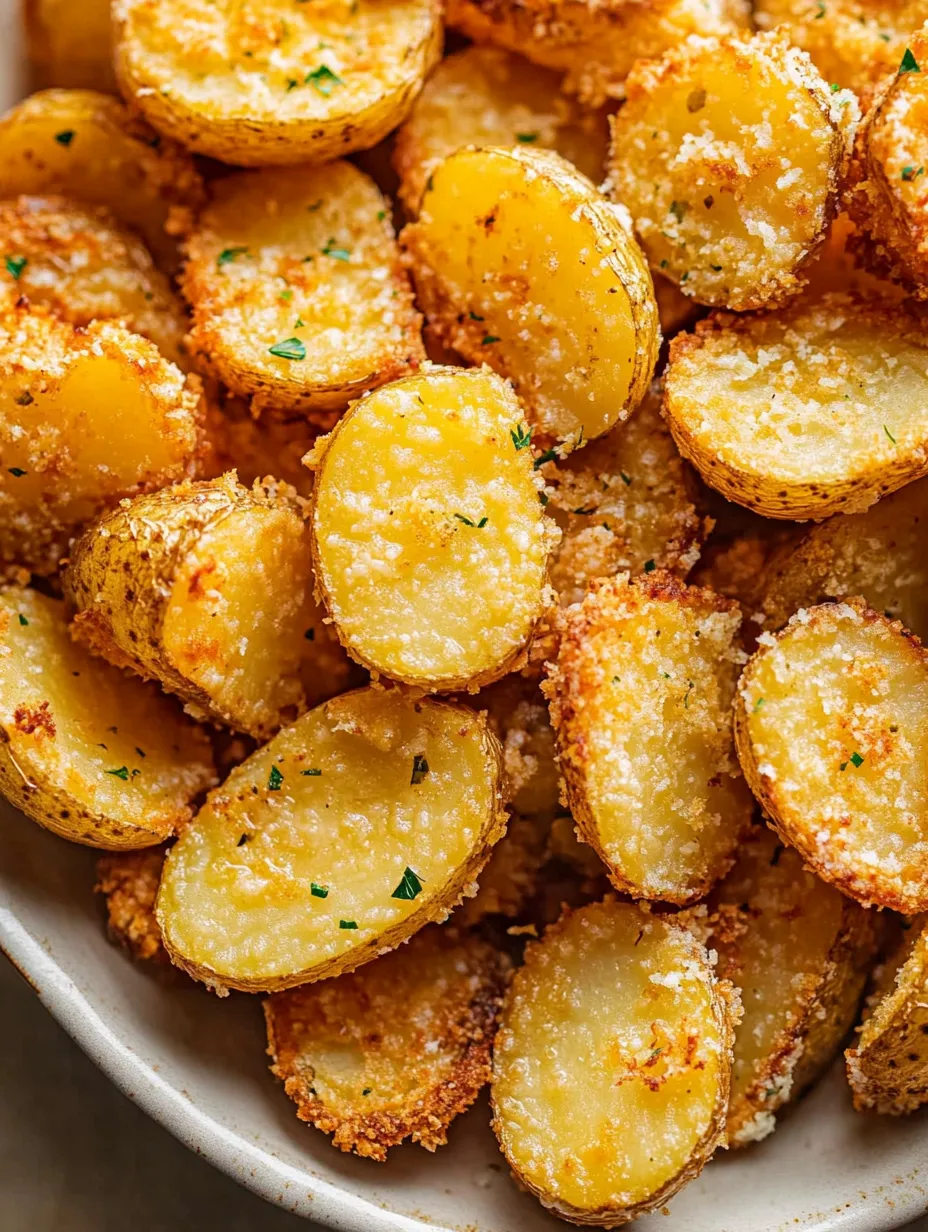
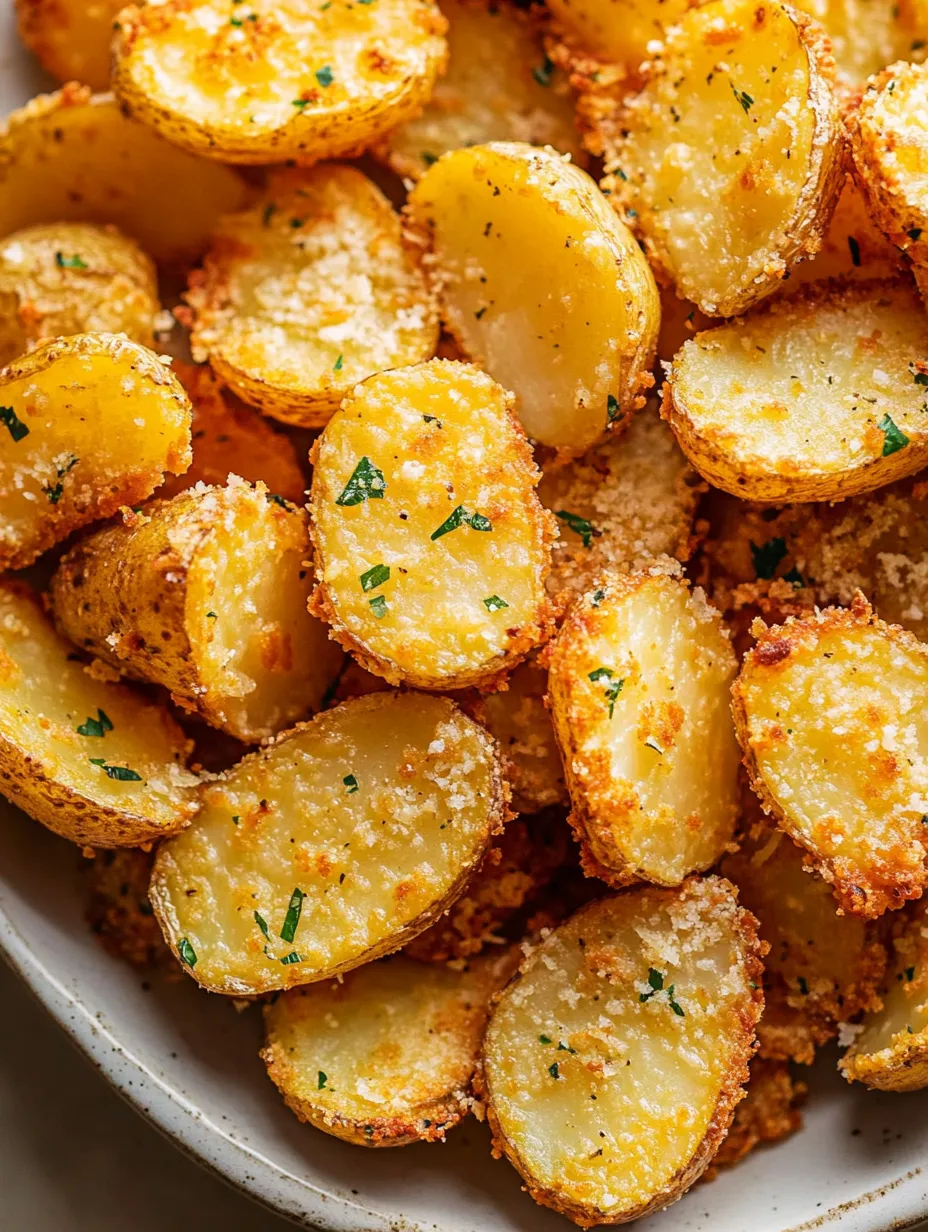
- → Can I use different types of potatoes?
- Yes, red potatoes work well too. Russets can work but may not hold their shape as well as waxy varieties.
- → Why score the potatoes?
- Scoring creates more surface area to absorb flavors and helps the potatoes cook more evenly.
- → Can I make these ahead?
- They're best fresh, but can be reheated in a 350°F oven for 10-15 minutes. The crust won't be quite as crispy.
- → What can I serve with these potatoes?
- They pair perfectly with grilled meats, roasted chicken, or as part of a vegetarian meal with a salad.
- → Why isn't my Parmesan crust sticking?
- Make sure to press potatoes firmly into the cheese layer and let them rest 5 minutes after baking before removing.