
 Pin it
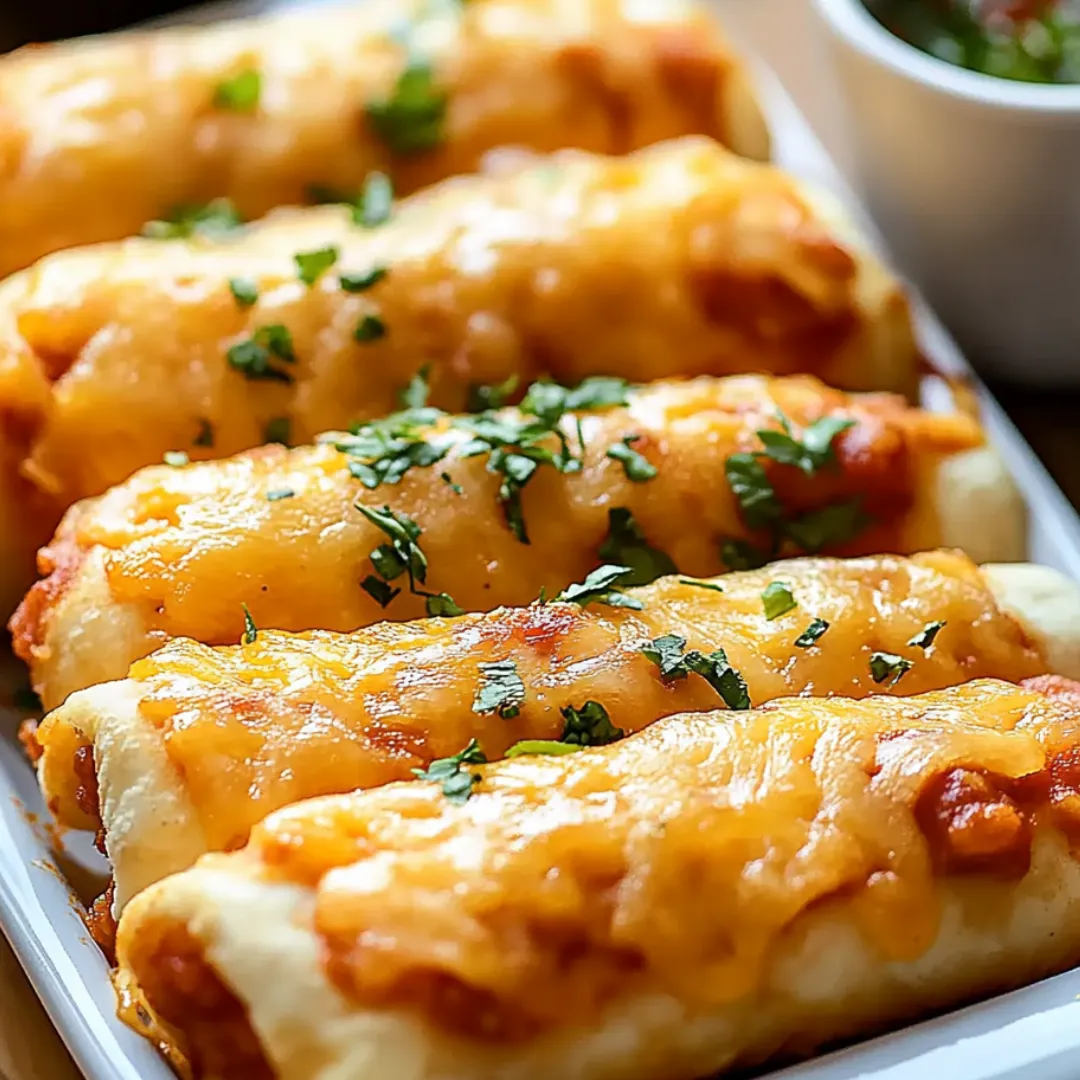
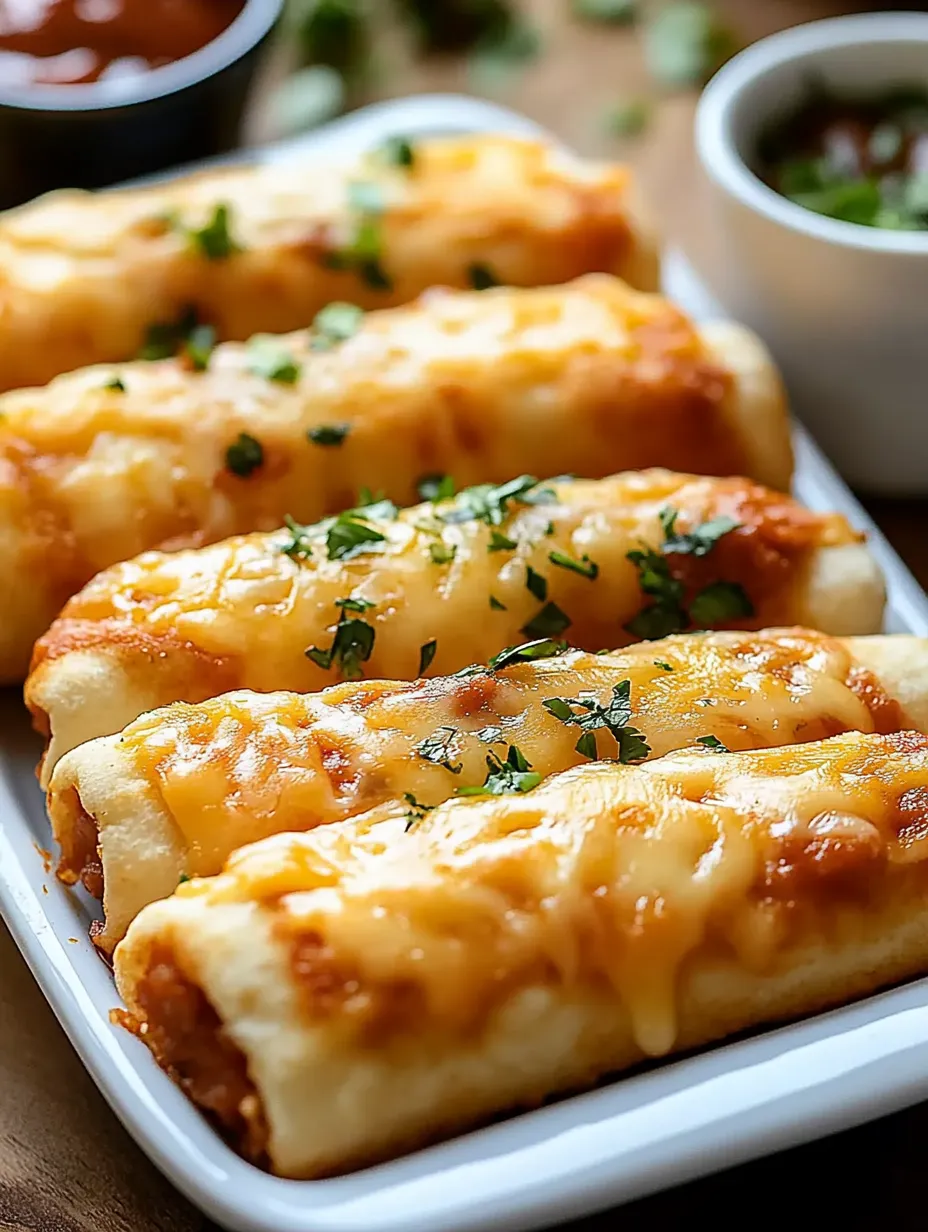
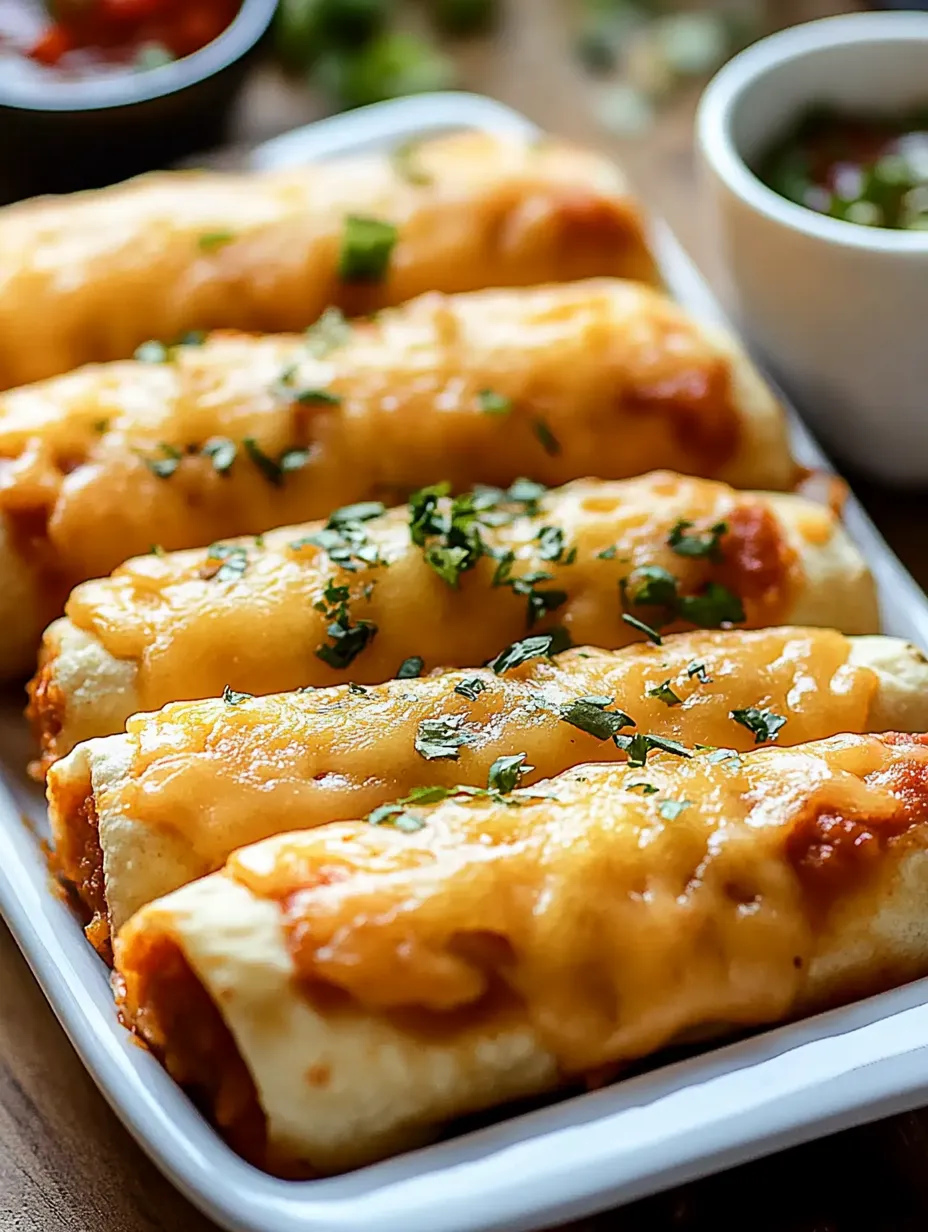
These cheesy taco sticks combine all the beloved flavors of traditional tacos in a convenient, hand-held form that eliminates the mess of regular tacos while maximizing the deliciousness. The crispy, golden exterior gives way to a savory interior where seasoned ground beef and melted cheese create the perfect bite every time. Unlike regular tacos that can fall apart with the first bite, these tightly wrapped delights keep all the flavorful filling securely contained, making them perfect for everything from game day gatherings to weeknight dinners. The transformation of simple ingredients into these irresistible sticks proves that comfort food doesn't need to be complicated to be extraordinary.
I created this recipe during football season when I needed something that could be eaten without taking eyes off the game. The first time I served these taco sticks, they disappeared before halftime – even the 'I'm-not-hungry' teenagers devoured them. My neighbor, who claims to make the best tacos in town, asked for the recipe after trying one. What started as a solution to messy taco eating has become our most requested party food. Last month, my daughter's teacher even called to ask for the recipe after my daughter wouldn't stop talking about 'taco sticks night' at school!
Ingredients You'll Need
- 1 pound Ground Beef: Creates the hearty, protein-rich foundation. 80/20 lean-to-fat ratio provides the best flavor without excessive grease.
- 1 packet Taco Seasoning: Infuses the beef with authentic taco flavor in one easy step. Choose mild, medium, or hot to suit your preference.
- 2 cups Shredded Cheddar Cheese: Provides the gooey, melty goodness that binds everything together. Freshly shredded melts better than pre-packaged.
- 8 large Flour Tortillas: Forms the crispy exterior shell. 10-inch tortillas work best for proper filling distribution and rolling.
- 3 tablespoons Butter, melted: Creates that irresistible golden-brown exterior that adds flavor and crunch. Salted butter enhances the savory notes.
- ½ teaspoon Garlic Powder: Adds aromatic depth to the butter coating without overpowering. This subtle addition makes a noticeable difference.
- Optional: Sour Cream and Salsa for dipping: Provides cooling creaminess and zesty flavor to complement the rich filling.
 Pin it
Step-by-Step Cooking Instructions
- Prepare Your Workspace:
- Begin by preheating your oven to 375°F (190°C) to ensure it reaches the proper temperature while you assemble the taco sticks. Line a large baking sheet with parchment paper for easy cleanup and to prevent sticking. Gather all your ingredients before starting so everything is within reach during assembly. Having an organized workspace makes the process smoother and more efficient, especially if you're involving kids in the preparation. This preliminary organization also helps prevent the tortillas from drying out while you work with them.
- Season and Cook the Beef:
- Heat a large skillet over medium-high heat until hot. Add the ground beef, breaking it into smaller pieces with a wooden spoon as it cooks. Continue cooking and stirring occasionally until the beef is completely browned with no pink remaining, about 7-8 minutes. Drain excess fat if needed, leaving just enough to help distribute the seasoning. Add the taco seasoning packet and the amount of water indicated on the package (typically ⅔ cup). Reduce heat to medium-low and simmer for 3-5 minutes, stirring occasionally, until the mixture thickens and the liquid is mostly absorbed. The meat should be moist but not soupy. Remove from heat and let cool slightly before assembly – this prevents the tortillas from becoming soggy.
- Prepare the Flavor Coating:
- While the beef mixture cools slightly, combine the melted butter and garlic powder in a small bowl, whisking to ensure even distribution of the garlic flavor. This simple enhancement elevates the ordinary tortilla to create a more complex flavor profile in the finished taco sticks. The garlic-infused butter not only adds flavor but also helps achieve that perfect golden-brown exterior during baking. Setting this mixture aside allows the garlic to infuse into the butter while you prepare the filling, intensifying the flavor.
- Begin the Assembly Process:
- Lay a tortilla flat on a clean work surface. Using a pastry brush, lightly coat one side of the tortilla with the garlic butter mixture – this will become the exterior of your taco stick. Flip the tortilla over so the buttered side is facing down. Spoon approximately 3 tablespoons of the seasoned beef in a line across the center of the tortilla, leaving about 2 inches empty on either end. The key is to add enough filling to make each stick satisfying without overstuffing, which would make them difficult to roll tightly and potentially cause splitting during baking.
- Add Cheese and Form the Sticks:
- Sprinkle about ¼ cup of shredded cheese evenly over the beef line, covering it completely. The cheese will melt and act as a binding agent for the filling. Fold in the sides of the tortilla over the ends of the filling, then tightly roll the tortilla from the bottom up, creating a secure cylinder. Place the taco stick seam-side down on the prepared baking sheet. This rolling technique, similar to making a burrito, ensures the filling stays contained during baking and eating. Repeat with the remaining tortillas and filling, spacing them about an inch apart on the baking sheet.
- Apply Final Coating and Prepare for Baking:
- Using your pastry brush, generously coat the top and sides of each rolled taco stick with the remaining garlic butter mixture. This step is crucial for achieving that appealing golden-brown color and crispy texture that makes these taco sticks irresistible. The butter also helps the tortillas crisp up properly in the oven without drying out. If desired, you can sprinkle a light dusting of additional taco seasoning over the buttered rolls for extra flavor and visual appeal before baking.
- Bake to Golden Perfection:
- Place the baking sheet in the preheated oven and bake for 15-20 minutes, or until the taco sticks are golden brown and crispy. About halfway through baking, rotate the pan to ensure even browning. You'll know they're done when the exterior is crisp to the touch and has developed a beautiful golden color. The interior cheese will be completely melted, creating that perfect gooey center when sliced. Allow the taco sticks to cool for 2-3 minutes before serving – this brief rest makes them easier to handle and lets the filling set slightly while still maintaining that desirable melty cheese pull when bitten into.
I learned about the importance of proper beef preparation through an unfortunate kitchen experiment. During my first attempt at these taco sticks, I was in a hurry and didn't drain the excess fat from the ground beef before adding the taco seasoning. The result was a greasy, soggy mess that leaked through the tortillas during baking, preventing them from crisping properly. Now I always take the extra minute to drain the beef thoroughly, resulting in perfectly crisp, non-greasy taco sticks every time. It's a simple step that makes all the difference in the final texture and enjoyment of this dish.
Perfect Party Presentation
These taco sticks shine as part of a larger spread. For game day gatherings, arrange them on a platter surrounded by small bowls of various dipping options – classic sour cream, fresh guacamole, zesty salsa, and perhaps a spicy queso dip. The visual impact of the golden-brown sticks alongside colorful dips creates an inviting display that draws guests in. For a family dinner, serve them with a simple side salad tossed in lime vinaigrette to cut through the richness. The sticks can be sliced in half on the diagonal before serving for easier handling and a more appealing presentation that showcases the colorful filling.
Make-Ahead Magic
One of the greatest advantages of these taco sticks is their make-ahead potential. You can prepare them completely up to the baking stage, cover with plastic wrap, and refrigerate for up to 24 hours. When ready to serve, simply brush with a little fresh melted butter and bake as directed, adding about 3-5 minutes to the cooking time since they'll be cold from the refrigerator. For longer storage, freeze the unbaked sticks on a baking sheet until solid, then transfer to a freezer bag for up to three months. Bake directly from frozen, adding about 10 minutes to the cooking time – a perfect solution for unexpected guests or busy weeknights.
Clever Variations
Once you've mastered the basic recipe, the possibilities for creative variations are endless. Try a breakfast version using scrambled eggs, breakfast sausage, and cheddar cheese. For a vegetarian option, substitute the beef with a mixture of black beans, corn, and sautéed bell peppers. Spice lovers can add diced jalapeños or a sprinkle of crushed red pepper flakes to the filling. For a fusion twist, try a Buffalo chicken version using shredded rotisserie chicken mixed with Buffalo sauce and ranch seasoning, topped with blue cheese. These adaptations maintain the convenient form while offering fresh flavor experiences.
Serving Suggestions
While delicious on their own, these taco sticks can be part of a complete meal with thoughtfully chosen accompaniments. For a Tex-Mex inspired dinner, serve alongside Spanish rice and refried beans for a restaurant-quality experience at home. A simple corn and black bean salad with lime dressing provides fresh contrast to the rich, baked sticks. For a lighter option, a crisp jicama slaw with citrus dressing complements the savory flavors perfectly. When serving to children, consider setting up a 'dip bar' with different options so they can customize their taco stick experience – this interactive element makes dinner more engaging for young eaters.
 Pin it
Storage and Reheating
Should you find yourself with leftover taco sticks (though this is rare!), they store surprisingly well. Keep them in an airtight container in the refrigerator for up to three days. For best reheating results, avoid the microwave which can make them soggy. Instead, place them on a baking sheet in a 350°F oven for about 10 minutes until heated through and re-crisped. If you're planning to have leftovers, consider slightly underbaking the original batch by 2-3 minutes so they don't overcook during reheating. The reheated sticks make an excellent quick lunch paired with fresh fruit or a simple salad.
The first time I brought these taco sticks to my son's soccer team potluck, I was amazed at how quickly they disappeared – even faster than the cookies and brownies! The coach's wife pulled me aside to ask for the recipe, confessing that her picky eater had taken three sticks when he normally refuses anything new. There's something about the familiar taco flavors in this fun, handheld format that appeals to even the most selective palates. Now these taco sticks have become my signature contribution to team events – I simply double or triple the recipe depending on the crowd size. The empty platter at the end of every gathering is all the validation I need!
Frequently Asked Questions
- → Can I use a different type of meat?
- Yes, you can substitute ground turkey, chicken, or even plant-based meat alternatives for the ground beef. Just make sure to season it well with the taco seasoning for best flavor.
- → Can I make these ahead of time?
- You can prepare the meat filling ahead of time, but it's best to assemble and bake the taco sticks just before serving. If needed, you can assemble them earlier in the day, refrigerate, and then bake when ready to serve (they may need an extra 2-3 minutes of baking time).
- → What if I can't find string cheese sticks?
- If cheese sticks aren't available, you can use about 2 tablespoons of shredded cheddar or Mexican blend cheese per taco stick. Just make sure to pack it tightly so it stays inside the dough while baking.
- → Can I make these without cheese for dairy-free diets?
- Yes, you can omit the cheese and use dairy-free butter for the garlic butter topping. The taco sticks will still be flavorful with just the seasoned beef filling.
- → How do I store and reheat leftovers?
- Store cooled leftovers in an airtight container in the refrigerator for up to 3 days. Reheat in a 350°F oven for 5-7 minutes or in an air fryer for 2-3 minutes until heated through. Microwaving works but may make the dough slightly softer.