
 Pin it
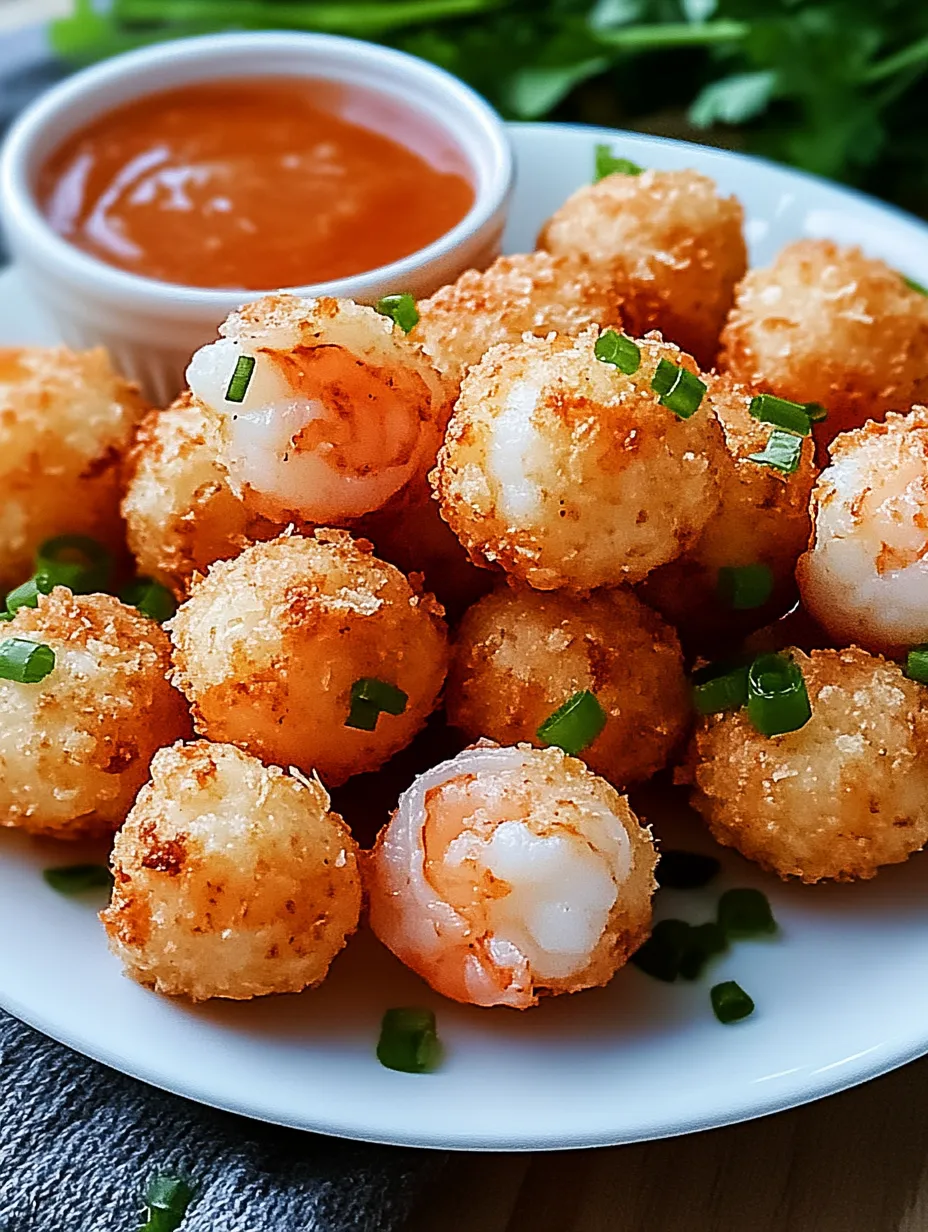
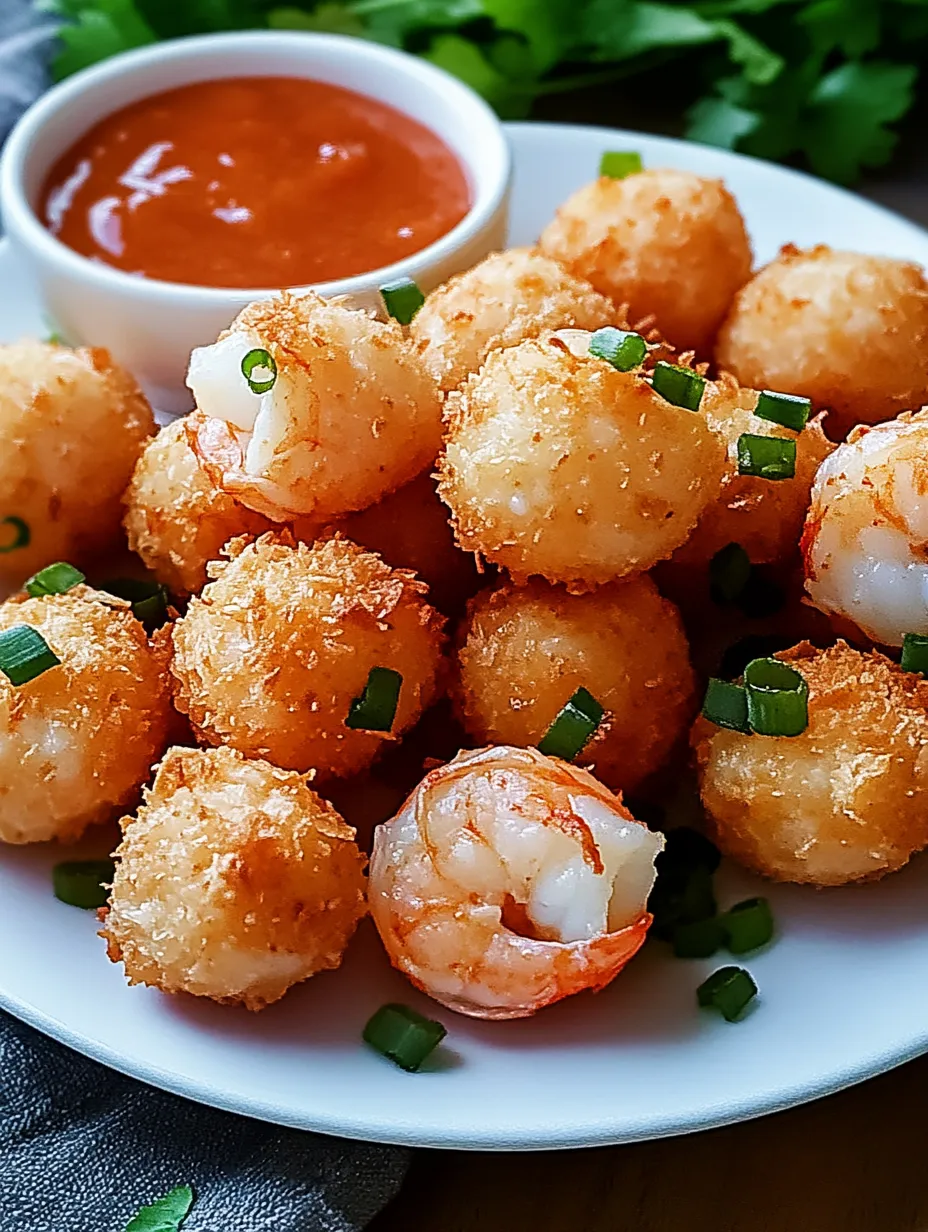
These golden shrimp balls transform humble ingredients into an irresistible dish that balances crispy exteriors with tender, juicy centers. Each bite delivers a perfect harmony of sweet shrimp flavor enhanced by aromatic ginger, garlic, and green onions. The light coating creates a satisfying crunch that gives way to the succulent interior, offering a delightful textural contrast that makes it impossible to eat just one. Whether served as an appetizer with dipping sauce or as part of a larger Asian-inspired meal, these versatile morsels bridge the gap between casual snack and sophisticated finger food. Their universal appeal makes them perfect for everything from weeknight family dinners to elegant cocktail parties, proving that sometimes the simplest dishes create the most memorable dining experiences.
I first discovered these shrimp balls at a dim sum restaurant and became determined to recreate them at home. After several attempts, I finally perfected this version that my family now requests weekly. What started as a culinary challenge has become our favorite Friday night tradition. My children, who normally shy away from seafood, devour these without hesitation—proof that the right preparation can transform even reluctant eaters into seafood enthusiasts. These have such universal appeal that they've become my signature contribution to neighborhood potlucks, where the platter is always the first to empty!
Ingredients You'll Need
- 1 pound Raw Shrimp, peeled and deveined: The star ingredient provides sweet flavor and substantial texture. Larger shrimp (16/20 count) offer the juiciest results.
- 1/2 cup Panko Breadcrumbs: Creates a lighter, airier texture than regular breadcrumbs. The Japanese-style crumbs provide superior crispiness.
- 1 large Egg, beaten: Acts as the essential binder that holds everything together. Farm-fresh eggs provide the best binding power.
- 1/4 cup Green Onions, finely chopped: Adds bright, fresh flavor and subtle crunch. Use both white and green parts for depth of flavor.
- 2 cloves Garlic, minced: Provides aromatic foundation. Fresh garlic is vastly superior to pre-minced for authentic flavor.
- 1 tablespoon Fresh Ginger, grated: Contributes warm, spicy notes that complement the shrimp perfectly. Freezing ginger briefly makes it easier to grate.
- 1 tablespoon Soy Sauce: Adds savory umami depth. Low-sodium varieties allow better control of the final saltiness.
- 1 teaspoon Sesame Oil: Introduces a distinctive nutty flavor that's essential to the Asian flavor profile. A little goes a long way.
- Fresh Cilantro, chopped (optional): Adds bright, herbaceous notes that lift the overall flavor profile. Perfect for cilantro lovers.
- Vegetable Oil, for frying: Choose a neutral oil with a high smoke point like canola or peanut oil for the crispiest results.
 Pin it
Step-by-Step Cooking Instructions
- Prepare the Shrimp Properly:
- Begin by thoroughly patting the peeled and deveined shrimp dry with paper towels to remove excess moisture. This crucial step ensures your final mixture won't be too wet. For the best texture, rough-chop the shrimp using a sharp knife into small, even pieces about 1/4-inch in size. While a food processor can be used for convenience, be extremely cautious—pulse only 3-4 times to maintain some texture as over-processing will create a paste-like consistency that produces dense, rubbery shrimp balls. The ideal texture should resemble a rough mince with visible small pieces of shrimp that will provide the perfect bite when cooked.
- Create the Perfect Binding:
- In a large mixing bowl, combine the chopped shrimp with 1/2 cup panko breadcrumbs, 1 beaten egg, 1/4 cup finely chopped green onions, 2 minced garlic cloves, 1 tablespoon freshly grated ginger, 1 tablespoon soy sauce, 1 teaspoon sesame oil, 1/2 teaspoon salt, and 1/2 teaspoon black pepper. If using, add 1/4 cup chopped cilantro for brightness. Using clean hands or a rubber spatula, gently fold the ingredients together until just combined, being careful not to overmix which would make the texture tough. The mixture should hold together when pressed but still maintain some lightness. If it seems too wet, add an additional tablespoon of panko breadcrumbs; if too dry, add a teaspoon of water.
- Form Perfect Balls:
- Slightly dampen your hands with water to prevent sticking, then scoop approximately 1.5 tablespoons of the shrimp mixture. Gently roll between your palms to form a ball about 1 to 1.5 inches in diameter. The key is to apply just enough pressure to shape the balls without compacting them too firmly, which would result in dense, tough shrimp balls. Place the formed balls on a parchment-lined baking sheet, spacing them apart to prevent sticking. Continue until all the mixture is used—you should have approximately 20-25 balls depending on size. For the most consistent cooking, try to make all balls relatively uniform in size.
- Optional Chilling Step:
- For the best texture and easier handling, especially in warm kitchens, place the tray of formed shrimp balls in the refrigerator for 15-20 minutes. This brief chilling period allows the binding ingredients to set, helping the balls maintain their shape during cooking and resulting in a better final texture. This step is particularly helpful if you're making these on a warm day or if your kitchen is hot from cooking. While not absolutely essential, this small extra step makes a noticeable difference in the final product and is worth the short wait.
- Master the Frying Technique:
- Heat a large, heavy-bottomed skillet or wok over medium-high heat and add enough vegetable oil to reach a depth of about 1/2 inch. The oil is ready when it shimmers but doesn't smoke, or when a small piece of breadcrumb sizzles vigorously when dropped in. Working in batches to avoid overcrowding (which would lower the oil temperature and result in greasy balls), carefully add the shrimp balls to the hot oil. Leave space between each ball to ensure even cooking and maintain oil temperature. Fry for approximately 3-4 minutes, turning occasionally with a slotted spoon or tongs, until they achieve a beautiful golden-brown color on all sides and are cooked through.
- Ensure Proper Draining:
- Using a slotted spoon or spider strainer, carefully remove the cooked shrimp balls from the oil and transfer them to a plate lined with paper towels or a cooling rack set over a baking sheet. The paper towels absorb excess oil while a rack allows air to circulate around the balls, maintaining their crispness. Allow them to drain for 1-2 minutes before serving. This brief resting period also allows the interior to finish cooking through from residual heat while the exterior remains perfectly crisp. Continue frying the remaining batches, allowing the oil to return to temperature between batches.
- Serve with Complementary Sauce:
- For the perfect finishing touch, serve the shrimp balls immediately while hot and crispy. They pair beautifully with a simple dipping sauce made by combining 1/4 cup soy sauce, 2 tablespoons rice vinegar, 1 teaspoon honey, 1 teaspoon sesame oil, and a sprinkle of thinly sliced green onions. Alternatively, a sweet chili sauce provides a delightful contrast to the savory shrimp. Garnish the serving platter with additional chopped cilantro and thinly sliced green onions for a pop of color and freshness that complements the rich, golden shrimp balls.
You Must Know
- Moisture Control - Properly draining the shrimp before chopping prevents a soggy mixture that won't hold its shape.
- Gentle Handling - Mix and form the balls with a light touch to maintain tenderness; overworking creates tough, dense results.
- Oil Temperature - Maintaining the proper oil temperature (around 350°F) ensures a crispy exterior without oily residue.
I learned about the importance of proper shrimp preparation through an early kitchen mishap. Once, rushing to prepare these for unexpected guests, I tossed still-wet shrimp into the food processor and pulsed too long, creating a paste rather than a chopped mixture. The resulting balls were dense and rubbery instead of light and tender. Now I always take time to thoroughly pat the shrimp dry and chop them by hand or pulse minimally in the processor. This simple attention to detail transformed my results from mediocre to restaurant-quality, proving that sometimes the most important cooking techniques are the most basic.
Perfect Pairings
These versatile shrimp balls work beautifully in numerous serving contexts. For an Asian-inspired meal, serve alongside steamed jasmine rice and stir-fried vegetables with a light soy-ginger sauce. For a cocktail party, present them on a platter with bamboo picks and several dipping sauce options—sweet chili, peanut sauce, and soy-ginger offer wonderful variety. When serving as an appetizer course, complement with something light and acidic like a cucumber salad dressed with rice vinegar to balance the richness. For a fusion approach, serve the shrimp balls in lettuce cups with shredded carrot, cucumber, and a drizzle of hoisin sauce for an interactive, fresh presentation.
Creative Variations
While the classic recipe is delicious, several variations can adapt to different tastes and dietary needs. For a spicier version, incorporate 1 teaspoon of sriracha or sambal oelek into the base mixture. Seafood lovers might enjoy a combination of shrimp and crab for more complex flavor notes. Those avoiding gluten can substitute crushed rice crackers or chickpea breadcrumbs for the panko with excellent results. For an herbal variation, add 2 tablespoons of finely chopped Thai basil and mint along with the cilantro. Health-conscious cooks can bake these instead of frying—arrange on a parchment-lined baking sheet, spray lightly with cooking oil, and bake at 400°F for 12-15 minutes, turning halfway through for a lighter but still delicious version.
Make-Ahead Strategies
These shrimp balls are perfect for advance preparation. Form the balls completely, then arrange in a single layer on a parchment-lined baking sheet and freeze until solid, about 2 hours. Transfer the frozen balls to a zip-lock freezer bag or airtight container where they'll keep beautifully for up to one month. When ready to cook, you can fry them directly from frozen—simply add 1-2 minutes to the cooking time and check to ensure they're heated through. The refrigerated mixture (before forming) keeps well for up to 24 hours, making this perfect for entertaining when you want to prepare components ahead but fry just before serving for optimal freshness and texture.
 Pin it
Troubleshooting Common Issues
Even experienced cooks occasionally encounter challenges. If your shrimp balls are falling apart during cooking, your mixture may be too wet—add additional breadcrumbs 1 tablespoon at a time until it holds together, or chill the formed balls longer before frying. If they're turning out dense or rubbery, you may be overmixing or overprocessing the shrimp—try a lighter touch when combining ingredients and less processing time. For balls that are browning too quickly on the outside while remaining undercooked inside, your oil is likely too hot—reduce the heat slightly for more even cooking. If they're absorbing too much oil and becoming greasy, your oil may not be hot enough—increase the heat between batches to maintain proper temperature.
My most memorable experience with these shrimp balls came during an unexpected power outage while hosting a dinner party. With the shrimp mixture prepared but not yet cooked, I improvised by carefully frying them on our gas grill's side burner. The outdoor cooking created an interactive experience as guests gathered around to watch. The subtle smokiness from cooking outdoors added an unexpected dimension to the flavor that everyone loved. Now, even with reliable power, I occasionally make 'blackout shrimp balls' on the grill during summer gatherings—a reminder that sometimes our most creative cooking solutions emerge from unexpected challenges.
Frequently Asked Questions
- → Can I use pre-cooked shrimp?
- Fresh raw shrimp is recommended for the best texture and flavor. Pre-cooked shrimp tends to make the balls rubbery when cooked a second time.
- → How can I make these gluten-free?
- Substitute the regular breadcrumbs with gluten-free panko breadcrumbs and use tamari instead of soy sauce to make these shrimp balls gluten-free.
- → Can I bake these instead of frying?
- Yes, for a healthier version, you can bake the shrimp balls at 375°F (190°C) for 15-20 minutes, turning halfway through, until golden brown and cooked through.
- → Can I freeze shrimp balls?
- Yes, you can freeze them either before or after cooking. For uncooked, freeze on a baking sheet then transfer to a freezer bag. For cooked, cool completely before freezing. Reheat frozen cooked balls in a 350°F oven.
- → What dipping sauces work well with shrimp balls?
- Sweet chili sauce, soy-ginger sauce, spicy mayo, or a simple mixture of soy sauce, rice vinegar and a touch of honey all complement the flavor of shrimp balls beautifully.