
 Pin it
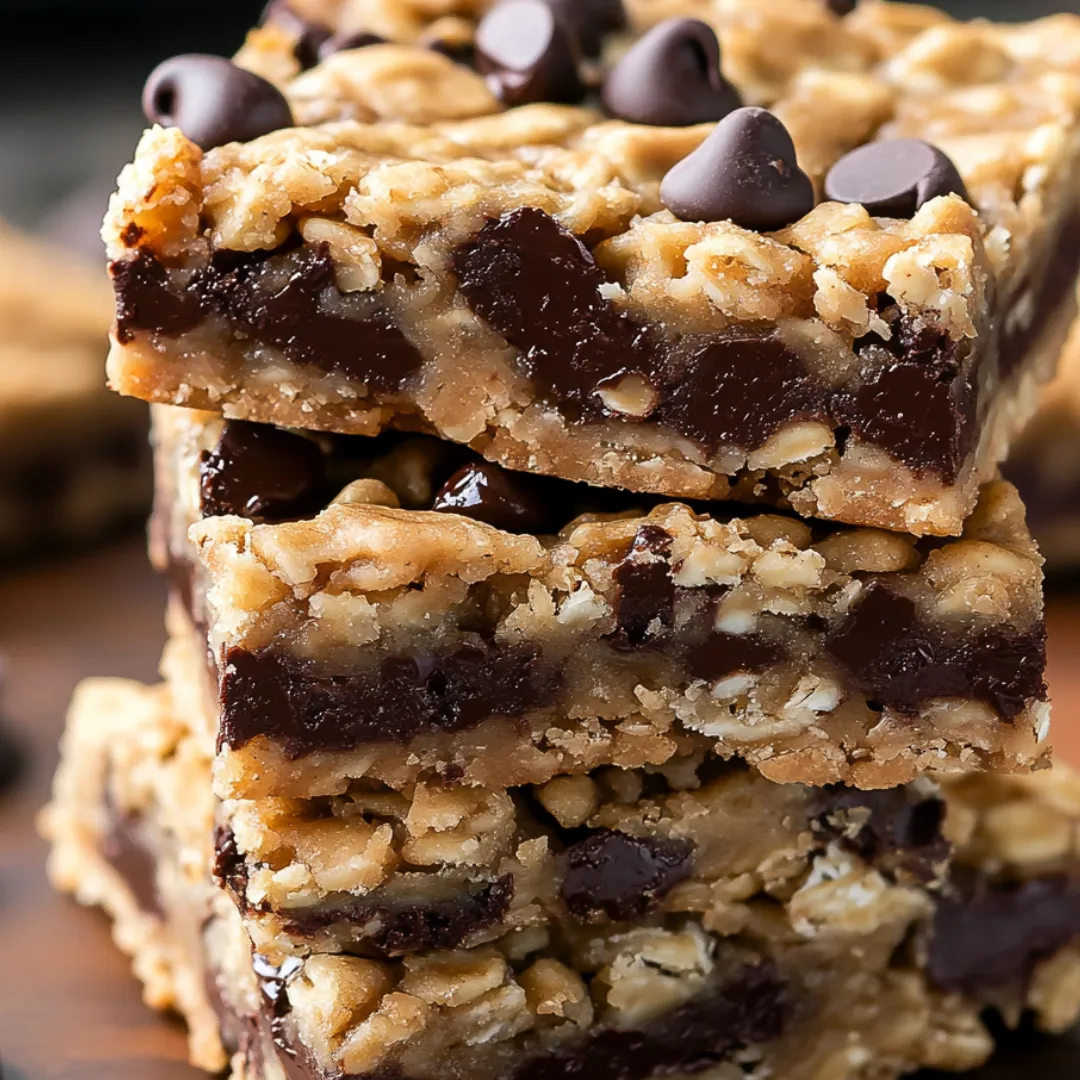
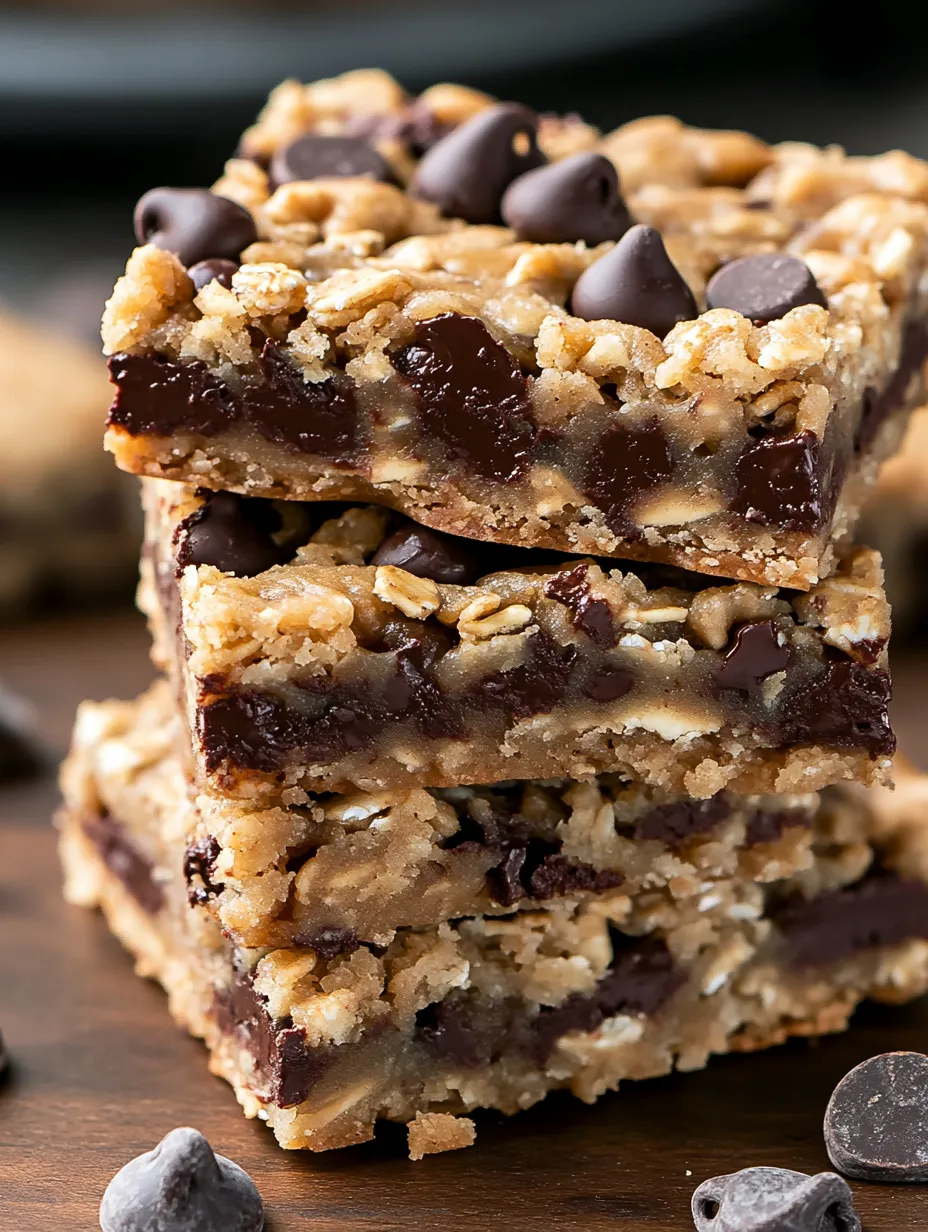
These Healthy Chocolate Chip Oatmeal Bars offer the perfect balance of nutritious ingredients and satisfying sweetness in one convenient package. Hearty oats provide filling fiber, mashed bananas create natural sweetness and moisture, while dark chocolate chips deliver those little moments of indulgence that make these bars truly crave-worthy. Portable and endlessly adaptable, they work equally well as a quick breakfast, post-workout refuel, or healthier dessert option that won't leave you feeling guilty. Best of all, they're surprisingly simple to prepare, requiring just basic ingredients and minimal hands-on time.
I originally created these bars when looking for portable breakfasts my teenage son would actually eat before school. What shocked me was how he started choosing these over store-bought granola bars! Even more surprising was when his friends started requesting the recipe from me after trying them during study sessions. Now I make a double batch every weekend, and they've become the most-requested item when my son comes home from college.
Ingredients You'll Need
- 2 Ripe Bananas: Provides natural sweetness and helps bind the ingredients; look for bananas with brown spots for the best flavor
- ¼ cup Honey or Maple Syrup: Adds additional sweetness and helps create the perfect chewy texture; local honey offers unique flavor notes
- ¼ cup Almond Milk: Contributes moisture without adding heaviness; substitute any milk variety based on dietary preferences
- ¼ cup Peanut Butter or Almond Butter: Creates richness and helps hold the bars together; choose natural varieties without added oils or sugar
- 1 teaspoon Vanilla Extract: Enhances the overall flavor profile; pure vanilla extract provides the best results
- 2 cups Rolled Oats: Forms the hearty base of these bars; old-fashioned oats provide the best texture compared to quick oats
- ½ cup Whole Wheat Flour: Adds structure while contributing more fiber than refined flour; freshly ground offers optimal nutrition
- ½ teaspoon Baking Powder: Provides just enough lift to keep the bars from becoming too dense
- ¼ teaspoon Salt: Balances the sweetness and enhances all other flavors; fine sea salt dissolves most evenly
- 1 teaspoon Ground Cinnamon: Adds warmth and complexity that complements the oats and chocolate beautifully
- 2 tablespoons Chia or Flaxseeds (optional): Boosts nutrition with omega-3 fatty acids and additional fiber
- ⅓ cup Dark Chocolate Chips: Delivers those moments of chocolatey indulgence; 70% cocoa or higher provides antioxidant benefits
 Pin it
Step-by-Step Cooking Instructions
- Create Your Perfect Base:
- Begin by preheating your oven to 350°F (175°C) and lining a 9×9-inch baking pan with parchment paper, leaving overhang on two sides for easy removal later. In a large mixing bowl, peel and thoroughly mash the bananas until they reach a smooth consistency with minimal lumps. For the best results, use bananas that have plenty of brown spots on the peel – these are sweeter and mash more easily. This banana base not only provides natural sweetness but also creates moisture that helps bind the oats together without requiring lots of added fat or refined sugar.
- Blend Your Wet Ingredients:
- To your mashed bananas, add the honey or maple syrup, almond milk, peanut butter, and vanilla extract. For the nut butter, warm it slightly in the microwave for 10-15 seconds if it's too firm to stir easily. Whisk this mixture vigorously until completely combined and smooth. The consistency should be relatively thick but pourable, similar to pancake batter. Take care to fully incorporate the nut butter, as any unmixed portions will create pockets in your finished bars. This wet mixture provides the binding power and much of the flavor base for your oatmeal bars.
- Prepare Your Dry Mixture:
- In a separate medium bowl, combine the rolled oats, whole wheat flour, baking powder, salt, and cinnamon. If using chia or flaxseeds, add them here as well. Whisk these dry ingredients thoroughly to ensure even distribution of the baking powder and spices. This careful mixing prevents any bitter bites from concentrated baking powder or pockets of salt in your finished bars. The combination of oats and whole wheat flour creates a nutritional powerhouse while also providing the perfect texture – substantial enough to satisfy but not overly dense.
- Combine With Precision:
- Pour your wet ingredient mixture into the bowl with the dry ingredients, using a rubber spatula to scrape out every bit of the flavorful wet mixture. With a wooden spoon or sturdy spatula, stir the two mixtures together using gentle folding motions. Continue mixing just until no dry streaks remain – overmixing can develop the gluten in the flour and make your bars tough. The batter will be thick and sticky, which is exactly what you want for bars that hold together well. Once combined, gently fold in the dark chocolate chips, distributing them evenly throughout the mixture.
- Perfect Your Texture:
- Transfer the mixture to your prepared baking pan, using the back of your spatula to spread it evenly into all corners. Press down firmly to compact the mixture – this is crucial for bars that hold together when sliced. For the most professional-looking bars, dampen your hands slightly and use them to press and smooth the top surface. This creates even bars with a nicely finished appearance. The thickness should be uniform across the entire pan to ensure consistent baking throughout.
- Bake With Precision:
- Place the pan in your preheated oven and bake for 20-25 minutes, or until the edges begin to turn golden brown and pull away slightly from the sides of the pan. A toothpick inserted into the center should come out clean or with just a few moist crumbs attached, but no wet batter. If you prefer chewier bars, aim for the shorter end of the baking range; for firmer bars, bake the full 25 minutes. Every oven is different, so start checking at the 18-minute mark to prevent over-baking, which can dry out your bars.
- Master the Cooling Process:
- Once baked to perfection, remove the pan from the oven and place it on a wire cooling rack. Allow the bars to cool in the pan for at least 15 minutes – this resting period allows them to set up properly and makes them much easier to cut. After the initial cooling, use the parchment paper overhangs to carefully lift the entire slab out of the pan and onto the cooling rack to finish cooling completely. Only cut the bars once they've reached room temperature; cutting while warm will result in crumbling. Use a sharp knife, cleaning the blade between cuts for the neatest presentation.
I once made these bars in a rush and forgot to press the mixture firmly into the pan. The result was a crumbly mess that fell apart when I tried to cut it! Now I place a piece of parchment on top of the mixture and use the bottom of a measuring cup to firmly press it down. This simple technique has given me perfectly intact bars every time. When my neighbor asked why her attempt at the recipe didn't hold together, sharing this tip transformed her next batch completely.
Storage Solutions
These versatile bars can be stored in multiple ways depending on your needs. For everyday snacking, keep them in an airtight container at room temperature, where they'll stay fresh for up to 5 days. Separate layers with parchment paper to prevent sticking. For longer storage, refrigerate in a sealed container for up to 10 days – the chilled bars develop an even chewier texture that many prefer. These bars also freeze beautifully for up to 3 months; wrap individual bars in parchment and store in a freezer bag for grab-and-go convenience.
Perfect Pairings
While delicious on their own, these oatmeal bars can be elevated further with thoughtful pairings. For breakfast, serve alongside fresh berries and Greek yogurt for a complete meal with additional protein. As an afternoon snack, enjoy with a cup of coffee or tea – the slight bitterness of the beverage beautifully complements the sweetness of the bars. For a special treat, warm a bar slightly and top with a small scoop of vanilla ice cream or frozen yogurt for a healthier dessert option that still feels indulgent.
Nutritional Notes
These bars offer impressive nutritional benefits compared to most commercial options. Each serving provides approximately 5 grams of fiber from the oats, whole wheat flour, and add-ins, supporting digestive health and sustained energy. The combination of complex carbohydrates from oats and protein from nut butter helps stabilize blood sugar levels, avoiding the crash that comes with processed snacks. Using dark chocolate with high cocoa content adds antioxidants while minimizing added sugar, making these truly smarter sweet treats.
 Pin it
Creative Variations
This versatile base recipe welcomes countless variations to keep things interesting. For a tropical twist, replace half the chocolate chips with dried mango pieces and add 1/4 cup shredded coconut to the dry ingredients. Create an autumn-inspired version by replacing the chocolate with dried cranberries and adding 1/4 teaspoon of nutmeg and a pinch of cloves. For extra protein, reduce the oats by 1/4 cup and add 1/4 cup of vanilla or unflavored protein powder to the dry ingredients – perfect for active individuals or growing children.
I've made these bars dozens of times, but my breakthrough moment came when experimenting with chilling the mixture before baking. After preparing the batter, I was interrupted by an emergency phone call and had to refrigerate it for about 30 minutes. To my surprise, those bars had an even better texture – slightly more dense and chewy in the best possible way. Now I intentionally chill the batter for 15-20 minutes before baking whenever time allows. This extra step lets the oats absorb more moisture, resulting in bars that hold together perfectly and have an almost cookie-like quality that makes them even more satisfying.
Frequently Asked Questions
- → Can I make these bars vegan?
- Yes! Replace the egg with a flax egg (1 tbsp ground flaxseed mixed with 3 tbsp water) and use dairy-free chocolate chips.
- → How can I make these gluten-free?
- Ensure you use certified gluten-free rolled oats, as regular oats may have cross-contamination. The almond flour is already gluten-free.
- → Can I freeze these oatmeal bars?
- Absolutely! Wrap individual bars in parchment paper, then place in freezer bag. They'll keep for up to 3 months. Thaw overnight in refrigerator.
- → What can I substitute for almond butter?
- Any nut or seed butter works well. Try peanut butter, cashew butter, or sunflower seed butter if you have nut allergies.
- → Are these suitable for breakfast?
- Yes, these make a great grab-and-go breakfast. They contain whole grains, healthy fats, and natural sweeteners for sustained energy.