
 Pin it
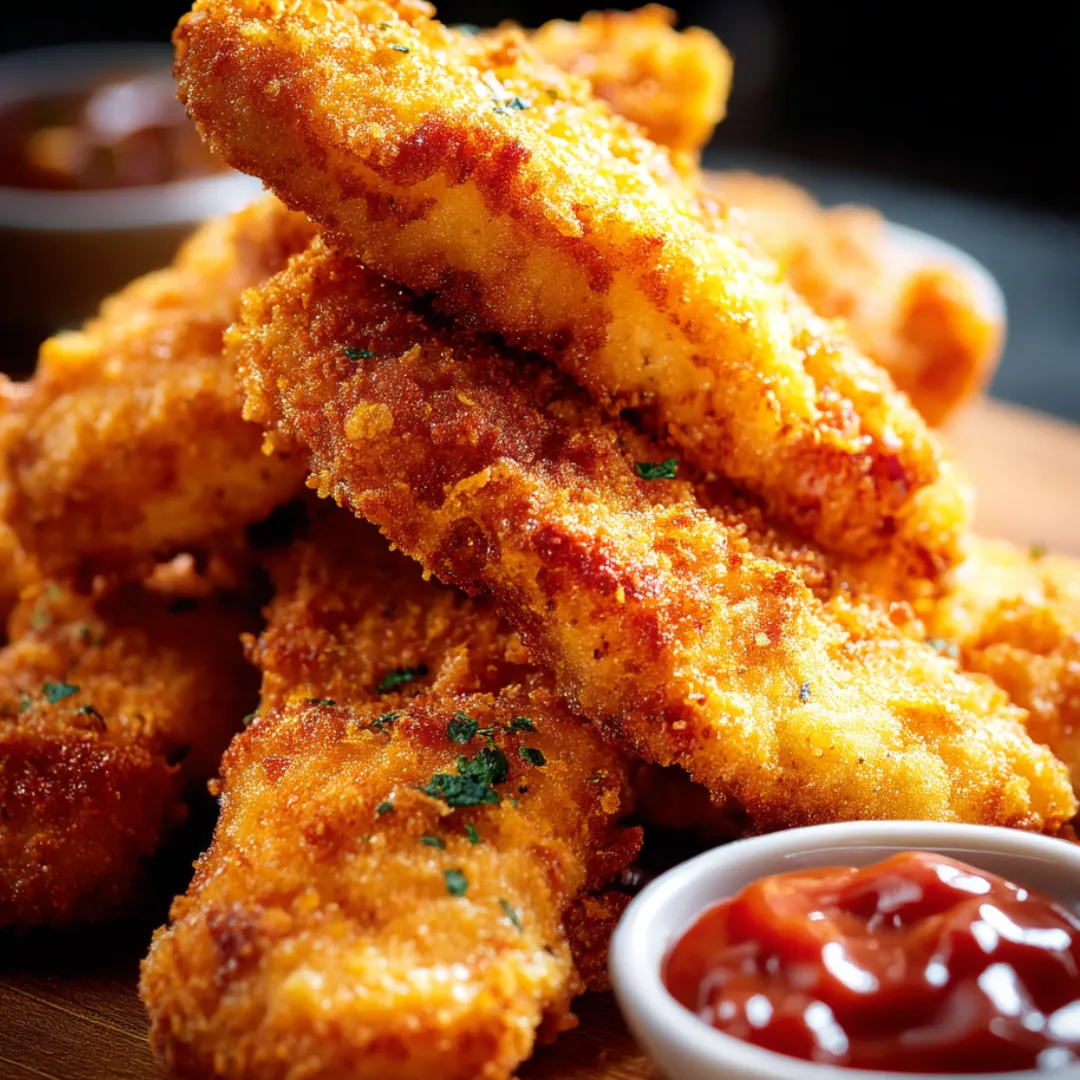
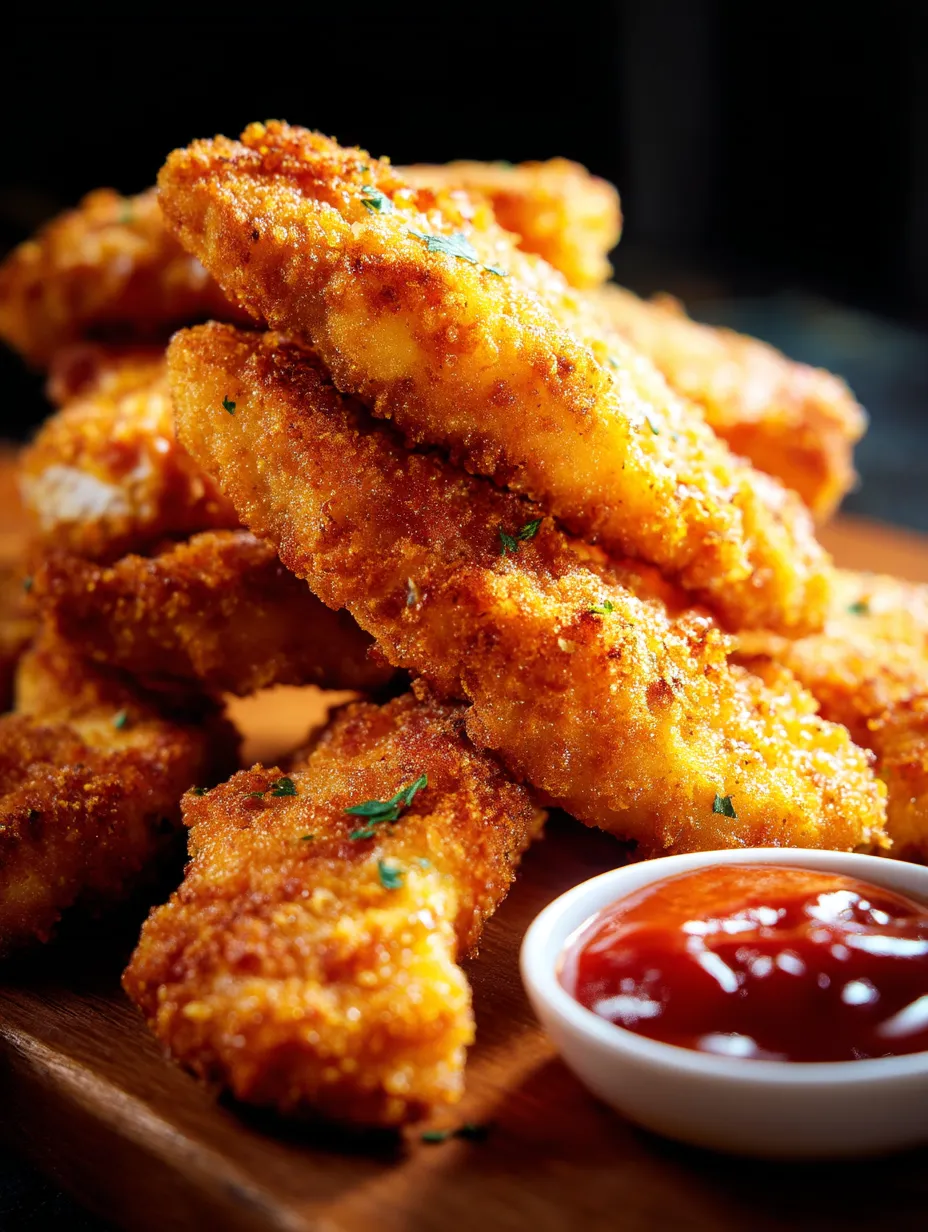
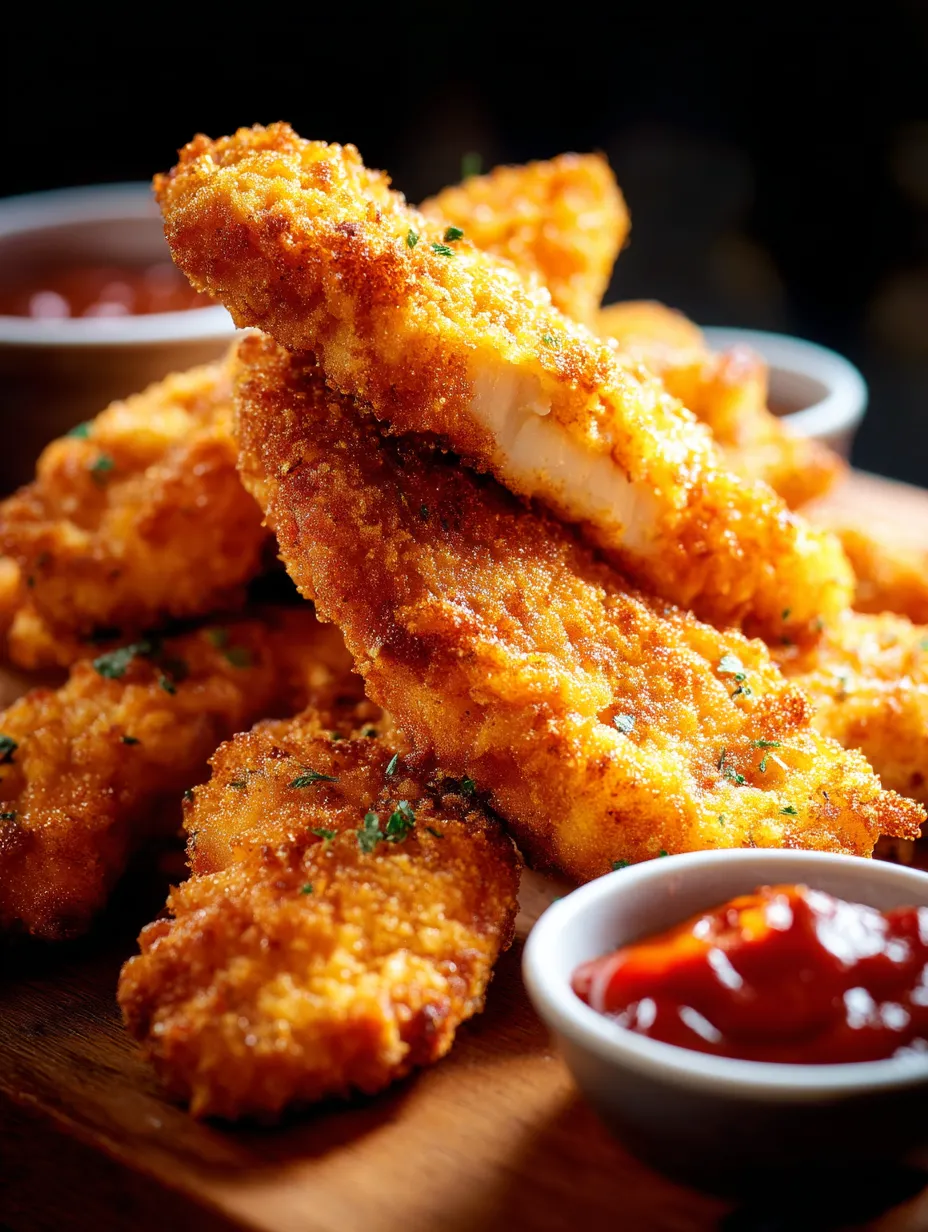
Golden-brown chicken tenders with a satisfyingly crunchy exterior that gives way to tender, juicy meat with each bite. The contrast between the crisp, well-seasoned coating and the succulent chicken creates a perfect textural experience that appeals to both children and adults alike. Unlike their frozen counterparts, these homemade tenders deliver deep flavor from a customized blend of seasonings while allowing you to control exactly what goes into this beloved comfort food. The triple-dredge breading technique creates that distinctive restaurant-quality crunch that's often missing from home cooking, while proper cooking technique ensures the chicken itself remains moist rather than dry and stringy. Whether served as a quick weeknight dinner, game day snack, or party appetizer, these versatile tenders deliver maximum satisfaction with minimal effort.
I discovered the secrets to perfect chicken tenders during my college years when I worked at a popular sports bar known for their chicken. The triple-dredge method was a revelation that transformed my home cooking. The first time I made these for my family, my nephew—who normally only ate dinosaur-shaped nuggets—devoured three tenders in record time, while my food-snob brother-in-law asked for the recipe. Years later, when hosting a game day gathering where half the guests were culinary professionals, these humble tenders disappeared faster than the fancy appetizers I'd labored over for hours. They've become my most-requested contribution to potlucks and my go-to solution when cooking for mixed groups of adults and children. There's something uniquely satisfying about transforming a simple chicken breast into something that consistently elicits enthusiasm from even the most discerning eaters.
Ingredients You'll Need
- Chicken Breasts or Tenderloins: The foundation of great tenders starts with quality chicken. Look for plump, pink chicken breasts without brown spots or a slimy texture. If using whole breasts, slice them against the grain into strips approximately 1-inch wide to ensure tenderness. True chicken tenderloins—the small muscle that runs alongside the breast—offer superior tenderness but at a higher price point. Either option works beautifully, though tenderloins cook slightly faster due to their smaller size. Fresh chicken produces the juiciest results, though properly thawed frozen chicken works well too. For the most consistent cooking, try to select pieces of similar thickness or gently pound thicker portions to even them out. The natural moisture in chicken helps the initial flour coating adhere, beginning the crucial building blocks of your breading.
- Panko Breadcrumbs: These Japanese-style breadcrumbs create the distinctively light, airy crunch that elevates homemade tenders above their denser counterparts. Unlike traditional breadcrumbs, panko has a flaky, dry texture that absorbs less oil and stays crispier longer. Look for breadcrumbs with a bright white color and large, irregular pieces rather than fine crumbs. The larger surface area creates more crunch and visual texture in the final coating. If panko isn't available, regular breadcrumbs can substitute but won't deliver quite the same level of crispness. For even more texture, avoid crushing the panko when mixing with seasonings; those irregular edges create the craggy, crunchy exterior that makes these tenders exceptional. The breadcrumbs form the critical outer layer that delivers the satisfying crunch everyone expects from great chicken tenders.
- All-Purpose Flour: Creates the crucial first layer that allows the egg wash and breadcrumbs to adhere properly to the chicken. The flour coating also helps seal in moisture during cooking, preventing the chicken from drying out. Seasoning the flour rather than just the breadcrumbs ensures flavor throughout every layer of the breading. The flour should be applied as a light, even coating that covers the entire surface of the chicken without clumping. Too much flour creates a gummy layer, while too little results in patchy breading that may fall off during cooking. This initial dusting might seem insignificant, but it's the essential foundation upon which the entire breading system depends. For those avoiding gluten, a one-to-one gluten-free flour blend works as an excellent substitute without compromising the final texture.
- Eggs and Milk: Form the critical binding layer between the flour and breadcrumbs. The protein in eggs coagulates during cooking, creating a strong adhesive that keeps the breading attached to the chicken. A small amount of milk added to the eggs improves flowability and helps create a more even coating. The egg mixture should be thoroughly beaten until completely homogeneous with no visible strands of white or yolk. This egg wash adds moisture that activates the starches in the flour, creating a paste-like surface for the breadcrumbs to cling to. The fat in both eggs and milk also contributes richness to the final flavor profile. For a dairy-free version, plain unsweetened plant-based milk works well without significantly affecting the result.
- Seasoning Blend: Transforms basic chicken into a flavorful culinary experience. The combination of garlic powder, onion powder, and paprika creates a balanced savory profile that complements the chicken without overwhelming it. These dried seasonings incorporate easily into the dry ingredients and won't burn during cooking like fresh aromatics might. Dried herbs like oregano add complexity and visual interest to the coating. The seemingly small amount of seasoning becomes concentrated on the exterior of the tenders, creating an impactful flavor presence in each bite. Salt is particularly important, as it not only seasons the coating but also helps draw a small amount of moisture to the chicken's surface, creating better adhesion for the breading. Customize this blend based on your preferences—add cayenne for heat, Italian seasoning for an herbal note, or lemon pepper for brightness.
- Parmesan Cheese: While optional, adds a savory depth that elevates the entire flavor profile. The cheese contributes saltiness and umami notes while also promoting better browning due to its protein content. Choose finely grated Parmesan rather than shredded for the most even distribution throughout the breadcrumb mixture. The cheese partially melts during cooking, creating pockets of intense flavor within the breading. Beyond flavor, the proteins in Parmesan help the coating brown more evenly, contributing to both appearance and taste through Maillard reaction development. For the best quality, use genuine Parmigiano-Reggiano or Grana Padano rather than pre-grated varieties that contain anti-caking agents, which can affect texture and melting properties.
- Cooking Oil: The right oil ensures crispy tenders without greasy residue. For pan-frying, choose an oil with a high smoke point like vegetable, canola, or peanut oil. The oil serves as the heat transfer medium that creates the critical transformation from raw, wet breading to crispy coating. If baking, a light drizzle or spray of oil helps promote browning and creates a more similar result to fried tenders. The amount of oil used significantly impacts the final texture—too little and the coating remains pale and soft, too much and the tenders become greasy and heavy. Proper oil temperature (around 350°F/175°C) is crucial; too hot and the exterior burns before the chicken cooks through, too cool and the breading absorbs excess oil instead of creating a crisp seal.
 Pin it
Step-by-Step Instructions
- Step 1:
- Prepare the chicken properly – Begin by patting 4 boneless, skinless chicken breasts dry with paper towels to remove excess moisture, which would impede proper browning. If using whole breasts, place them on a cutting board and, with a sharp knife, carefully slice them against the grain (perpendicular to the visible muscle fibers) into strips approximately 1-inch wide. Cutting against the grain shortens the muscle fibers, resulting in more tender pieces. Try to maintain uniform thickness throughout each piece for even cooking. If some pieces are significantly thicker than others, place them between two sheets of plastic wrap and gently pound with a meat mallet or heavy pan until they reach a more consistent thickness of approximately ½-inch. Season the chicken strips on all sides with ½ teaspoon salt and ¼ teaspoon black pepper, gently pressing the seasonings into the meat. This initial seasoning is crucial, as it flavors the chicken itself, not just the coating. Allow the seasoned chicken to sit at room temperature for 10-15 minutes, which takes the chill off and promotes more even cooking.
- Step 2:
- Set up an efficient breading station – While the chicken rests, prepare your three-part breading station using shallow dishes or pie plates that provide enough space to easily turn and coat the chicken pieces. In the first dish, combine 1 cup all-purpose flour with 1 teaspoon garlic powder, 1 teaspoon onion powder, 1 teaspoon paprika, ½ teaspoon salt, and ¼ teaspoon black pepper, whisking thoroughly to distribute the seasonings evenly. In the second dish, whisk together 2 large eggs and 2 tablespoons milk until completely homogeneous with no streaks of egg white visible. In the third dish, combine 1½ cups panko breadcrumbs with ½ cup finely grated Parmesan cheese (if using), ½ teaspoon garlic powder, ½ teaspoon dried oregano, and ¼ teaspoon black pepper, tossing with your fingers to mix thoroughly without crushing the panko. Arrange the dishes in assembly-line order: seasoned flour first, then egg mixture, then breadcrumb mixture. Place a clean plate or baking sheet at the end to hold the breaded chicken. This organization streamlines the breading process and minimizes mess.
- Step 3:
- Execute the triple-dredge breading technique – Working with one piece of chicken at a time to prevent clumping, begin the breading process. First, place a chicken strip in the seasoned flour, turning to coat completely and pressing gently to ensure the flour adheres to all surfaces. Lift the piece and gently shake off any excess flour—too much will create a pasty layer. Next, submerge the floured chicken into the egg mixture, turning to coat evenly and allowing any excess to drip back into the bowl. Finally, place the chicken in the breadcrumb mixture, pressing the crumbs firmly onto all sides to create a substantial coating. The pressure helps the breadcrumbs adhere better than merely tossing the chicken in the mixture. Transfer the fully breaded piece to the clean plate or baking sheet and repeat with remaining chicken strips, being careful not to overcrowd the holding plate, which could cause the breading to become soggy. If necessary, place breaded pieces in a single layer on multiple plates. This methodical triple-dredge approach creates the foundation for perfectly crispy tenders.
- Step 4:
- Allow the breading to set before cooking – Once all chicken pieces are breaded, allow them to rest for 5-10 minutes before cooking. This brief resting period gives the coating time to adhere more securely to the chicken, reducing the likelihood of the breading falling off during cooking. During this time, you'll notice the coating changing from a wet appearance to a more dry, set texture as the moisture from the egg wash is absorbed by both the flour beneath it and the breadcrumbs on top. This crucial but often overlooked step is the difference between breading that falls off in the pan and breading that forms a secure shell around the chicken. While the coating sets, you can prepare your cooking method of choice. If pan-frying, add enough oil to a large skillet to reach a depth of approximately ¼-inch and heat over medium-high until it reaches 350°F (175°C). If you don't have a thermometer, you can test the oil by dropping in a few breadcrumbs—they should sizzle immediately but not burn.
- Step 5:
- Cook with attention to temperature and timing – For pan-frying, carefully add the breaded chicken tenders to the hot oil, working in batches to avoid overcrowding the pan. Overcrowding causes the oil temperature to drop too dramatically, resulting in greasy, soggy tenders rather than crisp ones. Cook for 3-4 minutes on the first side until the coating is golden brown, then gently flip using tongs (not a fork, which would pierce the coating) and cook for an additional 3-4 minutes. For baking, preheat your oven to 400°F (200°C) and place the breaded tenders on a wire rack set over a baking sheet. The elevated position allows air to circulate around the entire tender, promoting even crisping. Lightly spray or drizzle the tenders with oil to promote browning, then bake for 15-18 minutes, flipping halfway through cooking time. Regardless of cooking method, the chicken is done when it reaches an internal temperature of 165°F (74°C) and the juices run clear when the thickest part is pierced. Properly cooked tenders should have a golden-brown exterior with no raw flour visible.
- Step 6:
- Manage the cooking process for consistent results – If cooking in batches, maintain oil temperature between batches by allowing it to return to 350°F (175°C) before adding more chicken. Remove any large crumbs from the oil between batches, as they can burn and impart bitter flavors to subsequent pieces. As finished tenders come out of the oil or oven, place them on a wire rack set over a sheet pan rather than on paper towels. The rack allows air to circulate around the entire tender, preventing the bottom from becoming soggy from trapped steam. If you need to hold the tenders warm while finishing additional batches, place the rack with completed tenders in a 200°F (95°C) oven. This low temperature keeps them warm without continuing to cook the chicken, which would make it dry. For the crispiest results, serve the tenders as soon as possible after cooking, as the contrast between the crunchy exterior and juicy interior is most pronounced when fresh.
- Step 7:
- Create complementary dipping sauces – While the tenders are incredible on their own, offering a variety of dipping options elevates the experience and allows customization. For classic honey mustard, whisk together ¼ cup mayonnaise, 2 tablespoons Dijon mustard, 2 tablespoons honey, 1 teaspoon lemon juice, and a pinch of salt until smooth. For a simple barbecue sauce, combine ½ cup ketchup, 2 tablespoons brown sugar, 1 tablespoon Worcestershire sauce, 1 teaspoon smoked paprika, and ½ teaspoon garlic powder. Buffalo sauce can be prepared by melting 4 tablespoons butter and whisking in ⅓ cup hot sauce, 1 teaspoon vinegar, and a pinch of garlic powder. For a creamy ranch, whisk ½ cup sour cream with ¼ cup buttermilk, 1 tablespoon each of fresh chopped parsley, dill, and chives, ½ teaspoon garlic powder, ½ teaspoon onion powder, and salt and pepper to taste. Prepare sauces up to a day ahead and refrigerate in small serving bowls, allowing them to come to room temperature about 20 minutes before serving for the best flavor.
- Step 8:
- Serve thoughtfully for maximum enjoyment – Arrange the chicken tenders on a platter lined with parchment paper or a clean kitchen towel, which absorbs any excess oil without making the coating soggy. For a casual presentation, serve the tenders in a paper-lined basket with small cups of various dipping sauces on the side. For a more elegant presentation, stack the tenders in a criss-cross pattern on a platter and place small bowls of sauce around the base, garnishing with fresh herbs or lemon wedges. If serving as a main course, pair with compatible sides like crispy oven fries, coleslaw, or a simple green salad to balance the richness of the tenders. For a party setting, keep the tenders warm in a 170°F (77°C) oven for up to 30 minutes, though they are best enjoyed as fresh as possible when the contrast between the crispy exterior and juicy interior is at its peak. Offer napkins liberally – the hallmark of truly great chicken tenders is that they're worth getting your fingers messy for.
I learned the importance of properly drying chicken before breading through an embarrassing dinner party mishap early in my cooking journey. Rushing through preparation, I skipped thorough drying, resulting in pale, soggy tenders that shed their breading with each bite. Now I lay the chicken pieces on paper towels and press additional towels on top, ensuring truly dry surfaces before proceeding. My sister-in-law, who typically avoids fried foods, makes an exception for these tenders, noting that they "don't have that heavy, greasy feeling" she associates with similar dishes. My young nephew, upon trying them for the first time, solemnly informed me that "these are WAY better than McDonald's," which from a six-year-old constitutes the highest possible praise. I've noticed that no matter what other dishes I serve alongside these tenders, they're invariably the first to disappear from the table.
Perfect Pairings for Complete Meals
These versatile chicken tenders shine in various meal contexts with the right accompaniments. For a casual family dinner, serve alongside crispy oven fries seasoned with the same spice blend used in the chicken coating for flavor continuity. Add a simple side of steamed broccoli or green beans for nutritional balance without competing flavors.
For entertaining, create a DIY chicken tender bar with assorted dipping sauces, slider buns, lettuce, and tomato slices so guests can enjoy the tenders alone or create mini sandwiches. This interactive approach makes the humble tender feel special and encourages social interaction.
When serving children alongside adults, consider plating more sophisticated sides with the adult portions – perhaps a quinoa salad with dried cranberries and feta, or roasted Brussels sprouts with balsamic glaze – while keeping the tenders consistent for everyone. This approach elevates the meal for adults while keeping the main component accessible to younger palates.
For a picnic or game day spread, prepare the tenders in advance and serve them at room temperature alongside pasta salad, coleslaw, and fresh fruit. The tenders maintain their satisfying texture even as they cool, making them ideal for casual gatherings.
Beyond Basic Tenders: Creative Variations
Once you've mastered the basic technique, consider these variations to expand your chicken tender repertoire. For a Southern twist, add 1 teaspoon of cayenne pepper to the flour mixture and 1 tablespoon of honey to the egg wash. The subtle heat and sweetness create a more complex flavor profile reminiscent of Nashville hot chicken.
Create an Italian version by incorporating 2 tablespoons of Italian seasoning and an extra ¼ cup of Parmesan into the breadcrumb mixture. Serve with marinara sauce for dipping and a side of garlic bread for a chicken parmesan-inspired meal.
For an Asian-inspired variation, add 1 teaspoon of ground ginger and 1 teaspoon of five-spice powder to the flour mixture. Serve with a dipping sauce of equal parts honey and soy sauce with a dash of sesame oil and garnish with sliced green onions and sesame seeds.
Make a Mediterranean version by adding 1 tablespoon of finely chopped fresh rosemary and the zest of one lemon to the breadcrumb mixture. Serve with tzatziki sauce for dipping and a Greek salad on the side for a fresh, herb-forward meal.
 Pin it
Strategic Make-Ahead Options
These chicken tenders offer several make-ahead possibilities to streamline meal preparation. The breading station components can be prepared up to a day in advance and kept covered in the refrigerator. The seasoned flour and breadcrumb mixtures can simply be covered with plastic wrap, while the egg mixture should be stored in an airtight container.
For partially prepared tenders, follow the breading process completely, then arrange the breaded chicken in a single layer on a parchment-lined baking sheet. Cover loosely with plastic wrap and refrigerate for up to 4 hours before cooking. This advance preparation makes them perfect for dinner parties or family gatherings where you want to minimize last-minute work.
Fully cooked tenders can be frozen for up to 3 months. Allow them to cool completely, then freeze in a single layer on a baking sheet before transferring to an airtight container or freezer bag. Reheat from frozen in a 375°F (190°C) oven for 15-20 minutes until heated through and crisp.
These homemade chicken tenders have become my culinary safety net – the dish I turn to when cooking for unfamiliar palates or when I need guaranteed success with minimal stress. There's something deeply satisfying about mastering a dish that appeals across age groups and dining preferences, transforming a humble chicken breast into something that consistently elicits enthusiasm. I've come to believe that the most valuable recipes in our repertoire aren't always the most complex or exotic, but rather the ones that reliably bring people together around the table with expressions of genuine enjoyment. Whether you're feeding finicky children, entertaining guests with sophisticated palates, or simply treating yourself to comfort food after a long day, these crispy, juicy tenders deliver satisfaction that far exceeds their straightforward preparation.
Frequently Asked Questions
- → Can I make these chicken tenders ahead of time?
- Yes! You can bread the chicken up to a day ahead and refrigerate until ready to cook. For make-ahead cooked tenders, reheat in a 350°F oven for 10 minutes to restore crispiness.
- → How do I keep the breading from falling off?
- Pat the chicken dry before starting, press the breading firmly onto each piece, and let the breaded tenders rest for 5-10 minutes before cooking to help the coating adhere better.
- → Can I freeze these chicken tenders?
- Absolutely! Freeze cooked and cooled tenders in a single layer, then transfer to a freezer bag. Reheat from frozen in a 375°F oven for 15-20 minutes until heated through.
- → How can I make these gluten-free?
- Substitute the all-purpose flour with gluten-free flour and use gluten-free panko or breadcrumbs. Be sure to check that your seasonings are also gluten-free.
- → What's the best oil for frying chicken tenders?
- Vegetable oil, canola oil, or peanut oil work best for frying due to their high smoke points. For pan-frying, you'll need about 1/4 inch of oil in the pan.