
 Pin it
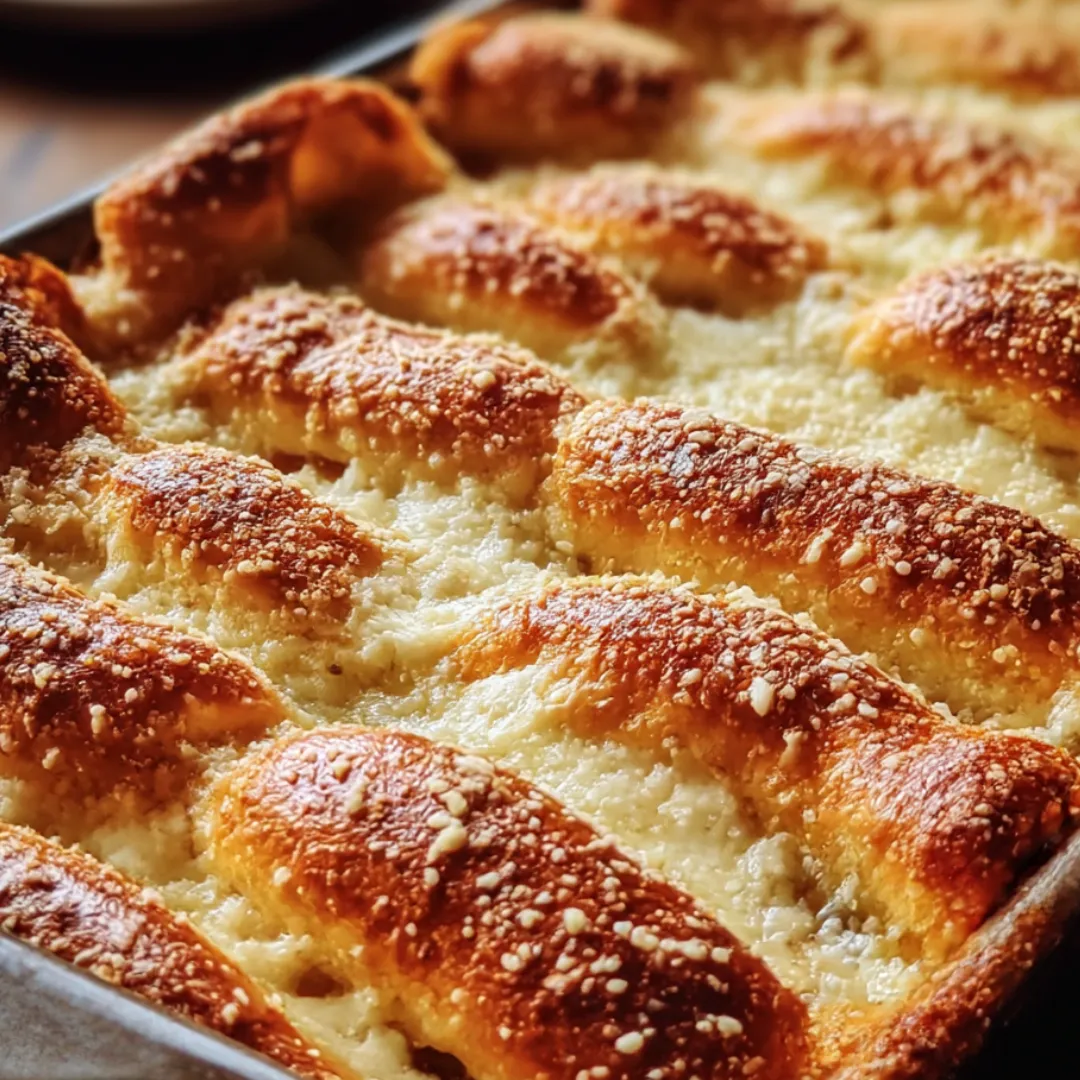
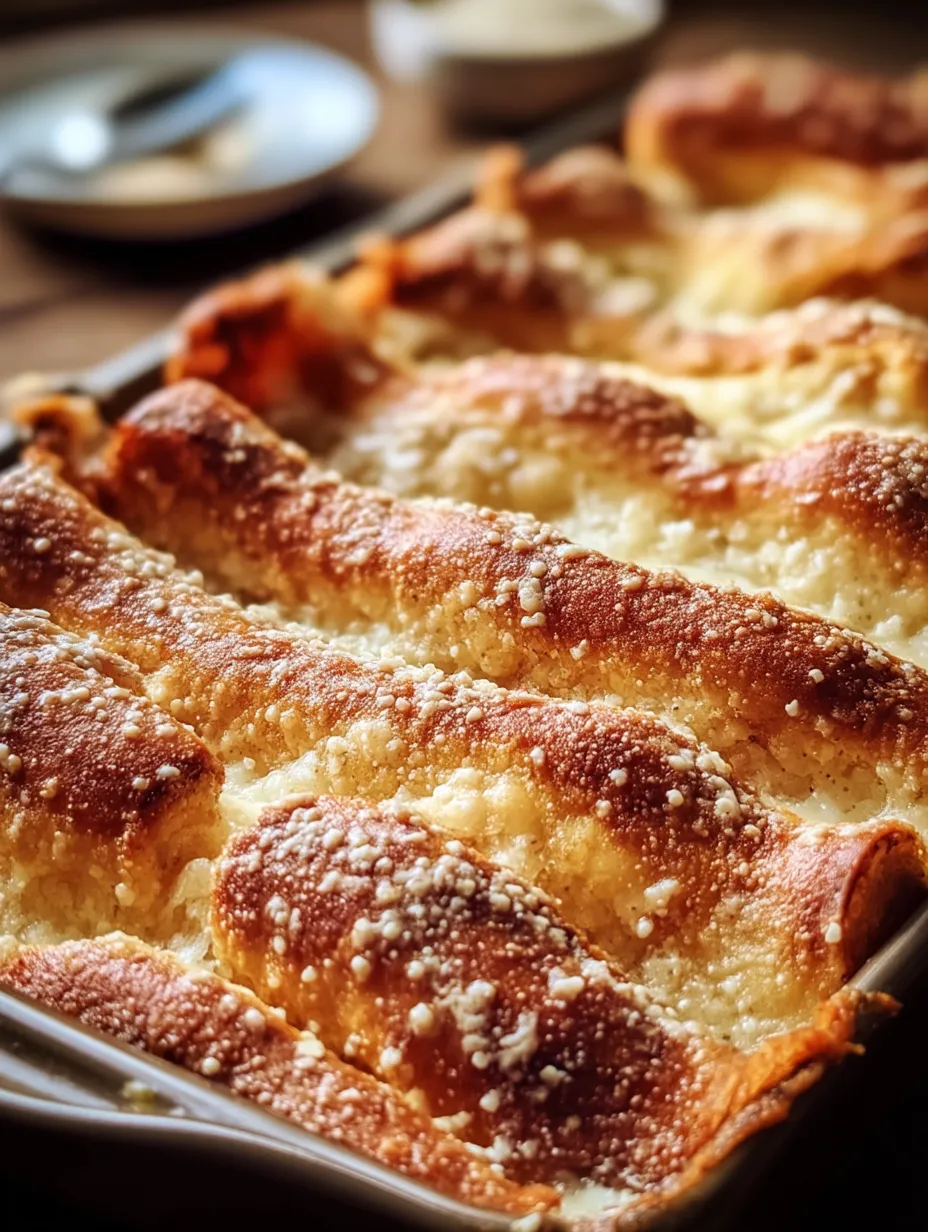
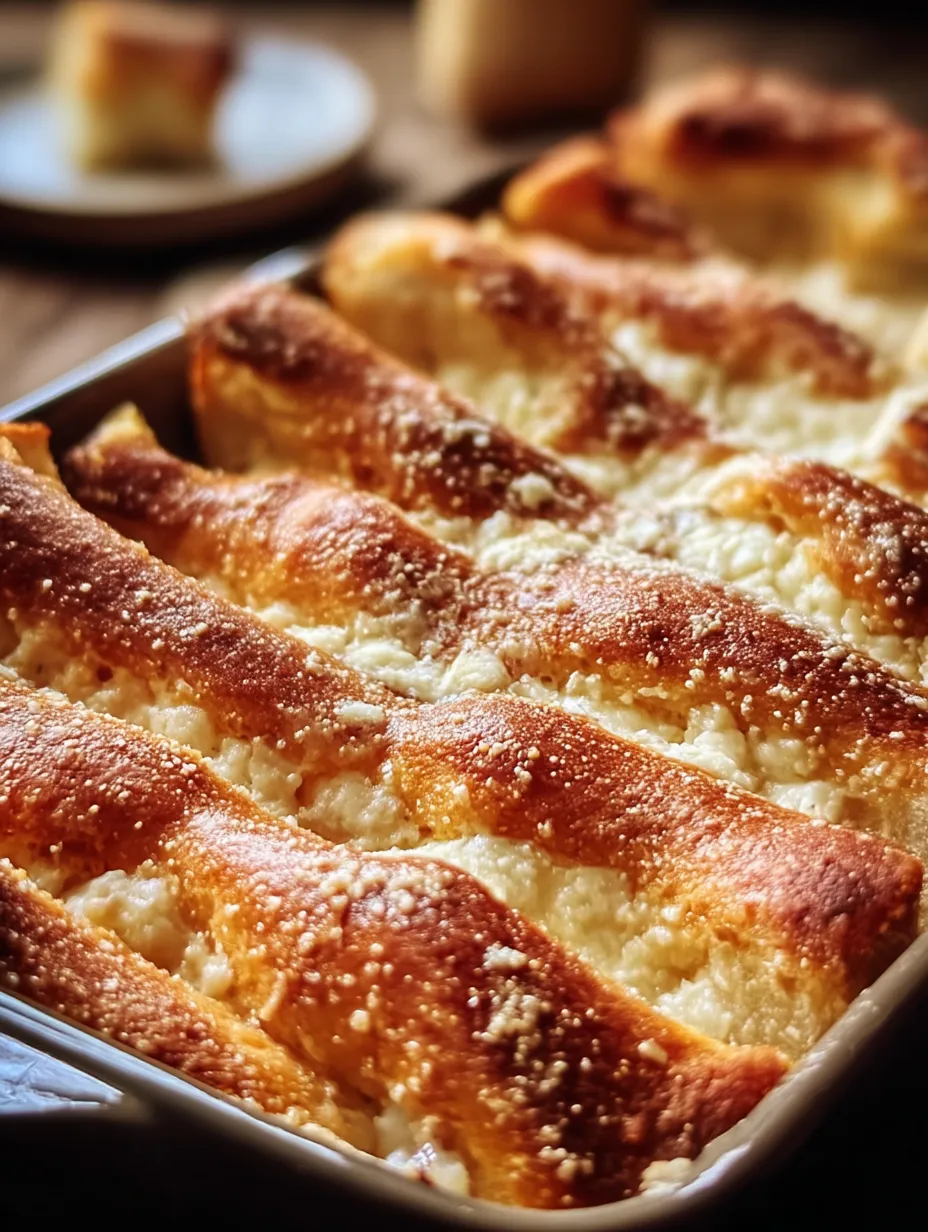
These homemade Little Caesars Crazy Bread sticks capture the irresistible magic of the famous pizza chain's beloved side with astonishing accuracy. The pillowy-soft interior wrapped in a delicate golden crust provides the perfect canvas for the signature buttery garlic parmesan coating that defines this iconic treat. Each warm breadstick delivers that distinctive combination of subtle yeasty sweetness, rich garlic butter, and savory cheese that triggers instant nostalgia with every bite. Unlike many restaurant copycat recipes that merely approximate the original, this version recreates that specific Crazy Bread experience—from the distinctive texture to the precise balance of garlic and parmesan—while allowing you to enjoy them at their absolute freshest, straight from your own oven.
The first time I attempted to recreate Crazy Bread was during the early months of pandemic lockdown when my son was desperately missing his favorite pizza night treats. After several disappointing attempts that produced breadsticks that were either too dense, too crusty, or simply not "Crazy" enough, I finally hit on the perfect combination of techniques. The moment of truth came when my son took his first bite—his eyes widened in recognition before he grabbed a second breadstick and declared them "exactly like the real ones, maybe even better." What began as a project to satisfy a specific craving has become our Friday night tradition, often accompanied by homemade pizza and, on special occasions, a recreation of that iconic orange Crazy Sauce. The simple joy of watching my family devour these breadsticks, fingers glistening with garlic butter, has made this recipe a permanent part of our household's comfort food collection.
Ingredients
- 2¼ teaspoons (1 packet) active dry yeast: Creates the perfect light, airy structure characteristic of Crazy Bread. Look for fresh yeast with a cream color, not gray or overly dark. The yeast should smell earthy but not unpleasant when opened, and the expiration date should be well in the future. This foundation ingredient determines the bread's rise and texture, which is key to authentic results. Fresh yeast activates quickly and produces consistent results, while old yeast leads to dense, heavy breadsticks. Store unopened packets in a cool, dry place, and opened yeast in the refrigerator.
- 1 cup warm water (110°F/43°C): Activates the yeast for proper rising. The temperature is crucial—too hot kills the yeast, too cool delays activation. Use a food thermometer for accuracy, or test on your inner wrist, where it should feel warm but not hot. This ingredient creates the environment for yeast to thrive and produce the gases that create perfect texture. Filtered water works best as some municipal water contains chlorine that can inhibit yeast activity. The precise water temperature is worth measuring as it directly affects the quality and consistency of your breadsticks.
- 2½ cups all-purpose flour: Provides the structure and texture base that mimics Little Caesars' distinctive chew. Unbleached all-purpose flour with around 10-12% protein content works best—not bread flour, which would create a chewier texture than the original. The flour should feel soft and powdery without lumps, indicating freshness. This key ingredient creates the distinctive Little Caesars mouthfeel through its moderate protein content. The specific protein level in all-purpose flour produces breadsticks with just enough structure without becoming tough or bagel-like.
- 1 teaspoon salt: Balances and enhances all other flavors in the dough. Kosher or fine sea salt provides clean flavor with even distribution. Beyond just making the breadsticks tasty, salt regulates yeast activity for proper, controlled rising. This seemingly simple ingredient is actually crucial to the chemistry of the dough, strengthening gluten formation and preventing overly rapid rising that would create large, irregular air pockets. Without adequate salt, the breadsticks would taste flat and have poor texture.
- 1 teaspoon sugar: Provides food for the yeast and contributes subtle sweetness that balances savory toppings. Regular granulated sugar dissolves readily in warm water for even distribution. The sugar helps kickstart yeast fermentation, leading to quicker activation and more reliable rising. This ingredient creates the subtly sweet undertone authentic to Little Caesars breadsticks while supporting proper yeast development. The small amount adds complexity without making the breadsticks noticeably sweet.
- 2 tablespoons olive oil: Creates tenderness and rich mouthfeel in the dough. Regular olive oil rather than extra virgin works best, as its milder flavor won't compete with the garlic butter topping. The oil coats flour proteins, limiting some gluten development for softer breadsticks. This ingredient is essential for achieving the signature Little Caesars tenderness rather than a crusty Italian bread texture. The specific amount provides richness without making the dough heavy or greasy.
- ¼ cup unsalted butter, melted: Forms the base of the signature topping that defines Crazy Bread. Use real butter, not margarine or spreads, for authentic flavor. The butter should be completely melted but not browned for the clearest flavor. This critical ingredient creates the rich mouthfeel and distinctive sheen on authentic Crazy Bread. The fat carries the garlic flavor throughout the topping while providing the characteristic Little Caesars richness that makes these breadsticks so craveable.
- 1 teaspoon garlic powder: Delivers the signature savory flavor without the burning risk of fresh garlic. Look for pure garlic powder without added salt for better flavor control. Fresh garlic powder should have a strong, pungent aroma when opened—if it smells faint, it's old and less potent. This key flavoring ingredient infuses the butter with the characteristic Crazy Bread taste. The powder form distributes evenly throughout the butter for consistent flavor with every bite, unlike the uneven distribution that would result from minced fresh garlic.
- ¼ cup grated Parmesan cheese: Provides the distinctive savory cheese element essential to authentic Crazy Bread. Use the dry-grated style (like Kraft) rather than freshly grated for the most accurate recreation—this is one case where the processed version is closer to the original. This ingredient creates both flavor and the characteristic slightly textured coating. The fine, dry texture of commercial grated Parmesan adheres better to the buttered surface and provides that specific Little Caesars mouthfeel that freshly grated Parmesan cannot replicate.
- ½ cup marinara sauce or pizza sauce (for dipping): Completes the authentic Little Caesars experience with tangy contrast to the rich breadsticks. A smooth, slightly sweet marinara most closely matches their "Crazy Sauce." This complementary ingredient balances the buttery richness of the breadsticks with acidic brightness. While the breadsticks are delicious on their own, the sauce recreates the complete Crazy Bread experience, providing moisture and tangy contrast that enhances each bite.
 Pin it
Step-by-Step Instructions
- Step 1: Activate the yeast properly
- In a large mixing bowl, combine the warm water (110°F/43°C) with the teaspoon of sugar, stirring briefly to dissolve. Sprinkle the active dry yeast evenly across the surface of the water rather than dumping it in one spot. Let this mixture stand undisturbed for 5-10 minutes in a draft-free area. During this time, the yeast will activate and begin consuming the sugar, creating a foamy layer on top of the water. This foam should reach about ½-inch thickness, indicating that your yeast is alive and active. If you don't see significant foaming after 10 minutes, your yeast may be old or your water temperature incorrect, and you should start again with fresh ingredients. This activation step is crucial for creating the light, airy texture characteristic of Crazy Bread rather than dense, heavy breadsticks.
- Step 2: Create the dough with perfect texture
- Once your yeast is foamy and active, add the olive oil to the bowl. In a separate bowl, whisk together the flour and salt until evenly combined, then add this dry mixture to the yeast solution. Using a wooden spoon or sturdy spatula, stir everything together until a shaggy dough forms and no dry flour remains at the bottom of the bowl. Turn the dough out onto a lightly floured surface and knead for 6-8 minutes. Proper kneading technique involves pushing the dough away from you with the heel of your hand, folding it back over itself, giving it a quarter turn, and repeating. The dough is ready when it feels smooth and elastic, bouncing back slowly when poked with a finger. It should be slightly tacky but not sticky enough to coat your hands. This texture is crucial for achieving the soft yet slightly chewy consistency that defines authentic Crazy Bread.
- Step 3: Allow for proper rising
- Shape your kneaded dough into a smooth ball and place it in a clean bowl that's been lightly coated with olive oil. Turn the dough once to coat its surface with oil, which prevents it from drying out during rising. Cover the bowl with a clean kitchen towel or plastic wrap and place it in a warm, draft-free location—ideally around 75-80°F. The inside of an oven with just the light turned on works perfectly. Let the dough rise until doubled in size, which takes approximately 1 hour depending on the ambient temperature. The dough is properly risen when you can gently press two fingers about ½-inch into the surface and the indentation remains rather than springing back. This rising period develops flavor and creates the light, airy texture essential to authentic Crazy Bread. Rushing this step results in dense breadsticks lacking the characteristic Little Caesars texture.
- Step 4: Shape the breadsticks with precision
- Once the dough has doubled in size, gently punch it down to release excess air. Turn it out onto a lightly floured surface and pat it into a rough rectangle. Using a knife or bench scraper, divide the dough into 12 equal portions—cutting it in half, then each half into thirds, and finally each third into halves works well for even distribution. Take each portion and roll it between your palms or on the work surface into a rope approximately 7-8 inches long and about ¾-inch thick. The thickness is important—too thin and they'll become crispy rather than soft; too thick and they won't cook through properly. Line a baking sheet with parchment paper and arrange the breadsticks about 1 inch apart. The spacing allows them to rise without touching while still keeping them close enough to create the soft sides characteristic of Crazy Bread rather than crusty all around.
- Step 5: Prepare for baking with proper technique
- Preheat your oven to 400°F (200°C) with a rack positioned in the middle. While the oven heats, cover the shaped breadsticks loosely with a clean kitchen towel and allow them to rest for about 15-20 minutes. This short second rise helps the breadsticks achieve their final light texture. The breadsticks are ready to bake when they've puffed slightly but not doubled in size. Just before baking, you can lightly brush the tops with a small amount of olive oil for better browning, though this is optional. This preparation ensures the breadsticks will bake evenly with the correct texture—soft and tender inside with just a light golden exterior, exactly like the Little Caesars original. The specific oven temperature is important for achieving the right ratio of exterior browning to interior cooking.
- Step 6: Bake to perfect doneness
- Place the baking sheet on the middle rack of your preheated oven and bake for 12-15 minutes. The exact timing depends on your specific oven—look for visual cues rather than relying solely on time. The breadsticks should be light golden on top, not deep brown, with slightly darker edges. They're ready when the surface feels set but still yields slightly to a gentle touch. If you have an instant-read thermometer, the internal temperature should reach about 190°F. Avoid overbaking, as Crazy Bread should remain soft rather than crusty or hard. This gentle baking approach creates the signature texture—breadsticks that are fully cooked but maintain the softness that makes them distinct from other breadstick styles. The pale golden color is characteristic of authentic Crazy Bread rather than the deeper brown of Italian breadsticks.
- Step 7: Create the signature garlic butter topping
- While the breadsticks are baking, prepare the essential Crazy Bread topping. In a small bowl, melt the ¼ cup of unsalted butter. Once fully melted but not browned, stir in the teaspoon of garlic powder and half of the grated Parmesan cheese (about 2 tablespoons). Whisk until completely combined into a smooth mixture. This preparation timing is important—you want the garlic butter ready the moment the breadsticks come out of the oven. If prepared too far in advance, the mixture may separate or the cheese may clump. The specific proportion of garlic powder to butter creates the authentic Little Caesars flavor intensity, while adding some Parmesan directly to the butter helps it adhere better to the breadsticks. This signature topping is what transforms basic breadsticks into true "Crazy Bread."
- Step 8: Apply toppings and serve at peak freshness
- The moment the breadsticks come out of the oven, while still hot, brush them generously with the garlic butter mixture, making sure to coat all sides. Immediately sprinkle the remaining Parmesan cheese evenly over the buttered breadsticks. The heat from the fresh breadsticks will slightly melt the cheese, helping it adhere while maintaining some texture. If desired, add a light sprinkle of dried parsley for color and visual appeal, though this is not strictly part of the original. Serve the breadsticks immediately while hot, when they're at their absolute best texture and flavor. Accompany with small cups of warmed marinara or pizza sauce for dipping. The breadsticks are at their peak quality within the first 15-20 minutes after baking, just like at Little Caesars where they're served fresh from the oven.
The Perfect Side for Pizza Night
These Crazy Bread breadsticks have transformed our family pizza nights from simple meals into memorable occasions. While ordering pizza used to feel like just another dinner solution, making these breadsticks from scratch has turned pizza night into something we genuinely look forward to each week. There's something special about the house filling with the aroma of freshly baked bread and garlic that creates an atmosphere of anticipation and comfort.
What particularly surprised me about this recipe is how it brings everyone into the kitchen. My teenagers, typically difficult to pry away from their devices, willingly abandon screens to roll out breadsticks or brush on the garlic butter. My youngest has become the designated "cheese sprinkler," taking her role with impressive seriousness. This collaborative aspect has turned what could be just another cooking task into a family activity that creates both food and memories.
The breadsticks themselves pair perfectly with virtually any pizza style, from classic pepperoni to gourmet varieties with unusual toppings. We've found they're particularly wonderful with pizzas that have spicier components, as the soft, buttery breadsticks provide a perfect palate-cleansing counterpoint to heat. They've also proven to be the ideal vehicle for using up leftover pizza sauce, transformed into a quick dipping option that completes the experience. In our household, these Crazy Bread replicas have gone from being a side dish to an essential component of pizza night—sometimes even outshining the main attraction.
Make-Ahead and Storage Strategies
Through considerable trial and error, I've developed several approaches to fit these breadsticks into busy schedules without sacrificing their distinctive fresh-baked quality. For same-day preparation with minimal last-minute work, I often make the dough in the morning, give it its first rise, then shape the breadsticks and refrigerate them covered on the baking sheet. About an hour before dinner, I remove them from the refrigerator to come to room temperature before baking. This approach distributes the work while still delivering that fresh-from-the-oven experience that makes Crazy Bread so special.
For longer-term planning, the dough freezes remarkably well. After the first rise, I divide the dough into individual breadstick portions, freeze them solid on a baking sheet, then transfer to freezer bags. These frozen portions thaw quickly at room temperature (about 1-2 hours) and can then be shaped and baked as usual. I've found this approach particularly useful for unpredictable schedules—having ready-to-shape dough on hand makes it possible to have fresh Crazy Bread even on hectic weeknights.
The breadsticks themselves are best enjoyed fresh, but leftovers can be successfully revived. I store any extras in an airtight container at room temperature for up to two days. To restore their fresh-baked texture, I wrap them in foil and warm in a 300°F oven for about 5-7 minutes. Just before serving, I'll sometimes add a light brush of fresh garlic butter and a sprinkle of Parmesan to refresh the flavor. While not quite identical to just-baked, this approach preserves much of the original texture and flavor, making leftovers a welcome treat rather than a disappointment.
 Pin it
Creative Variations While Maintaining Authenticity
While the classic Crazy Bread is perfect in its simplicity, I've developed several variations that maintain the authentic texture and basic flavor profile while introducing new elements. These adaptations have been particularly useful for keeping our weekly tradition feeling fresh and exciting without straying too far from what makes Crazy Bread special.
For a more substantial offering, I occasionally fold shredded mozzarella into the dough just before shaping the breadsticks. About a half cup distributed throughout the entire batch adds pockets of melty cheese without compromising the texture. These cheese-stuffed versions make a heartier accompaniment that can almost function as a meal on their own, especially when served with marinara for dipping.
A subtle but delicious variation involves infusing the butter with different aromatics. While garlic is essential to the classic flavor profile, adding a small amount of finely minced fresh rosemary or basil to the melted butter creates a more complex flavor without overwhelming the original. This approach feels like an enhancement rather than a departure from the authentic taste.
For special occasions, I sometimes roll the shaped dough in a mixture of sesame seeds and the traditional Parmesan before baking. This creates a more textured exterior while maintaining the soft interior and garlic butter finish. The seeds add visual interest and a subtle nutty flavor that complements the classic Crazy Bread profile, making them feel slightly more sophisticated while still honoring the original concept.
I learned about the importance of proper baking time through a memorable kitchen disaster during a dinner party. Eager to impress my guests and worried the breadsticks wouldn't be done enough, I left them in the oven "just a few more minutes" while finishing other dishes. Distracted by conversation, those few minutes stretched longer than intended. When I finally removed the tray, instead of soft, tender Crazy Bread, I found dry, hard breadsticks that more closely resembled biscotti than anything from Little Caesars. Too embarrassed to serve them, I quickly made a joke about having prepared "twice-baked breadsticks" as a special appetizer while my husband gave me that knowing look that clearly said, "You forgot them, didn't you?" Since that humbling experience, I've become religious about setting a timer and checking the breadsticks at the earliest suggested time rather than the latest. That simple adjustment has ensured consistently perfect results, reminding me that sometimes the margin between success and failure is literally just a matter of minutes.
After making these Crazy Bread breadsticks countless times, I'm still amazed by how such simple ingredients can create something that triggers such strong nostalgic reactions. I've watched friends' faces light up with recognition at the first bite, transported back to childhood pizza parties or late-night college study sessions. There's something deeply satisfying about recreating a commercial product that holds such specific memories for so many people, especially when the homemade version delivers all the familiar pleasure without the artificial ingredients or preservatives. What began as a pandemic project to satisfy a specific craving has become something more meaningful—a weekly tradition that brings my family together in the kitchen, creates delicious food memories for my children, and proves that sometimes the most humble foods carry the strongest emotional connections. That transformation from fast food side item to cherished family recipe is perhaps the most unexpected and delightful outcome of this copycat creation.
Frequently Asked Questions
- → Can I make the dough ahead of time?
- Yes, you can prepare the dough up to 24 hours ahead and keep it in the refrigerator. Just let it come to room temperature before shaping.
- → What can I serve with these breadsticks?
- These breadsticks are great with marinara sauce, pizza sauce, ranch dressing, or even garlic butter for dipping.
- → How do I store leftover breadsticks?
- Store them in an airtight container at room temperature for up to 2 days. Reheat in the oven at 350°F for about 5 minutes.
- → Can I freeze these breadsticks?
- Yes, you can freeze them after baking. Thaw at room temperature and reheat in a 350°F oven for 5-7 minutes until warm.
- → Can I use instant yeast instead of active dry?
- Yes, use the same amount but you can skip the activation step and mix it directly with the dry ingredients.