
 Pin it
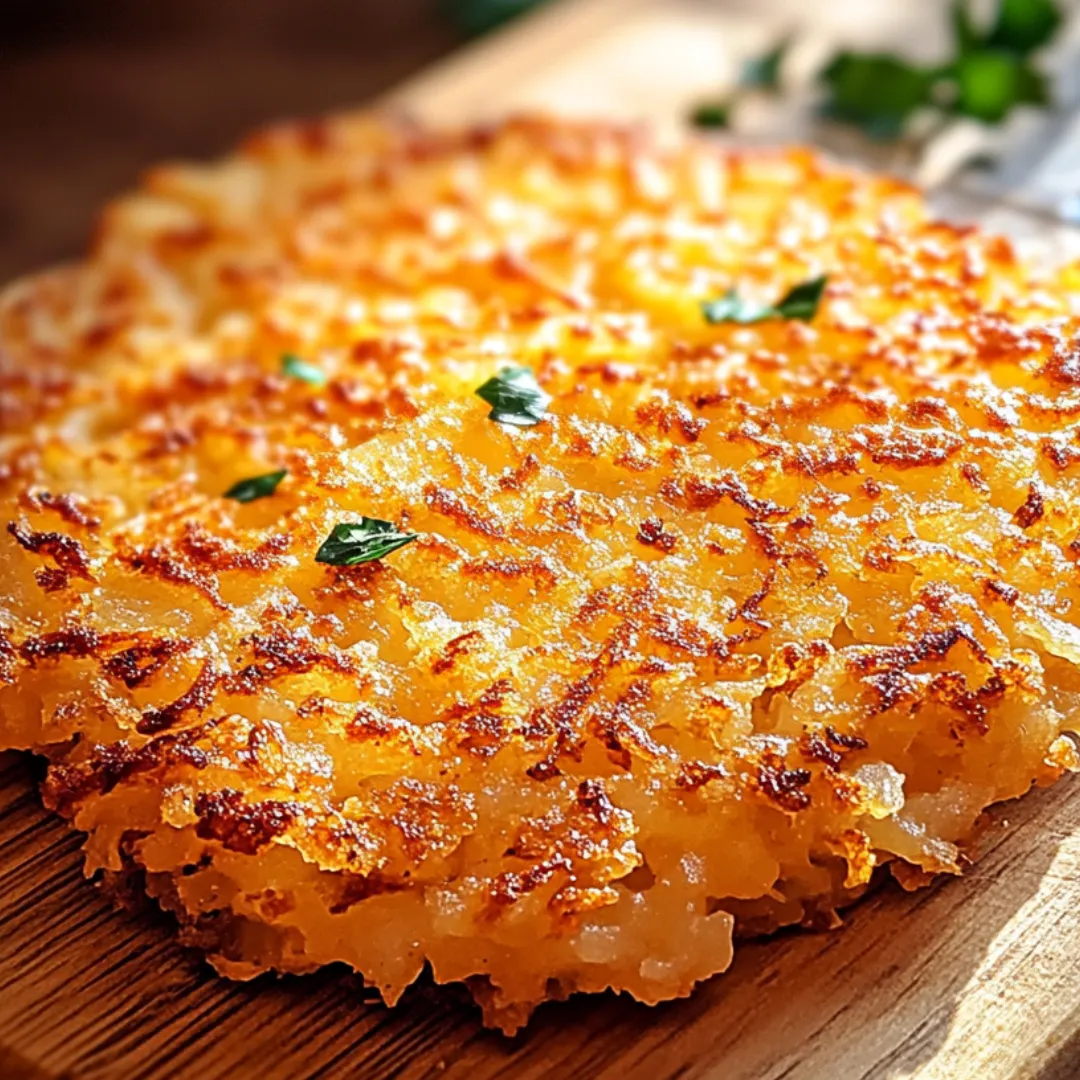
These Homemade McDonald's Hash Browns recreate the iconic fast-food breakfast staple with astonishing accuracy, delivering that unmistakable contrast between shattering-crisp exterior and fluffy interior that makes the original so irresistible. The golden-brown ovals offer that satisfying one-handed potato convenience but with fresher, cleaner flavors that only home cooking can provide. Unlike other homemade hash brown recipes that produce different styles entirely, this version specifically targets the unique texture, shape, and flavor profile that has made McDonald's version a breakfast icon—crispy enough to create that distinctive crunch with each bite, yet tender inside with perfectly seasoned potato that brings both comfort and satisfaction.
I first attempted recreating these hash browns after moving to a rural area without convenient fast food access. During a particularly nostalgic weekend craving, I found myself studying McDonald's ingredient list online and experimenting with different techniques. My early attempts produced either overly mushy potato cakes or dry, stick-like creations nothing like the original. After multiple test batches that my family patiently endured, I discovered the crucial combination of proper moisture removal, cornstarch binding, and exact frying temperature that creates that signature texture. The first time I achieved that perfect crispy-yet-tender result, my teenage son grabbed a second one and declared they were "actually better than McDonald's" – high praise from someone who considers fast food a major food group. Now these hash browns have become our Saturday morning tradition, often accompanied by sunny-side-up eggs and freshly squeezed orange juice – our own version of the breakfast experience that feels both indulgent and wholesome simultaneously.
Ingredients
- 3 medium Russet potatoes (about 600g), peeled: Provide the ideal starchy foundation for crispy hash browns. Look for firm potatoes with no green spots or sprouts, as these indicate age and potential bitterness. Russets specifically offer the perfect starch-to-moisture ratio that creates that distinctive McDonald's texture—higher starch content than waxy varieties means better crisping ability. The potatoes should feel heavy for their size, indicating good moisture content. This foundation ingredient determines the eventual texture of your hash browns, making potato selection particularly important for authentic results.
- 2 tablespoons cornstarch: Creates that signature binding and crispness that defines McDonald's hash browns. Look for pure cornstarch without additives. The fine white powder should feel silky between your fingers with no lumps, indicating freshness. This crucial ingredient forms a thin coating around the potato shreds that crisps beautifully when fried, creating that characteristic shattering exterior texture. The starch also helps absorb any remaining moisture in the potatoes, which is essential for achieving maximum crispness during cooking.
- ½ teaspoon onion powder: Provides subtle savory depth without visible onion pieces. Choose a fresh, aromatic powder without clumps (which indicate moisture exposure). The powder should have a pronounced onion scent when opened. This ingredient adds the characteristic savory background note that's present in the original McDonald's version. The fine powder distributes evenly throughout the potato mixture, ensuring consistent flavor in every bite without interrupting the smooth texture.
- ½ teaspoon garlic powder: Adds complementary aromatic notes that enhance the potato's natural flavor. Select garlic powder with a strong, fresh aroma and no clumping. Pure garlic powder without added salt works best for better seasoning control. This ingredient contributes subtle depth without overwhelming the clean potato taste. The combination with onion powder creates the signature savory profile that makes these hash browns distinctively reminiscent of the McDonald's original.
- Salt and black pepper, to taste: Enhance and balance all other flavors in the hash browns. Kosher salt or fine sea salt distributes most evenly throughout the mixture. Freshly ground black pepper provides more aromatic complexity than pre-ground. These basic seasonings are crucial for bringing out the natural flavors of the potatoes. The right amount awakens the other ingredients without making the hash browns taste overtly salty or peppery—aim for enhancement rather than dominance.
- 2 tablespoons all-purpose flour (optional): Provides additional binding that can help the patties hold together during cooking. Unbleached all-purpose flour works best for clean flavor. This optional ingredient is particularly helpful if your potatoes are higher in moisture or if you're having trouble with the patties maintaining their shape. The small amount adds structure without creating a batter-like consistency that would change the authentic texture.
- Neutral oil for frying: Creates the essential crispy exterior through proper high-heat cooking. Choose oils with high smoke points and neutral flavors like vegetable, canola, sunflower, or peanut oil. The oil should be fresh with no off aromas, as any rancidity will transfer to the finished hash browns. This cooking medium is critical for achieving the signature golden-brown color and crisp texture. The right oil temperature (around 350°F/175°C) ensures the hash browns crisp properly without absorbing excess oil.
 Pin it
Step-by-Step Instructions
- Step 1: Prepare the potatoes properly
- Begin by thoroughly washing the Russet potatoes under cool running water, scrubbing with a vegetable brush to remove any dirt from the skin. Pat dry with paper towels before peeling to prevent slipping. Using a vegetable peeler, remove all skin, turning the potato as you work to ensure complete removal. After peeling, rinse the potatoes again briefly to remove any surface starch released during peeling. This preparation ensures no bitter skin bits remain and provides a clean potato flavor. Properly prepared potatoes create the foundation for perfect hash browns, so this initial step, while simple, is crucial for the best texture and flavor in the finished product.
- Step 2: Master the proper grating technique
- Using a box grater with the large holes or a food processor with a grating attachment, grate the peeled potatoes. If using a box grater, hold it at a slight angle over a large bowl and use long, steady strokes, applying even pressure to create uniform shreds. If using a food processor, cut potatoes into chunks that fit the feed tube and use the pulse function for more control over the shred size. The goal is consistent, medium-sized shreds that will cook evenly—too fine and the hash browns will become mushy; too coarse and they won't bind properly. Work quickly to prevent the grated potatoes from oxidizing and turning brown. The consistent shred size is key to achieving the proper texture that mimics the McDonald's original.
- Step 3: Remove excess moisture thoroughly
- Immediately after grating, place the potato shreds in a large bowl of cold water. Swirl them gently with your hand for about 30 seconds to release the surface starch, which will cloud the water. Let them soak for 5-10 minutes, which removes excess starch that would otherwise prevent proper crisping. After soaking, drain the potatoes in a colander, rinse briefly with fresh cold water, then transfer to a clean kitchen towel or cheesecloth. Gather the corners to create a pouch and twist tightly over the sink, squeezing out as much moisture as physically possible. Continue twisting and squeezing until barely any water emerges. This moisture removal is perhaps the most critical step in the entire process—inadequate drying results in steaming rather than frying, producing soggy hash browns instead of crispy ones.
- Step 4: Season and bind the mixture properly
- Transfer the thoroughly dried potato shreds to a mixing bowl. Sprinkle the cornstarch, onion powder, garlic powder, ½ teaspoon salt, and ¼ teaspoon black pepper evenly over the potatoes. If using the optional flour for extra binding, add it now as well. Using clean hands or a spatula, mix thoroughly but gently, tossing rather than compressing, until the dry ingredients evenly coat all potato shreds. The mixture should feel slightly tacky but not wet or sticky. This gentle mixing approach preserves the individual potato shreds rather than mashing them, which is essential for the proper texture. The even distribution of seasonings and binding agents ensures consistent flavor and texture throughout each hash brown patty.
- Step 5: Form perfect patties with the right technique
- Divide the seasoned potato mixture into six equal portions using a measuring cup or kitchen scale for consistency. Take one portion and place it on a clean surface. Gently press and shape it into an oval approximately 3 inches by 5 inches and about ½ inch thick, similar to the distinctive McDonald's shape. Press firmly around the edges to seal and compact the patty, which helps it hold together during cooking. The surface should be relatively smooth with some visible potato shreds but no loose pieces that might separate during frying. Repeat with remaining portions, placing formed patties on a parchment-lined baking sheet. If time allows, refrigerate the formed patties for 15-30 minutes to help them set, though this is optional if you're in a hurry.
- Step 6: Master the proper frying technique
- Heat ¼ inch of neutral oil in a large, heavy-bottomed skillet or cast iron pan over medium heat until it reaches approximately 350°F (175°C). If you don't have a thermometer, test by sprinkling a few potato shreds into the oil—they should sizzle immediately but not smoke or burn. Gently slide 2-3 patties into the hot oil, being careful not to overcrowd the pan, which would lower the temperature and result in greasy hash browns. Cook for 3-4 minutes on the first side until the bottom is deeply golden brown and crispy. Using a wide, thin spatula, carefully flip each patty once and cook for an additional 2-3 minutes until the second side is equally golden and crisp. The edges should be noticeably crunchy while the center remains tender. Proper oil temperature is crucial—too low and the hash browns absorb oil and become greasy; too high and they burn before cooking through.
- Step 7: Drain and season properly
- Using a slotted spatula, carefully transfer the cooked hash browns to a paper towel-lined plate or cooling rack to drain excess oil. Immediately sprinkle with a pinch of salt while still hot, which adheres better and enhances the outer layer's flavor. The draining process is important for achieving the optimal texture—too much residual oil makes them greasy, while proper draining results in crisp, non-oily hash browns. If cooking in batches, keep the first batch warm in a 200°F (95°C) oven while completing the remaining patties. This low temperature maintains crispness without continuing to cook the hash browns. The immediate salting step enhances flavor without making them overtly salty.
- Step 8: Serve at peak perfection
- Transfer the hash browns to serving plates immediately after the final draining and salting, as they are at their absolute crispy best when fresh from the pan. For the authentic McDonald's experience, serve with ketchup on the side for dipping. For a homemade breakfast platter, pair with fried eggs, breakfast sausage, or bacon for a complete meal. These hash browns are best enjoyed immediately, when the contrast between the crispy exterior and tender interior is most pronounced. While they can be held briefly in a warm oven, they begin to lose their optimal texture after about 10 minutes, so timing your serving to coincide with their peak crispy state delivers the most satisfying eating experience.
The Secret to Perfect Texture
After multiple batches of experimentation, I discovered that achieving that signature McDonald's hash brown texture hinges on three critical factors that work in perfect harmony. First and foremost is moisture control. The extensive soaking and aggressive drying process I described isn't just helpful—it's absolutely essential. Those first few batches where I rushed this step produced disappointingly soggy results, teaching me that patience here directly translates to crispness later.
The second crucial element is the cornstarch binding. While many recipes rely solely on the potato's natural starch or add eggs as binders, the light coating of cornstarch creates that distinctive ultra-thin crisp shell around each potato shred. This microscopic layer is what produces the characteristic shattering crunch when you bite into a properly made hash brown. The fine texture of cornstarch versus flour produces a different type of crispness that more accurately mimics the fast-food original.
Finally, proper oil temperature maintains that perfect balance between exterior crispness and interior tenderness. Too hot, and you get hash browns with burned exteriors and undercooked centers; too cool, and they absorb excess oil, becoming greasy and limp. I've found that maintaining a consistent 350°F creates that golden-brown exterior while allowing enough time for the interior to steam to fluffy perfection. The combination of these three elements—proper moisture removal, cornstarch binding, and exact frying temperature—creates hash browns that aren't just similar to McDonald's version but often superior in both texture and flavor.
Make-Ahead and Storage Strategies
One of the most practical aspects of these homemade hash browns is their excellent make-ahead potential, which I've refined through considerable trial and error. For busy mornings when cooking from scratch isn't feasible, having ready-to-cook hash browns can be a game-changer.
To prepare in advance, complete the recipe through the patty-forming stage, then place the shaped hash browns on a parchment-lined baking sheet in a single layer. Freeze until solid (about 1-2 hours), then transfer to airtight freezer bags or containers with parchment between layers to prevent sticking. These uncooked hash browns can be stored frozen for up to three months with no noticeable quality loss. The beauty of this method is that you can cook them directly from frozen—just add about 1-2 minutes to the cooking time per side. I often prepare a large batch on weekend afternoons, freezing most for quick breakfasts throughout the following weeks.
For the rare occasion when you have leftover cooked hash browns, they can be refrigerated for 1-2 days, though they'll never regain that perfect just-fried texture. I've found the most successful reheating method is in a dry skillet over medium heat for about 2 minutes per side, which restores some crispness without further cooking the interior. The oven at 350°F for 5-7 minutes works reasonably well too, but avoid microwave reheating, which inevitably produces soggy results. That said, freshly made hash browns are always superior, which is why the freeze-before-cooking approach is my preferred strategy.
 Pin it
Creative Serving Suggestions
While these hash browns are delicious served traditionally with ketchup, I've discovered several creative serving methods that elevate them from simple side to impressive component of a larger breakfast experience. One of my family's favorites is using them as the base for a creative breakfast stack—the sturdy texture holds up beautifully under toppings like avocado slices, poached eggs, and hollandaise sauce for a playful take on eggs Benedict.
For brunch gatherings, I often create a hash brown bar where guests can customize their own toppings. Providing options like crumbled bacon, sliced avocado, different cheeses, sour cream, salsa, and chopped herbs allows everyone to create their perfect combination. This interactive approach has proven especially popular when entertaining, creating natural conversation as people compare their creations.
On weeknights when we have breakfast for dinner, I've used these hash browns as "buns" for breakfast sandwiches, placing scrambled eggs, cheese, and a thin slice of ham between two hash browns. The contrast between the crispy potato exterior and the soft filling creates a delightful textural experience that even my pickiest eater enthusiastically devours. The sturdy texture of these particular hash browns makes them versatile enough to hold up to creative applications that other, more fragile versions simply can't manage.
I learned about the importance of proper moisture removal through an unfortunate kitchen mishap that still makes my family laugh. During my early experimental phase, I was convinced I had squeezed enough water from the potatoes, despite them still feeling somewhat damp. Confident in my shortcut, I dropped the first patty into hot oil, creating an explosive splattering that sent me jumping backward while oil popped violently in all directions. After the chaos subsided, I discovered a misshapen, partly disintegrated hash brown swimming in dangerously disturbed oil. The sink-side potato-squeezing session that followed was comically intense, with my teenage son timing me to ensure I spent at least two full minutes wringing every possible drop from the grated potatoes. The perfectly crisp, splatter-free hash browns that resulted became our new standard, and "Did you squeeze them enough?" has become our family's shorthand for avoiding cooking shortcuts. That messy lesson taught me that proper preparation isn't just about taste—it's sometimes about kitchen safety too.
After making countless batches of these Homemade McDonald's Hash Browns over the years, I'm still amazed by how such simple ingredients can recreate a fast-food icon with even better flavor and texture. There's something deeply satisfying about demystifying commercial recipes and bringing them into our home kitchens, adapting them to suit our tastes and ingredient standards. While I certainly respect the consistent quality that McDonald's has maintained with their product, there's undeniable pride in serving a homemade version that delivers that same distinctive experience without preservatives or mass production. In our household, these hash browns have become more than just a breakfast side—they're a small rebellion against the notion that certain foods can only be enjoyed as takeout, and a reminder that with a little patience and technique, we can often create something even better at home.
Frequently Asked Questions
- → Can I bake these hash browns instead of frying?
- Yes! Preheat your oven to 425°F (220°C), place the shaped patties on a well-oiled baking sheet, brush the tops with oil, and bake for about 10-15 minutes per side until golden and crispy.
- → Can I use an air fryer for these hash browns?
- Absolutely! Spray the air fryer basket and both sides of the hash browns with oil, then cook at 380°F (190°C) for about 8 minutes, flip, and cook for another 6-8 minutes until crispy.
- → Why do my hash browns fall apart when cooking?
- This usually happens if the potatoes are too wet or not bound well enough. Make sure to squeeze out excess moisture thoroughly and consider adding the optional flour for better binding. Chilling the shaped patties for 30 minutes before cooking can also help.
- → Can I freeze these homemade hash browns?
- Yes! Shape the patties, place them on a baking sheet lined with parchment paper, and freeze until solid. Transfer to a freezer bag and store for up to 3 months. Cook from frozen, adding a few extra minutes to the cooking time.
- → What can I add to these hash browns for different flavors?
- Try adding grated cheese, finely chopped bell peppers, chives, or bacon bits to the mixture before shaping. You can also experiment with different seasonings like paprika, cayenne pepper, or dried herbs.